Colibri Loader
ColibriLoader is a freely available Windows XP/7 application. It lets you program the Bootloader or the Win CE Image over JTAG, Ethernet, or USB.
ColibriLoader was mainly written as a tool for disaster recovery, but it could also be used for regular updates of Bootloader and OS Image.
Warning: Programming invalid system files can render your module unbootable. Only use ColibriLoader if you know what you are doing!
Installation
Please follow the simple steps below to install ColibriLoader.
- Download ColibriLoader_X.YY.zip
- Unzip and store all files in a folder on a local drive.
- Optionally create a shortcut to ColibriLoader.exe
Local Administrator rights are required to run ColibriLoader.
Usage
ColibriLoader supports mainly two download media: Ethernet and JTAG. Download over USB is also possible but more complex and normally not needed.
Ethernet Download
If your Bootloader is still working you just need to re-Flash a good OS image over Ethernet:
HW Setup
To connect to the Bootloader you need:
- a Null Modem Cable
- a PC with a serial com port (RS232)
- a terminal application, e.g. TeraTerm
On Colibri Evaluation Board version 3.1 and later:
Connect an Ethernet cable to connector X17 of the Evaluation Board and the other end of the cable to a switch connected to your network. If no network with DHCP server is available, you can also connect the Evaluation Board with the PC directly with an Ethernet cable. You need to set static IPs in this case, which is explained in the list below.
Connect one end of the Null Modem Cable to the serial port of the PC and the other end to lower RS232 port on connector X25.
Downloading and flashing the image
- Download the latest image and bootloader for PXAxxx here.
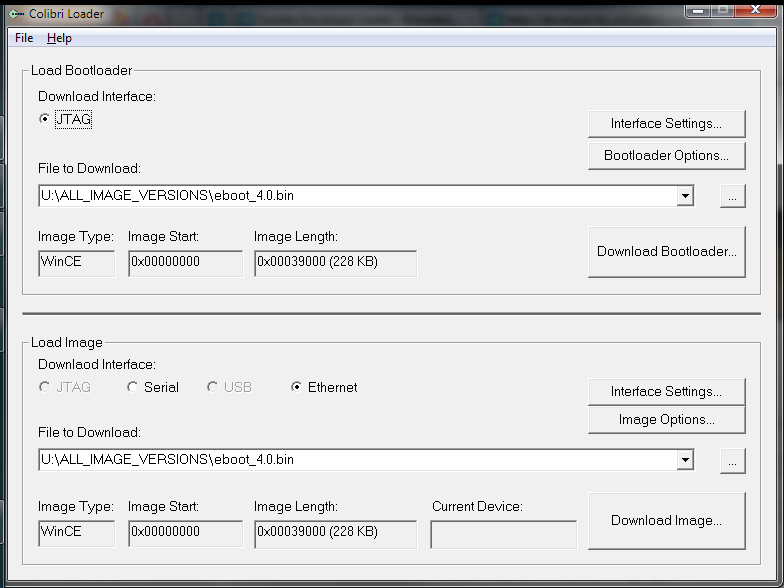
- Start ColibriLoader.
- In the Load Image section, under "Downlaod Interface", select "Ethernet".
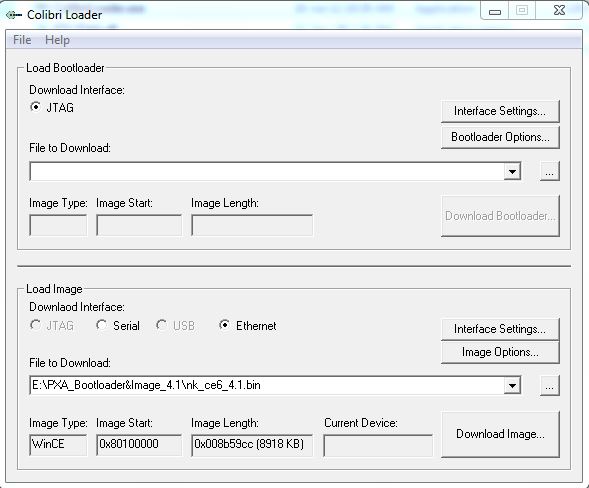
- Under "File to Download", click on the button "..." and provide the path to the folder where the image and bootloader have been downloaded in step 1.
- Press "Download Image..." button
A Window saying Waiting for Device to Respond will appear. - Enter the Bootloader Menu.
NOTE: If a network with DHCP is not available, image download can be done by connecting the Evaluation Board and the development directly with an Ethernet cable and using static IP addresses and subnet masks. After reaching step 6, enter the following commands in the bootloader menu.
x
set ip.ip = IPADDRESS
set ip.subnet = SUBNETMASK
set ip.dhcp = 0
save ip
Replace IPADDRESS and SUBNETMASK with values according to your network configuration. Don't forget to set a static IP address and the correct subnet mask on the development PC as well. - From the Bootloader menu, choose "f". The image will start downloading in a moment.
- In case the image is larger than 19 MB, you will need to shift the flash file system in your default registry to the right position and adjust the size. Please refer to this article to understand how to prepare the system for an image larger than 19 MB.
NOTE: The update is not finished when the Ethernet file transfer ends! Check the messages over the serial port on the serial port. Depending on the module type, the whole download and program process takes a few seconds up to 2 minutes. After the programming has been done, the module boots with the new software.
JTAG Download
If the Bootloader has been overwritten or is not working anymore, you can still recover over JTAG.
HW Setup
See also our JTAG Article. You need a JTAG adapter which is not provided by Toradex. The following adapters are tested by Toradex:
- Amontec JTAGkey-Tiny
This is the recommended solution, but we got some feedback that Amontec JTAGkey-Tiny may not available for purchase anymore. - Olimex ARM-USB-OCD (not the ARM-USB-OCD-H !)
Requires ColibriLoader 3.00 or later. This would be the second choice in case the Amontec adapter is not available. - Amontec JTAGkey
Requires ColibriLoader 2.67 or later. Please note that Amontec JTAGkey may not available for purchase anymore.
On Colibri Evaluation Board version 1.1:
Connect an 8-pin, 0.5mm pitch FFC cable between X4 on the Colibri Evaluation Board and the X2 of the Colibri Module.
Make sure the FCC cable is properly inserted with contacts towards Colibri PCB and with contacts towards the Evalboard PCB.
On Colibri Evaluation Board version 2.1:
Connect an 8-pin, 0.5mm pitch FFC cable between X19 on the Colibri Evaluation Board and the X2 of the Colibri Module.
Make sure the FCC cable is properly inserted with contacts towards Colibri PCB and with contacts away from the Evalboard PCB. The Cable should do a half twist.
On Colibri Evaluation Board version 3.1 and later:
The Evaluation Board V3.1 uses pogopins (X28) to directly connect to the Colibri module JTAG pins. There is no need for an additional cable between the Colibri module and the Colibri Evaluation Board as it was with earlier versions.
Change the position of JP29 from pin 1-2 to pin 2-3 to set 3.3V as JTAG reference voltage.
Downloading and installing the bootloader via JTAG
- Download and install the Amontec driver or Olimex driver.
- Download the latest image and bootloader for PXAxxx here.
- Plug the JTAG adapter directly onto the Evalboard's JTAG connector. Check for the correct polarity (pin 1 position).
This is X13 on the Evaluation Board V3.1A, V2.1 and X20 on Evaluation board V1.1. - Switch on the Evaluation Board.
- Start the ColibriLoader Tool.
- In the Load Bootloader section, click on Interface Settings.... In the JTAG Interface Settings, select Olimex / Amontec USB to JTAG. Click on OK.
- In the Load Bootloader section, under File to Download, click on ... and provide the path to the folder where the image and bootloader have been downloaded in step 2.
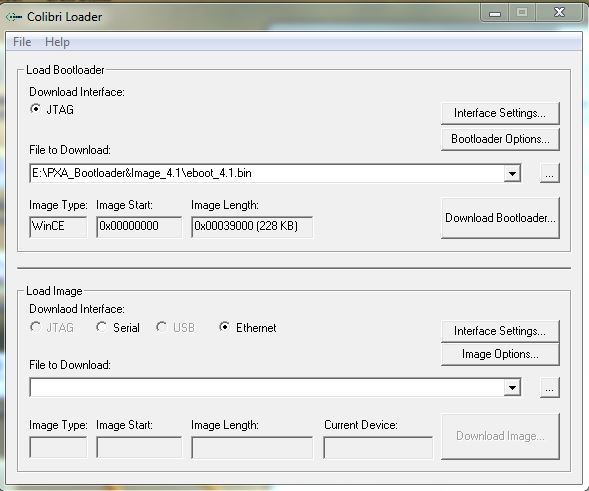
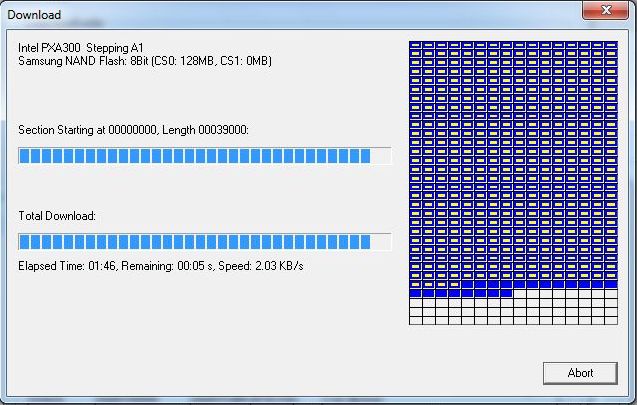
8.Press Download Bootloader... Button. The Download can take a few minutes, depending on the module type and bootloader size.
Note on Tegra modules (Colibri T20/T30 and Apalis T30)
For the Tegra modules, we currently provide the image as .nb0 file which is not compatible with Colibri Loader. If you build your own image you can use the bin file with Colibri Loader. In general we recommend to use the Recovery Mode if you work with a Tegra module.