First Steps with Capacitive Touch Display 10.1" DSI
Introduction
This article provides information on how to start working with the Capacitive Touch Display 10.1" DSI, which includes how to set up the hardware (wiring), install and configure the necessary drivers for a touch demo.
Getting Started
What I need to order
The Capacitive Touch Display 10.1" DSI can be ordered with many Toradex computer on modules and carrier boards. See the compatible products.
Where do I order
All the products can be ordered online in the Toradex Webshop.
Cable Connection
This topic provides pin connection details regarding connecting the Capacitive Touch Display 10.1" DSI to the carrier boards.
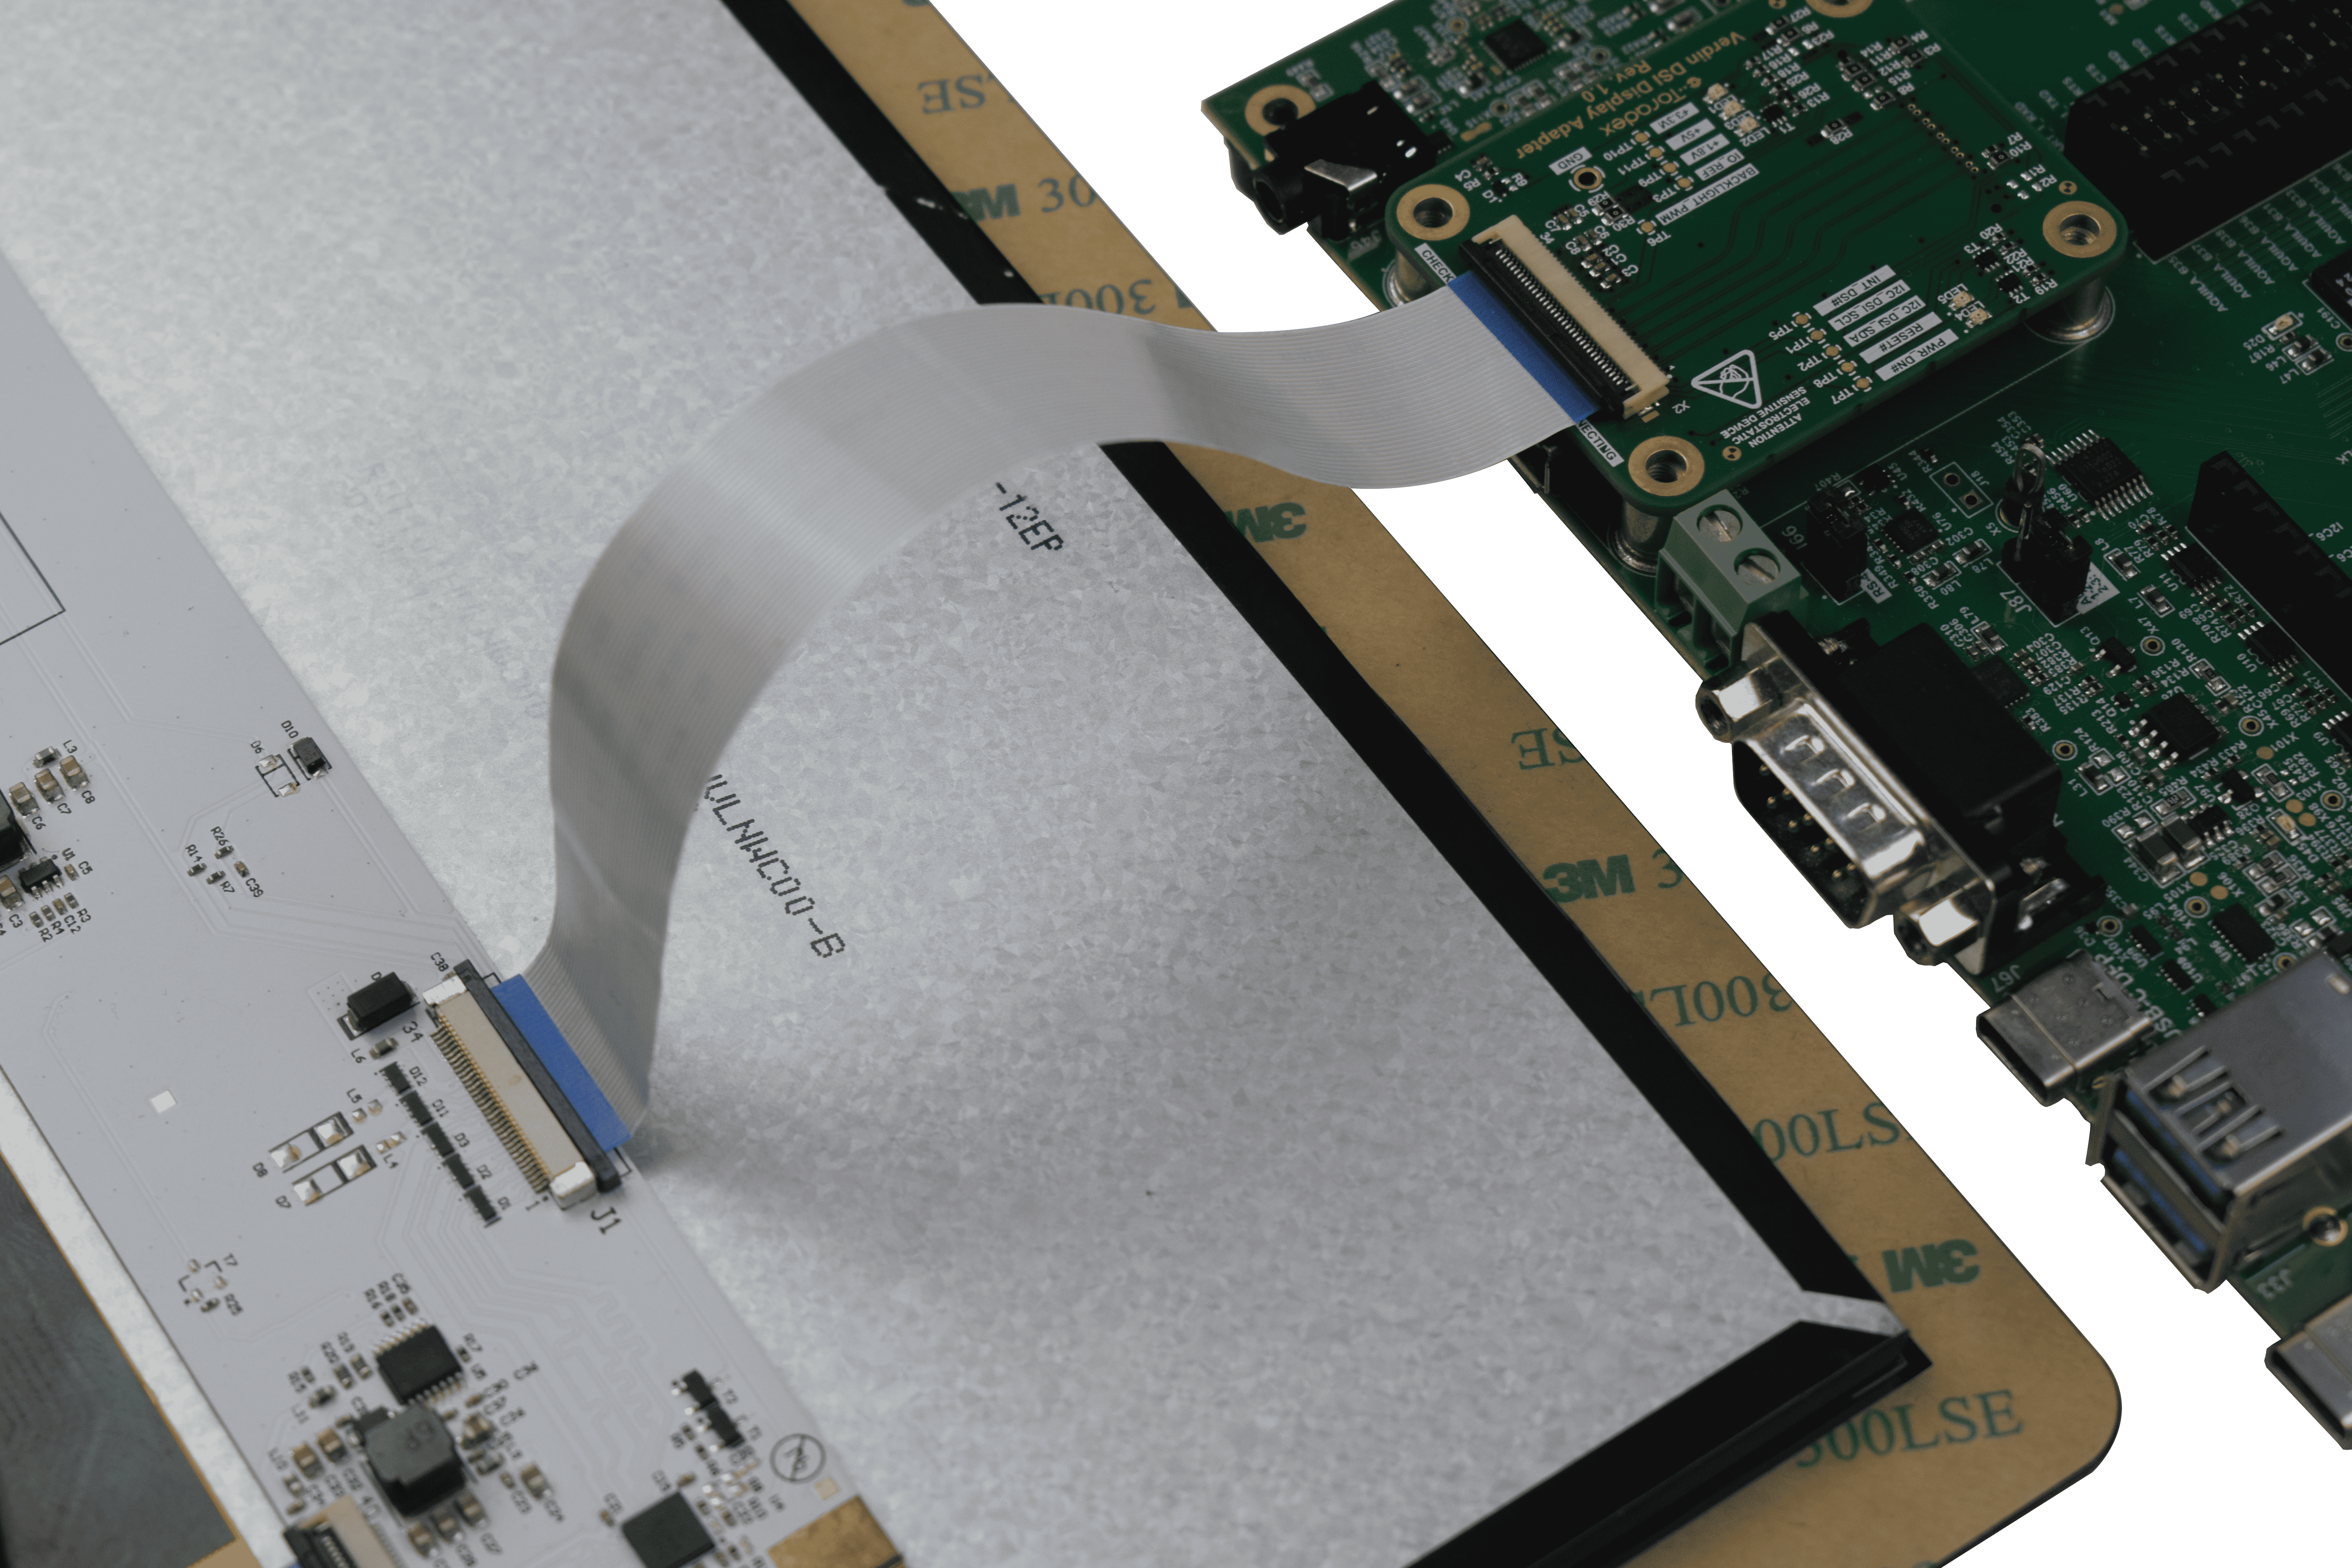
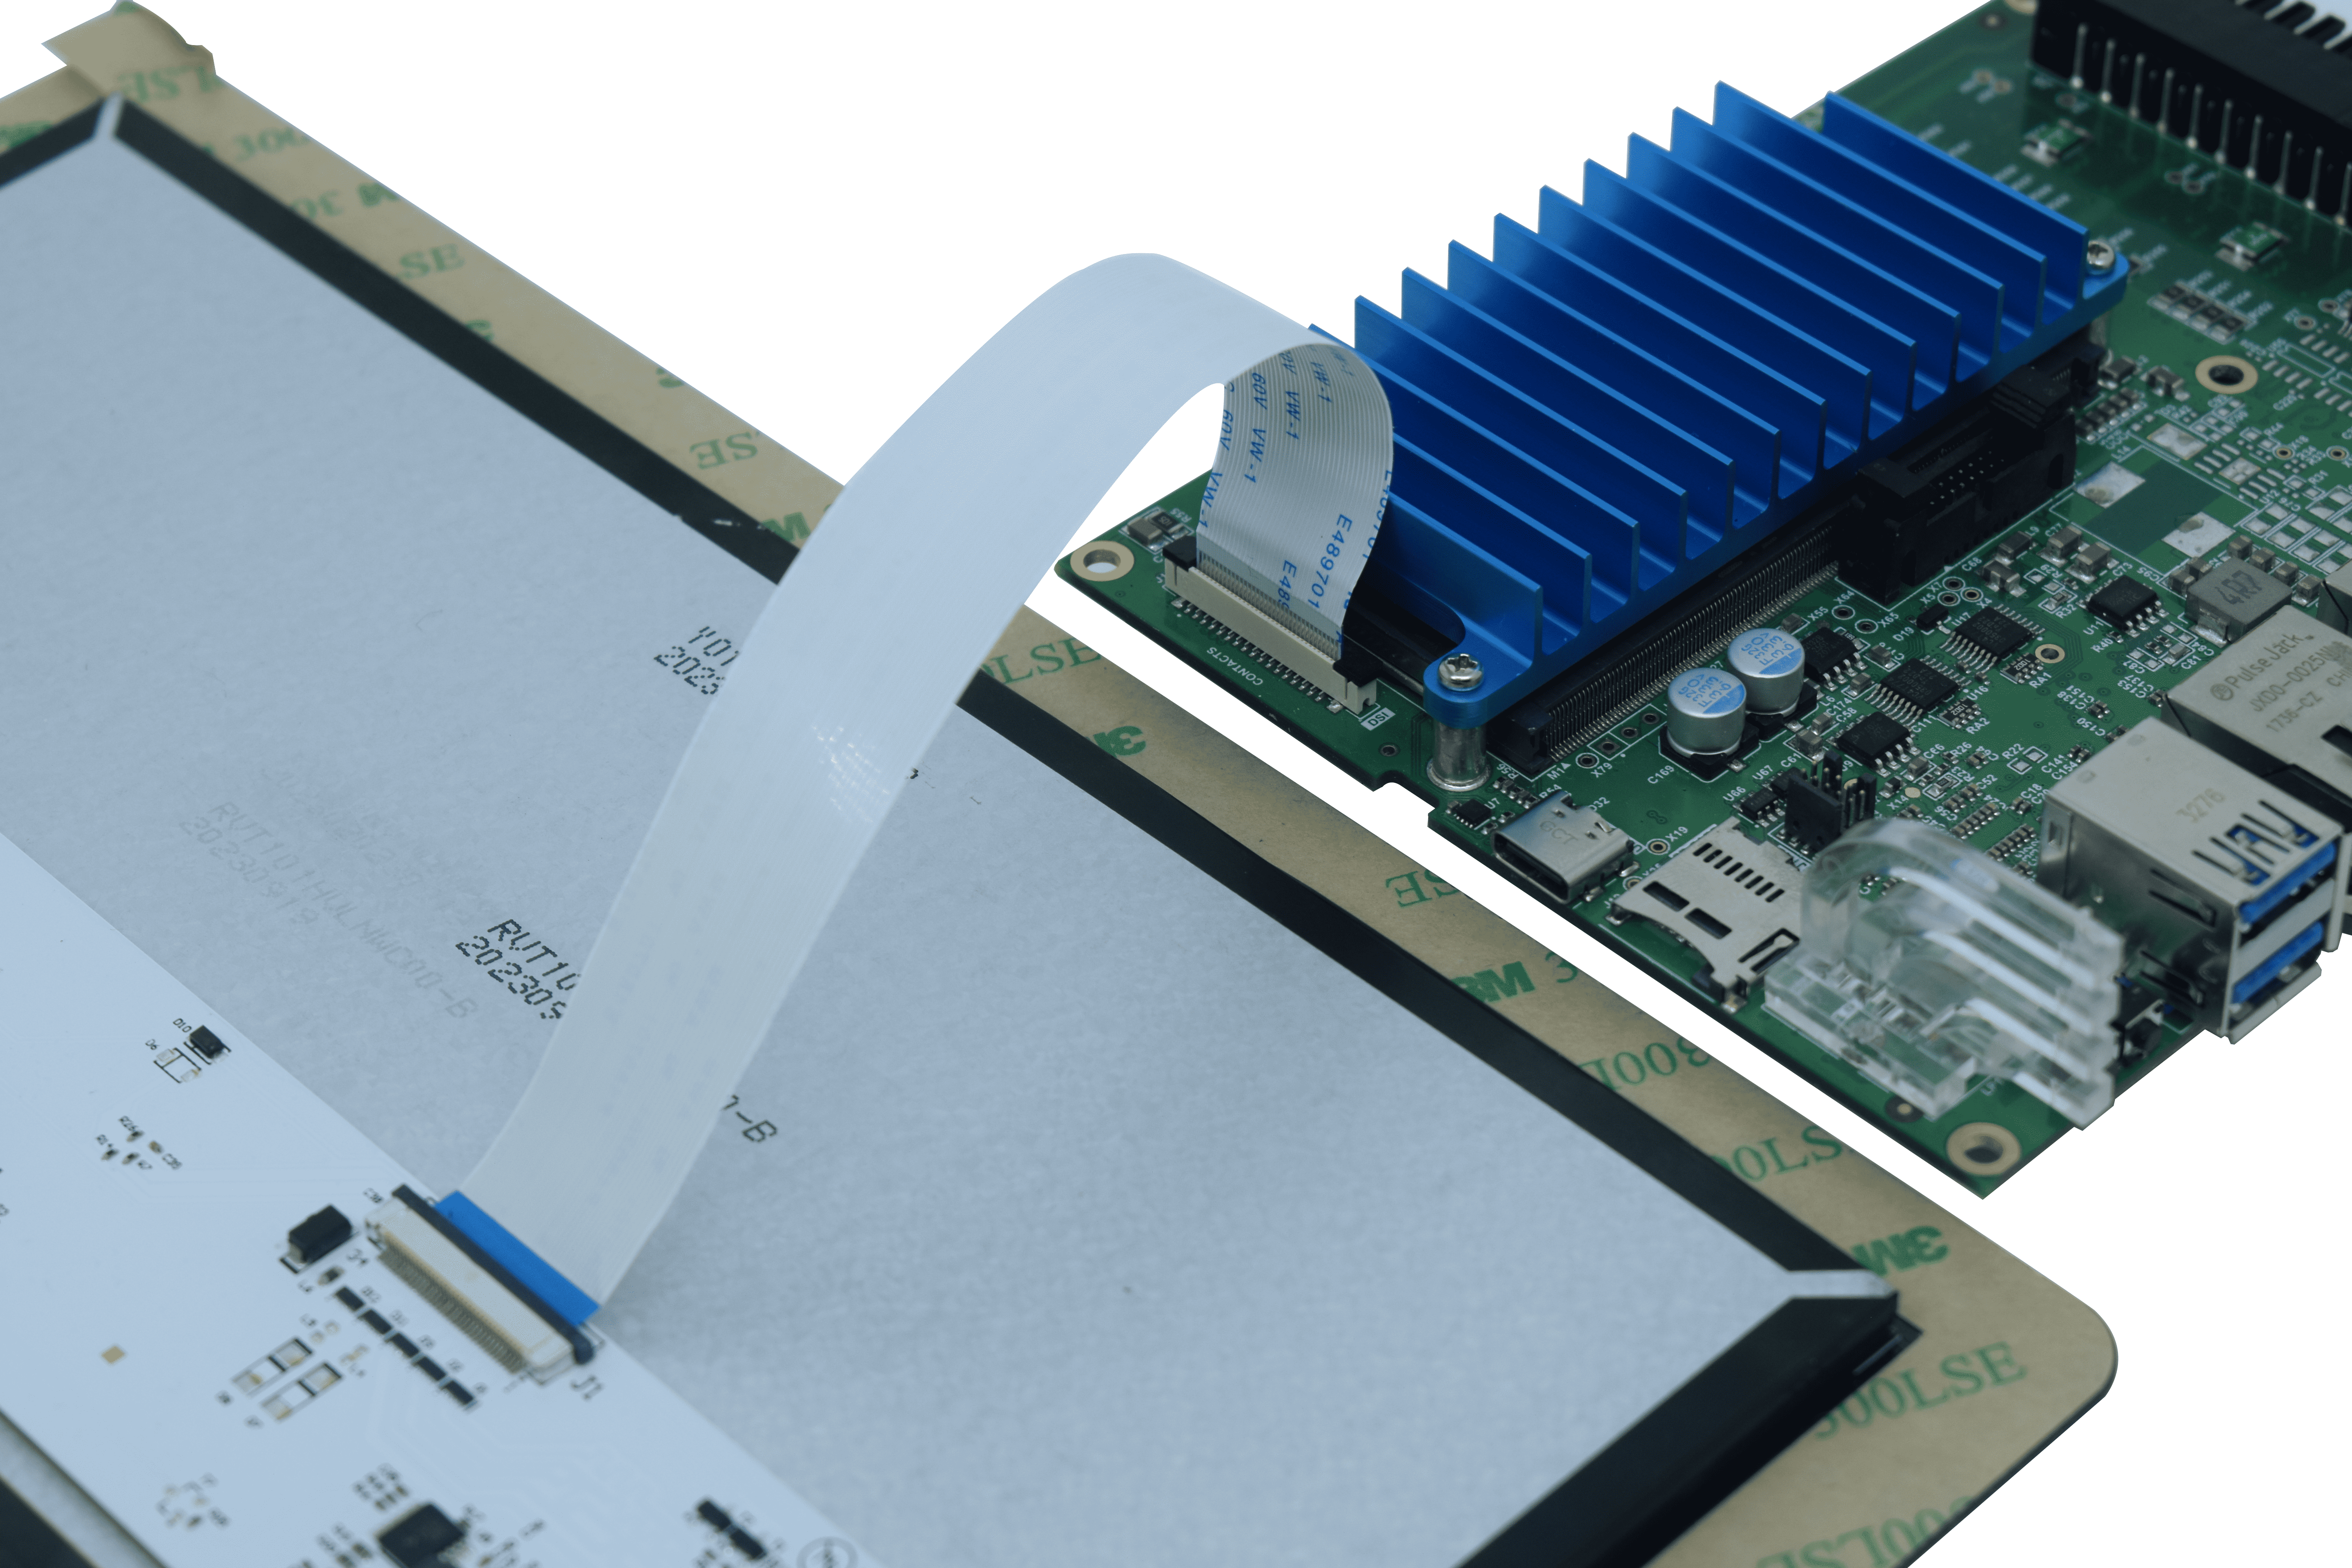
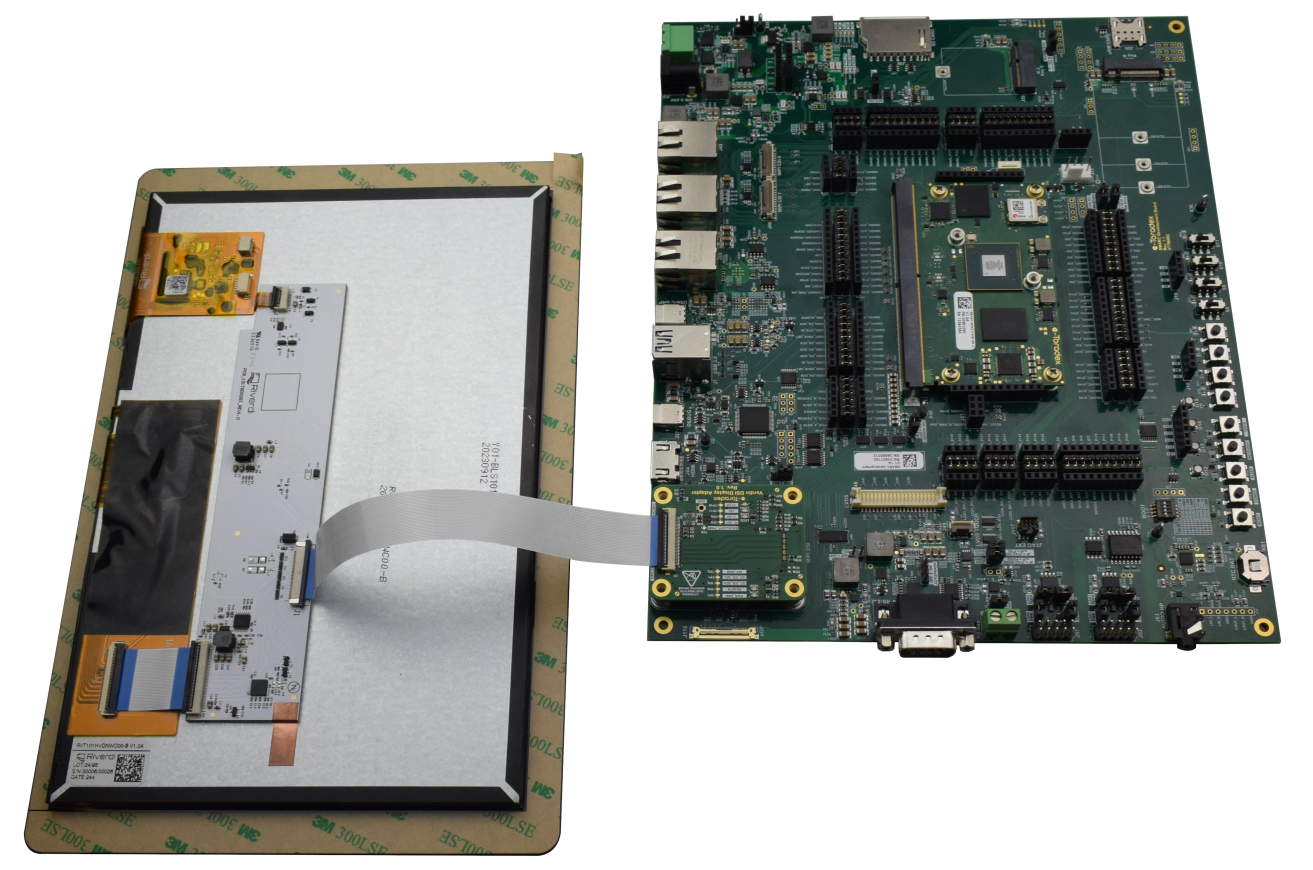
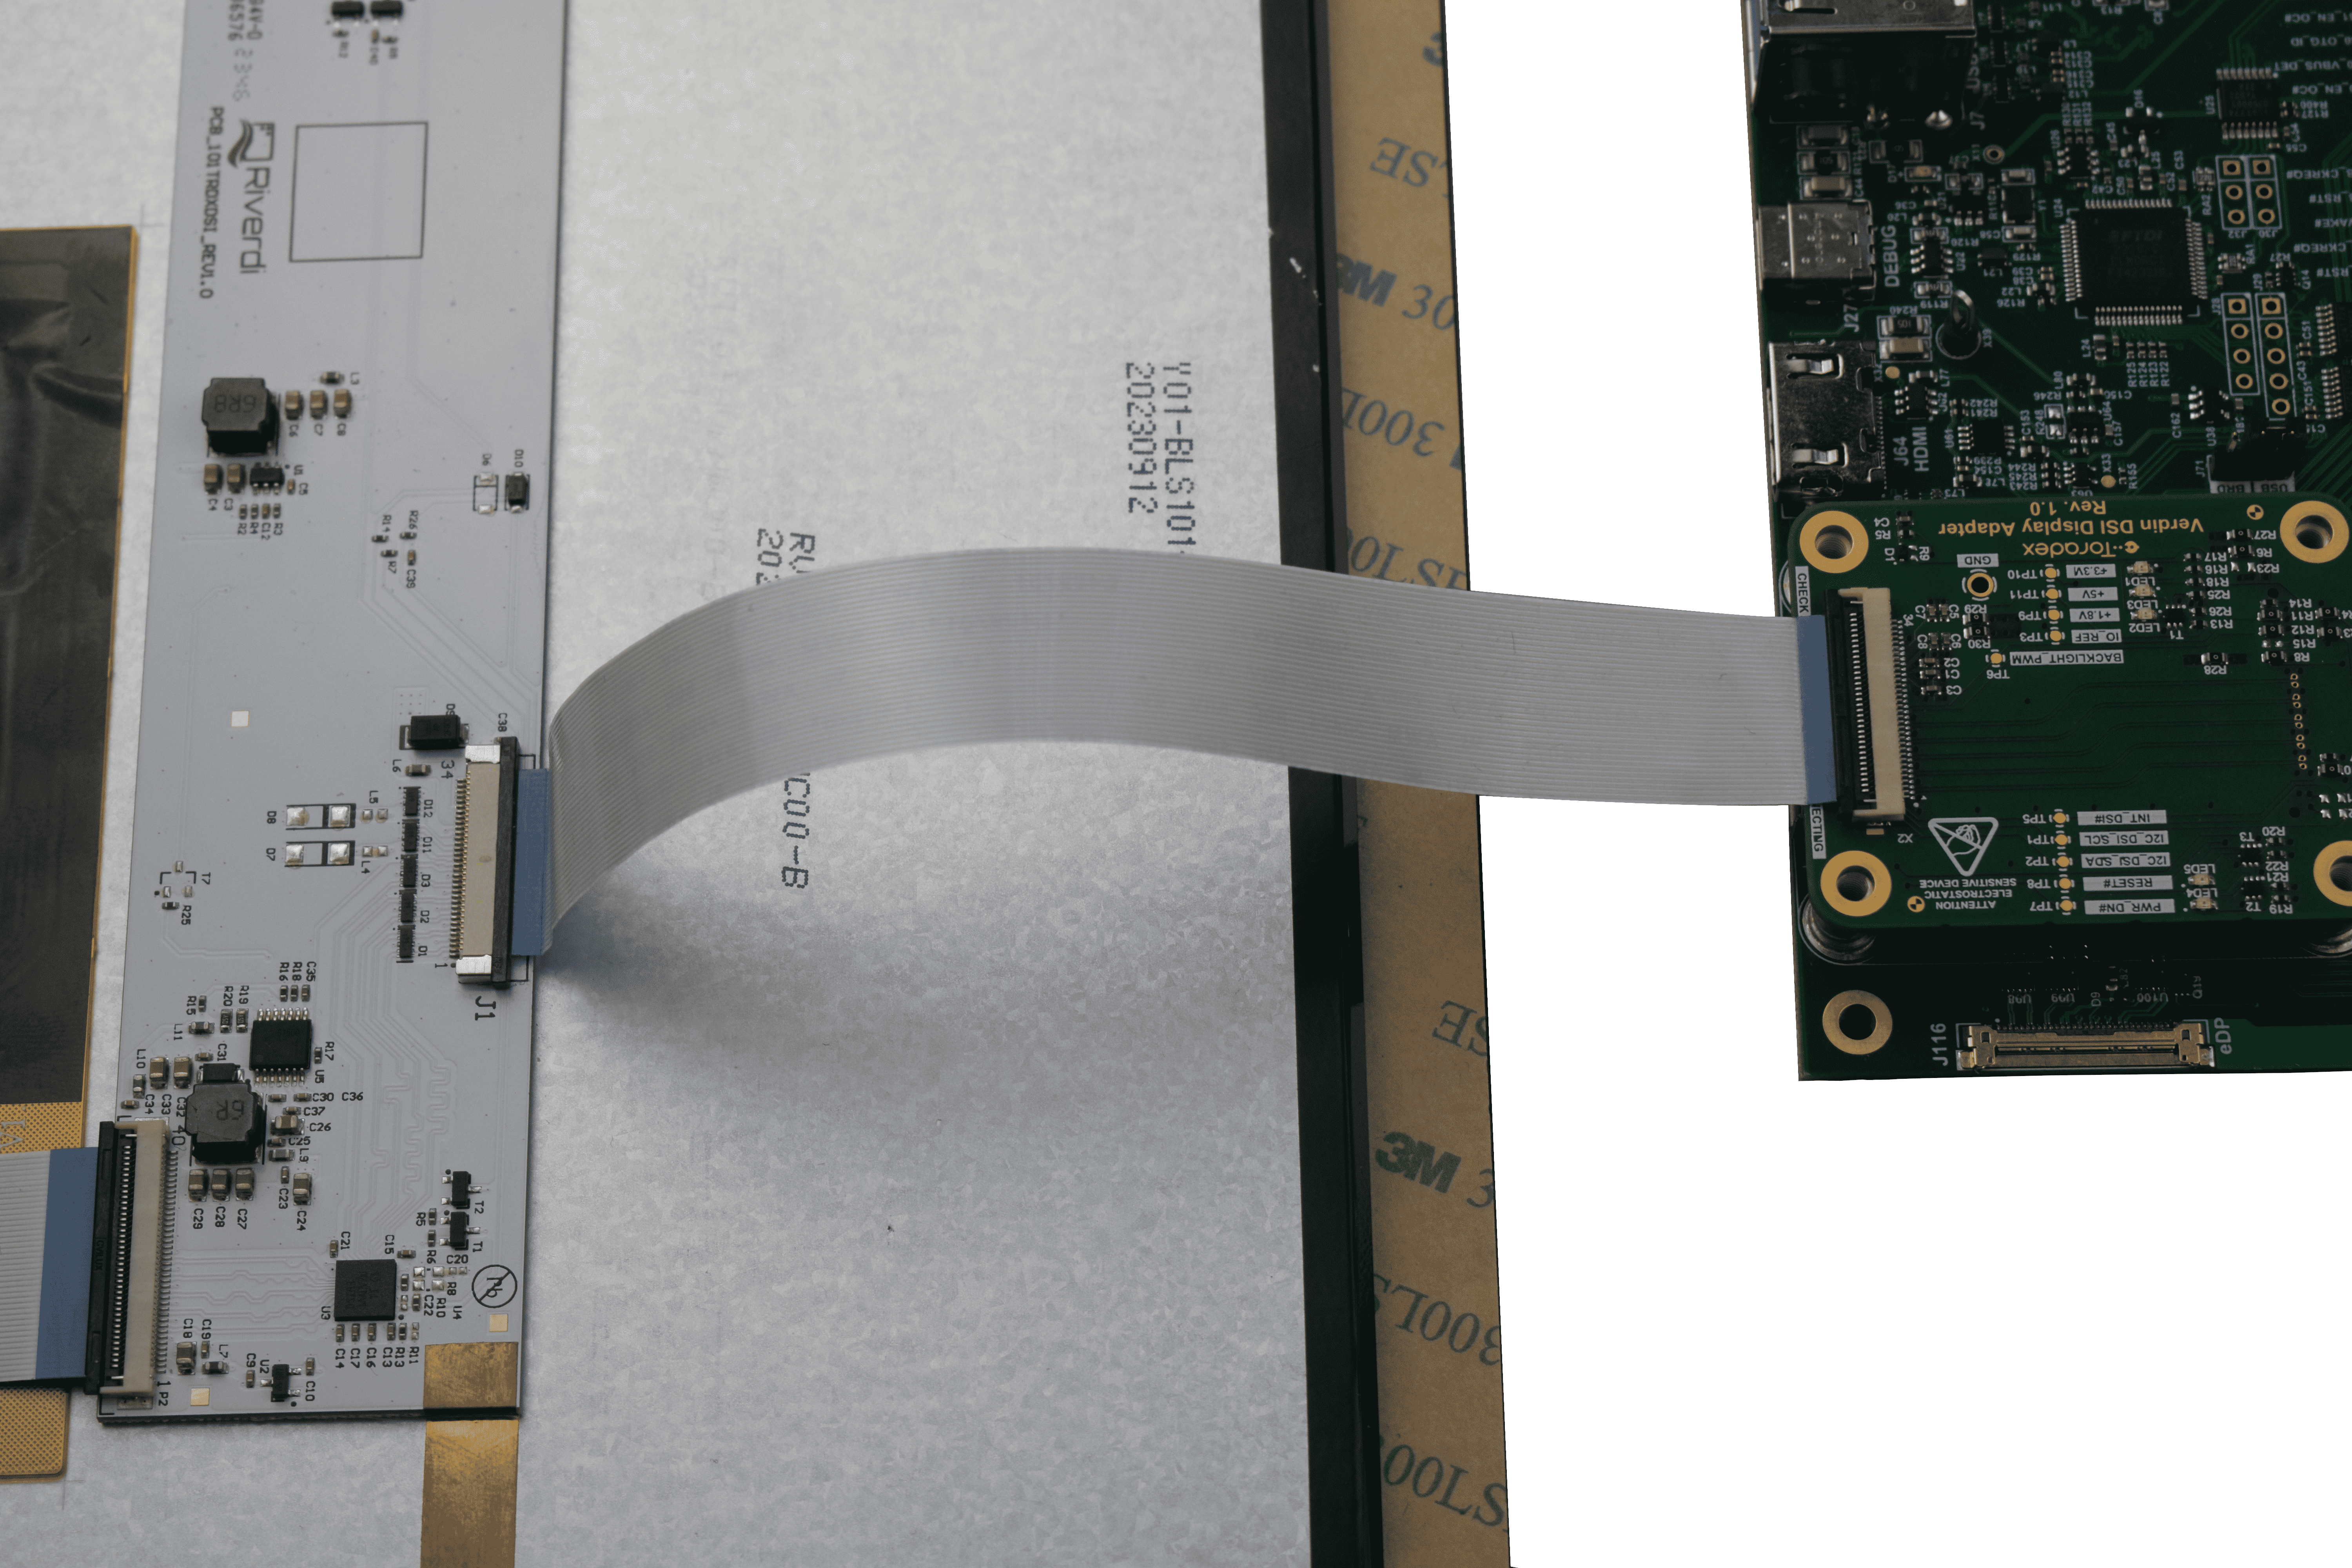
Connect the flat ribbon cable to the display.
Please refer to the below instructions for connecting the display to your specific carrier board.
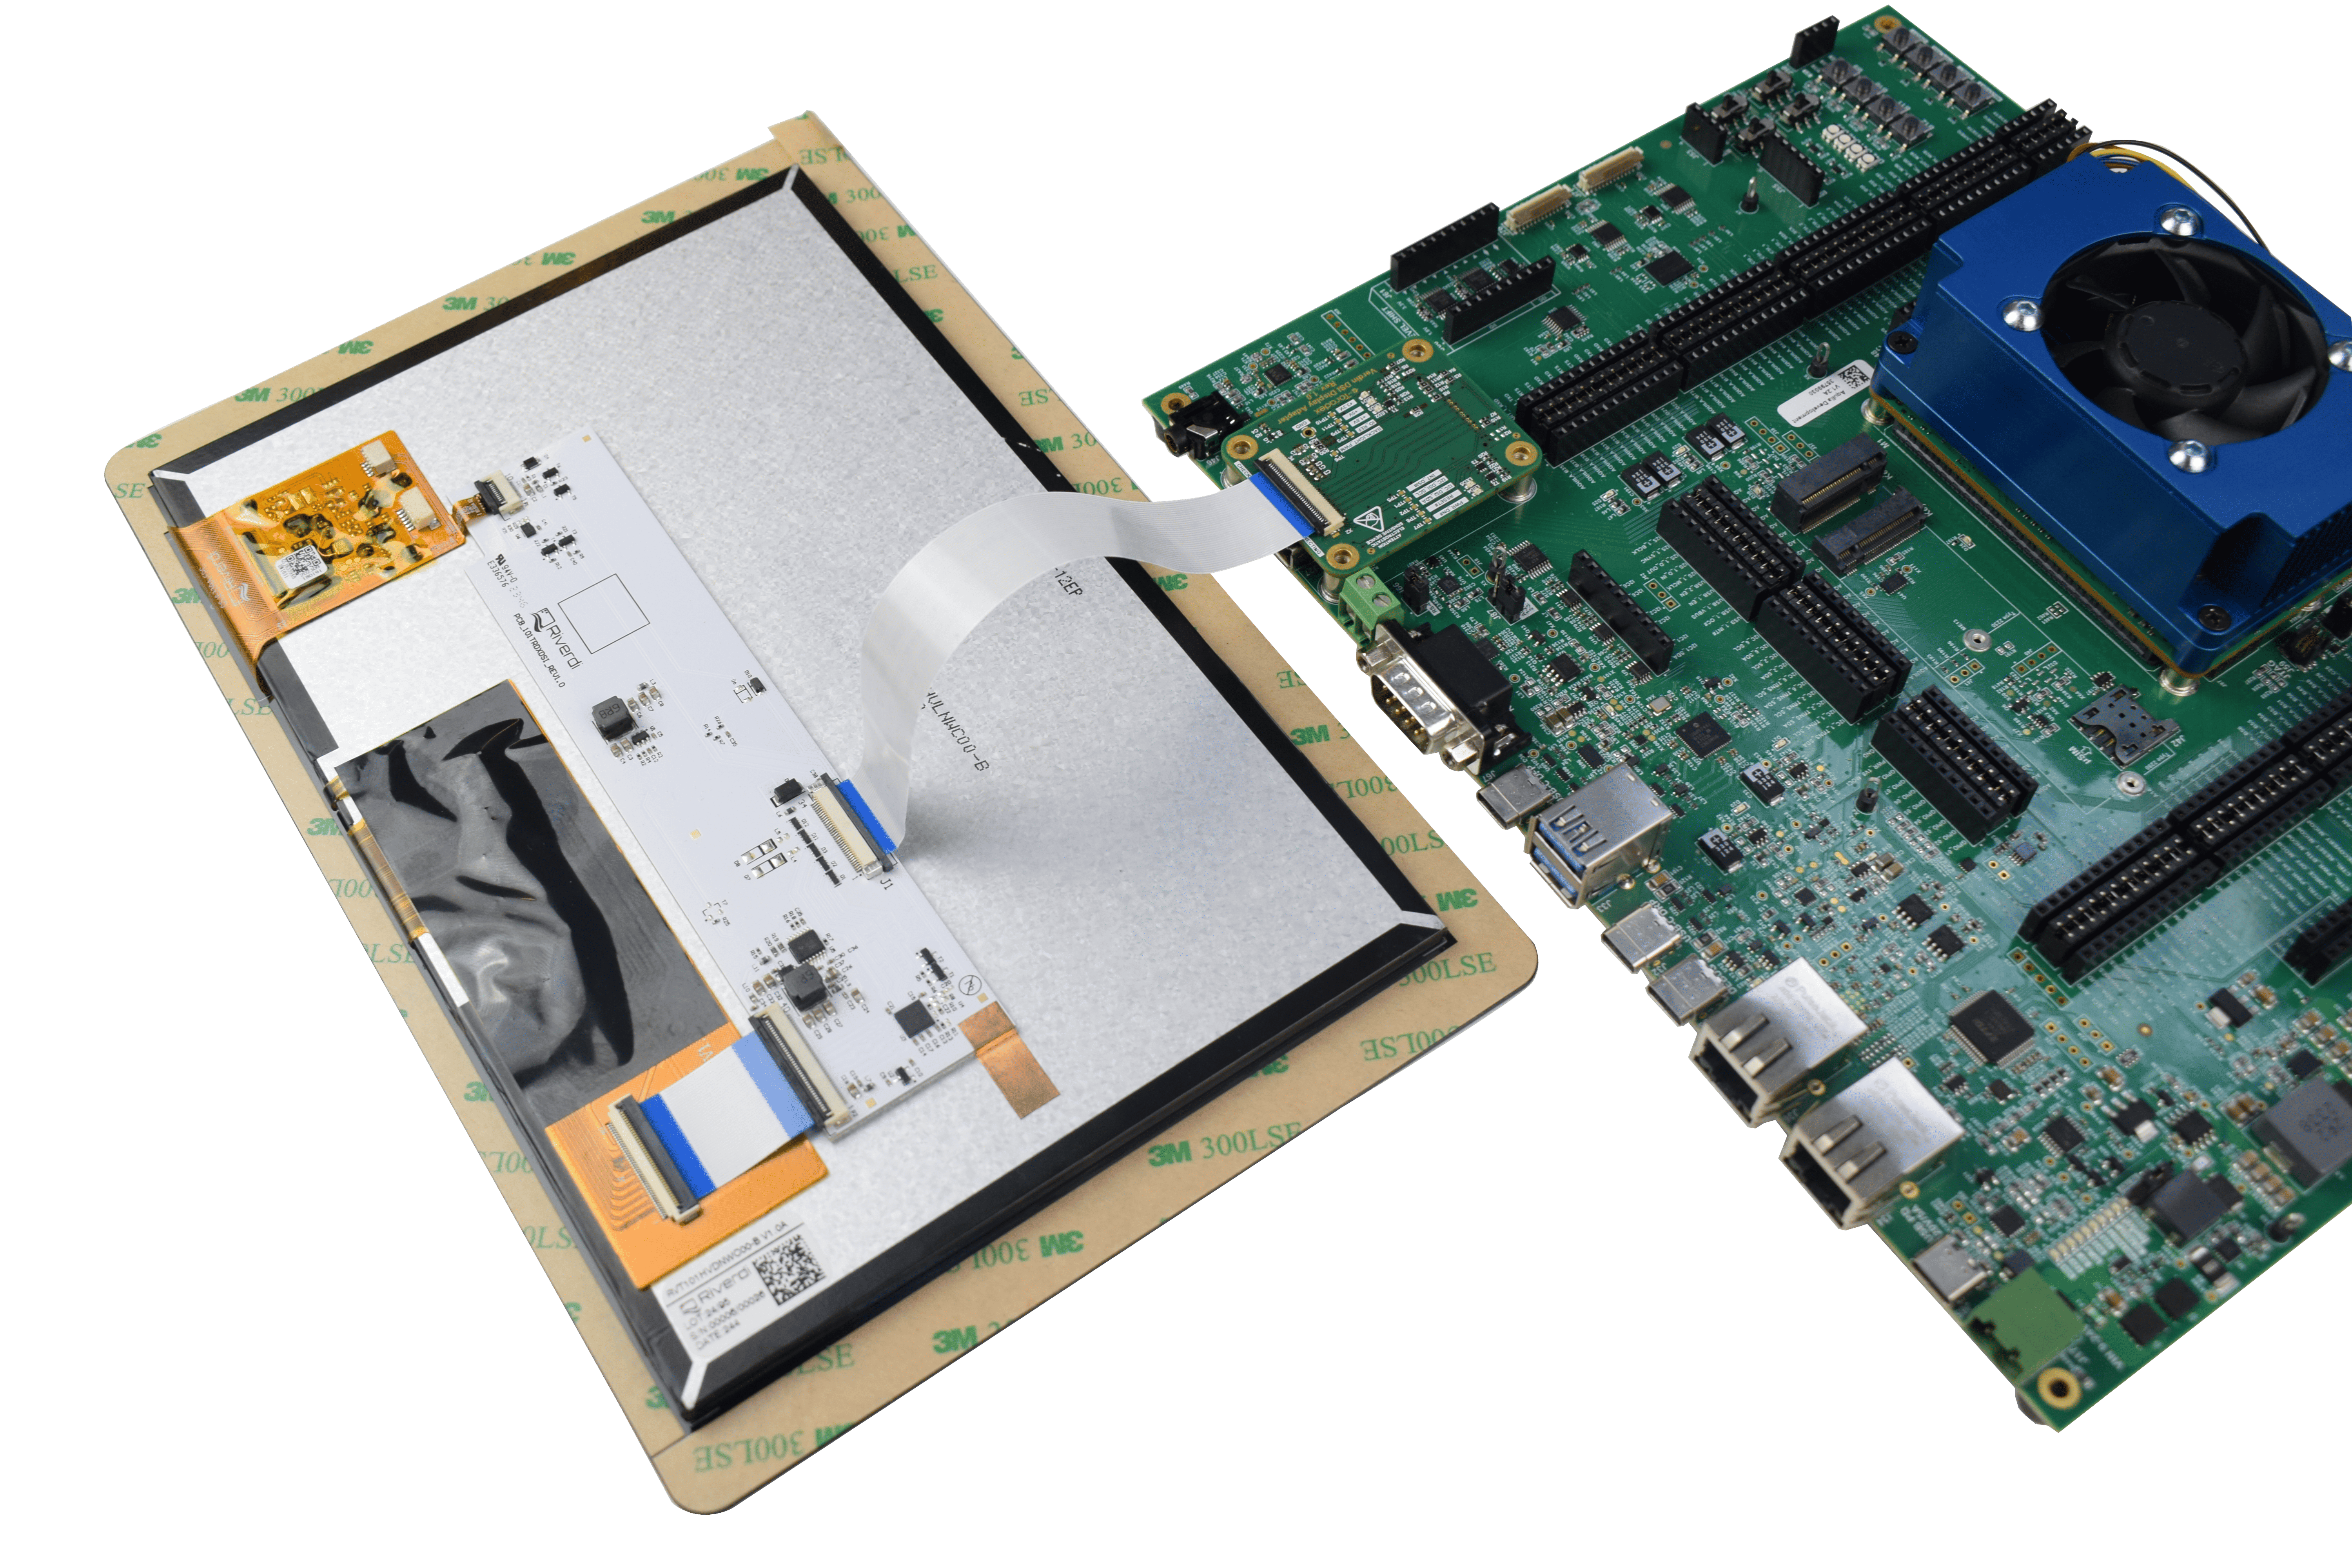
Connections on Aquila Development Board
A Toradex DSI Display Adapter is required to use this display on Aquila Development Board.
Connect the Toradex DSI Display Adapter into the DSI Connector (J44) of the carrier board.
Connect the flat ribbon cable to the display. Make sure to connect the pin 1 side of display controller to the respective pin 1 of the Toradex DSI Display Adapter.
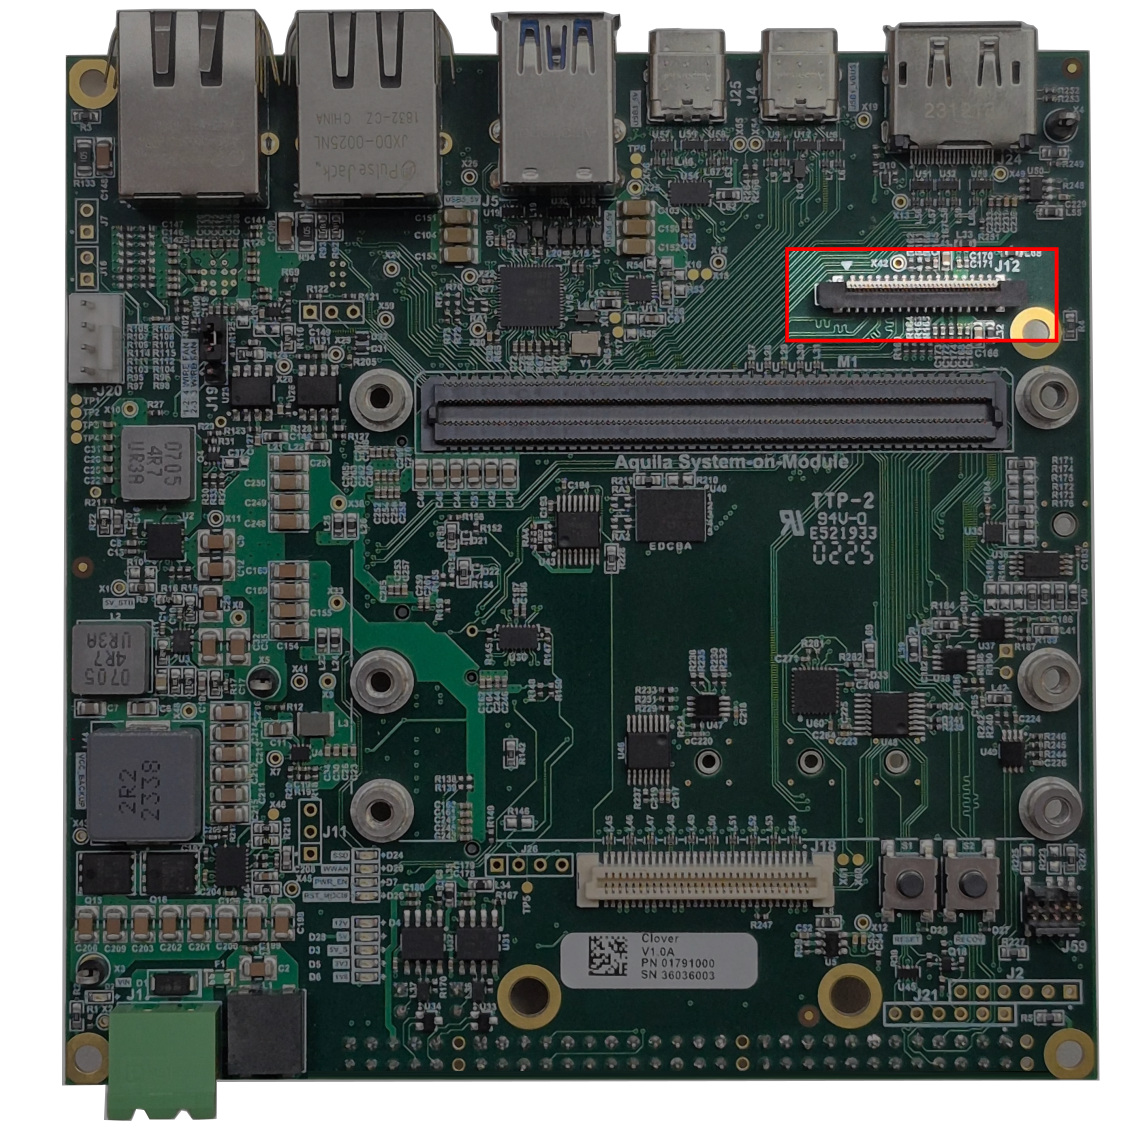
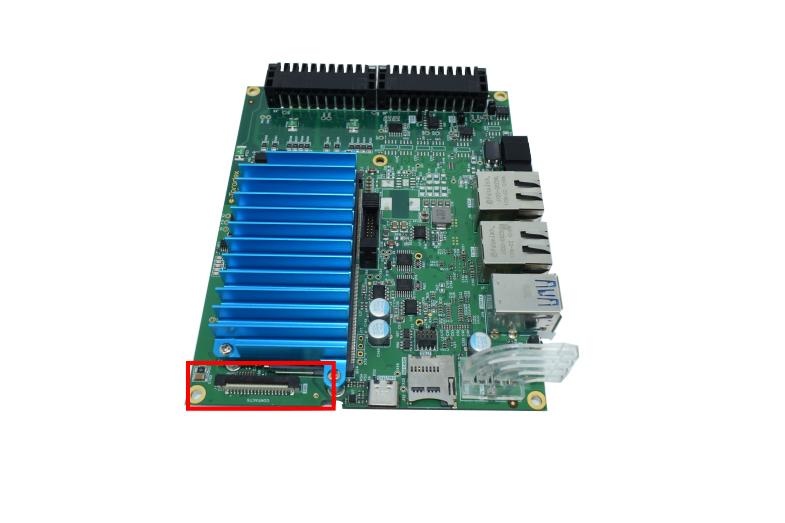
Connections on Clover Carrier Board
Connect the flat ribbon cable to the display. Make sure to connect the pin 1 side of display controller to the respective pin 1 of the J12 connector of the Clover Carrier Board.
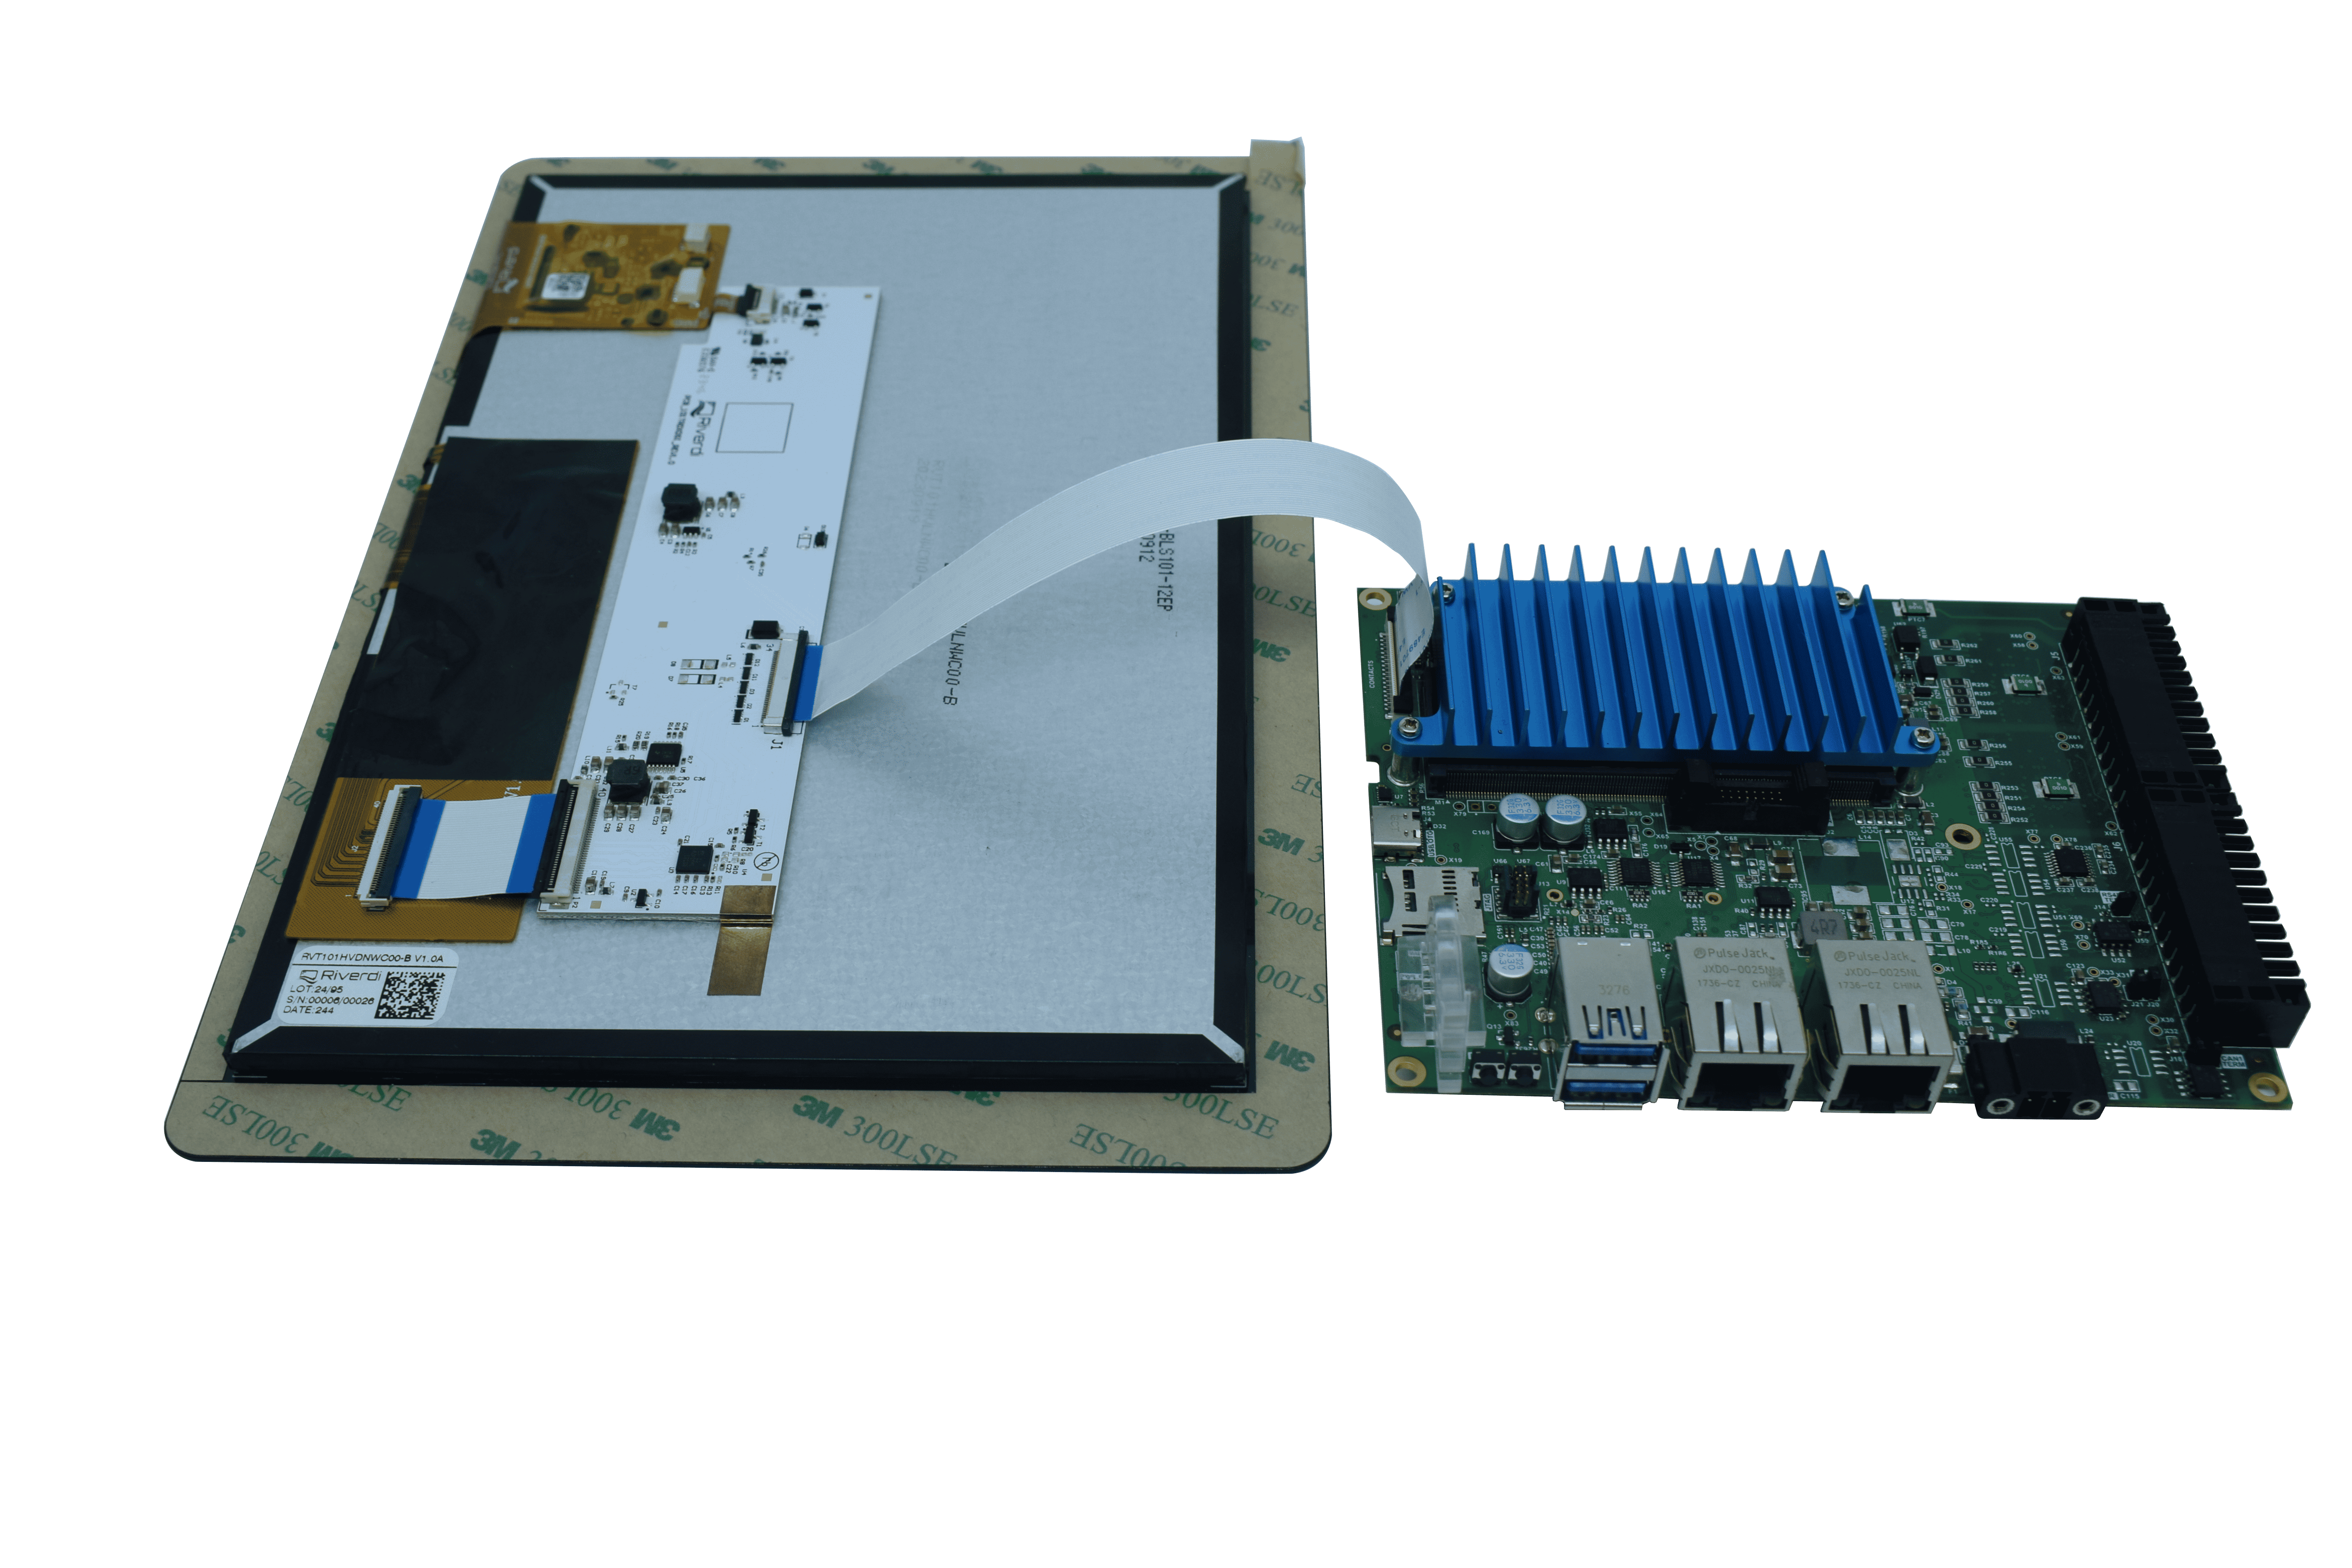
Connections on Ivy Carrier Board
Connect the flat ribbon cable to the display. Make sure to connect the pin 1 side of display controller to the respective pin 1 of the J15 connector of the Ivy Carrier Board.
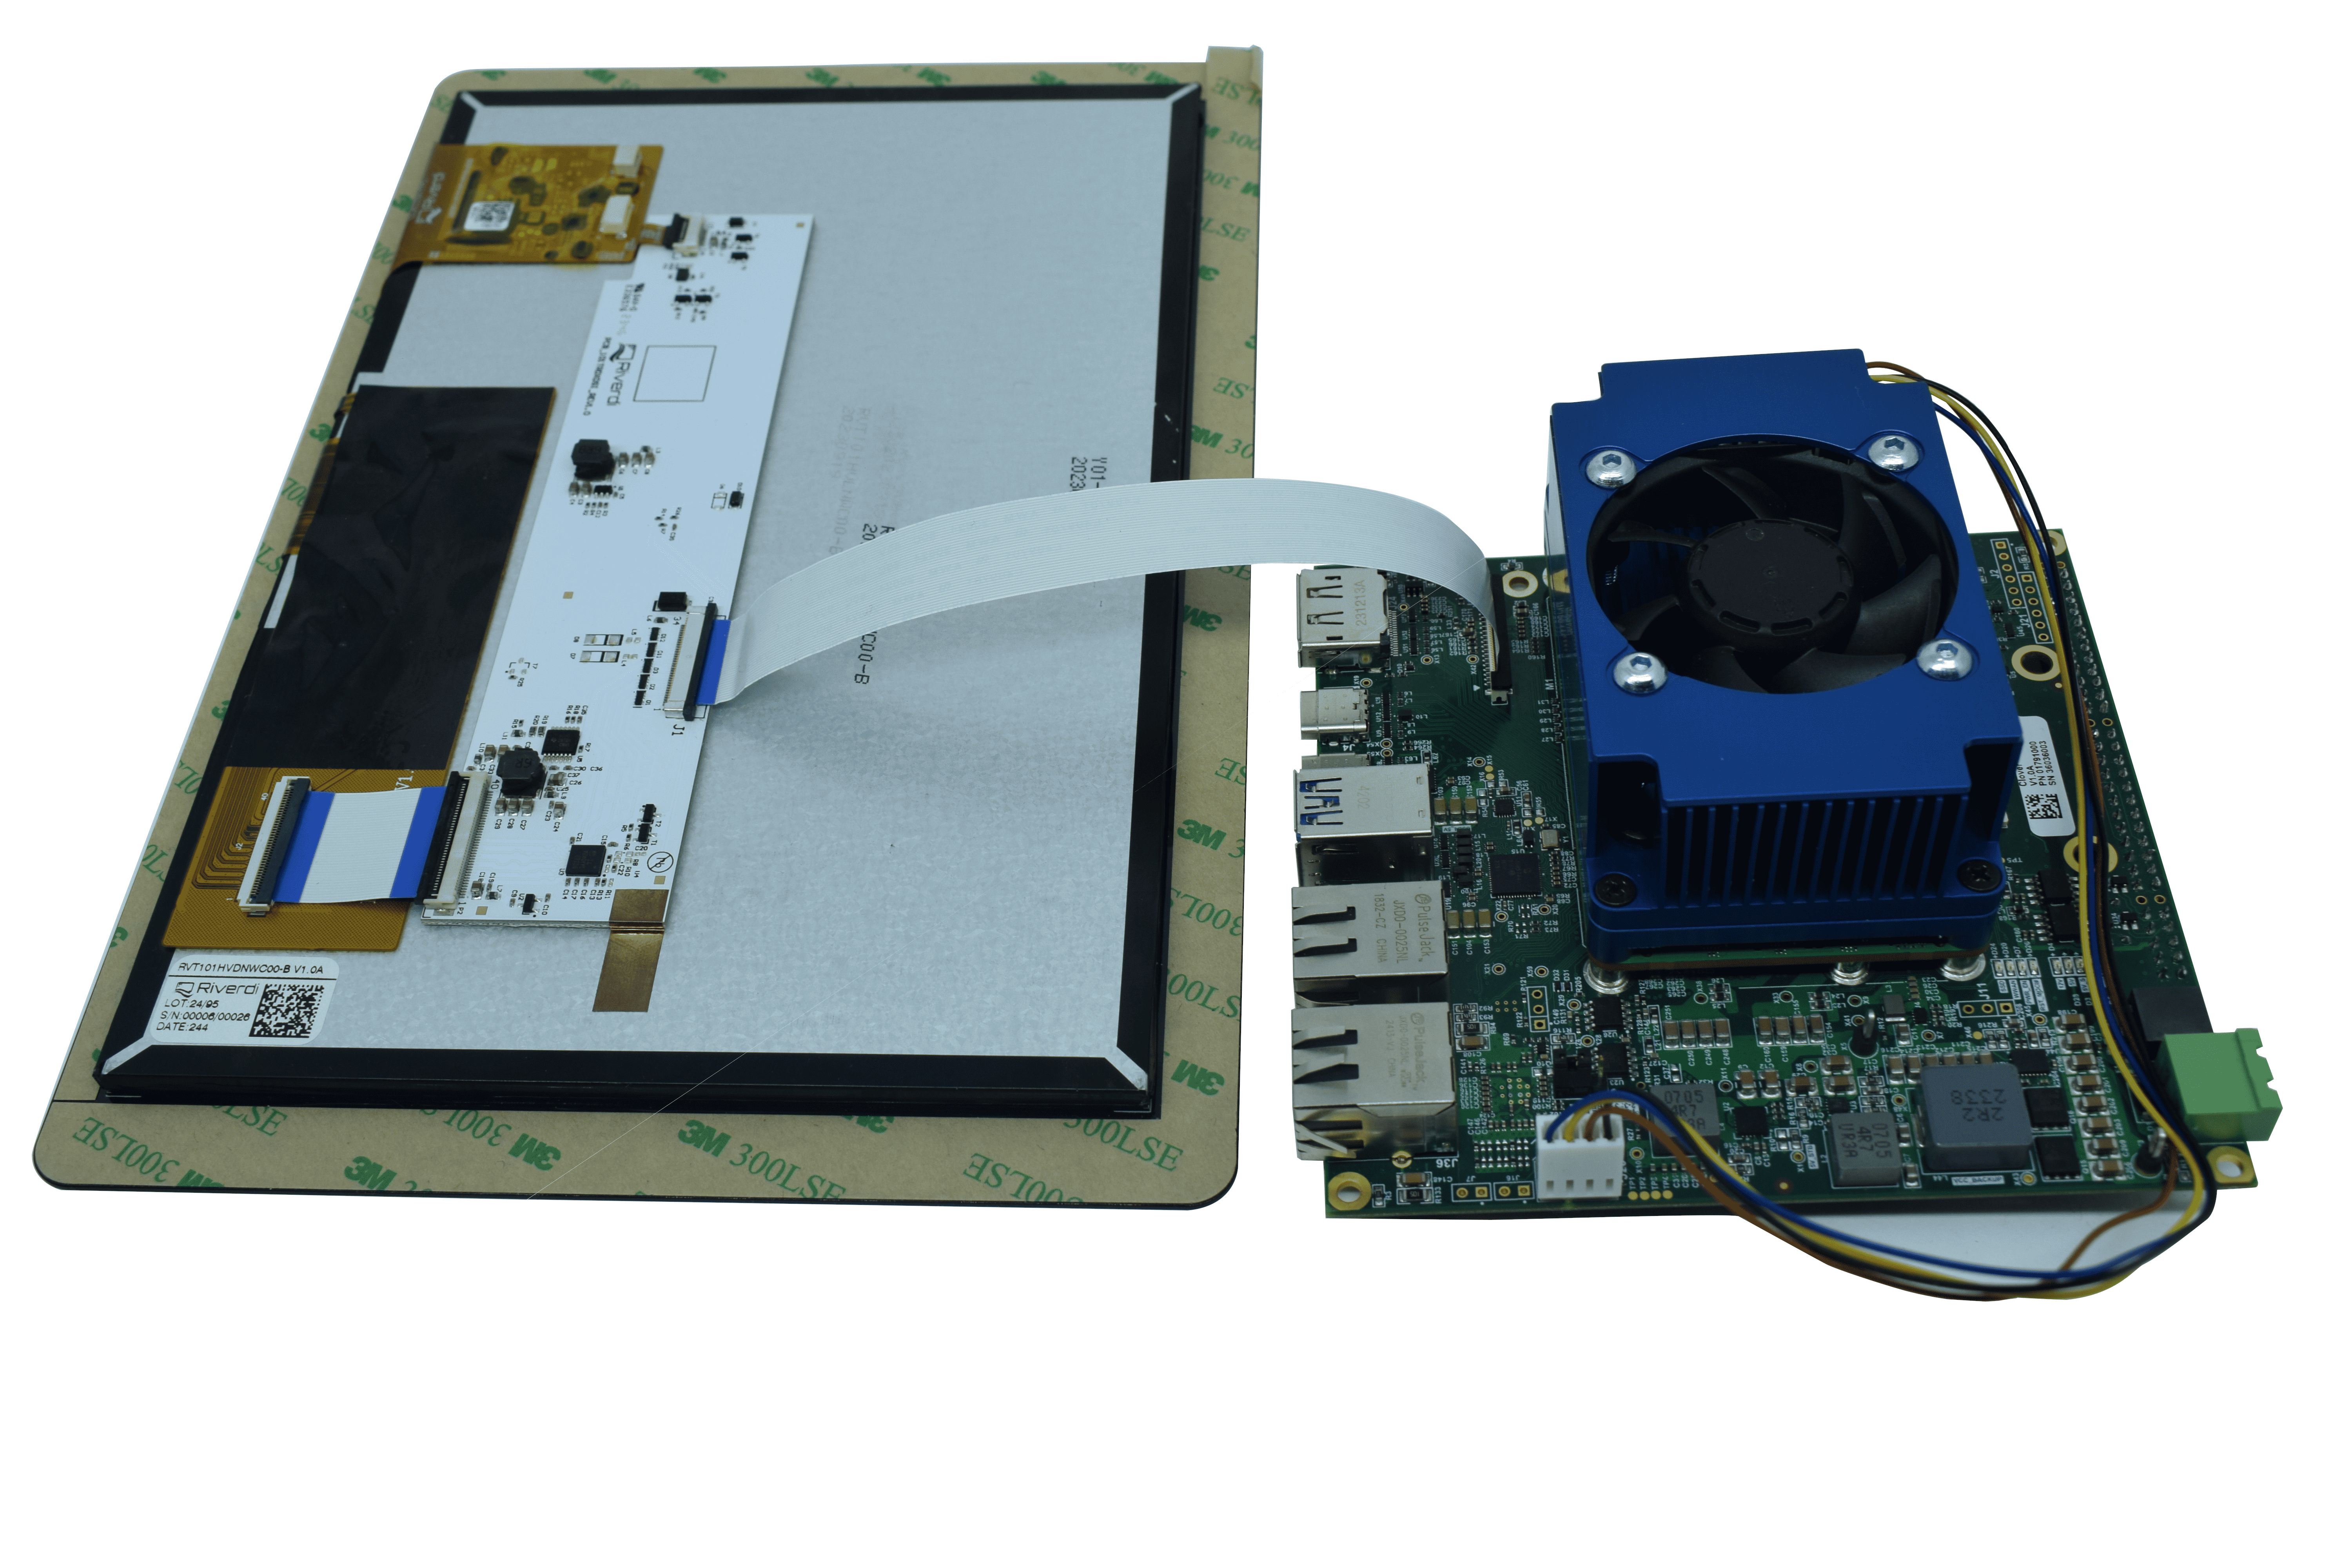
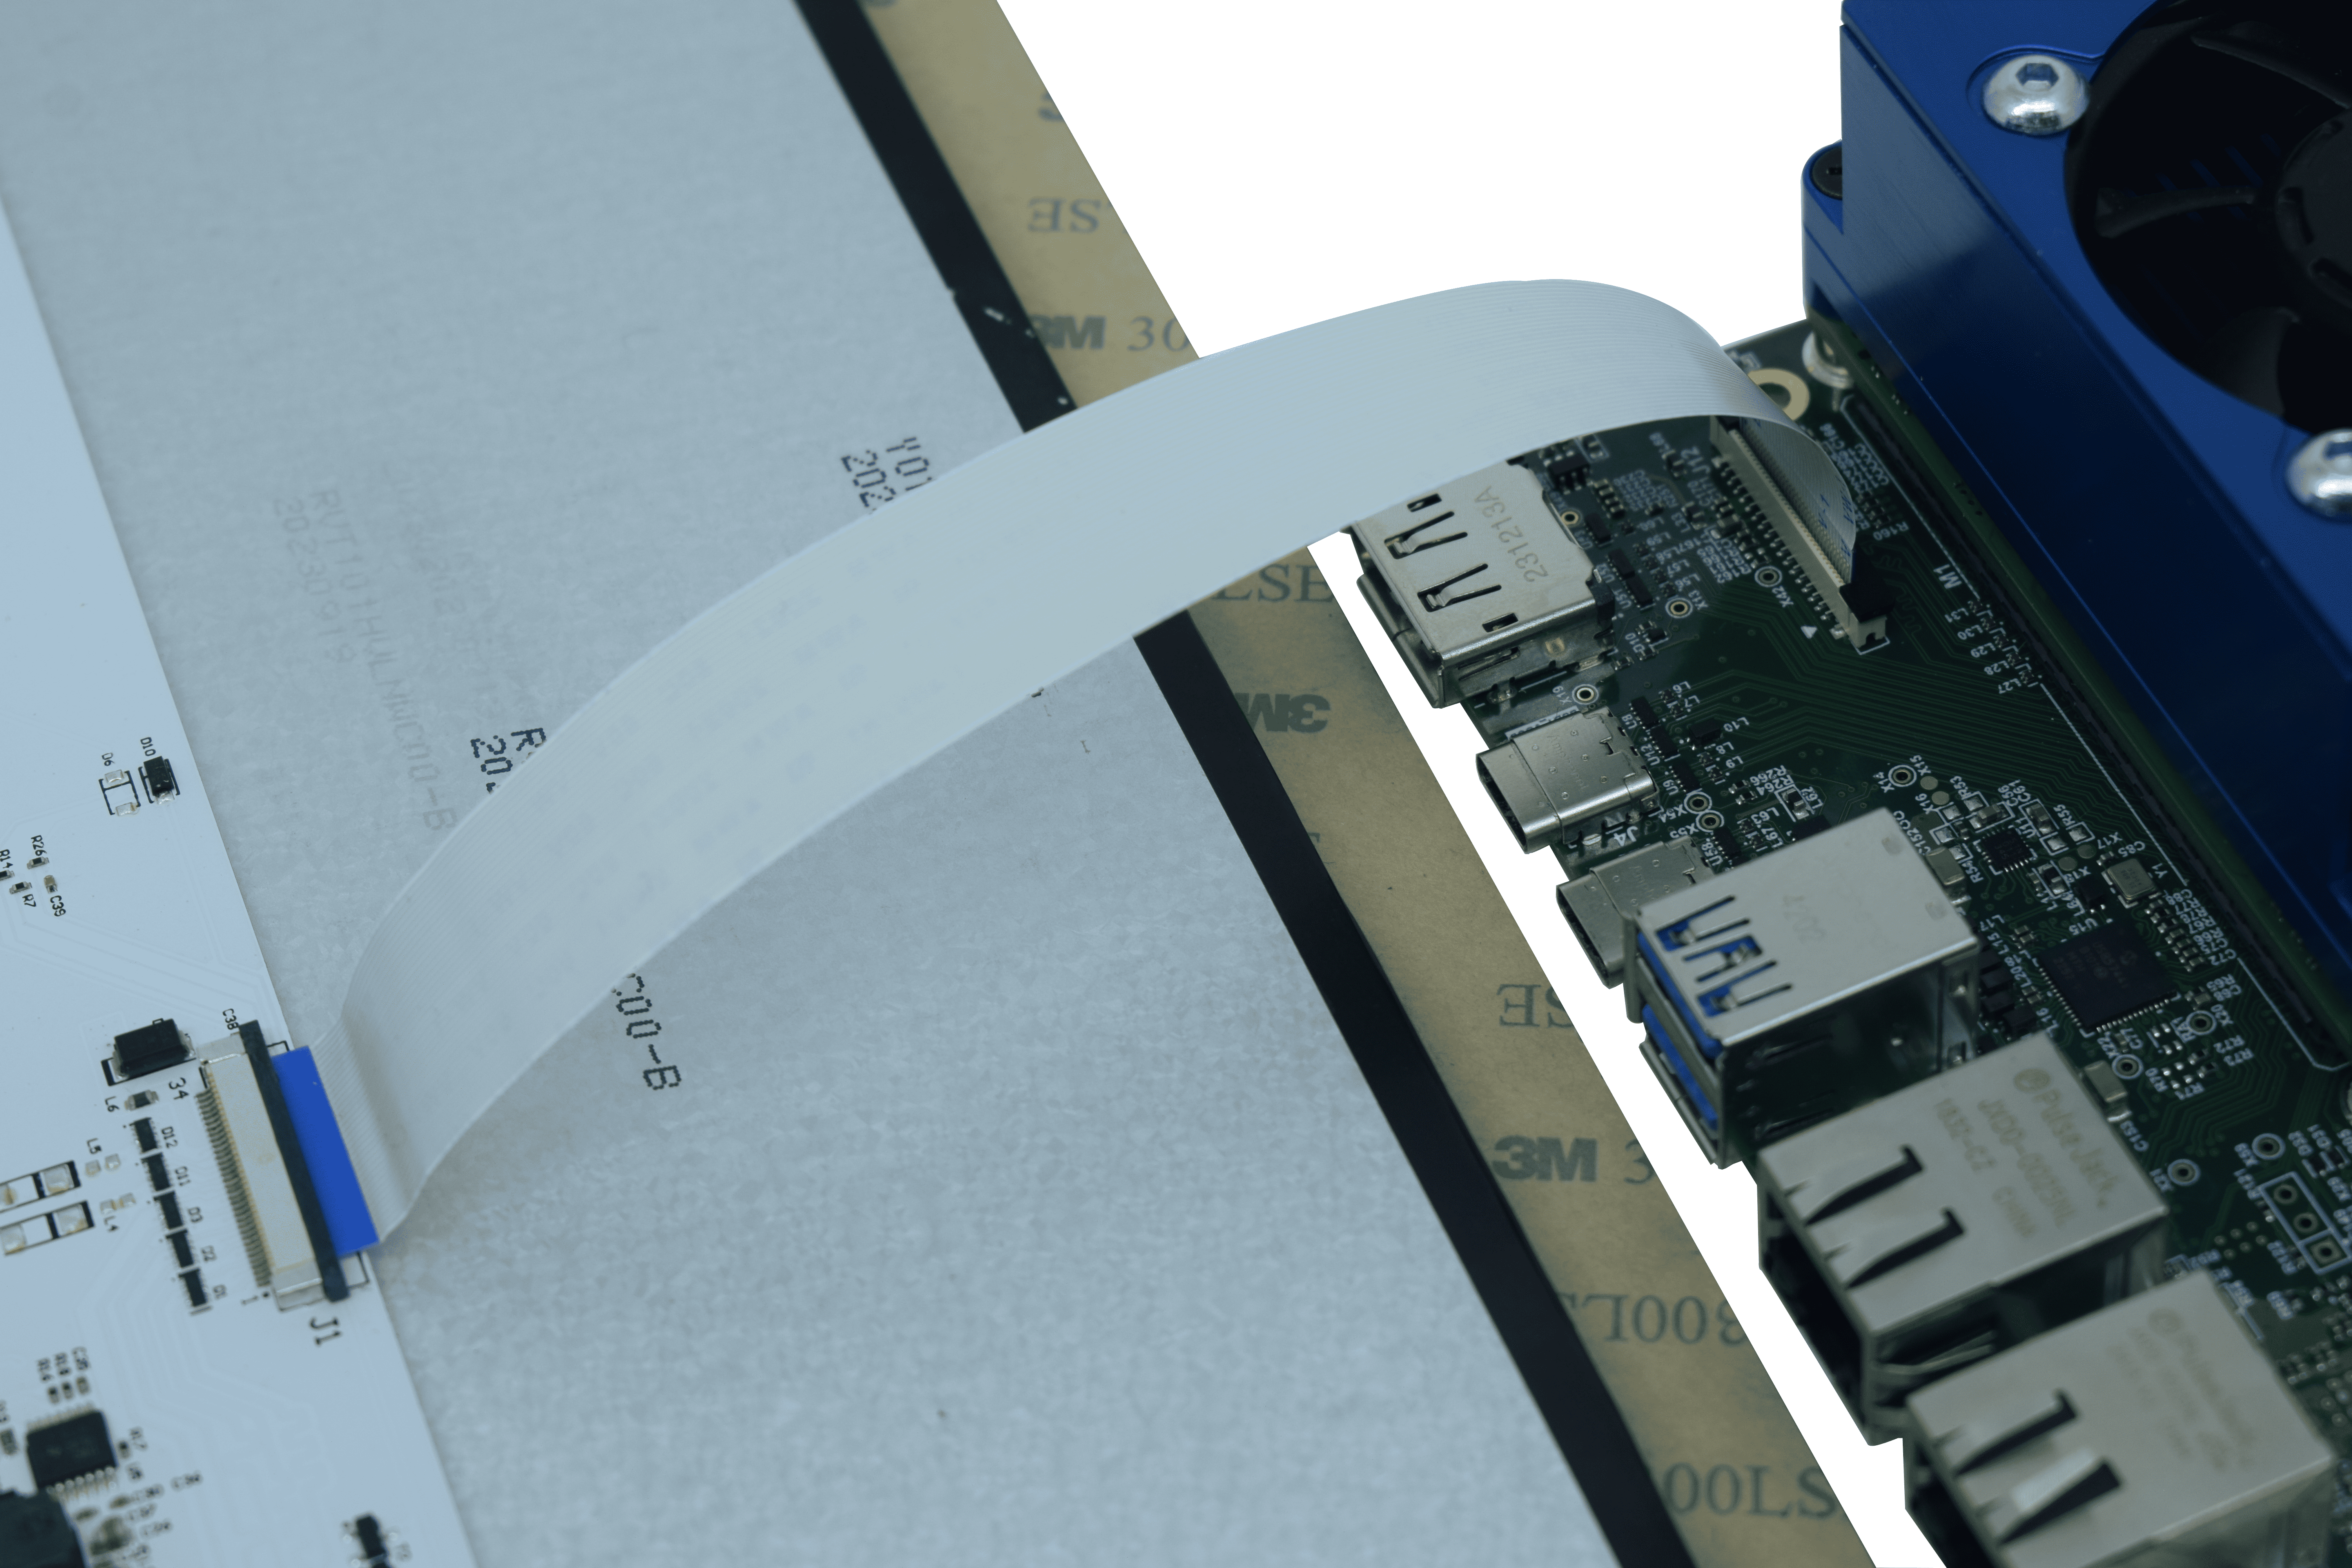
Connections on Mallow Carrier Board
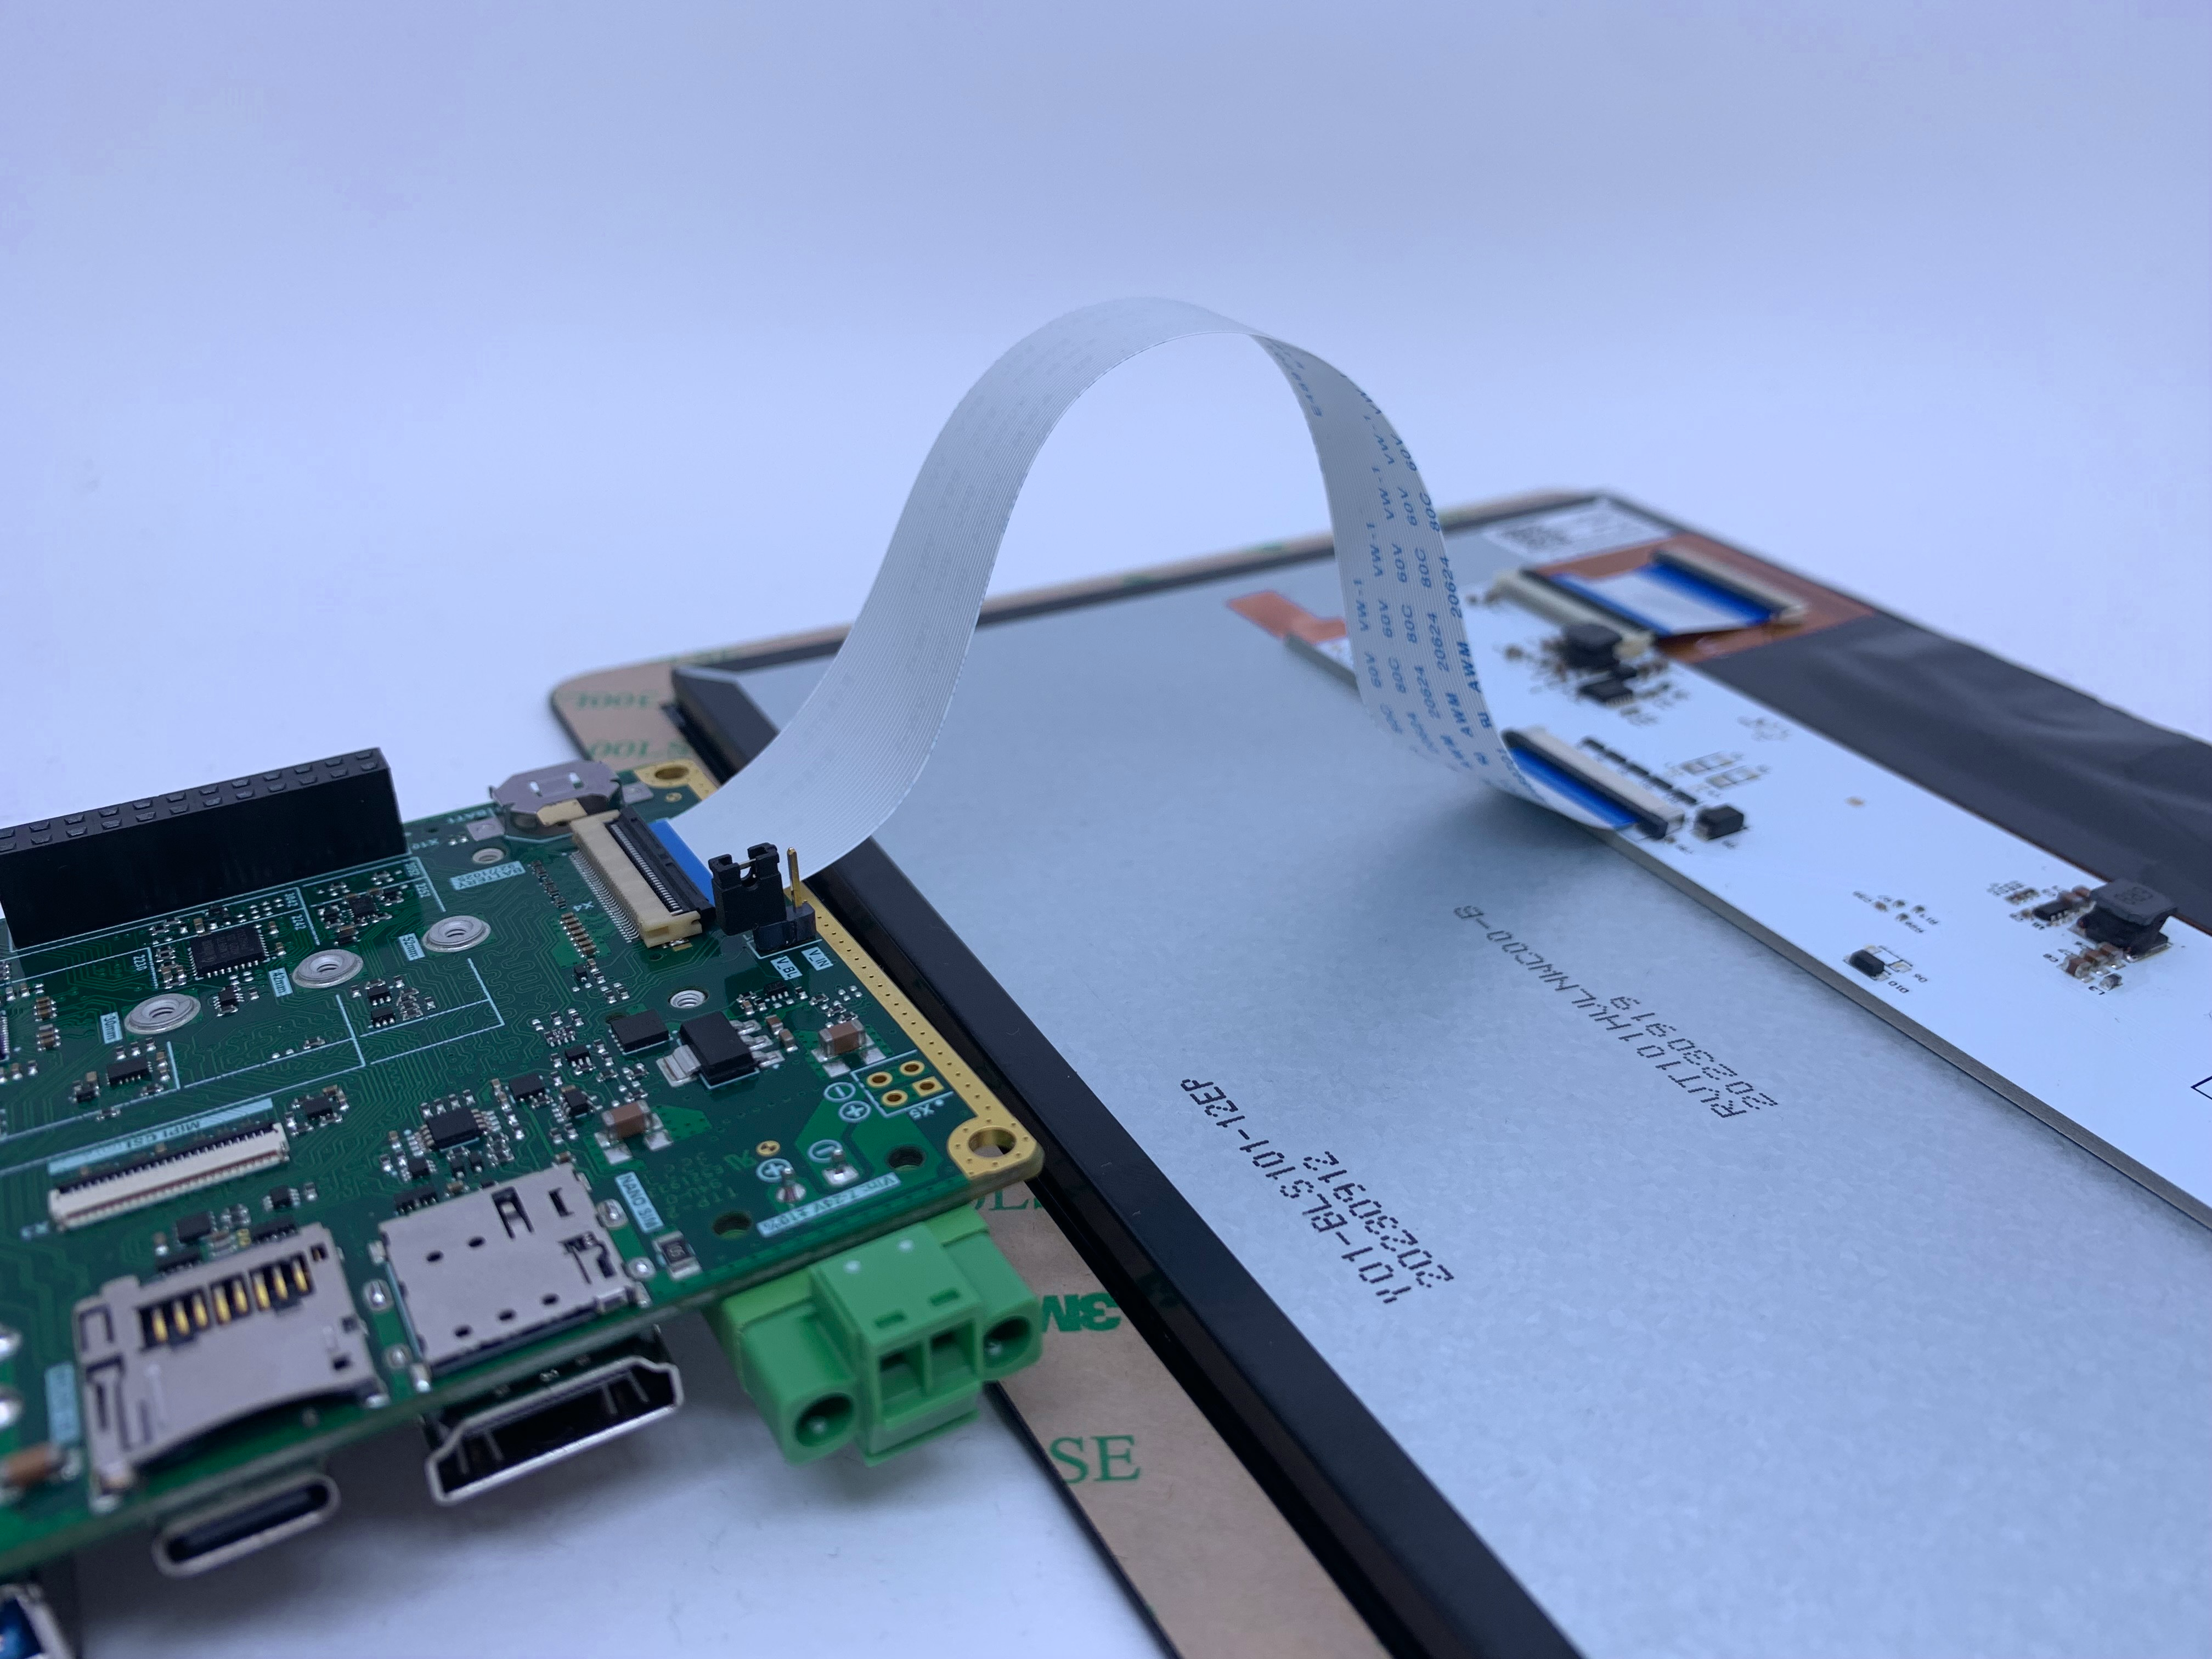
See the picture below for the direct connection from the display to the Mallow Carrier board. Make sure to connect the pin 1 side of display controller to the respective pin 1 of the carrier board.
Connection on Dahlia Carrier Board
A Toradex DSI Display Adapter is required to use this display on Verdin boards.
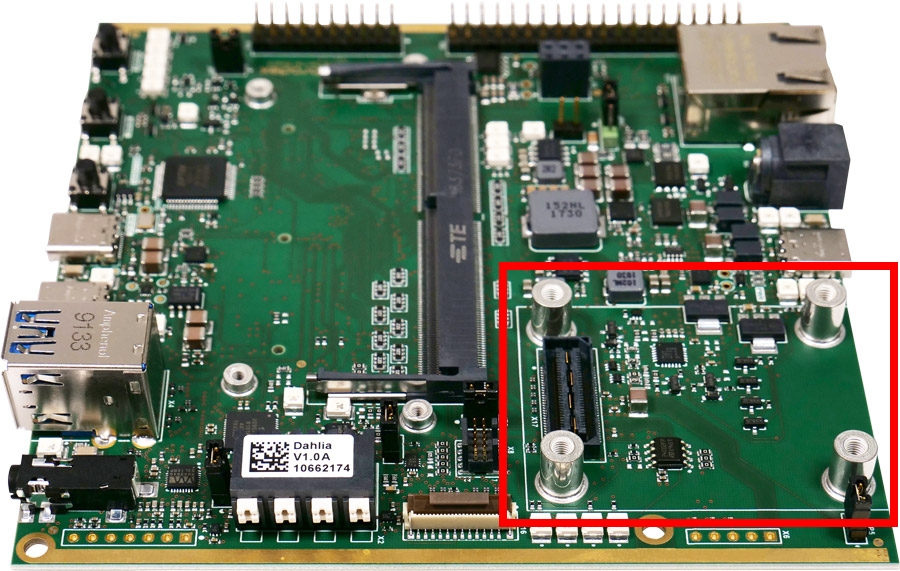
Connect the Toradex DSI Display Adapter into the DSI Connector (X48) of the carrier board.
Connect the flat ribbon cable to the display. Make sure to connect the pin 1 side of display controller to the respective pin 1 of the Toradex DSI Display Adapter.
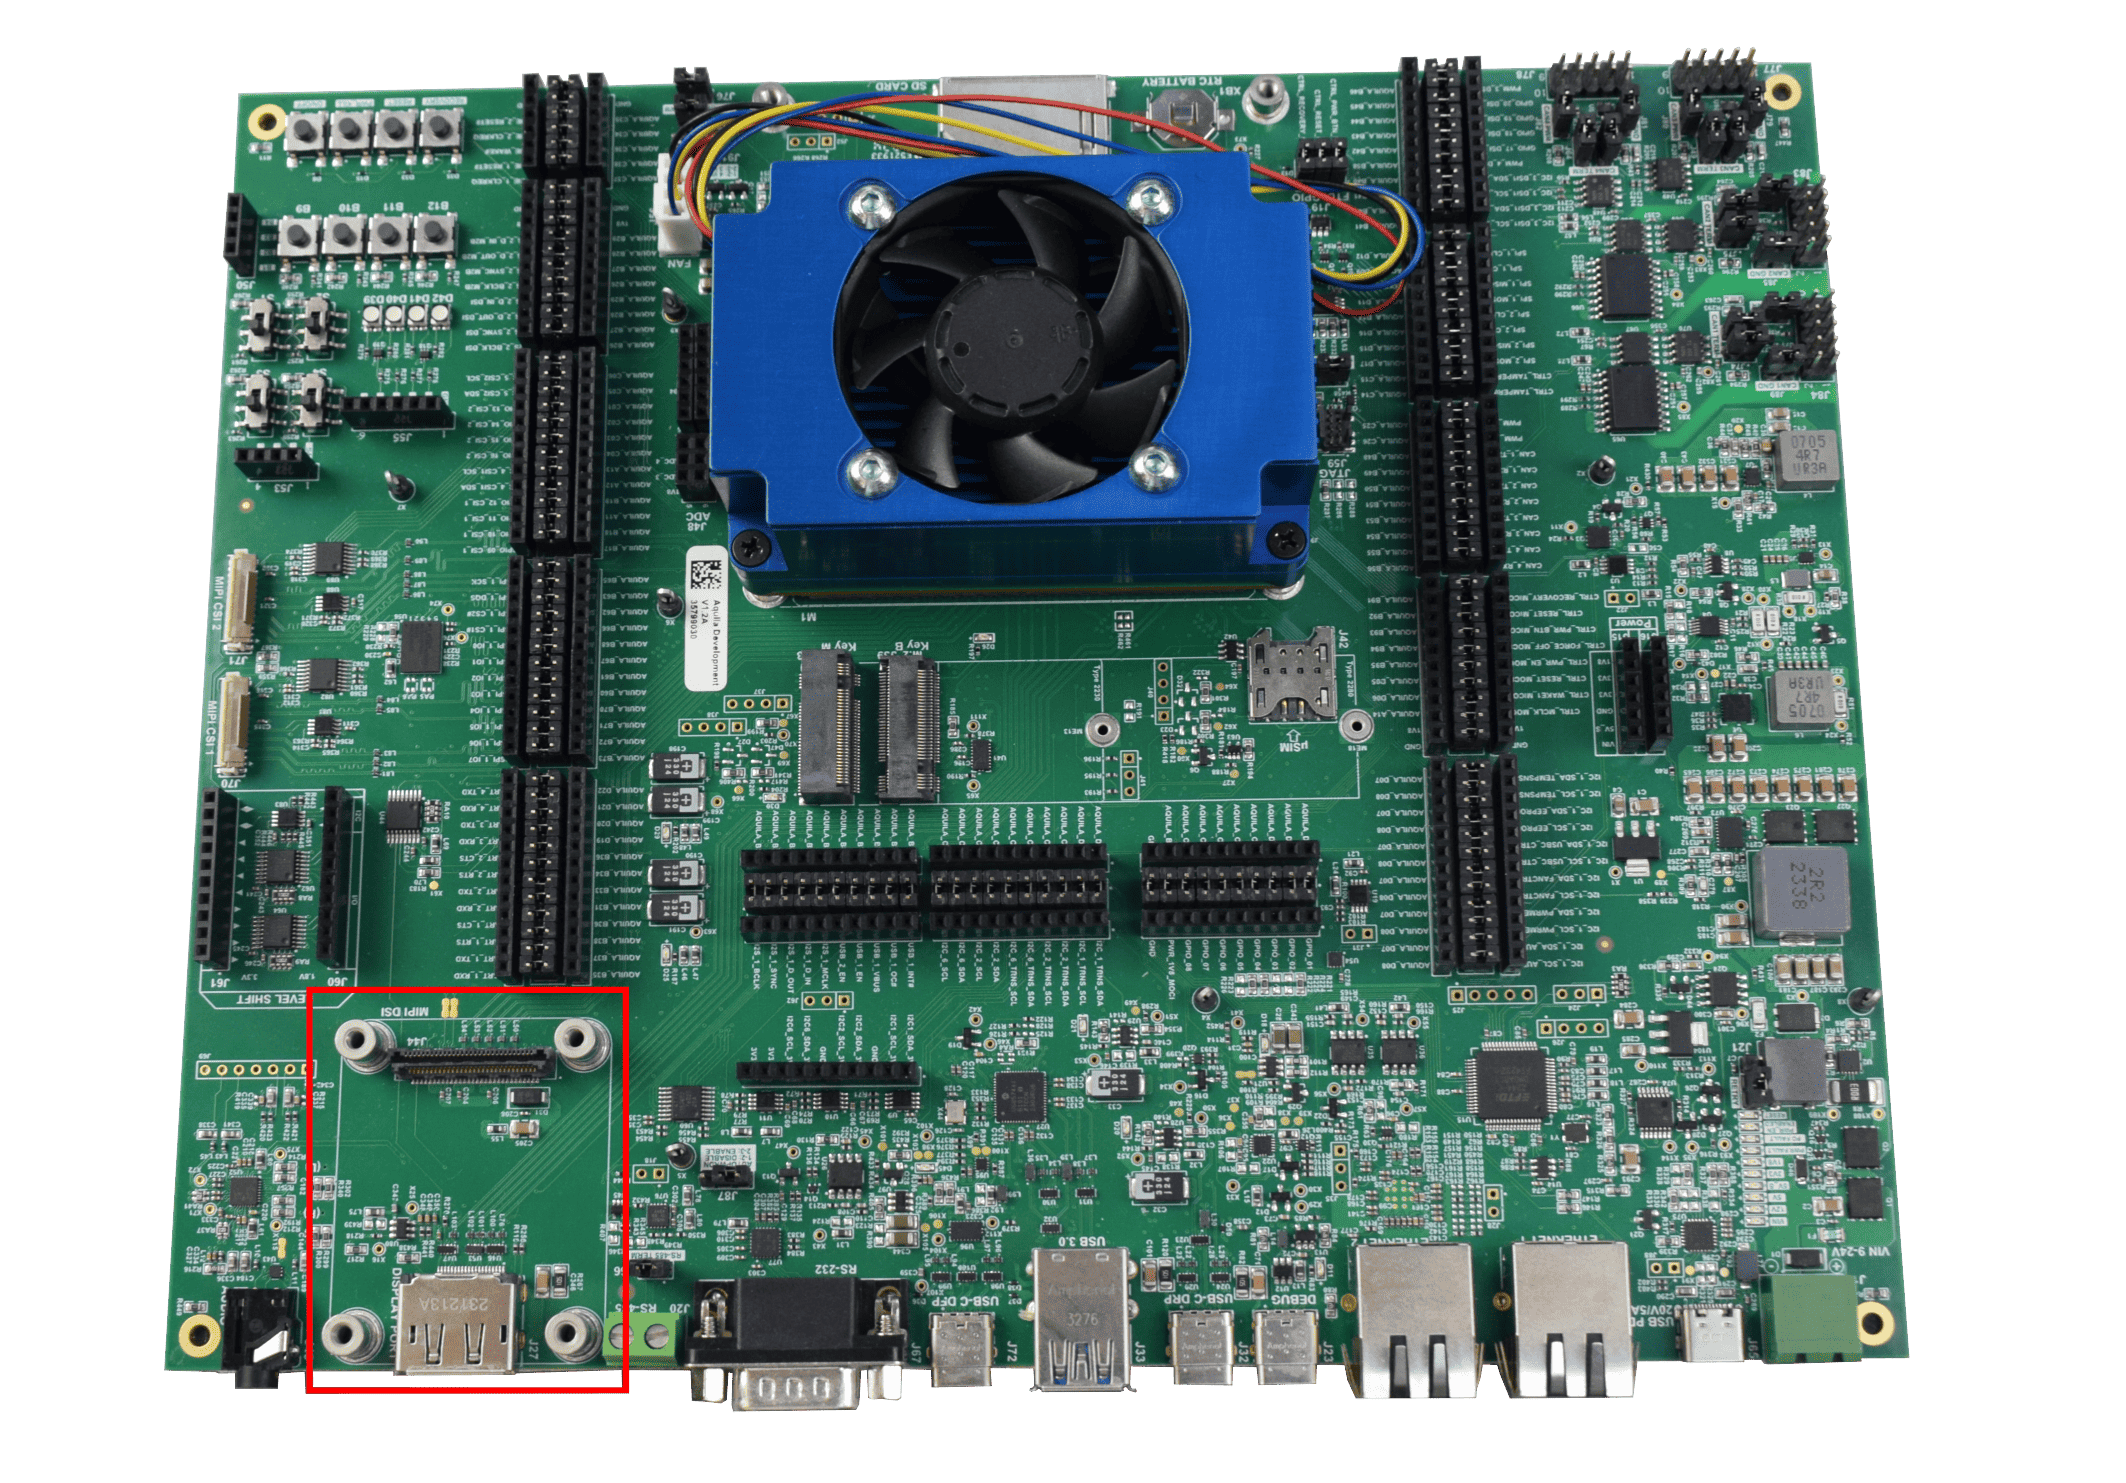
Connection on SMARC Development Board
A Toradex DSI Display Adapter is required to use this display on SMARC boards.
Connect the Toradex DSI Display Adapter into the MIPI DSI Connector (J44) of the carrier board.
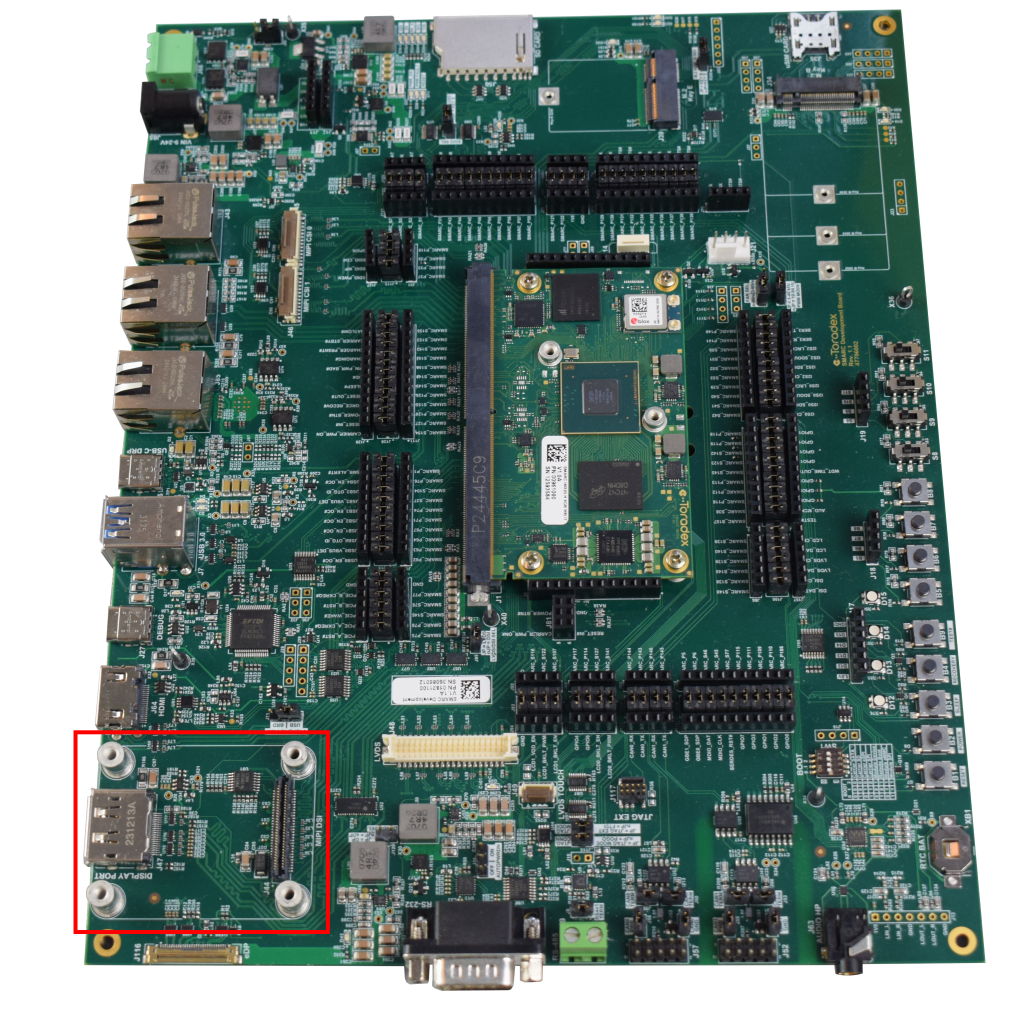
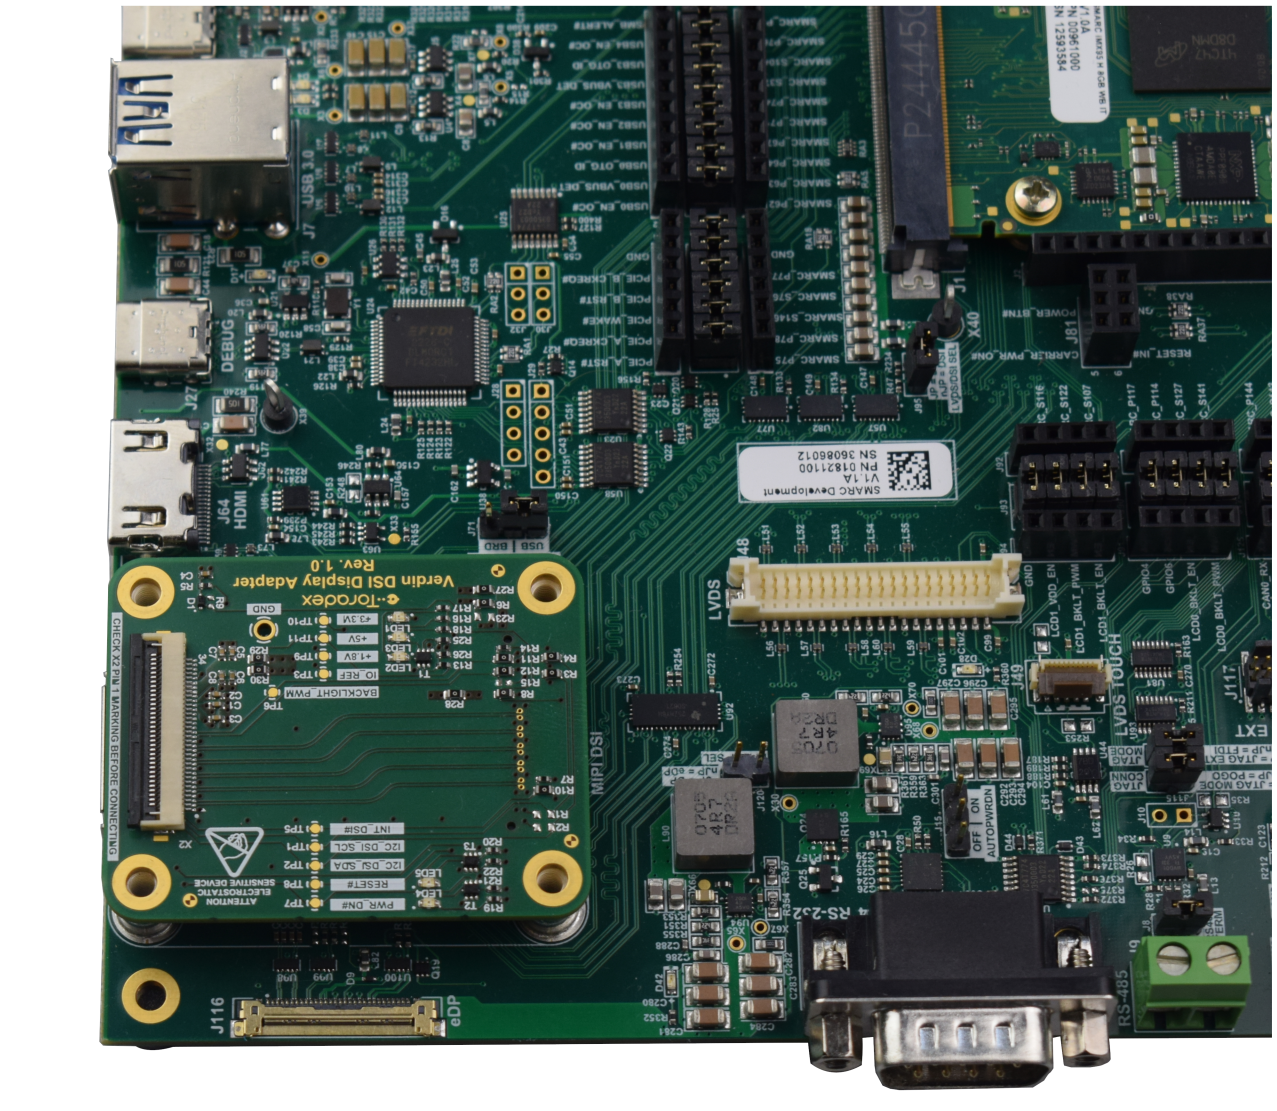
Connect the flat ribbon cable to the display. Make sure to connect the pin 1 side of display controller to the respective pin 1 of the Toradex DSI Display Adapter.
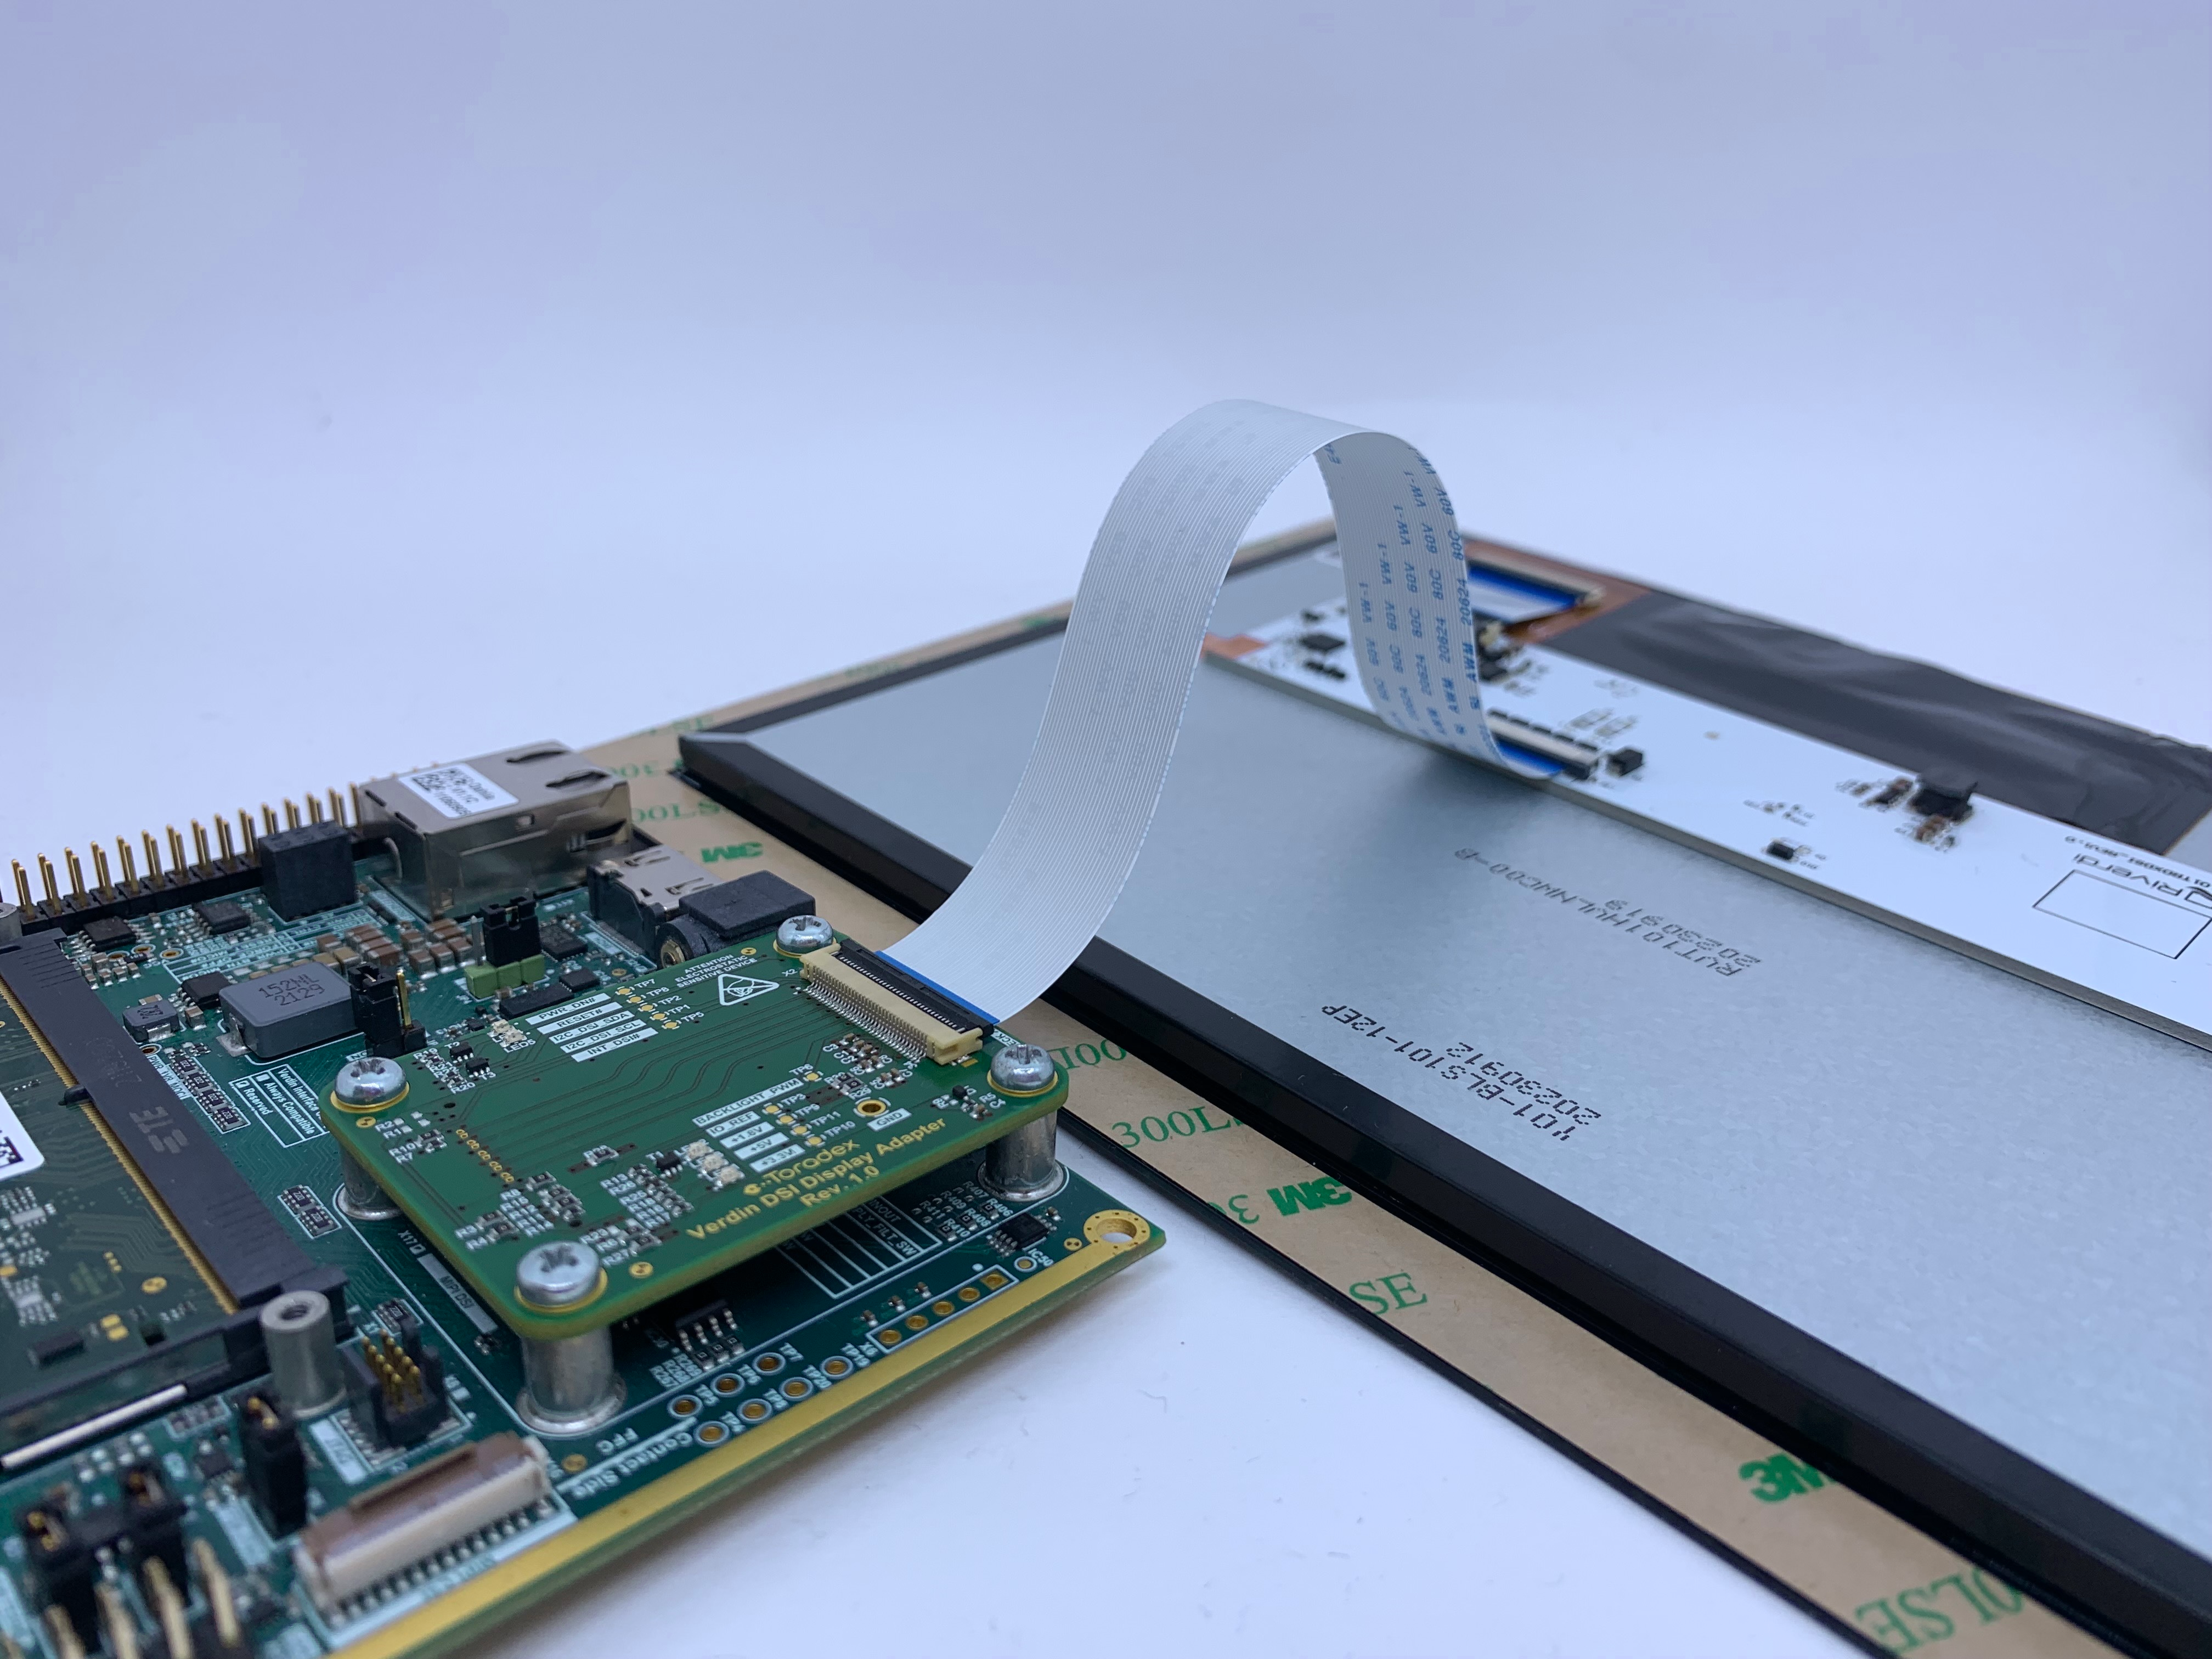
Connection on Verdin Development Board
A Toradex DSI Display Adapter is required to use this display on Verdin boards.
Connect the Toradex DSI Display Adapter into the DSI Connector (X17) of the carrier board.
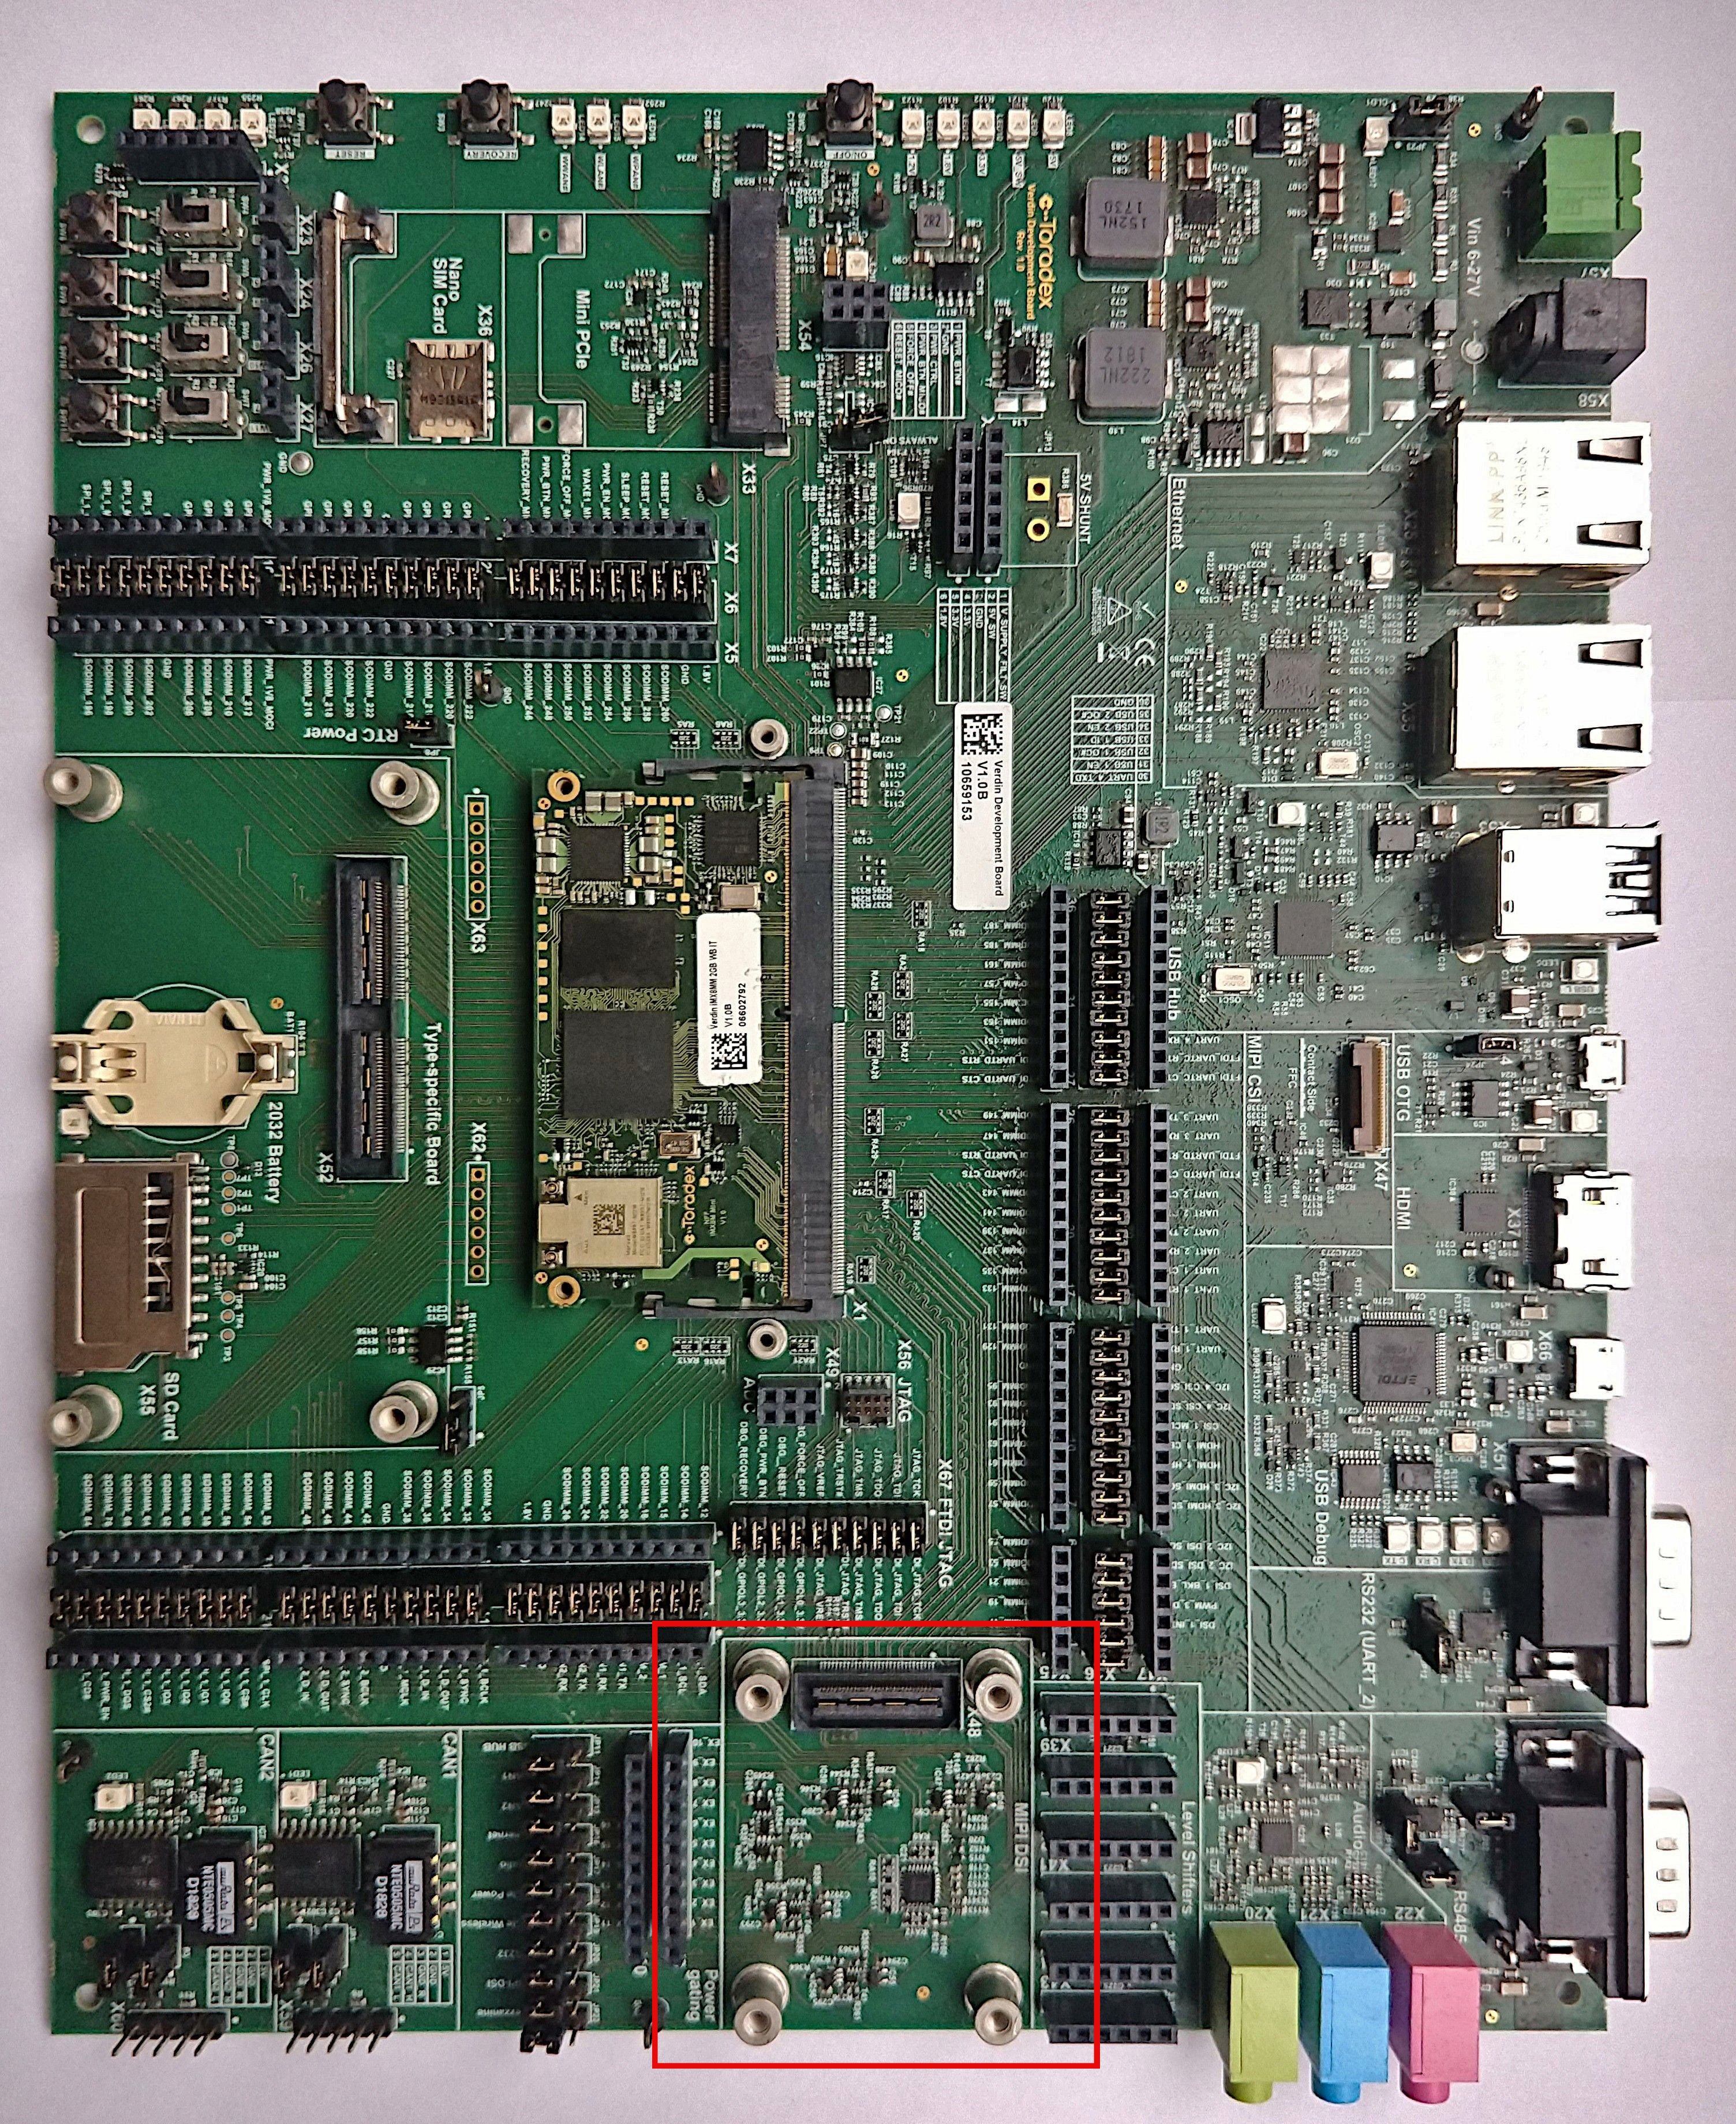
Connect the flat ribbon cable to the display. Make sure to connect the pin 1 side of display controller to the respective pin 1 of the Toradex DSI Display Adapter.
Installation on Embedded Linux
Torizon OS
On Torizon OS, Toradex deploys pre-compiled and ready-to-use device tree overlays for this display, inherited from the BSP layers. Enabling them for evaluation can be done with a few commands. Learn how to do it on Setting up Displays with Torizon.
Reference Images for Yocto Project
On the Linux BSP, Toradex deploys pre-compiled and ready-to-use device tree overlays for this display. This enables you to evaluate it with few commands and very fast. Learn how to do it on Device Tree Overlays (Linux).
For more advanced use cases, please refer to the article Display Output, Resolution and Timings (Linux).
Adjusting the Brightness
Read the dedicated article Backlight (Linux).
Touch Screen
Capacitive touch screen works out-of-the-box in our BSP.
Touch Screen Calibration
Read the dedicated articles:
- Touch Screen Calibration (Linux): if you plan to use our BSP Layers and Reference Images for Yocto Project.
- Touch Screen Calibration (Torizon): if you plan to use Torizon.