Kynetics Android
Kynetics
Kynetics offers a wide line of Embedded Android products and services that help customers handle all the phases of their Android projects and product lifecycle.
Kynetics’ evaluation OS and Embedded Android Developer Toolkit, including Android Automotive, can accelerate customers’ hardware evaluation and their software development across a wide range of Toradex products, including the Apalis, Colibri, SMARC, and Verdin families, reducing customers’ project startup costs. Product lifecycle support is provided through Kynetics Security Updates and continuous Software Bill of Materials (SBOM) analysis.
To learn more about Kynetics Embedded Android, refer to Kynetics' Toradex products page.
Embedded Android
Kynetics provides Embedded Android solutions for Toradex hardware, supporting product development from evaluation through production, including secure OTA update capabilities and an integrated build pipeline:
-
Evaluation OS: Pre-built Android images intended for initial evaluation, performance testing, and application prototyping on Toradex hardware.
-
Embedded Android Developer Toolkit (EADT): A complete development stack for Toradex SoMs, including the operating system, an embedded SDK providing direct access to hardware I/O from Android applications, and OTA update support.
-
Custom OS: A production-ready, customizable Android stack designed for specific products or custom hardware, with optional features such as secure boot, kiosk mode, OTA updates, and remote device management.
Supported Modules and the Latest Android Version
Please check the supported Hardware on the Kynetics Toradex Products page.
Supported Displays
- For Verdin iMX95 SMARC EADT and EADT Automotive: Capacitive Touch Display 10.1" LVDS as per Toradex Evaluation Kit 2.
- For Verdin iMX95 SDK EADT: Capacitive Touch Display 10.1" LVDS as per Toradex Evaluation Kit 2.
- For Verdin iMX8M Plus with EADT: HDMI Display.
- For Verdin iMX8M Mini: Compatible with any HDMI display using the Verdin DSI to HDMI adapter.
- For Colibri SoMs: Toradex Capacitive Touch Display 7" Parallel.
- For Apalis SoMs: Toradex Capacitive Touch Display 10.1" LVDS.
SoMs with HDMI output support any display up to a resolution of 1920x1080.
How to Get Started
To begin working with Kynetics Embedded Android on Toradex hardware, follow these steps:
-
Request an Evaluation OS or EADT license: Submit a request for the appropriate software package using the Kynetics submission form
-
Set up the development environment: Refer to the setup instructions for the Kynetics Embedded Android Developer Toolkit (EADT). The following video covers the process for the Toradex SMARC95 Evaluation Kit:
Setup Hardware for USB Debugging
To deploy and debug apps, connect the board to your computer using a micro-USB to USB cable and remove the jumper short-circuit in JP2 on Ixora:
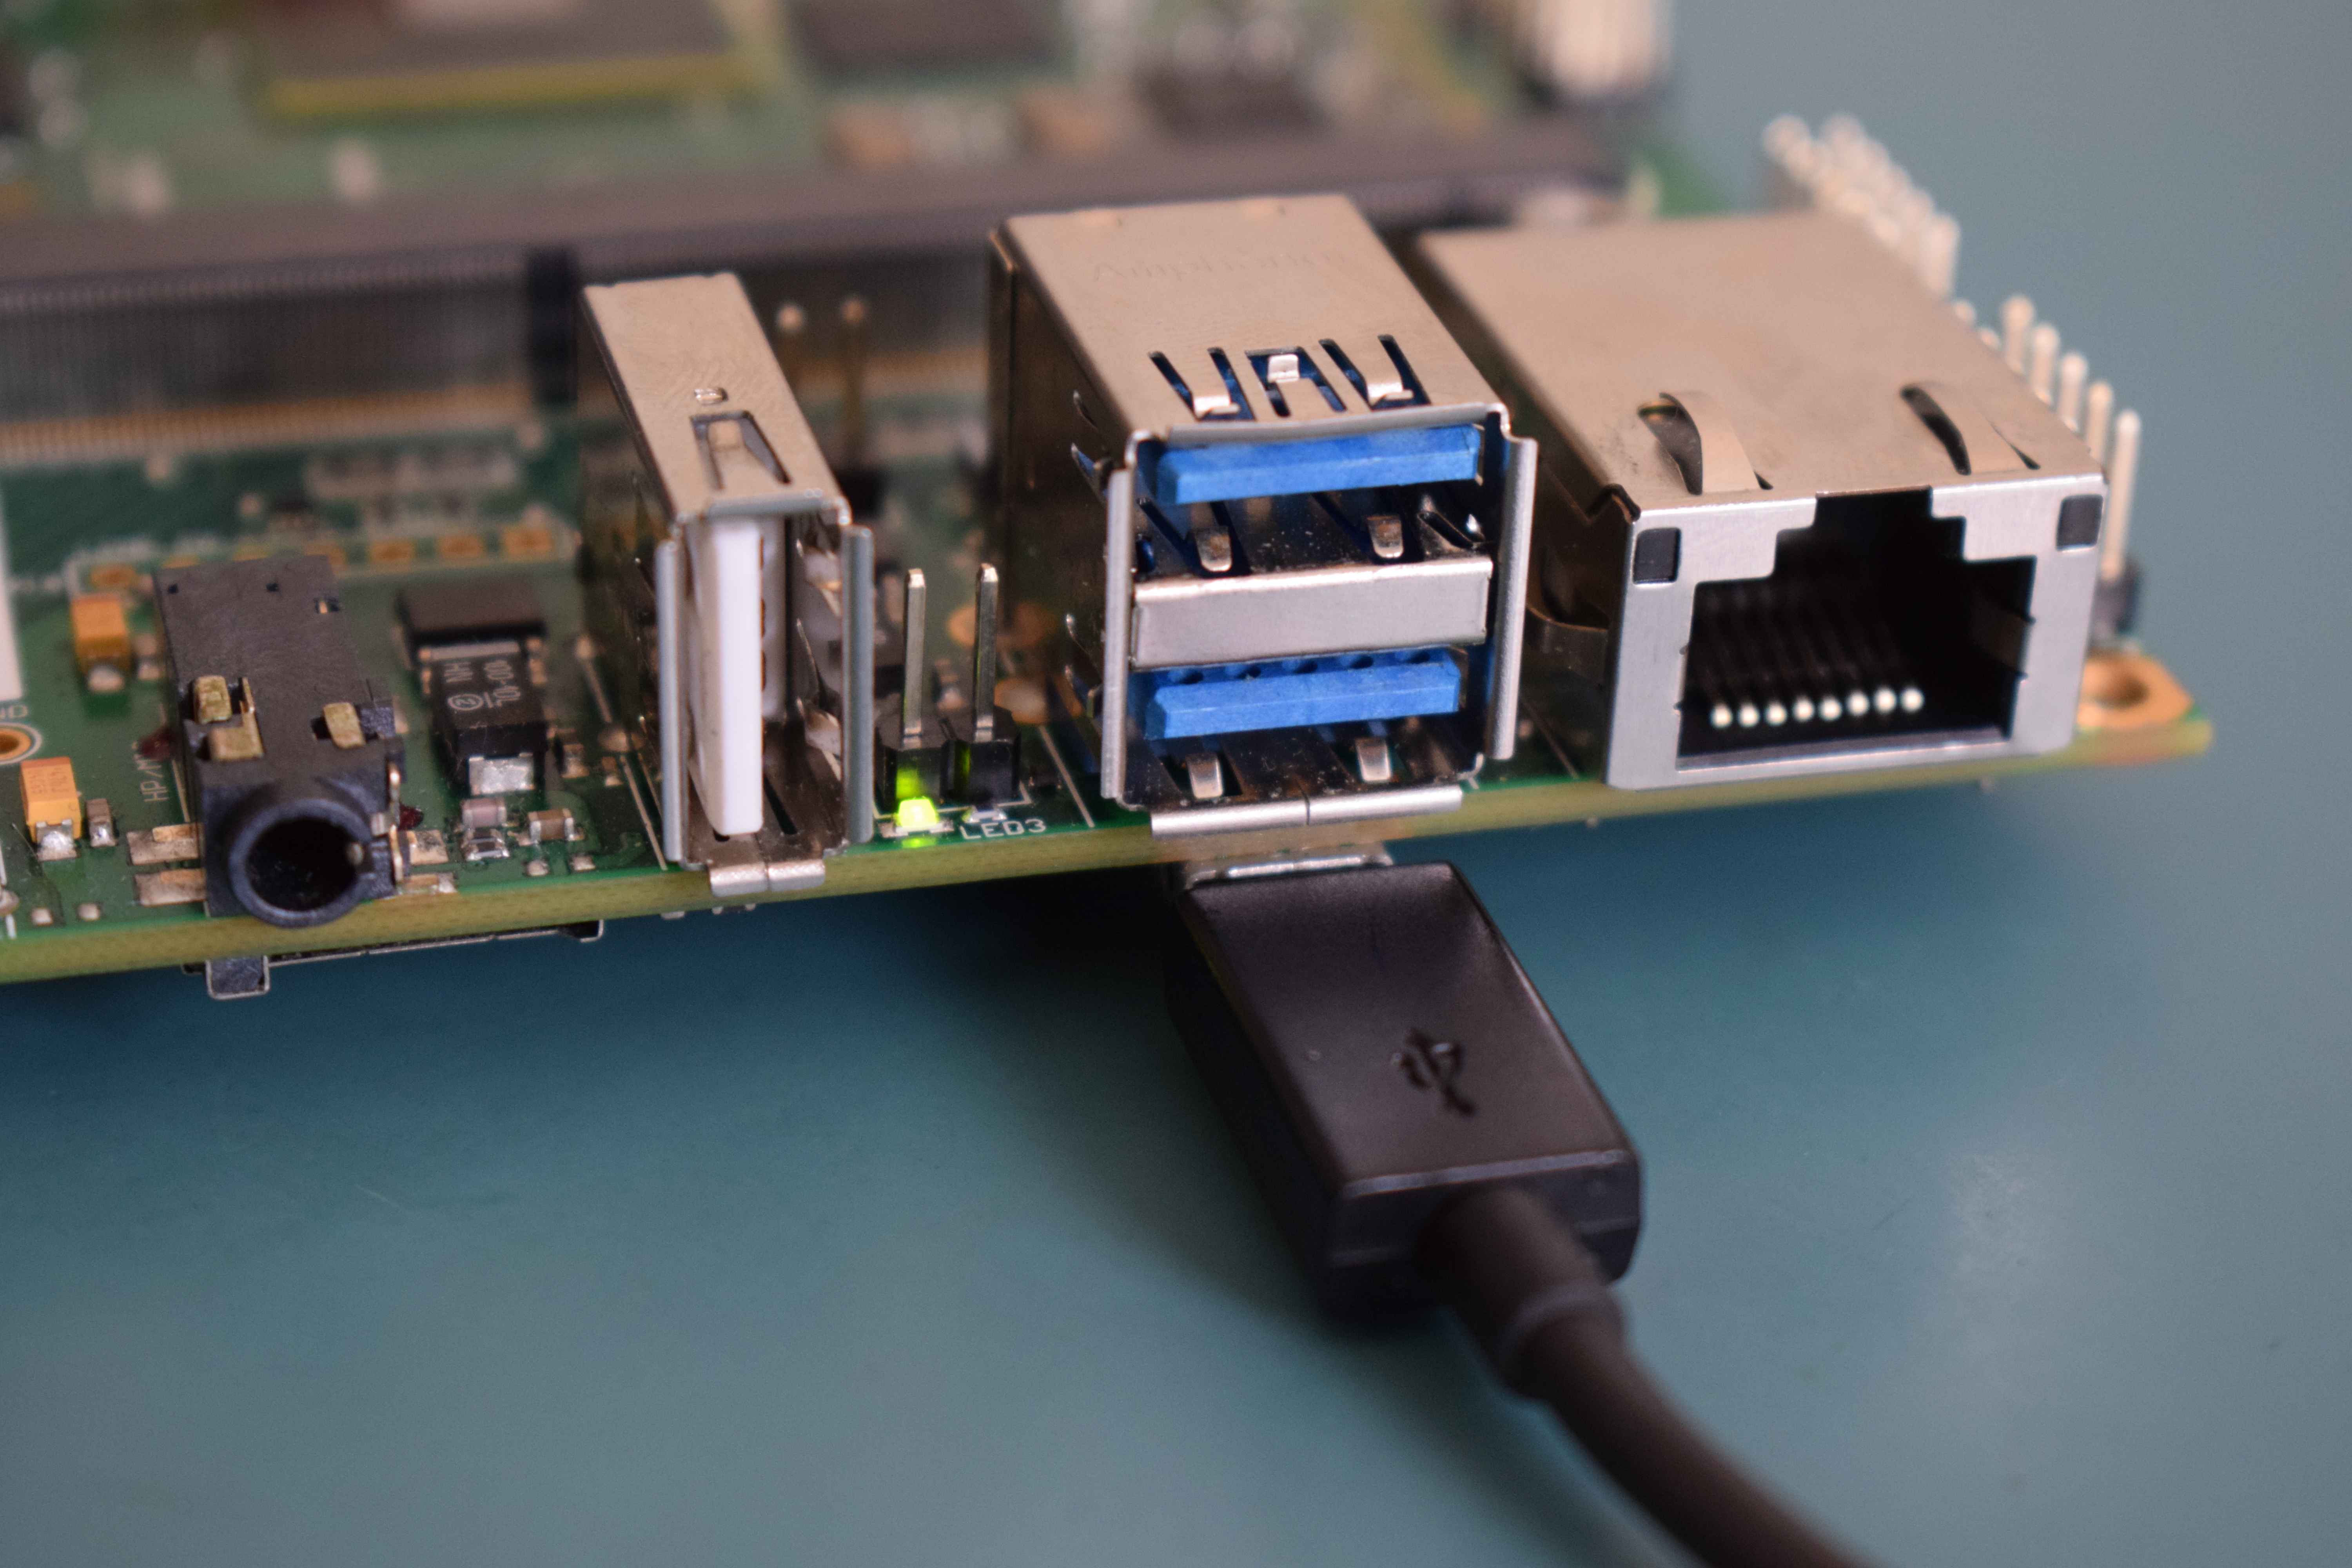
Alternatively, you can use the Ethernet or Wi-Fi interface for debugging. Search the official Android documentation on how to use adb to setup debugging over TCP/IP.
Build and Deploy an Android App Sample
This article is not meant as an introduction to Android development. If you have questions, go through its comprehensive documentation.
To avoid issues when deploying the app to the actual hardware, go through the following article:
If your host OS is Ubuntu, apt-get install adb might do the trick.
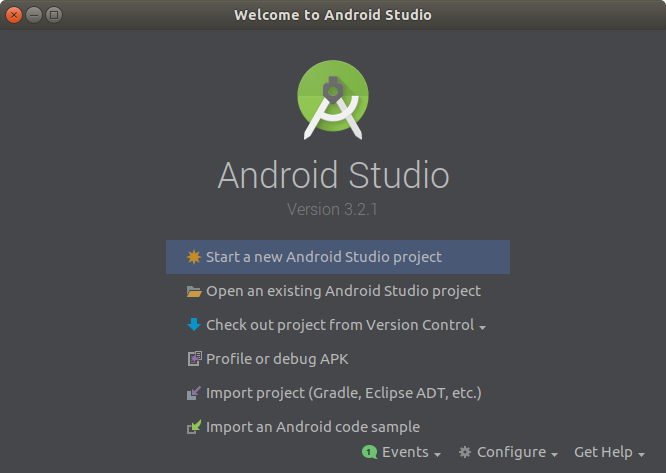
Download, install, and start Android Studio. Once it starts you will see a welcome screen. Choose the option Import an Android code sample:
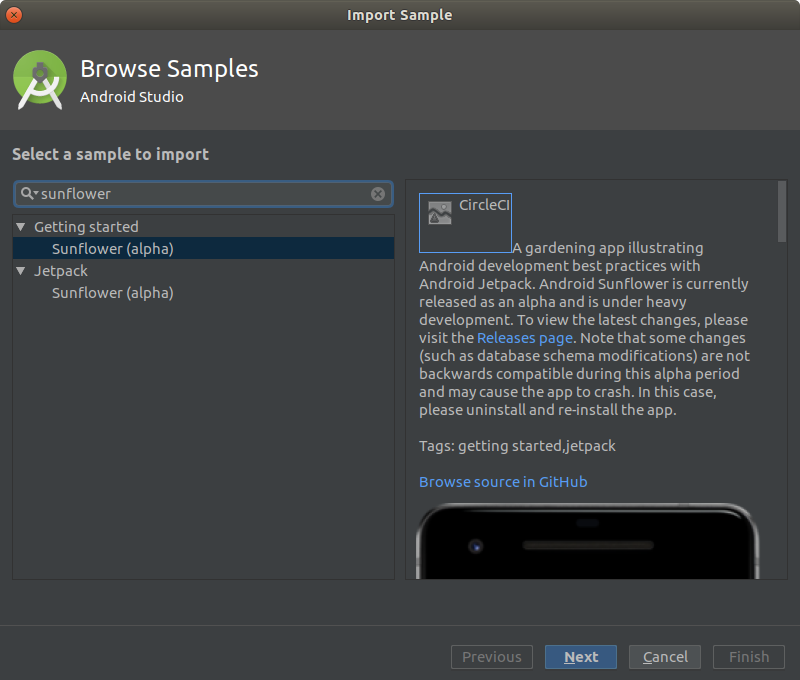
Select a sample of your choice. In this article we will build and deploy the Sunflower sample app:
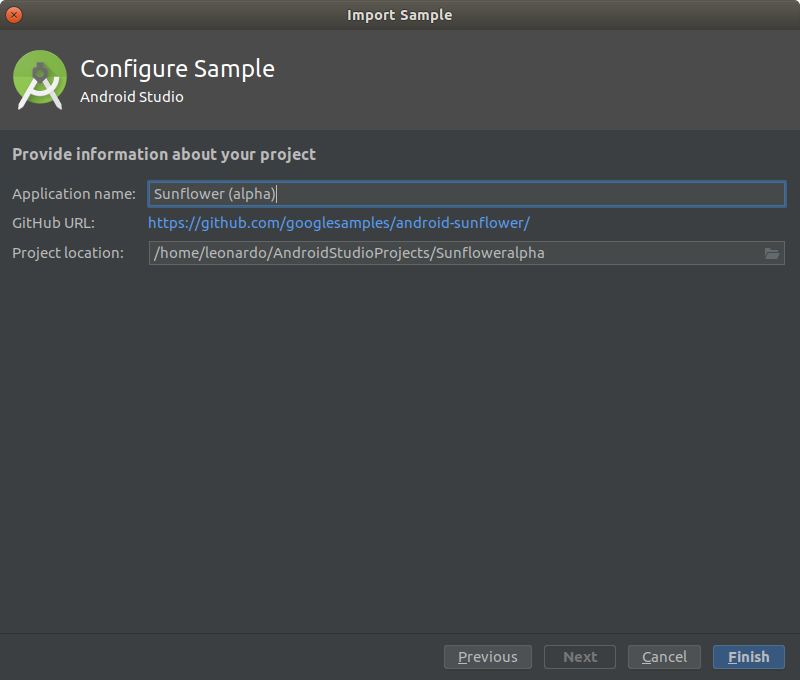
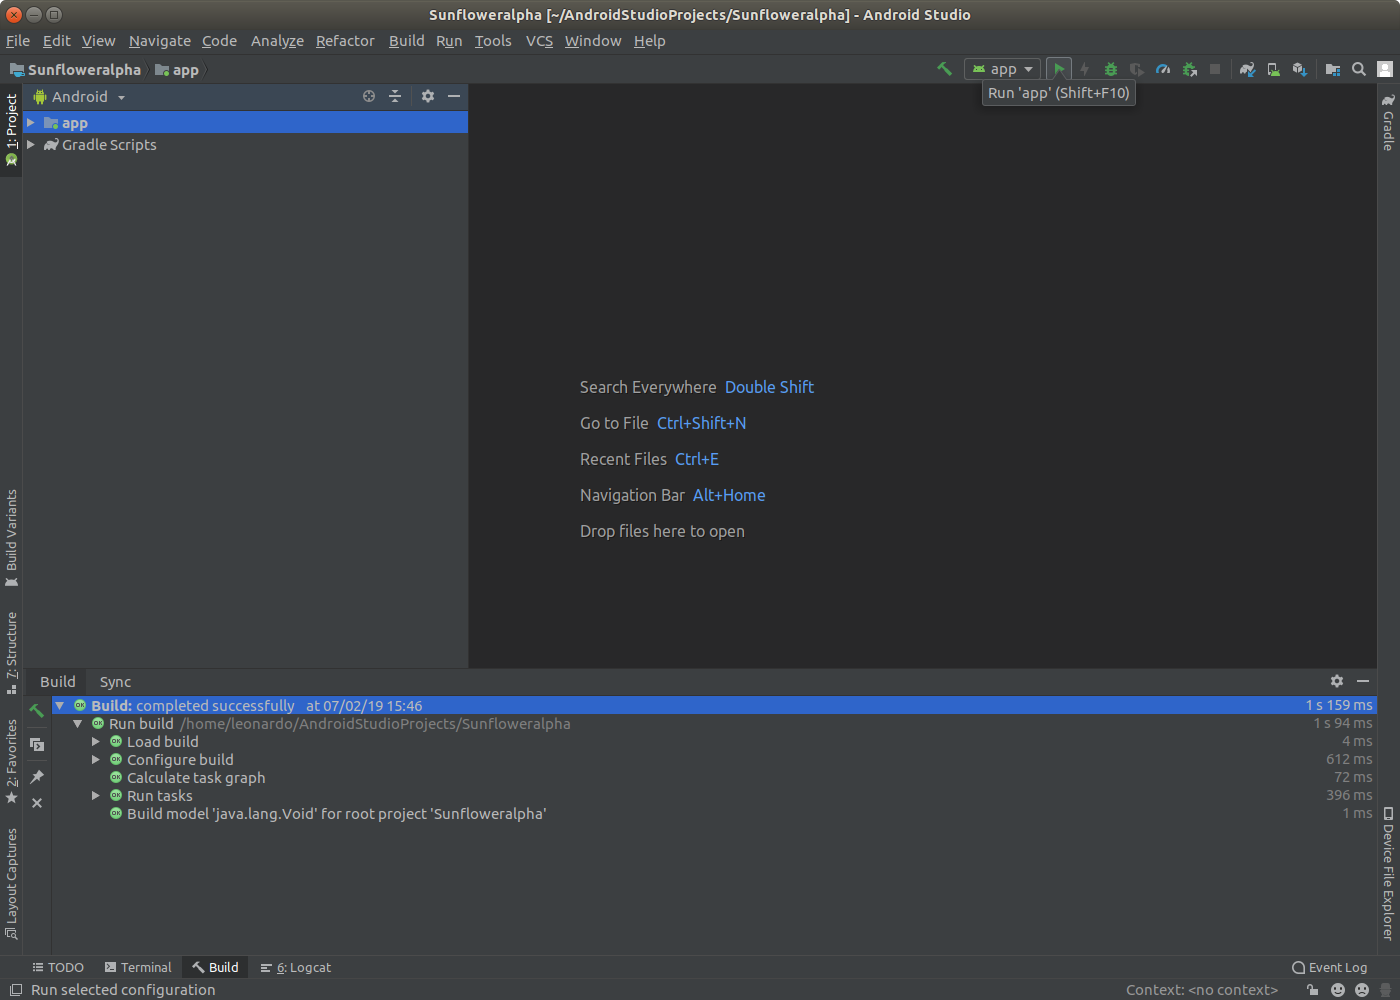
Wait for the Gradle build to finish. The outcome is a view of the IDE. Click the Run button in the top-right corner of the IDE:
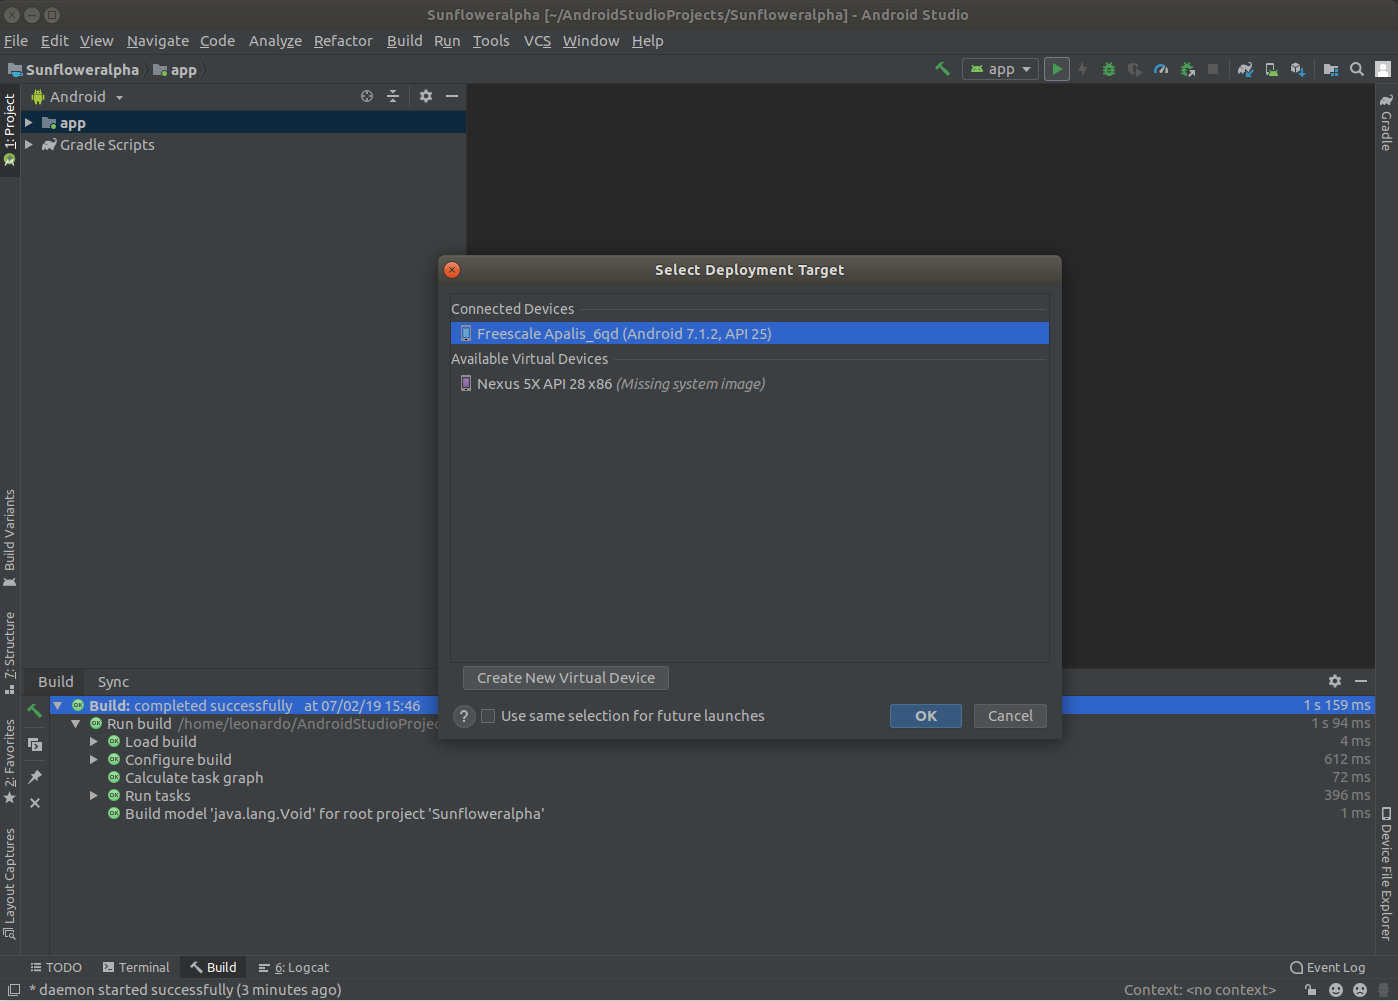
Select the Toradex SoM from the list of Connected Devices, click OK and wait for the app to start:
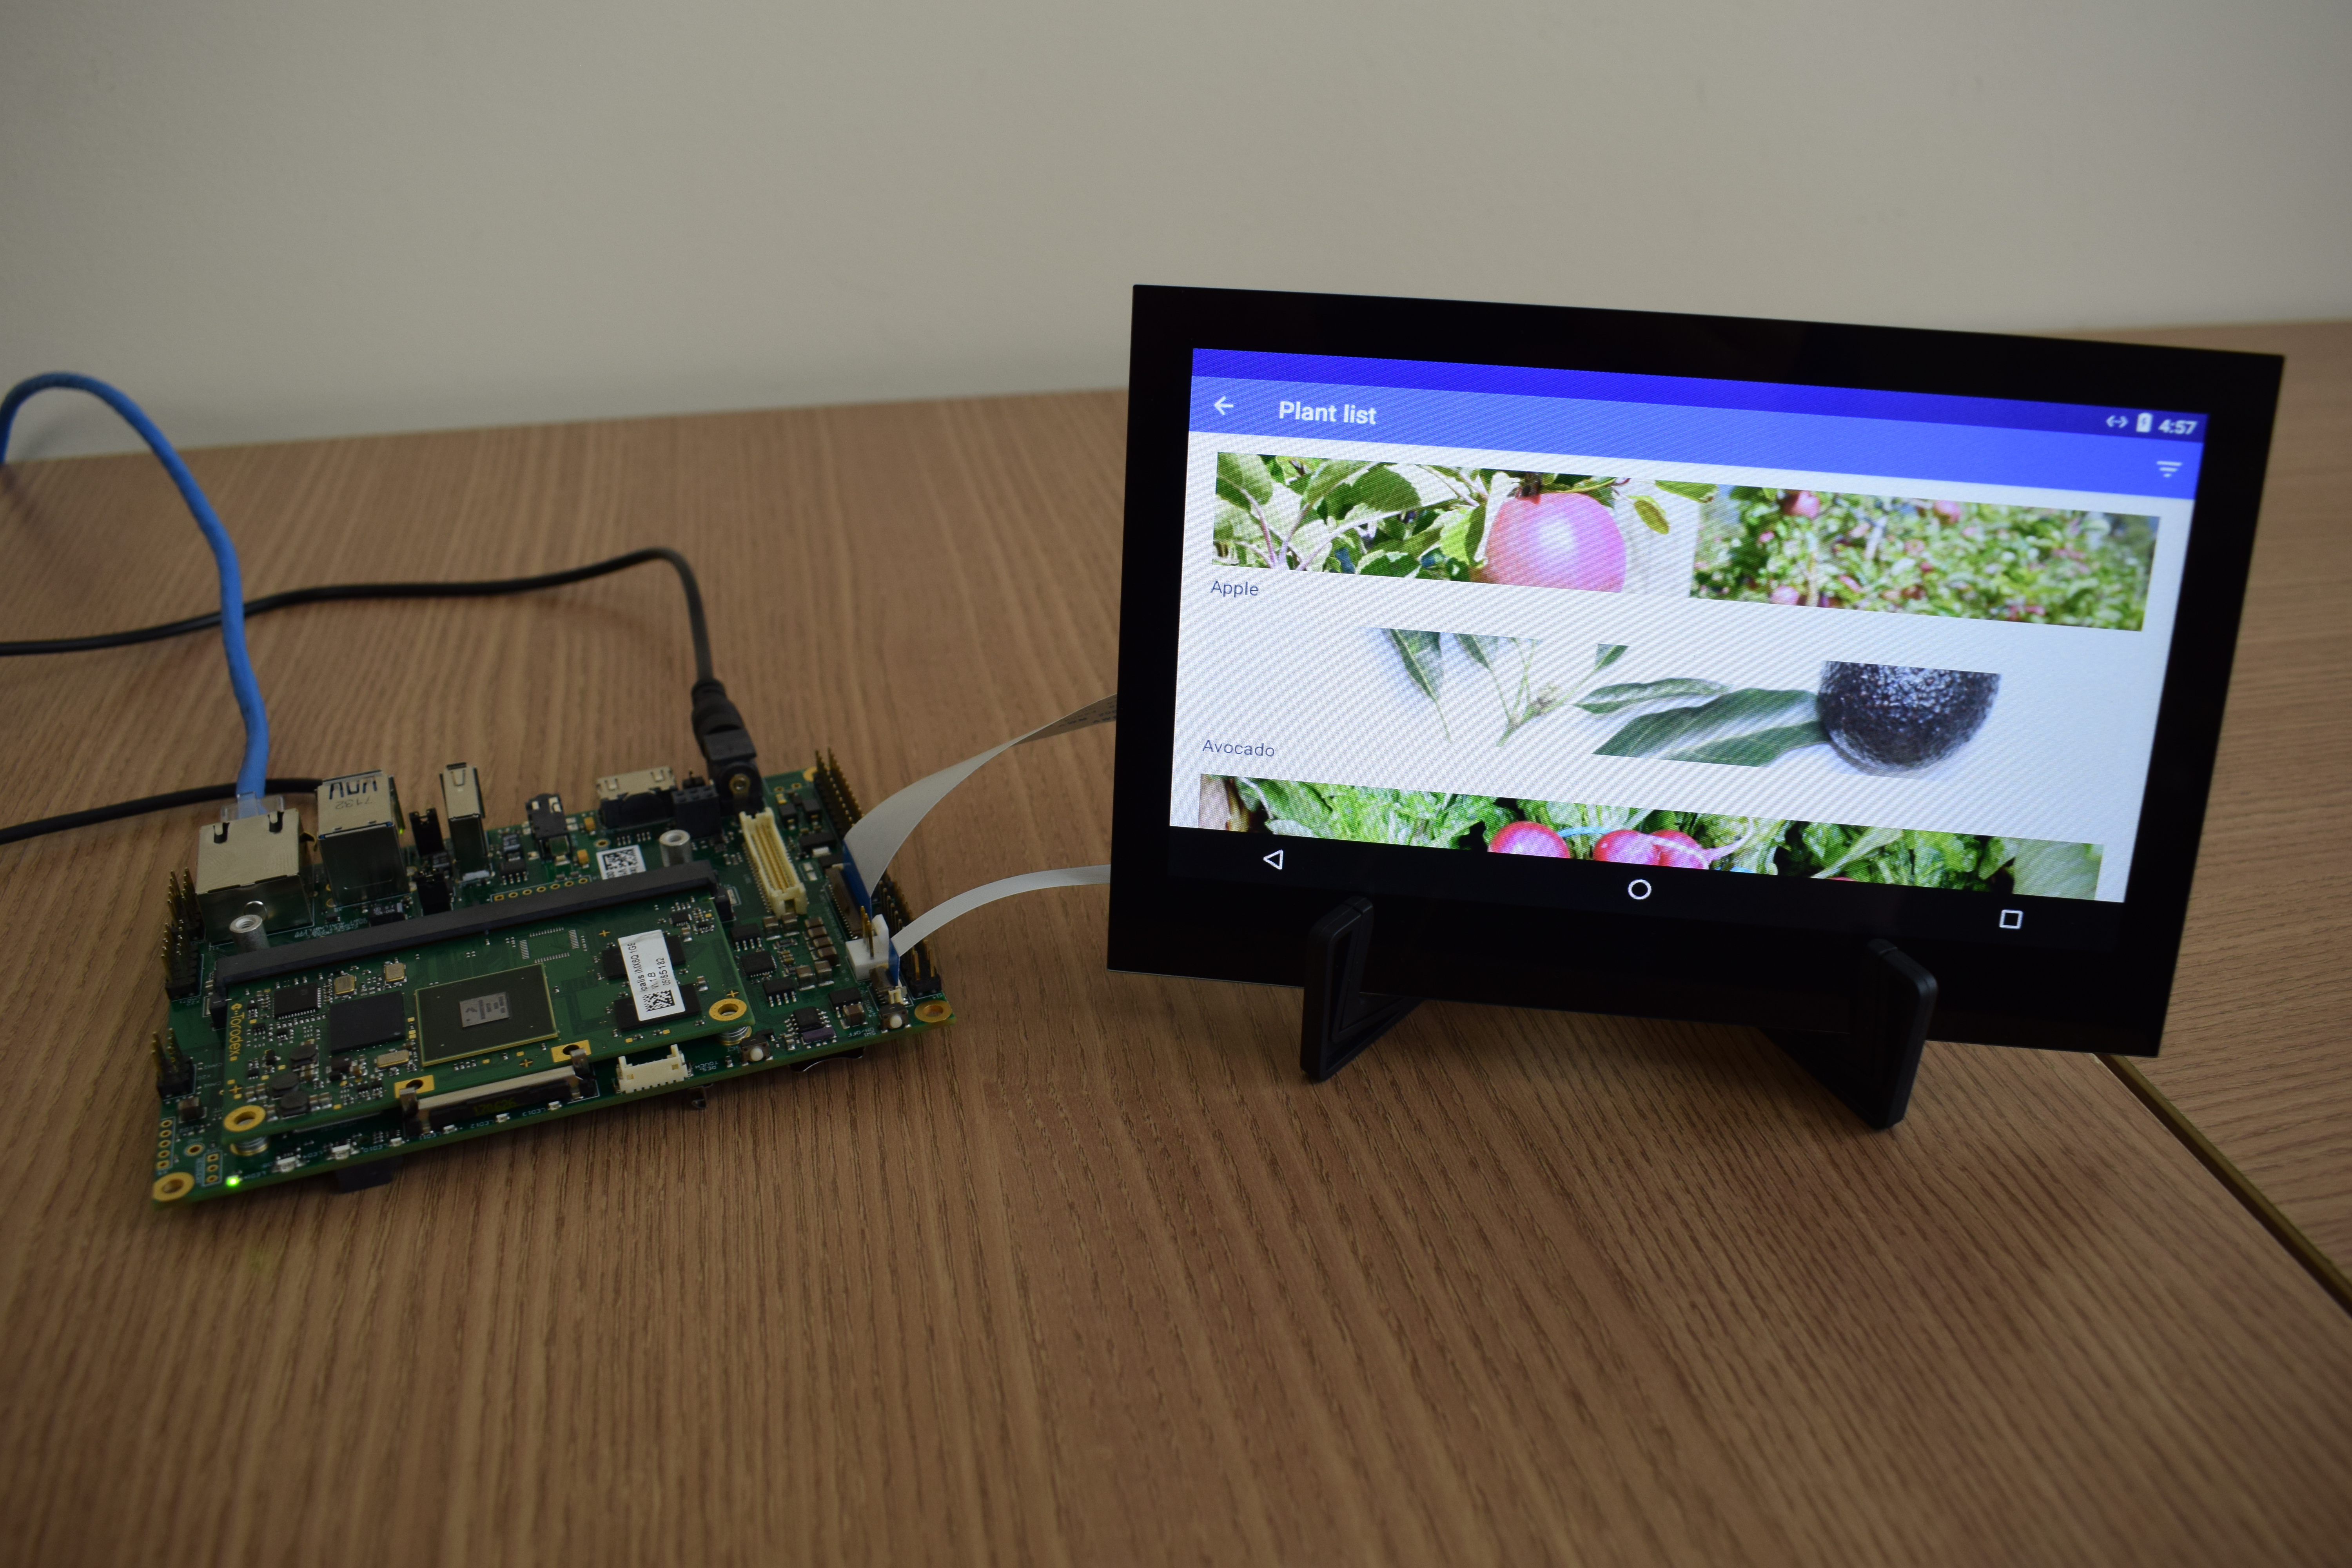
Android Embedded SDK
To help you take full advantage of the Toradex hardware and elevate your embedded application, the Embedded Android Developer Toolkit (EADT) includes Kynetics' Embedded SDK. This SDK provides support for controlling I/O and managing buses, as well as relevant protocols such as GPIO, CAN, PWM, I2C, RS232/485, and SPI, from your Android Studio Project.
Update OTA From Update Factory
If you are using a Kynetics Evaluation OS, you can register with Update Factory for a 30-day free trial.
If you have a license for EADT, you already have access to Update Factory to deploy your embedded Android app to the Toradex hardware and/or receive Kynetics OS updates.
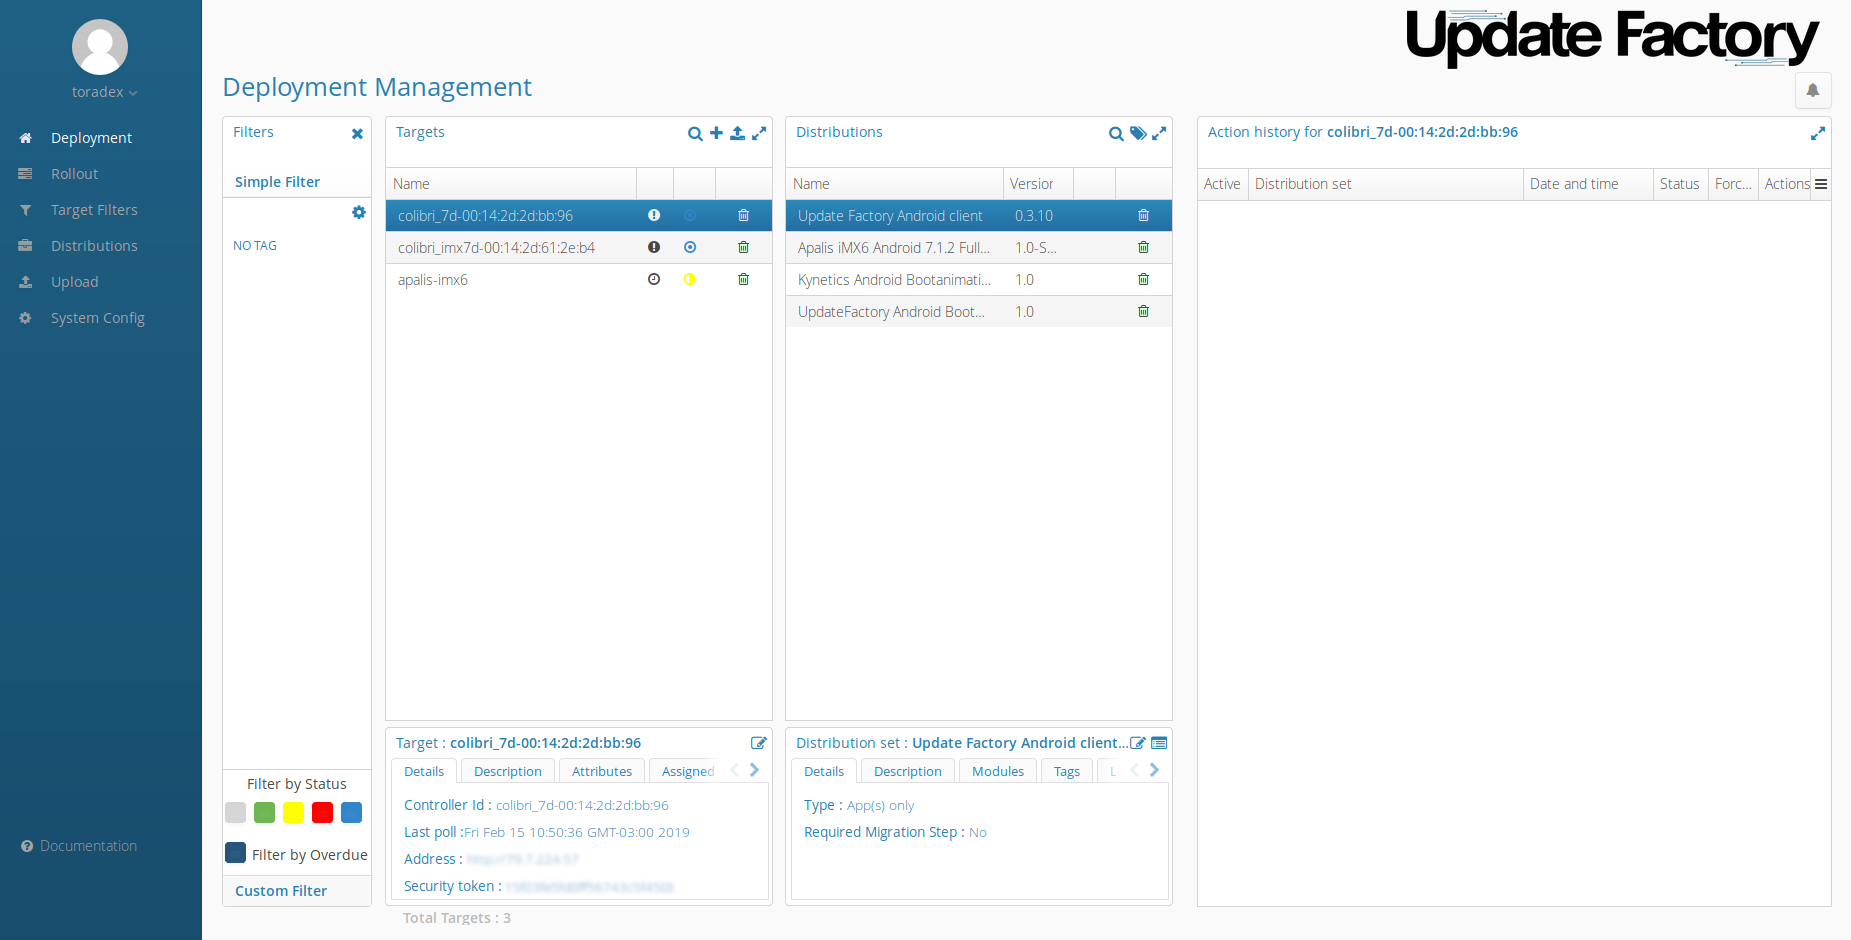
No configuration is needed for the EADT, which comes fully integrated with Update Factory.
The following video demonstrates how to deliver OTA updates to target devices. To initiate an update, drag a distribution from the distribution list to the desired module and select either a soft update or a forced update. Complete the update process by following the on-device prompts. For more details, refer to the Update Factory documentation: https://docs.updatefactory.io/
Next Steps
From now onwards, you can use Android Studio and the Kynetics Embedded SDK to create your own Android apps. Refer to the Android Developer website for documentation and development resources.
Kynetics has a comprehensive documentation website named Technical Notes as well as the Update Factory documentation.
For more information about how to get this demonstration image supported and customized, get in contact with Kynetics.
Touch Screen
Touch should work out-of-box but in case it does not, check the Kynetics documentation for your specific Computer on Module and Android version:
Kynetics Android Licensing Information
This Partner Demo Image is subject to the terms of the Kynetics Software License Agreement, provided either from their Technical Notes articles, or during the installation from the Toradex Easy Installer online feeds.
Webinars
Android-related webinars that you can watch on-demand.