Edit a Torizon Project
Introduction
This article guides you on editing a Torizon project using the Torizon IDE Extension. By the end of this article, you will be ready to edit your project and advance your application development.
The instructions of this article work for both Linux and Windows environments. When required for a particular OS environment, additional instructions will be provided.
Prerequisites
- Read the basics of Torizon IDE Extension.
- Having created a Torizon project.
Editing the Project
-
Enter the project creation and editing menu:
- Open a new VS Code window.
- Press
F1and enterCreate or Edit Torizon Projectin the command bar.

-
Enter the project workspace name and the workspace creation path. Ensure you follow the requirements below:
- The workspace name must contain only alphanumeric characters.
- The
Workspace pathspecifies the system directory where all project files will be stored.
You can skip this section if you already have your project open, as the templates will be displayed automatically.
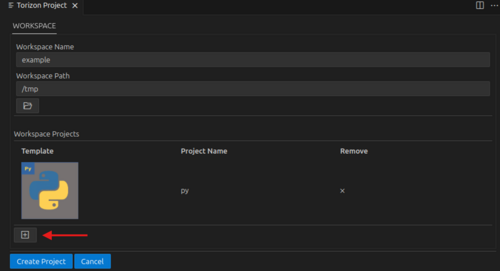
-
Select templates: You will see a new tab with a list of templates. Select the templates that closely match your project requirements:
- Add templates to your project, as shown in create a Torizon project.
-
After selecting the templates to use, click
Create Project: