CODESYS TargetVisu Container
Introduction
TargetVisu is a CODESYS visualization component that alows you to render the graphical interface of your application directly on a display connected to the target device, without the need to access the application via a browser. TargetVisu is ideal for embedded systems and industrial controllers that include a local display, enabling real-time monitoring and interaction with the control application without needing a separate container running a web browser or a different client device..
This article will guide you on how to visualize your application through TargetVisu. Following the steps below, you will create two separate containers: A weston container with XWayland for TargetVisu to run on top of, and a container with both the Codesys Runtime and TargetVisu, which will run and display your application.
The basic usage of CODESYS is covered in our article about the CODESYS Demo Container. This article requires a similar, but slightly different IDE set up, which is specified in the Set Up the IDE section.
Prerequisites
- Follow the article Partner Demo Container - CODESYS.
Codesys Visualization with TargetVisu
Since TargetVisu is not available on the Codesys Demo container, you need to create your own container and install TargetVisu on it. TargetVisu requires an X11 environment to run on top of. While Toradex does not offer support for X11, you can run XWayland on top of Weston so that TargetVisu can use it.
To start configuring the containers, create a directory on your host machine to work on:
$ mkdir codesys && cd codesys
Download Codesys Debian Packages
Before building the Codesys container, fetch the Debian packages required to run the Codesys runtime and TargetVisu. The packages and steps to download them are described below:
-
codesyscontrol_linuxarm64_<version>_arm64.deb: Codesys runtime, necessary for running the Codesys application.-
Open the Codesys Download Page and download the latest version of
CODESYS Control for Linux ARMinside thecodesysdirectory you just created (requires login). -
Unzip the file and extract the Debian package to the root of the
codesysdirectory$ unzip CODESYS\ Control\ for\ Linux\ ARM64\ SL\ <version>.package -d codesys-control
$ cp codesys-control/Delivery/linuxarm64/codesyscontrol_linuxarm64_<version>_arm64.deb .
-
-
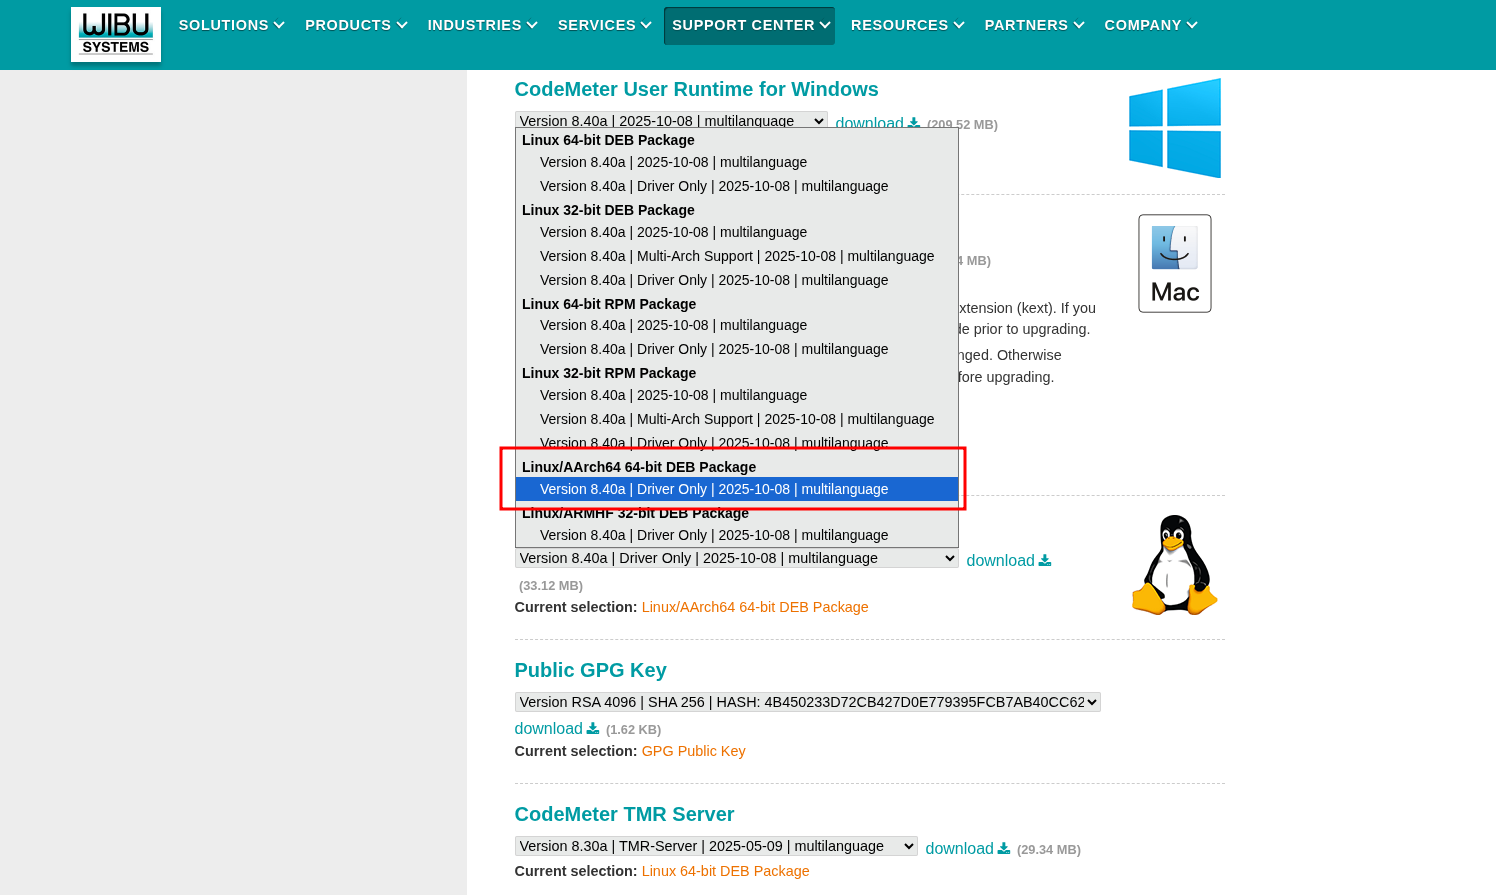
codemeter-lite_<version>_arm64.deb: Software license server, a dependency for Codesys Control.-
Open the CodeMeter Download Page and download CodeMeter for Linux. Select the Linux/AArch64 64-bit DEB Package option, as shown in the image below:
-
Copy the Debian package to the
codesysdirectory.
-
-
codesysvisualization_visualizationarm64_<version>_arm64.deb: Codesys component that displays user interfaces directly on the device running the Codesys runtime. It alows you to view your application directly on the display connected to the device.-
Download TargetVisu and copy it to the
codesysdirectory (requires login). -
Unzip the file and extract the Debian package to the root of the
codesysdirectory$ unzip CODESYS\ TargetVisu\ for\ Linux\ SL\ <version>.package -d target-visu
$ cp target-visu/Delivery/visualizationarm64/codesysvisualization_visualizationarm64_<version>_arm64.deb .
-
The 4.17.0.0 version of TargetVisu is not currently compatible with Torizon and Qt6. For displaying your application directly on a display connected to your device, download a TargetVisu version up to 4.16.0.0.
With the three Debian packages inside the codesys directory, transfer them to your device:
$ scp *.deb torizon@<module>-<serial_number>.local:~/
Initialize the Codesys Runtime
TargetVisu requires an X environment to run on top of. While Toradex does not offer support for X, you can run XWayland on top of Weston so that TargetVisu can use it.
The instructions below show you how to set up the Weston and Qt containers, such that you'll be able to start TargetVisu with a single docker compose up command.
-
Inside the
codesysdirectory, create the two Dockerfiles below. Make sure you substitute the*.debpackages for the ones you downloaded at Download Codesys Debian Packages.Dockerfile.westonDockerfile.weston
ARG BASE_NAME=weston-imx8
ARG IMAGE_ARCH=linux/arm64
ARG IMAGE_TAG=4
# For arm32v7 use:
ARG PKG_ARCH=arm64v8
ARG DOCKER_REGISTRY=torizon
FROM $DOCKER_REGISTRY/$BASE_NAME:$IMAGE_TAG
WORKDIR /home/torizon
RUN apt-get update -y && \
apt-get upgrade -y && \
apt-get install -y x11-xserver-utils
COPY weston-xutils-entry.sh /usr/bin/weston-xutils-entry.sh
RUN chmod +x /usr/bin/weston-xutils-entry.sh
ENTRYPOINT ["/usr/bin/weston-xutils-entry.sh"]Dockerfile.targetvisuDockerfile.targetvisuARG BASE_NAME=qt6-wayland-examples-imx8
ARG IMAGE_ARCH=linux/arm64
ARG IMAGE_TAG=4
# For arm32v7 use:
ARG PKG_ARCH=arm64v8
ARG DOCKER_REGISTRY=torizon
FROM $DOCKER_REGISTRY/$BASE_NAME:$IMAGE_TAG
WORKDIR /home/torizon
RUN apt-get update -y && \
apt-get upgrade -y && \
apt-get install -y sudo xwayland x11-apps libqt6svg6 libqt6webenginecore6 \
libqt6webenginewidgets6 libncursesw6 libproc2-0 procps
ENV DISPLAY=:0
# Copy files
COPY codemeter-lite_<version>_arm64.deb .
COPY codesyscontrol_linuxarm64_<version>_arm64.deb .
COPY codesysvisualization_visualizationarm64_<version>_arm64.deb .
RUN dpkg -i ./codemeter-lite_<version>_arm64.deb ./codesyscontrol_linuxarm64_<version>_arm64.deb
RUN sudo dpkg -i --force-depends codesysvisualization_visualizationarm64_<version>_arm64.deb
# Remove installation files
RUN rm ./codesyscontrol_linuxarm64_<version>_arm64.deb ./codemeter-lite_<version>_arm64.deb ./codesysvisualization_visualizationarm64_<version>_arm64.deb
ENV LD_LIBRARY_PATH=${LD_LIBRARY_PATH}:/opt/codesysvisualization/lib
COPY targetvisu-entry.sh /usr/bin/
RUN chmod +x /usr/bin/targetvisu-entry.sh
ENTRYPOINT ["/usr/bin/targetvisu-entry.sh"] -
Also in the
codesysdirectory, create theweston-xutils-entry.shandtargetvisu-entry.shshown below. These scripts need to be executed in runtime, and are thus the entry points of each container.weston-xutils-entry.shweston-xutils-entry.sh#!/bin/bash
nohup /usr/bin/entry.sh --developer --tty=/dev/tty7 2>&1 &
sleep 3
su torizon -c "export DISPLAY=:0 && xhost +"
# Prevent container from exiting
tail -f /dev/nulltargetvisu-entry.shtargetvisu-entry.sh#!/bin/bash
/etc/init.d/codemeter start
/etc/init.d/codesyscontrol start
/opt/codesysvisualization/bin/codesysvisualization.bin /etc/codesysvisualization/CODESYSVisualization.cfg -
Build the containers and push them to your Dockerhub repository.
$ docker build -t <your-dockerhub-user>/weston-xutils:latest -f Dockerfile.weston .
$ docker build -t <your-dockerhub-user>/targetvisu:latest -f Dockerfile.targetvisu .
$ docker push <your-dockerhub-user>/weston-xutils
$ docker push <your-dockerhub-user>/targetvisu:latest -
Create the
docker-compose.ymlfile shown below.
Keep in mind that it runs the Codesys container in privileged mode, since this procedure is for evaluation purposes. Do not use this docker-compose.yml file in production.
services:
  weston:
    network_mode: host
    cap_add:
      - CAP_SYS_TTY_CONFIG
    volumes:
      - '/dev:/dev'
      - '/tmp:/tmp'
      - '/run/udev/:/run/udev/'
    device_cgroup_rules:
      - 'c 4:* rmw'
      - 'c 10:223 rmw'
      - 'c 13:* rmw'
      - 'c 199:0 rmw'
      - 'c 226:* rmw'
      - 'c 253:* rmw'
    image: '<username>/weston-xutils:latest'

  codesys:
    network_mode: host
    privileged: true
    depends_on:
      - weston
    device_cgroup_rules:
      - 'c 199:* rmw'
    volumes:
      - '/tmp:/tmp'
      - '/home:/home'
      - '/dev:/dev'
      - '/run/udev:/run/udev'
    image: '<username>/targetvisu:latest'
    stdin_open: true
    tty: true
-
Copy the
docker-compose.ymlfile to the module.scp docker-compose.yml torizon@verdin-imx8mp-15006535.local:~ -
Inside the module, run the containers:
# docker compose up
After running the previous command, weston should start, and a Codesys graphical interface should appear in your display. The Codesys GUI should show your board's hostname as one of the available options. Do not select your board in the interface yet, you will need to set up your user and password in the Set up the IDE section below.
IDE and Project Setup
Reconfigure an Existing Project for TargetVisu
If you have already followed the CODESYS Demo Container Article, you do not need to reconfigure your IDE, simply follow the steps below and advance to Run the Application. Otherwise, jump to the next section.
-
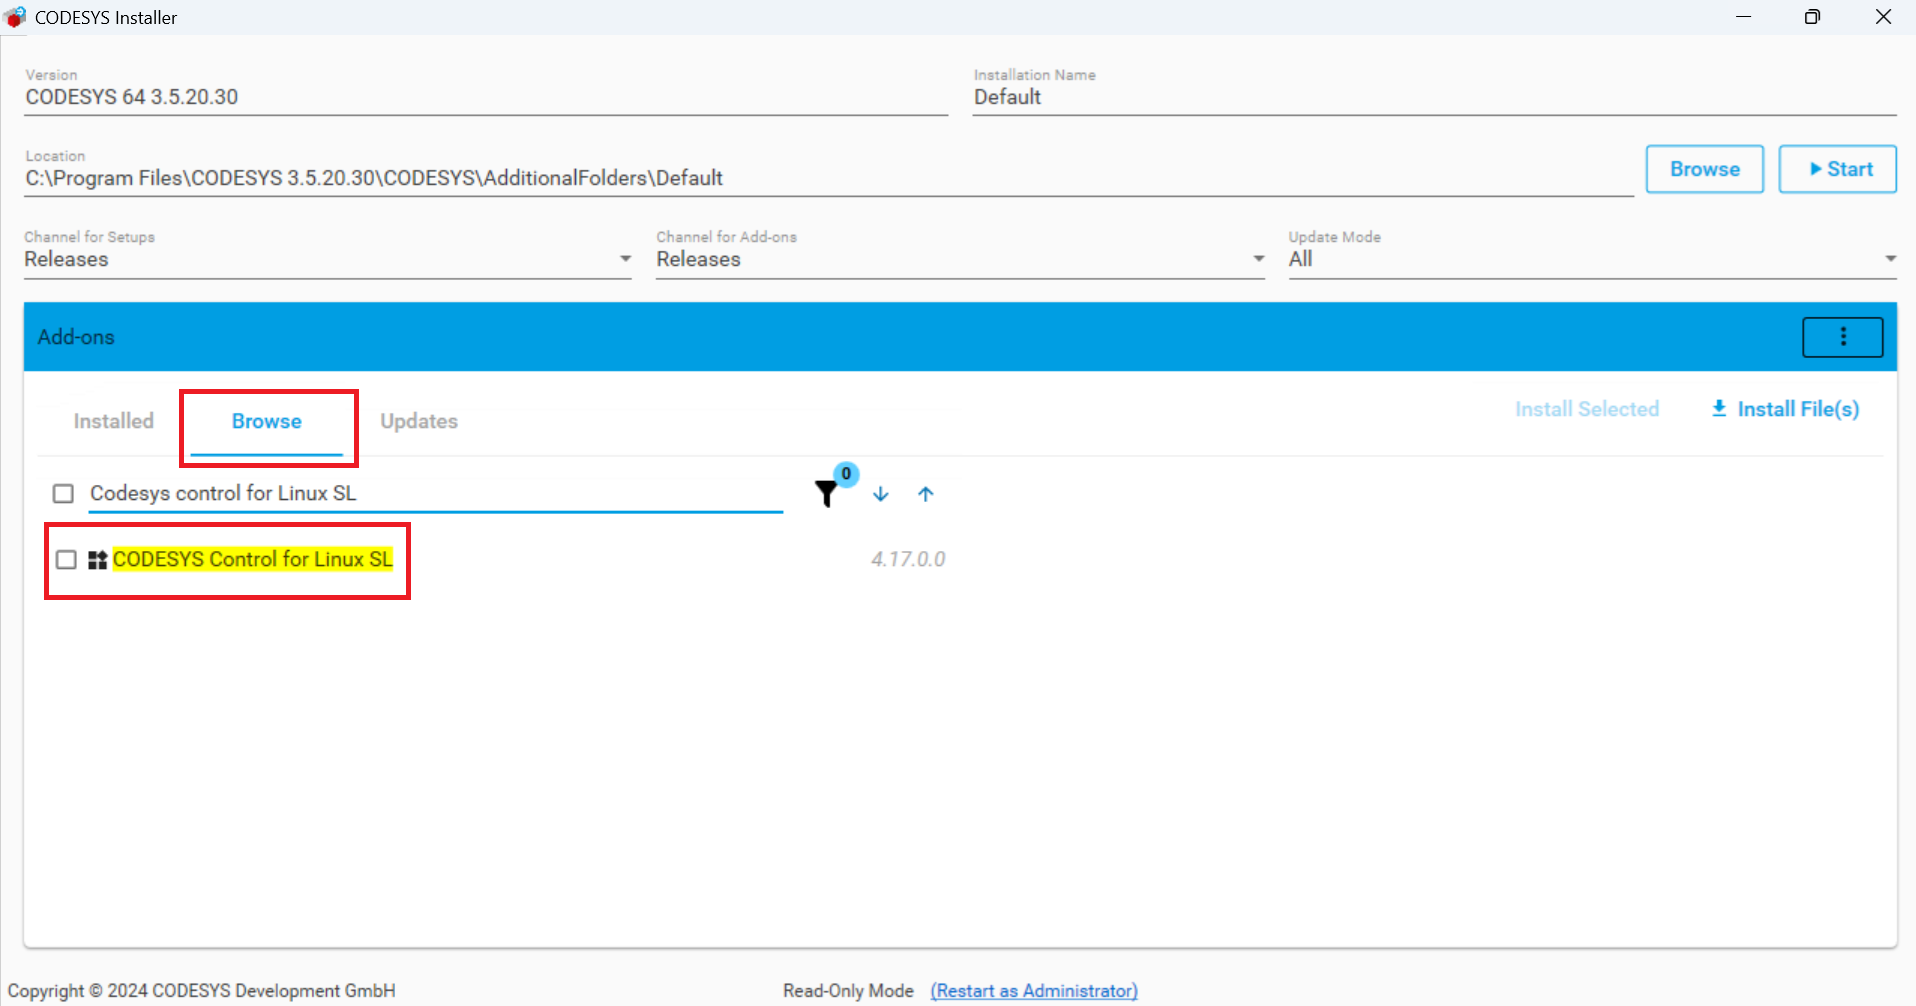
Install CODESYS Control for Linux ARM64 SL, if it's not already installed.
-
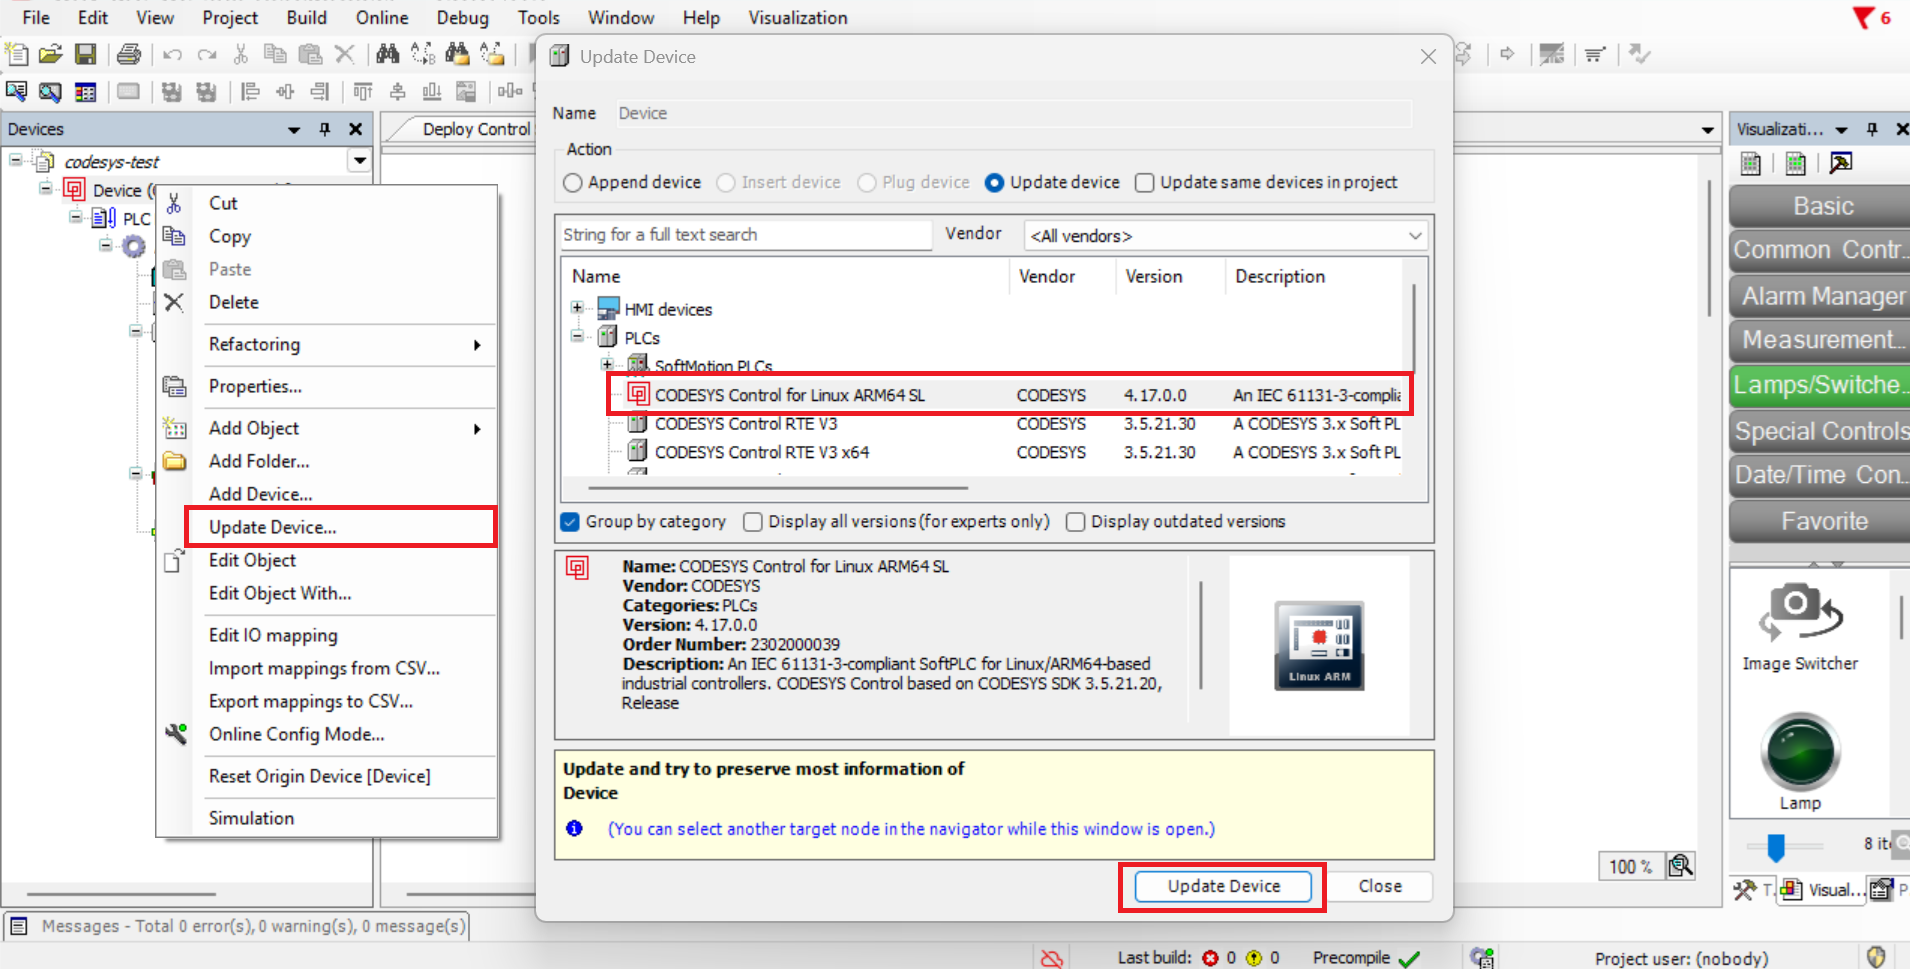
Update your device to the CODESYS Control for Linux ARM64 SL configuration.
Install the CODESYS IDE
-
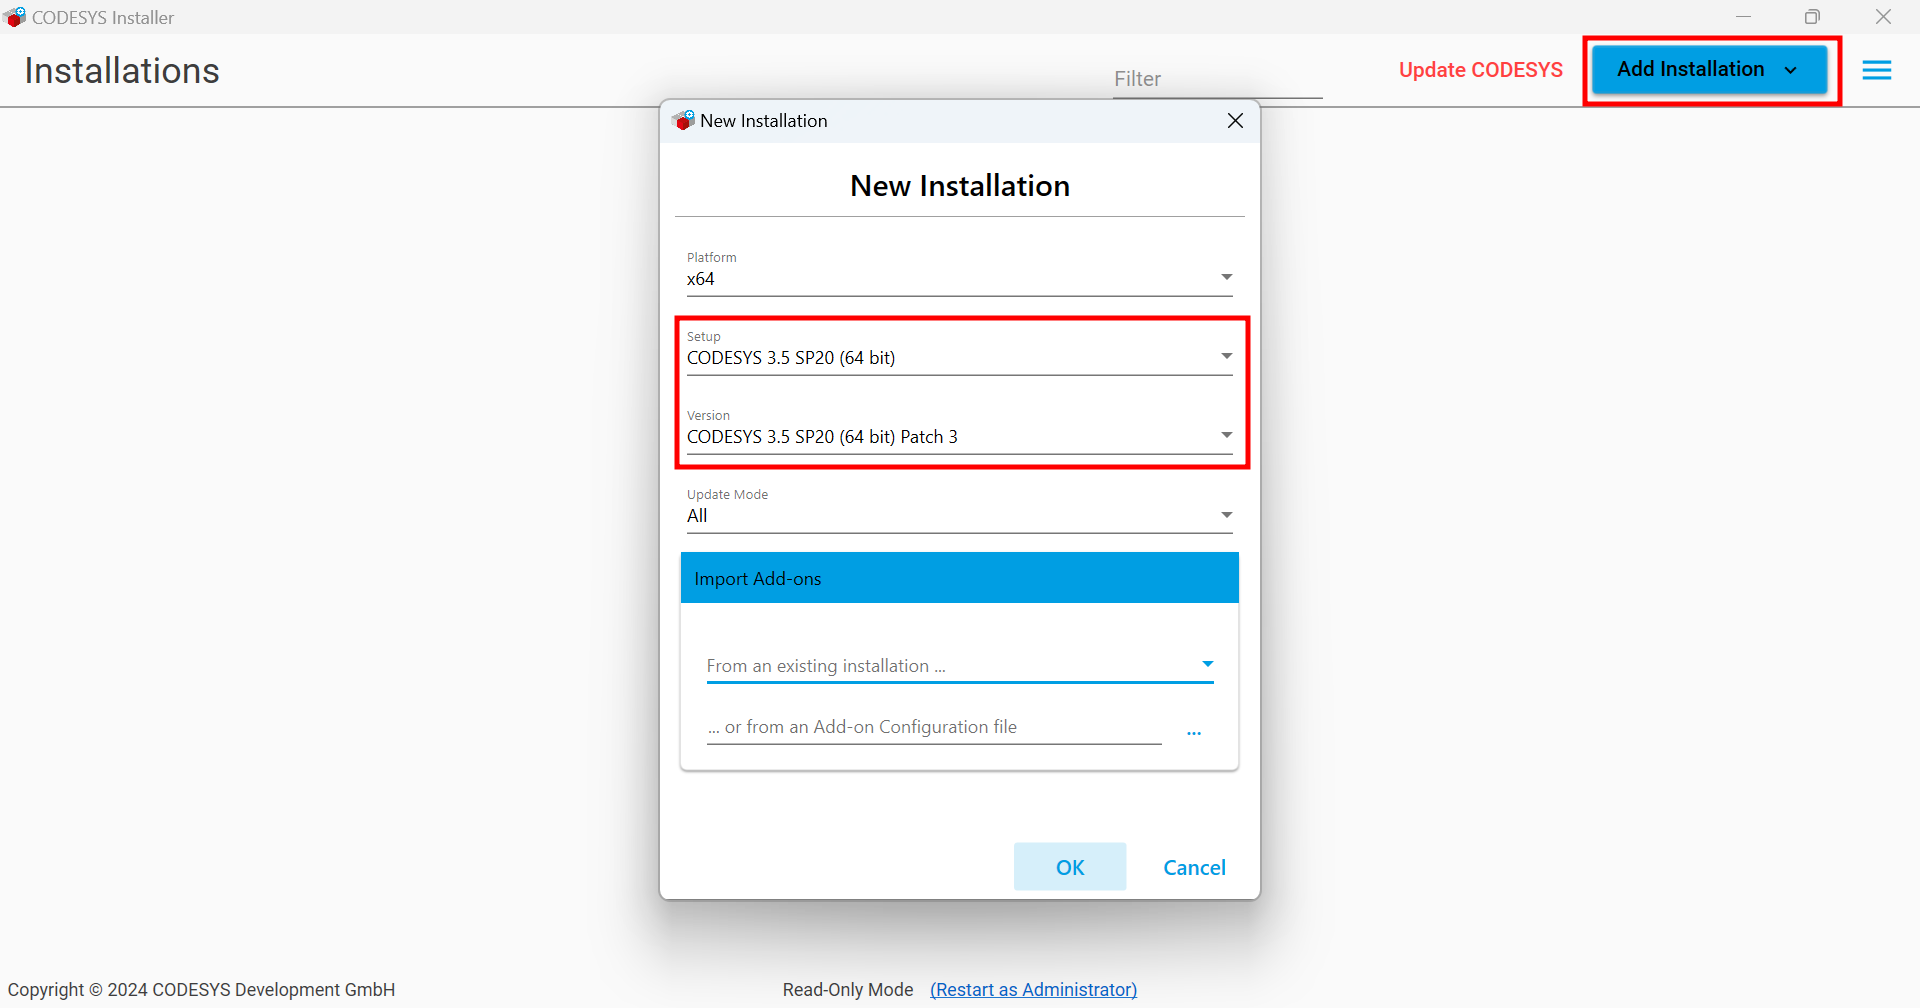
Download the CODESYS Installer from the Codesys store;

-
Install the lastest version of the Codesys Development System;
-
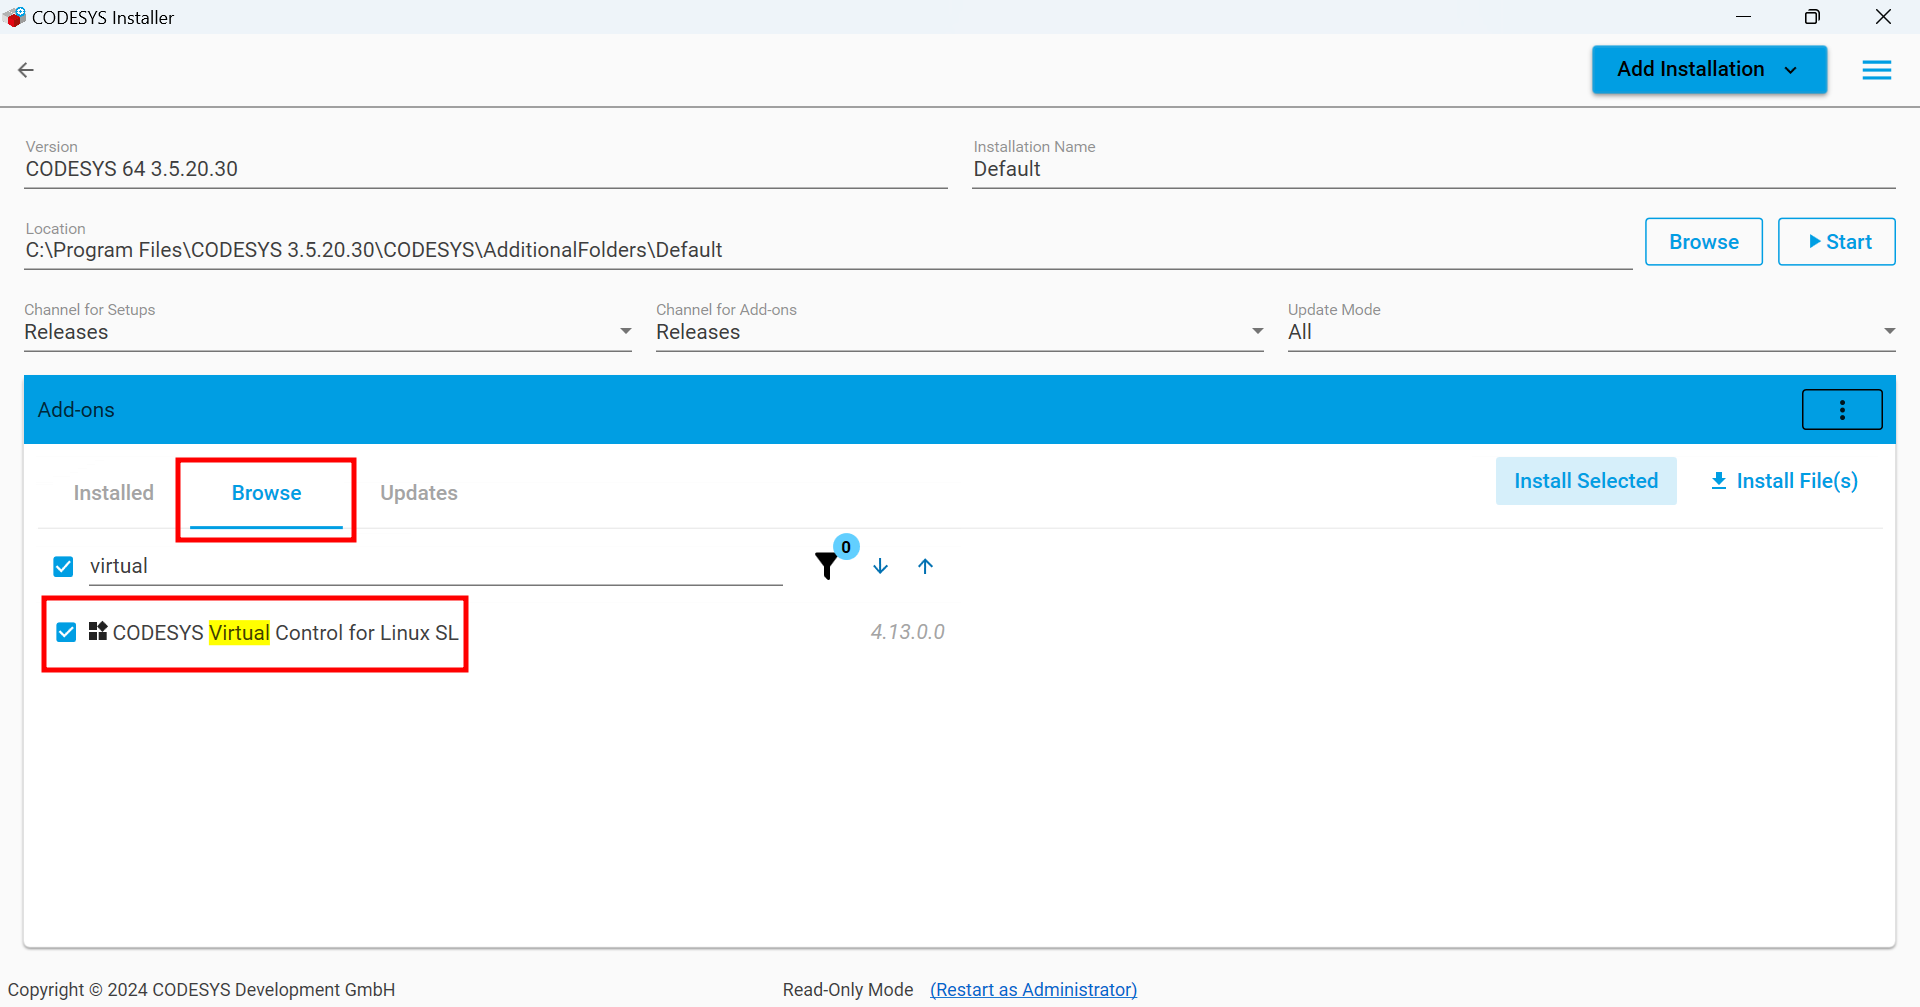
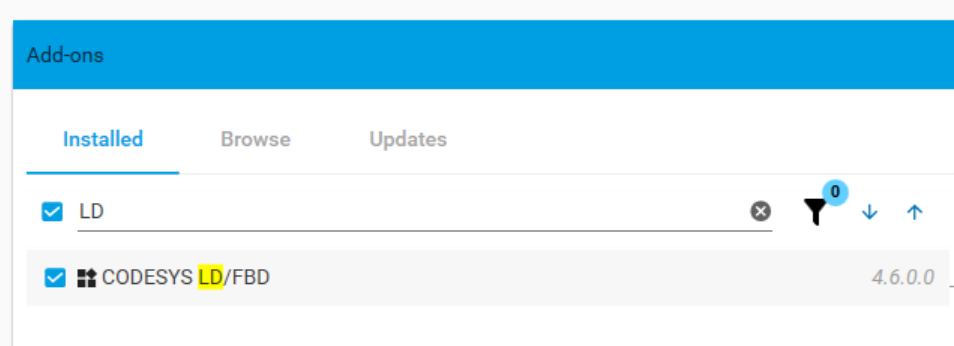
Install the following Add-Ons:
- CODESYS Control for Linux ARM64 SL
- CODESYS Virtual Control for Linux SL
- CODESYS LD/FBD
Download and Deploy the Gateway Container
-
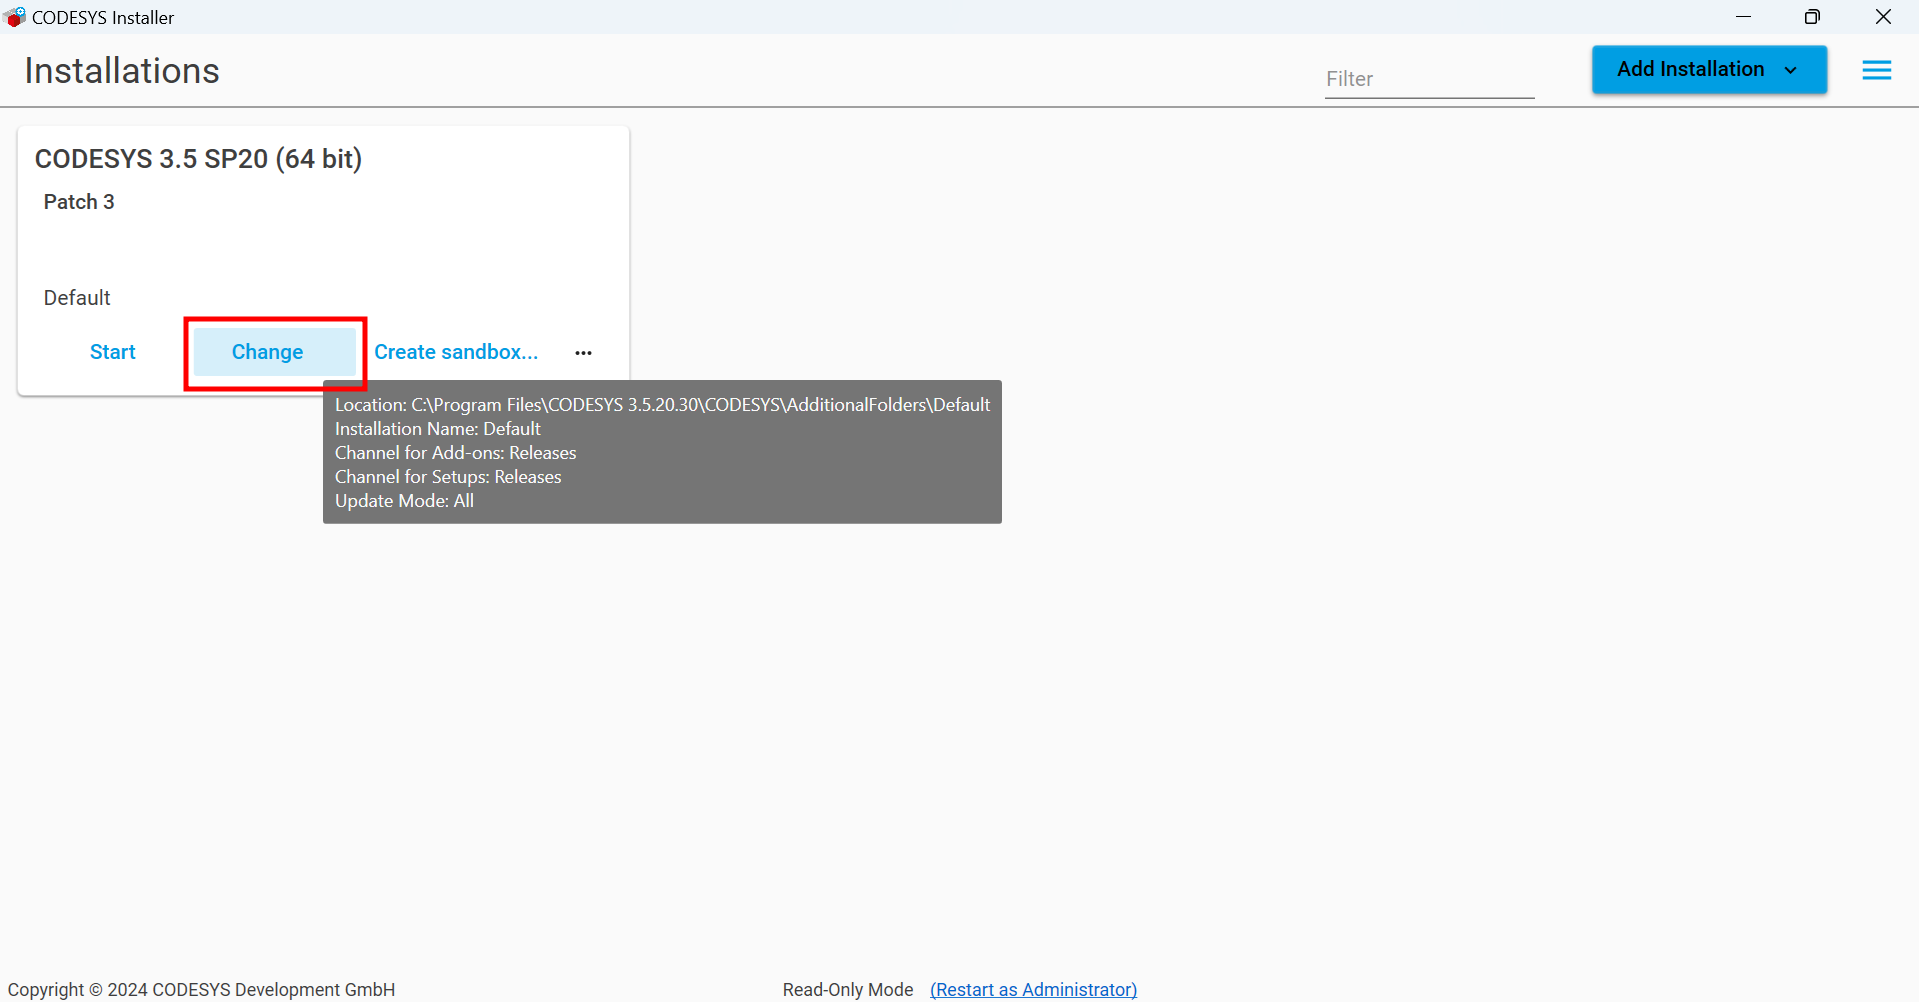
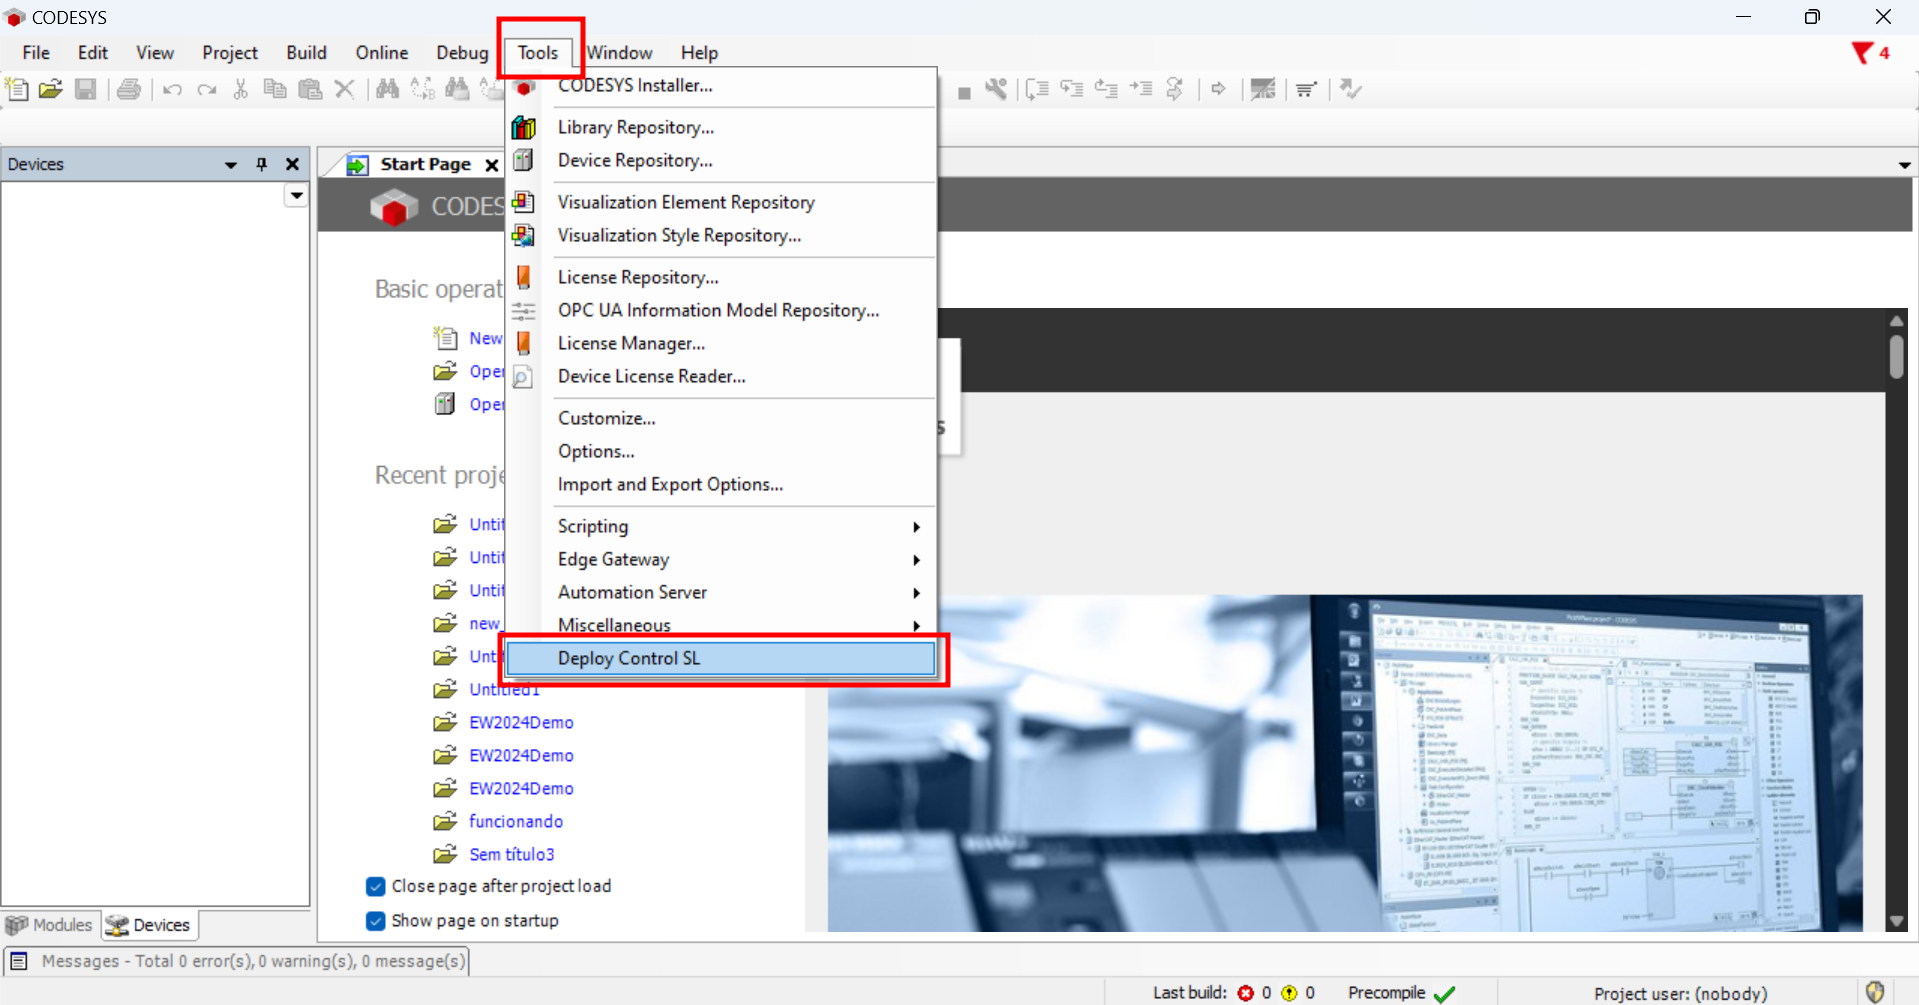
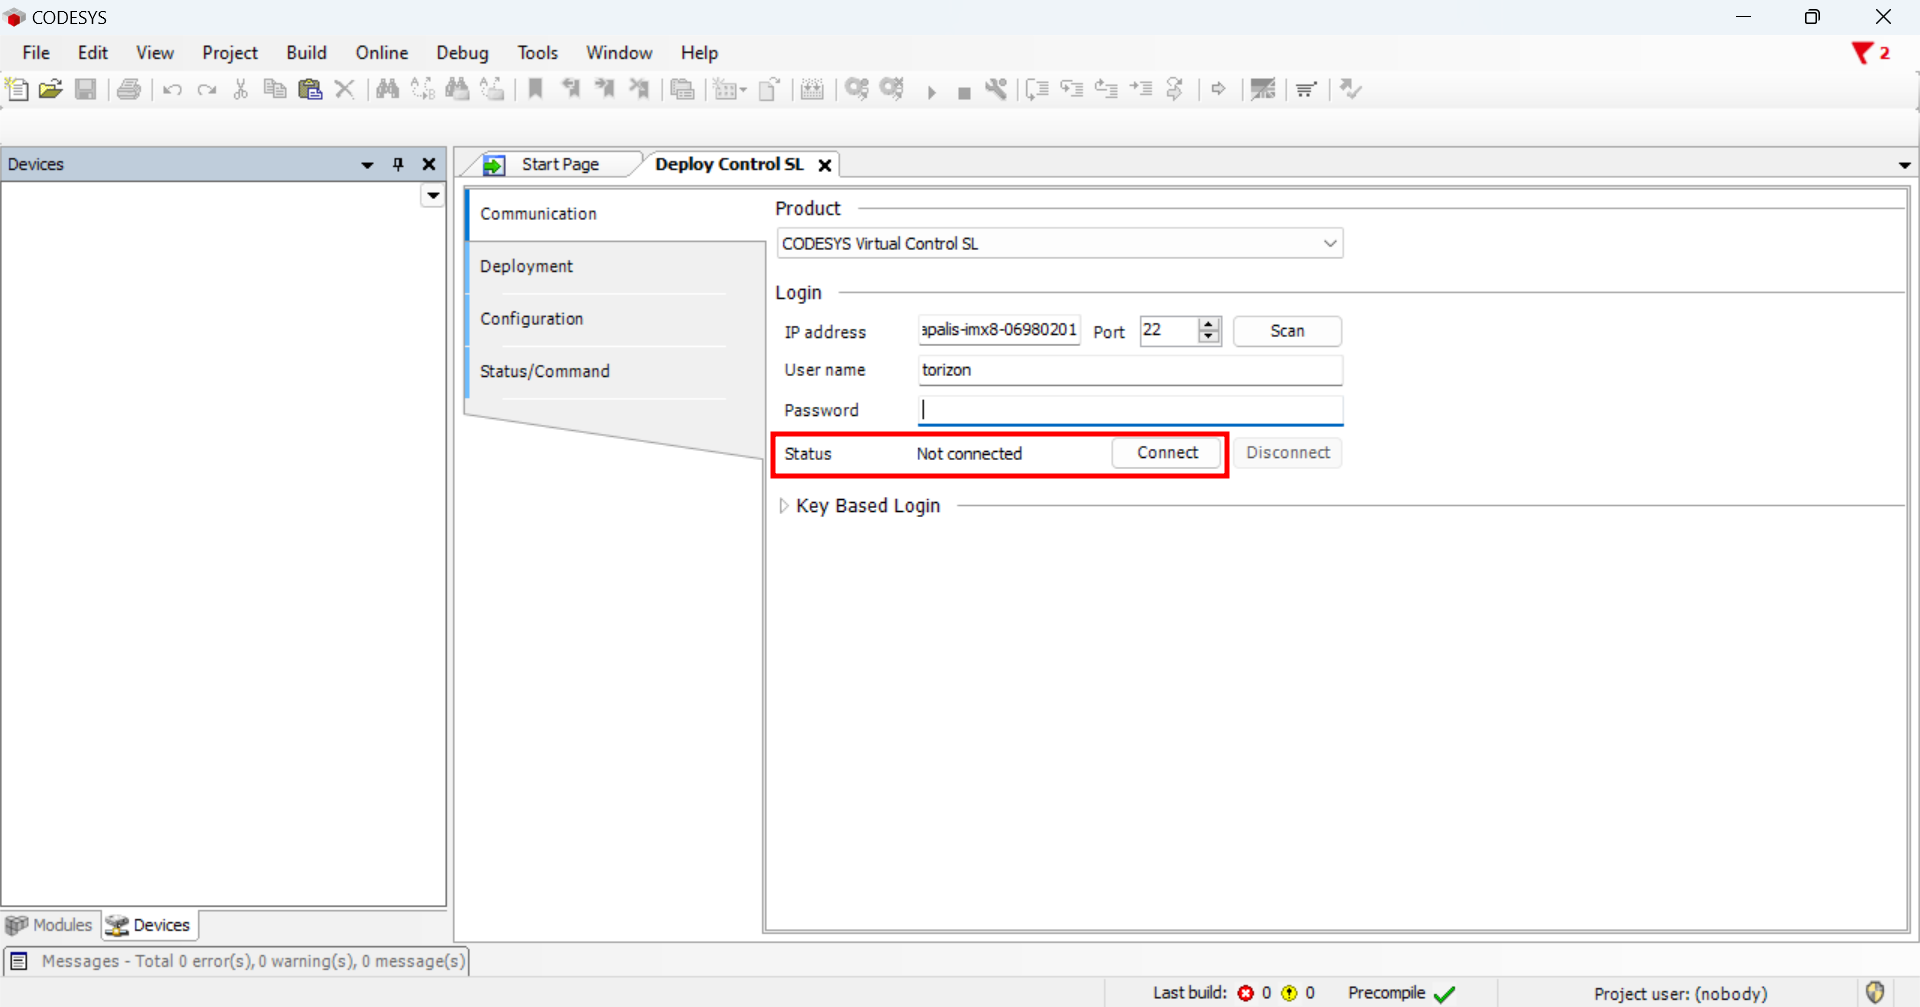
Click the Tools tab and Open the Deploy Control SL Menu;
noteIf you can't see the Deploy Control SL option, check if Virtual Control for Linux SL was installed correctly in step 3.
-
Connect to the Target Device. You can connect using the hostname or the IP address of your target device. You should see the Connected status.
-
In the "Deployment" tab, install the Virtual Edge Gateway container.
infoThe
edgearmis a Gateway Application and thevirtuallinuxarmis the Runtime Application.
-
In the "Operation" tab, add an instance (image) of the Virtual Edge Gateway. For this example, we named the image
codesys_gateway.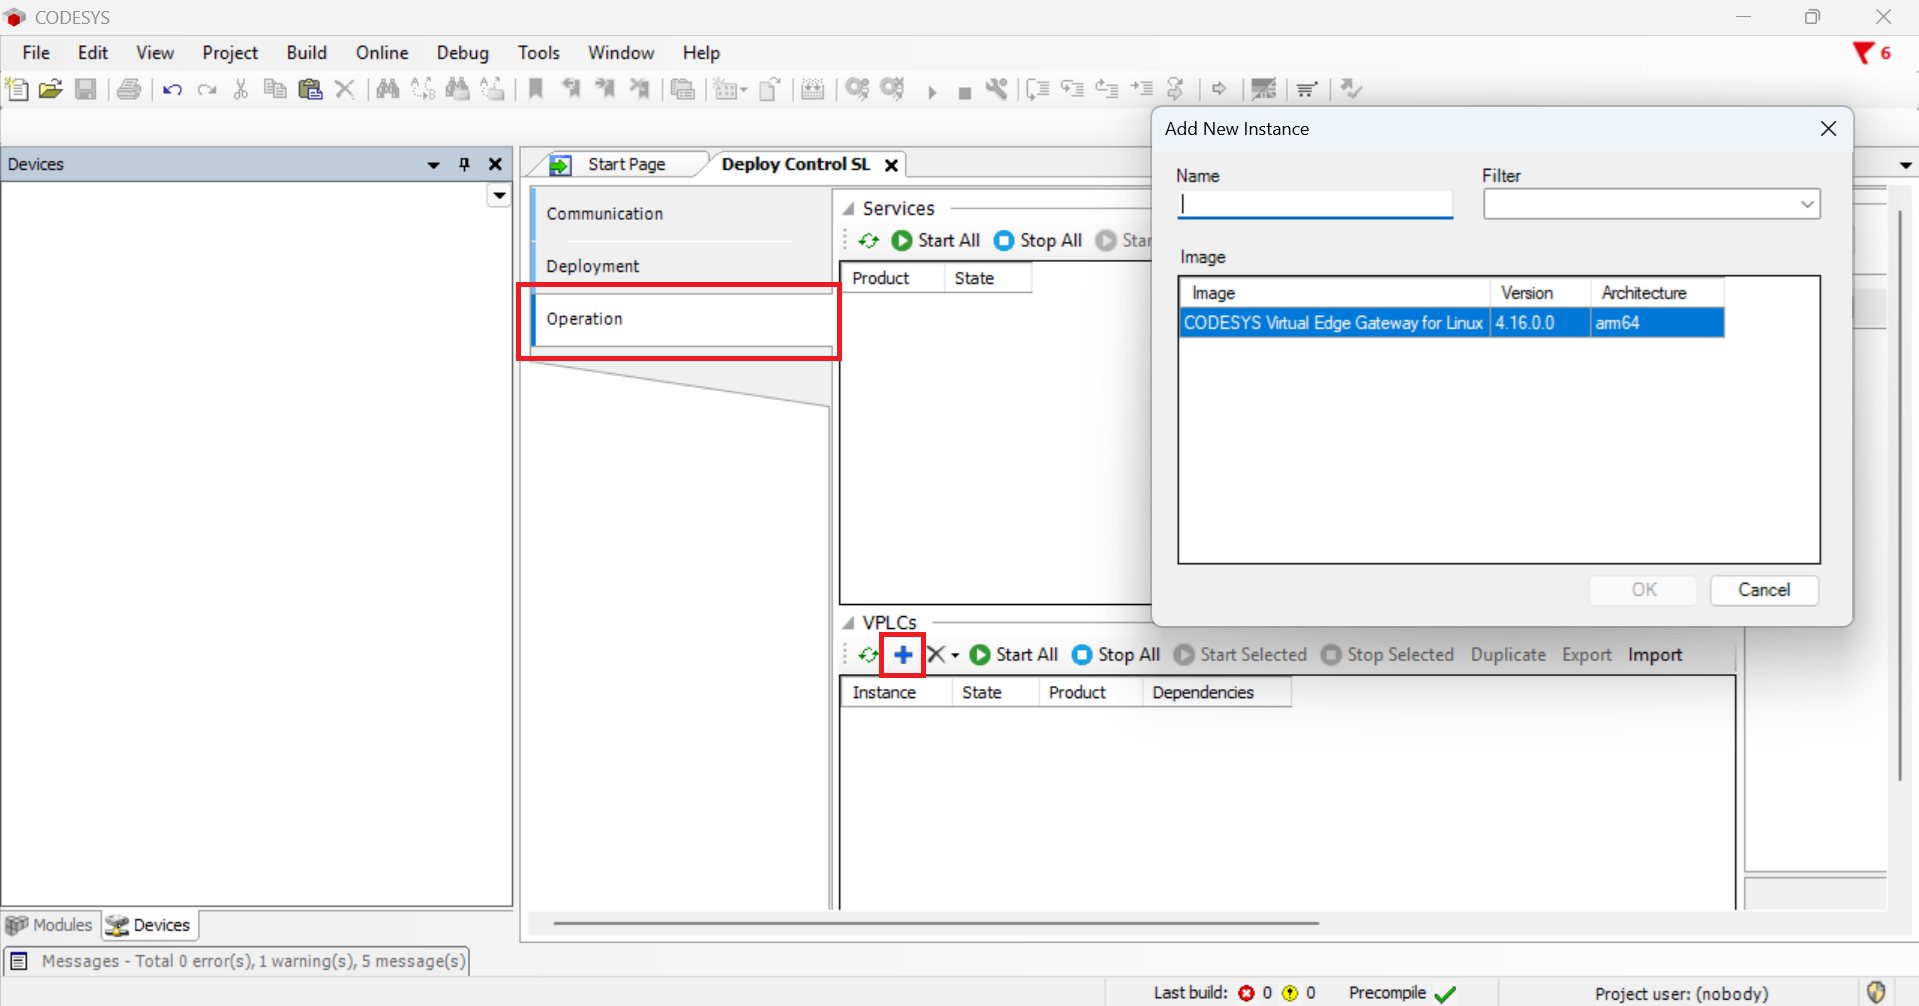
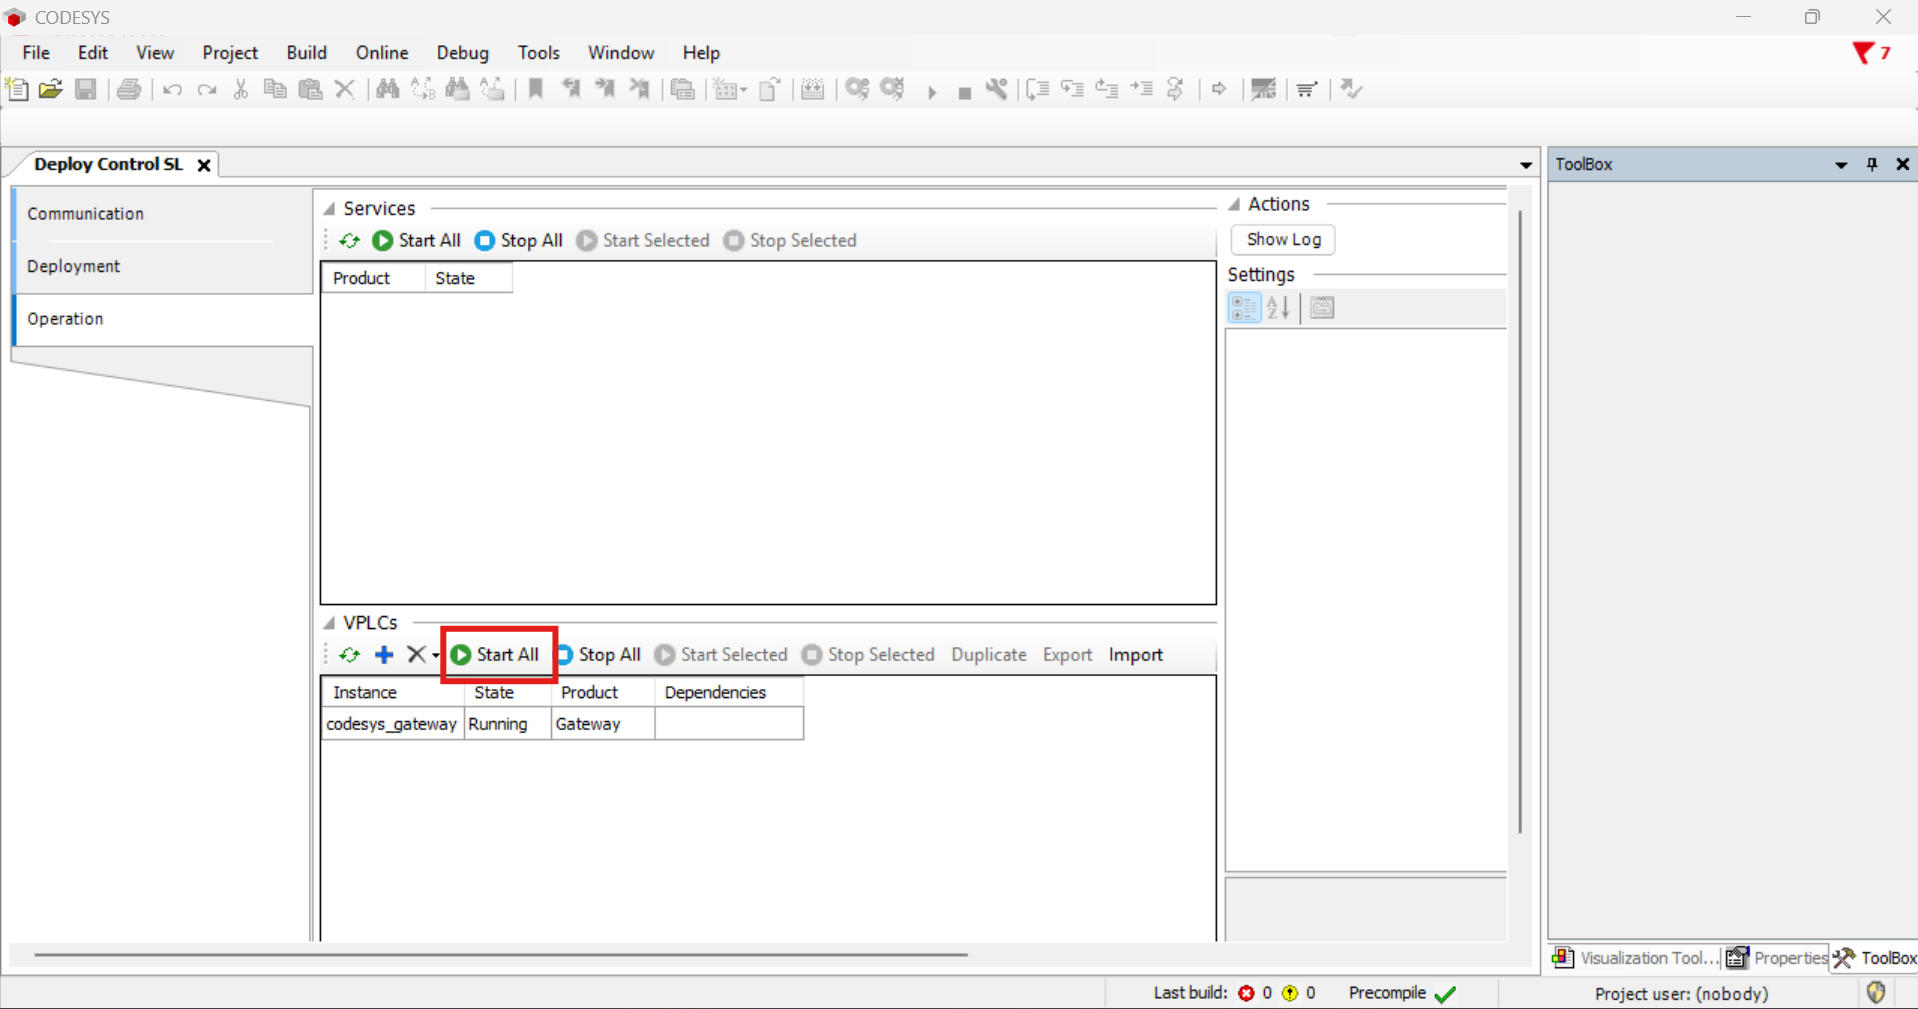
-
Start all the containers. The status on all images should change to "Running":
Create a Basic Application
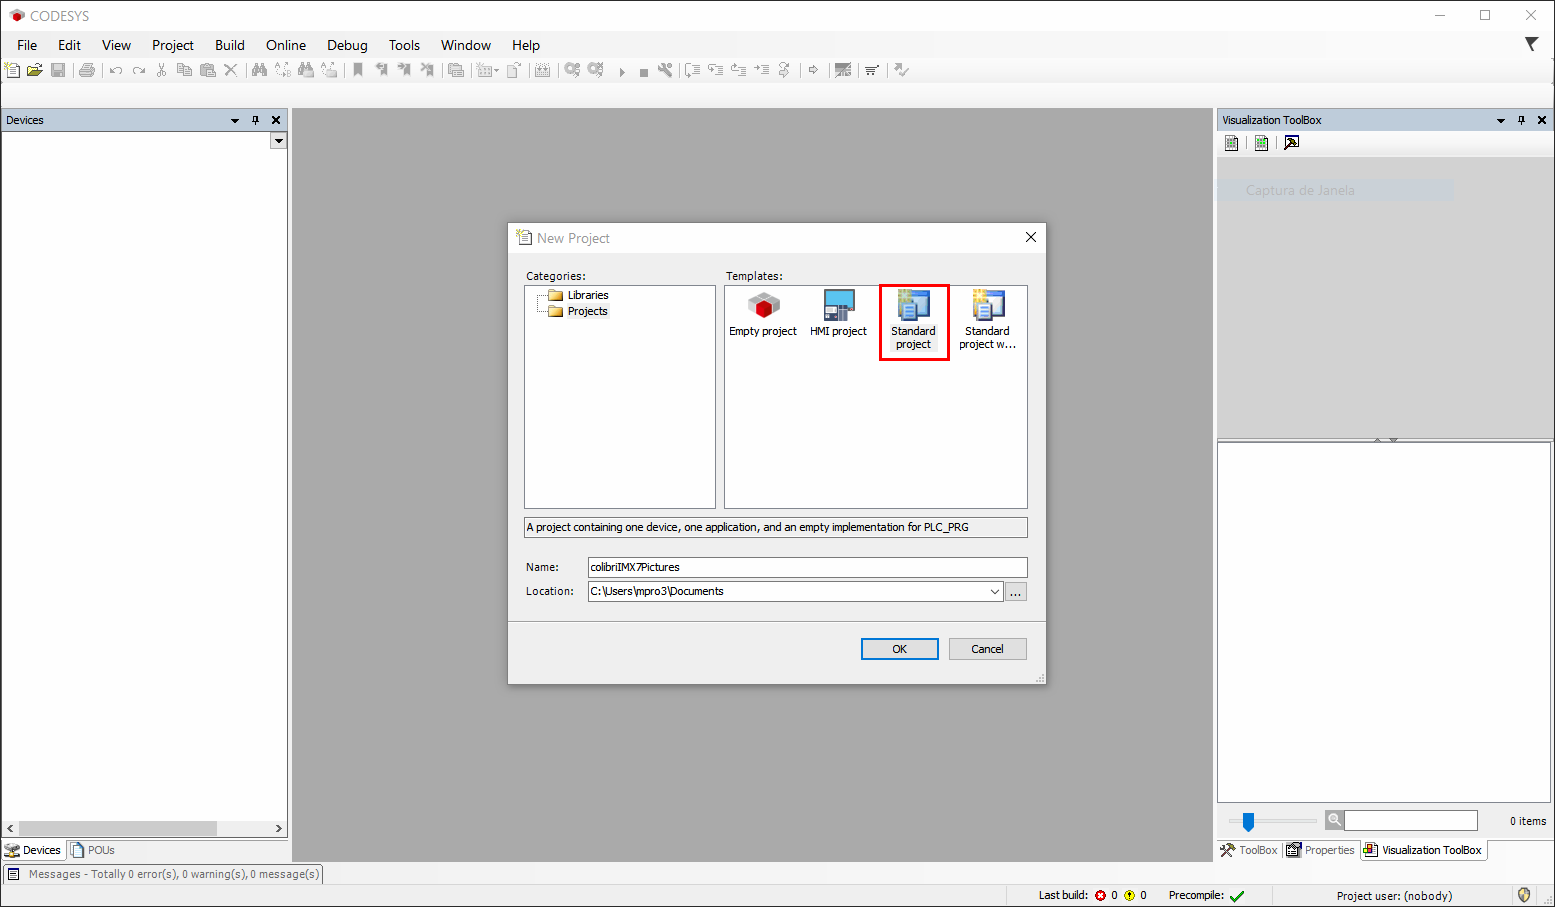
-
Create a new Standard project, give the project a name and click ok:
-
Select the
CODESYS Control for Linux ARM64 SL. In PLC_PRG select Ladder Logic Diagram (LD):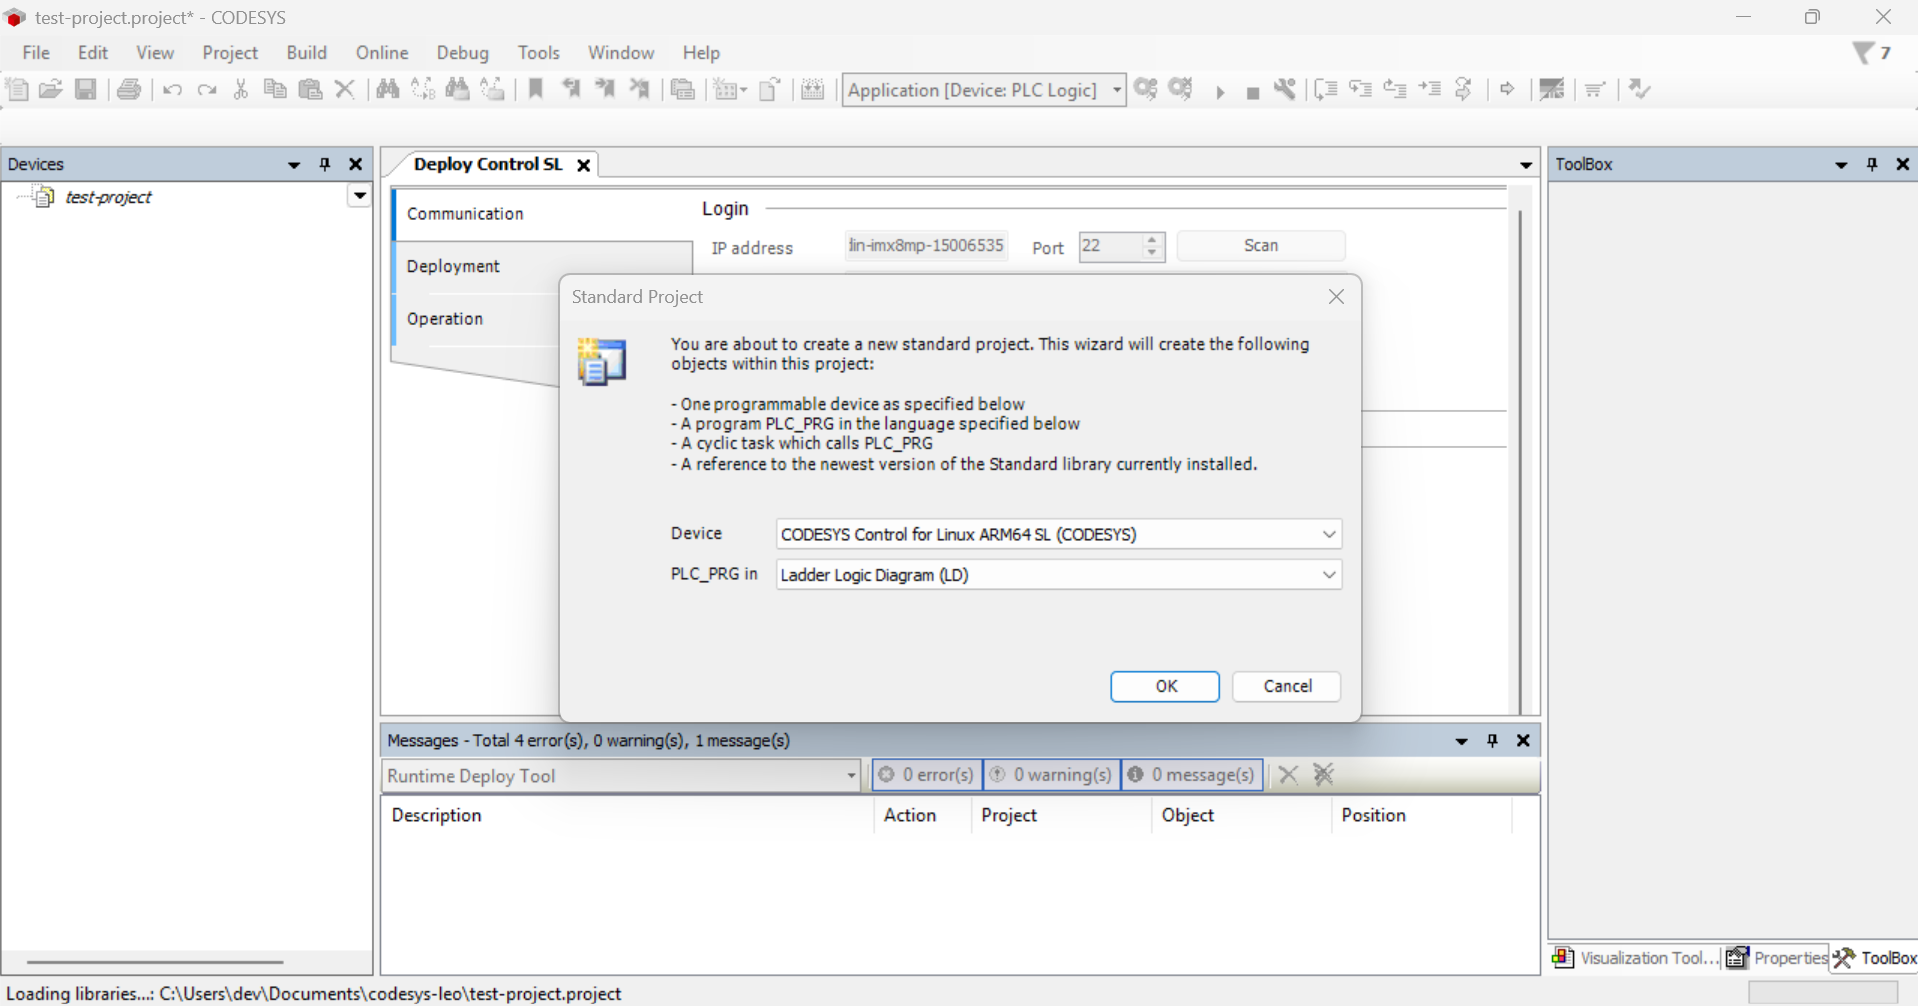
-
Now a new project is created. You will see a menu listed on the left-hand side of the project window.
-
Double click on Device. A new tab will open. Click on Gateway -> Manage Gateways:
-
Click Add to create a new Gateway using the target device IP:
-
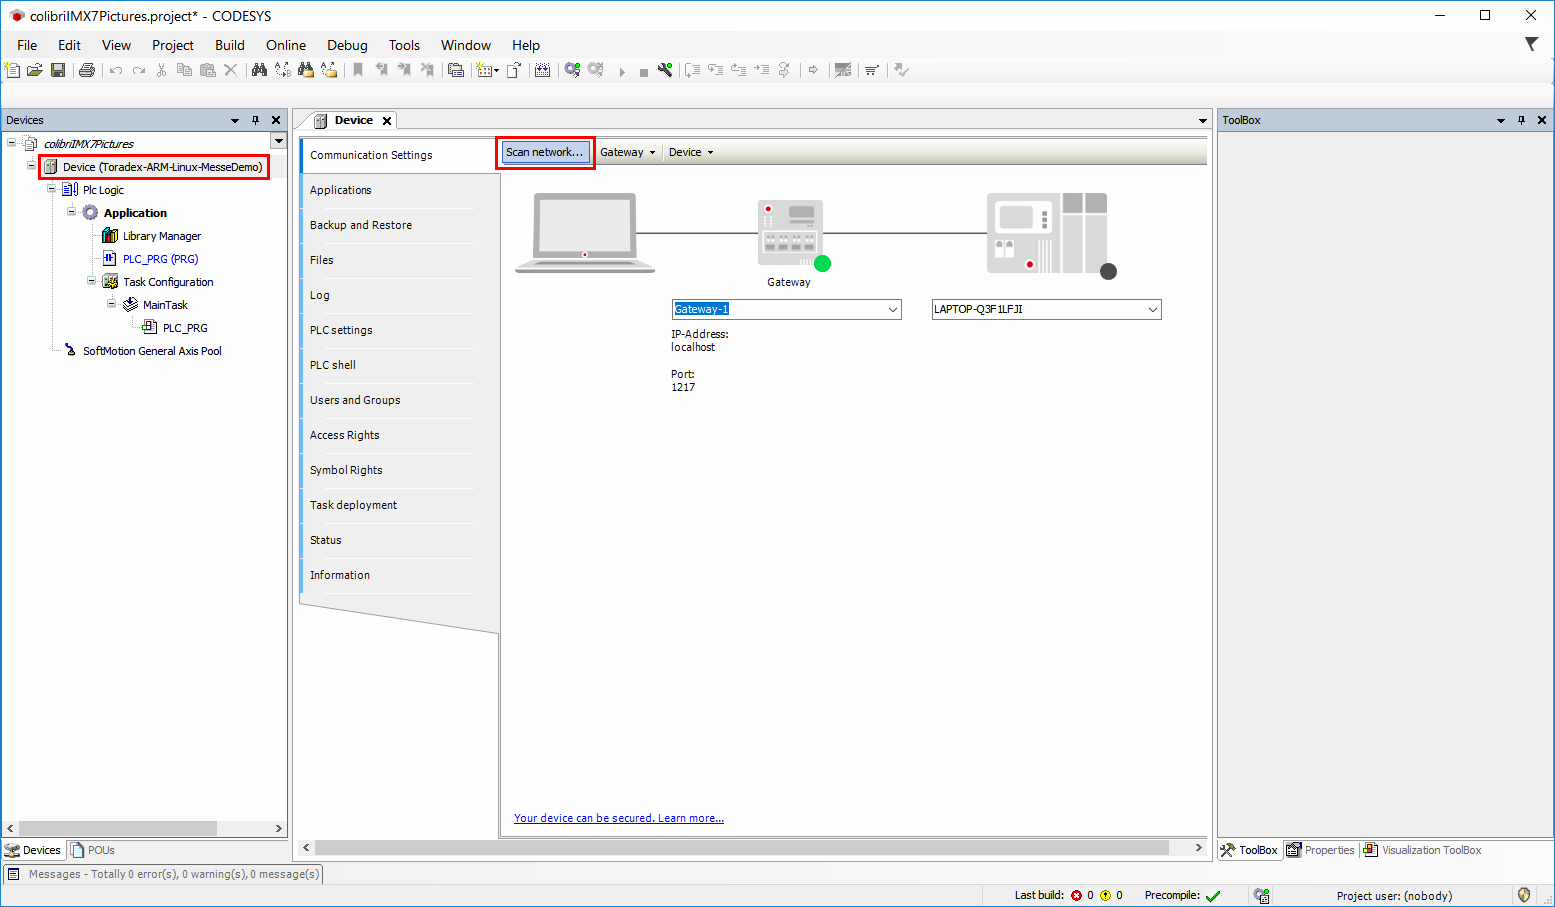
Change to the new Gateway and Click Scan Network:
-
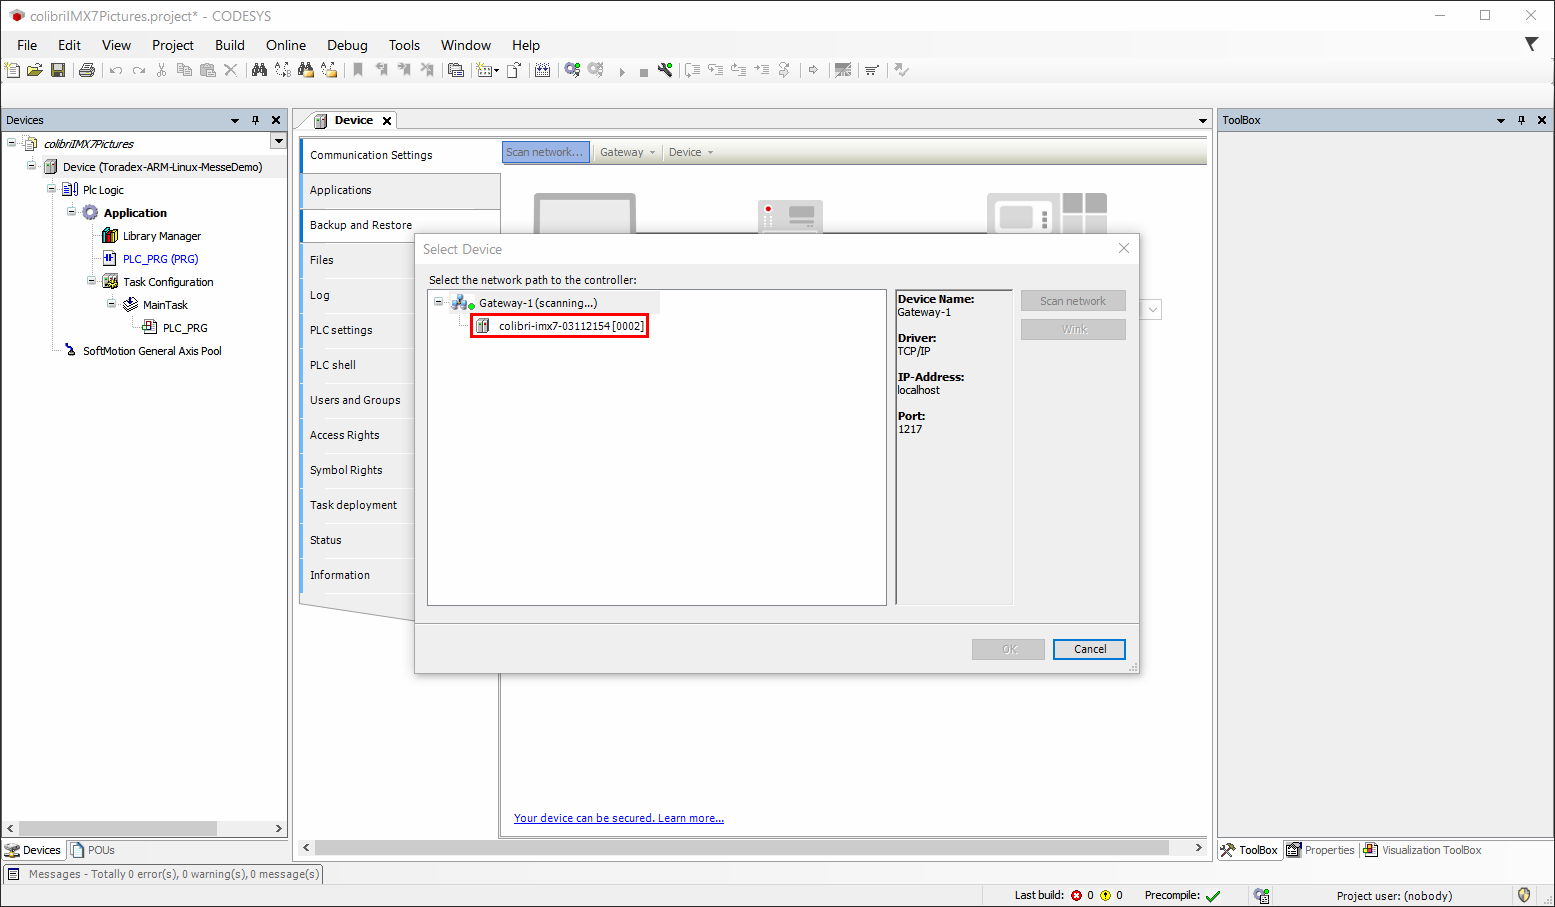
In the Select Device window make sure the device was found and then double click on it. If no device is found under the Gateway, verify if the Codesys Control container is running.
-
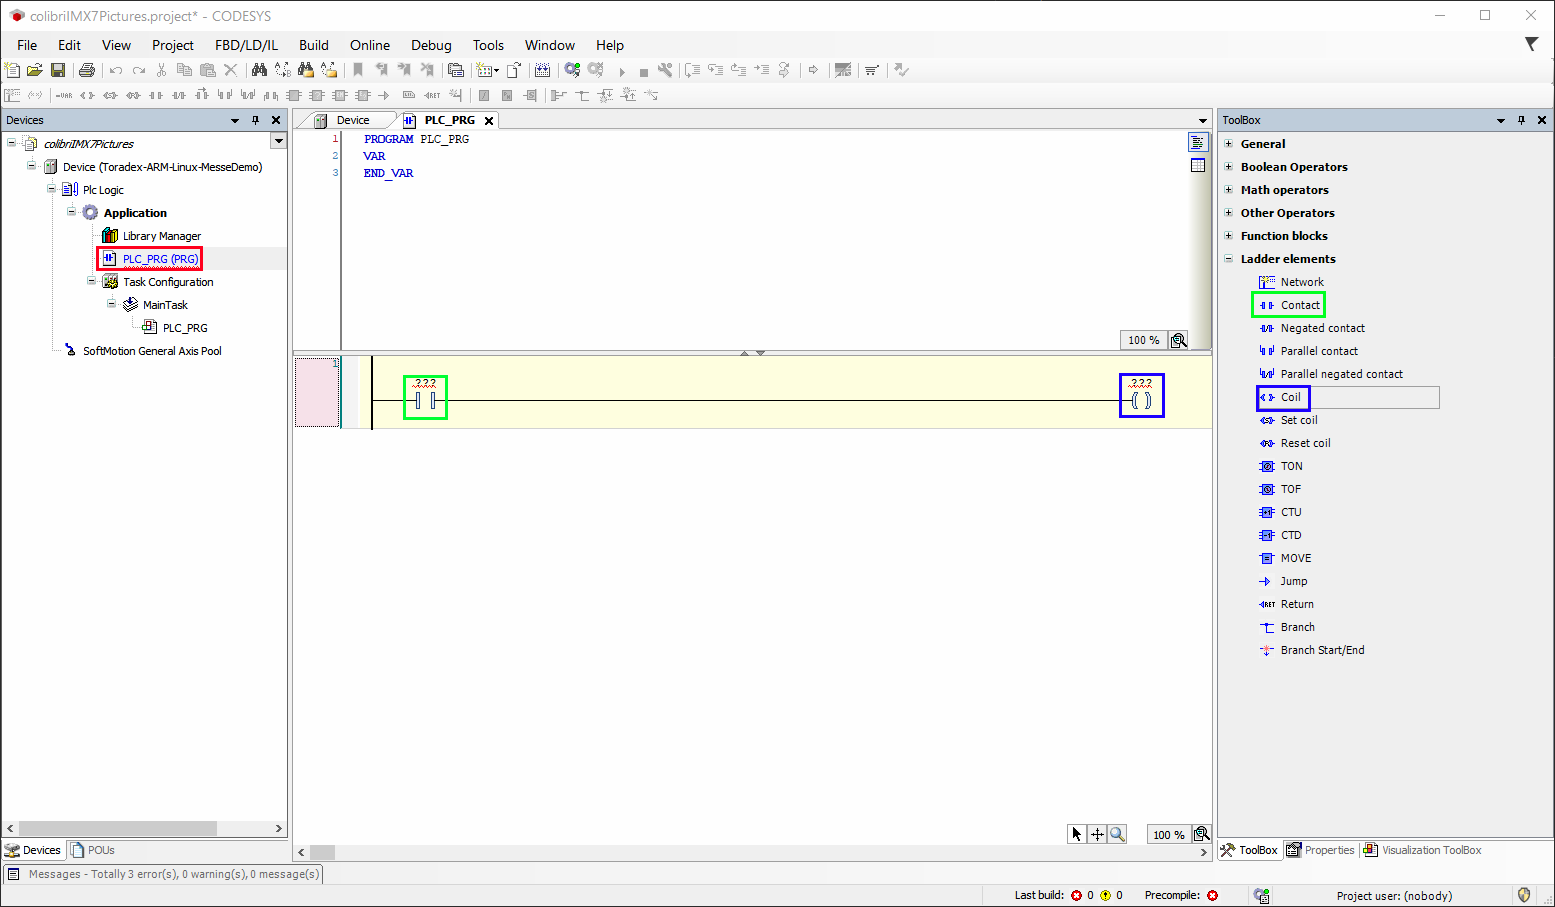
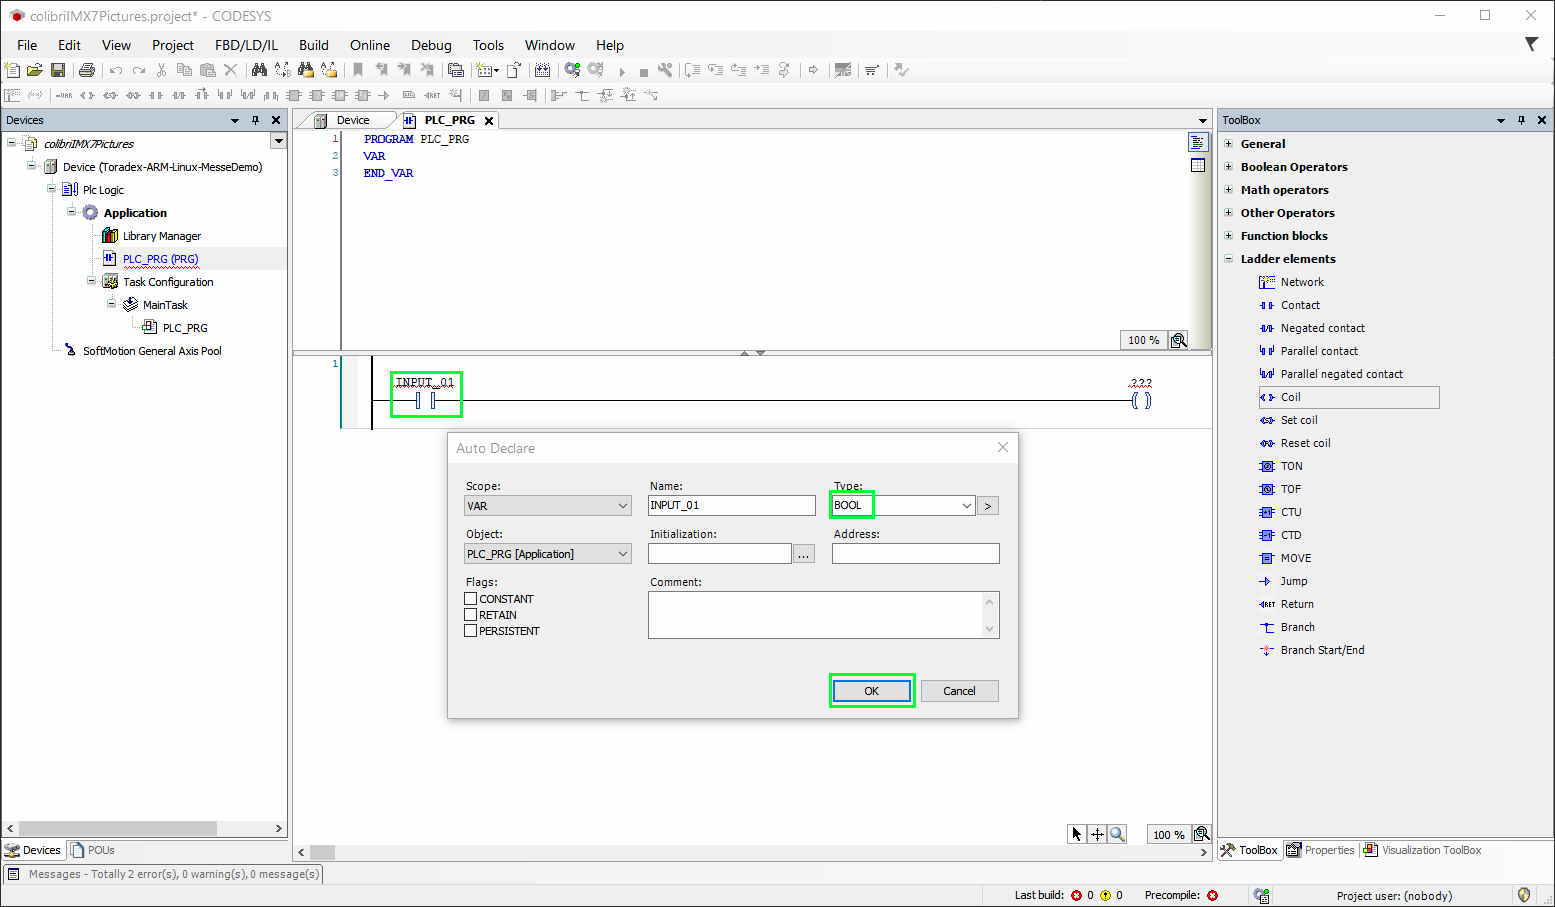
With the device connected to the development environment, we can start programming the logic. Click PLC_PRG in the project tree. In Toolbox drag and drop a Contact and a Coil to the Ladder area:
-
Add the INPUT_01 variable name in the Contact text box and select as type BOOL:
-
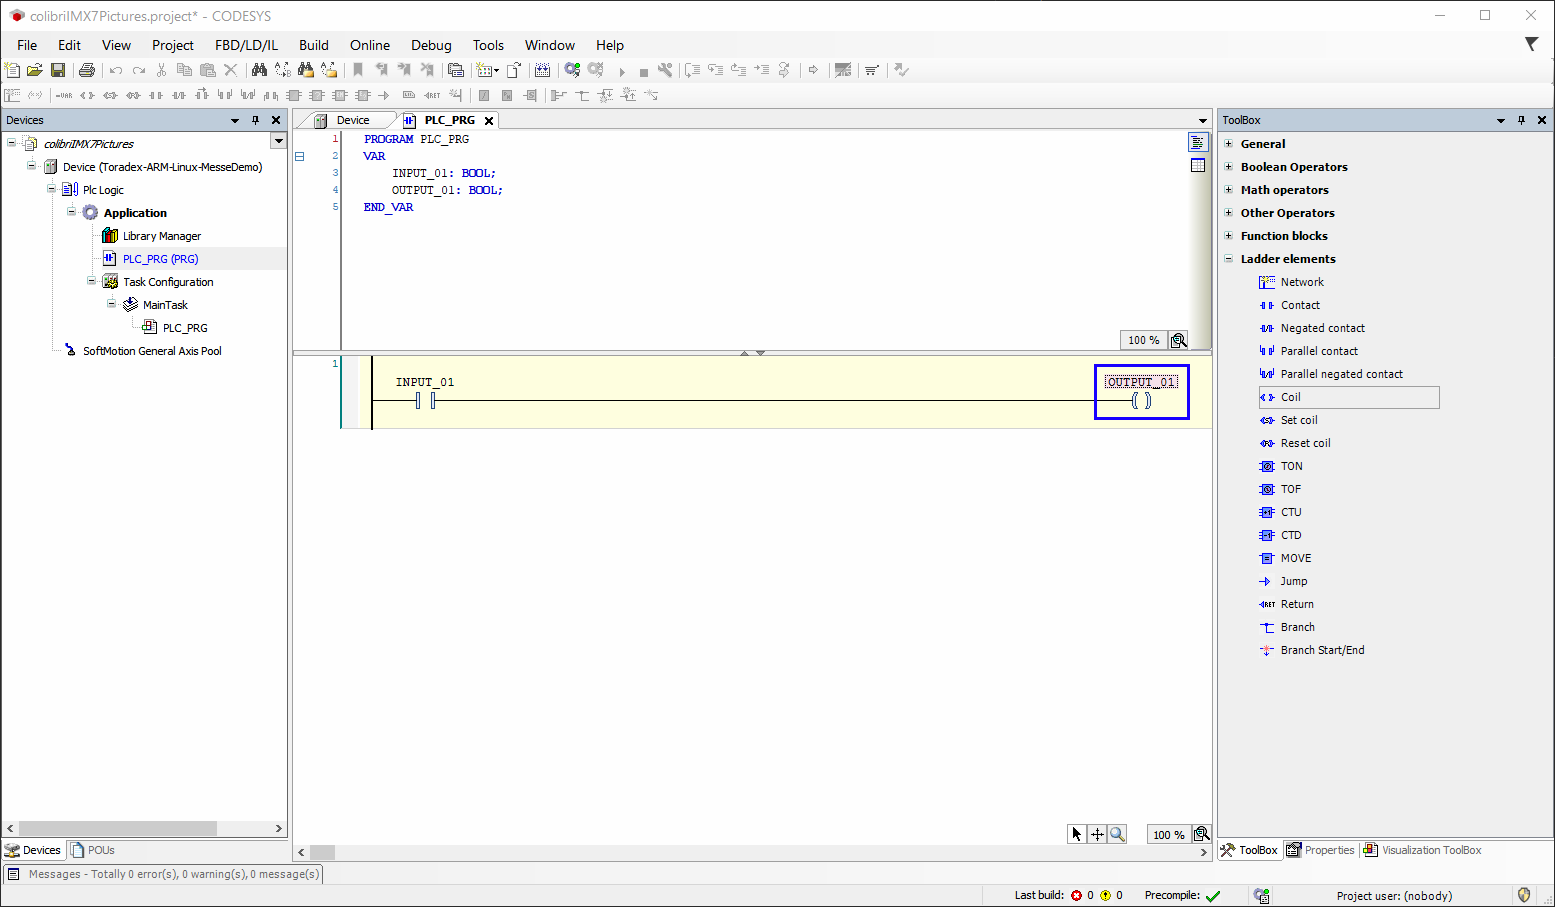
Add the OUTPUT_01 variable name in the Coil text box and select as type BOOL:
-
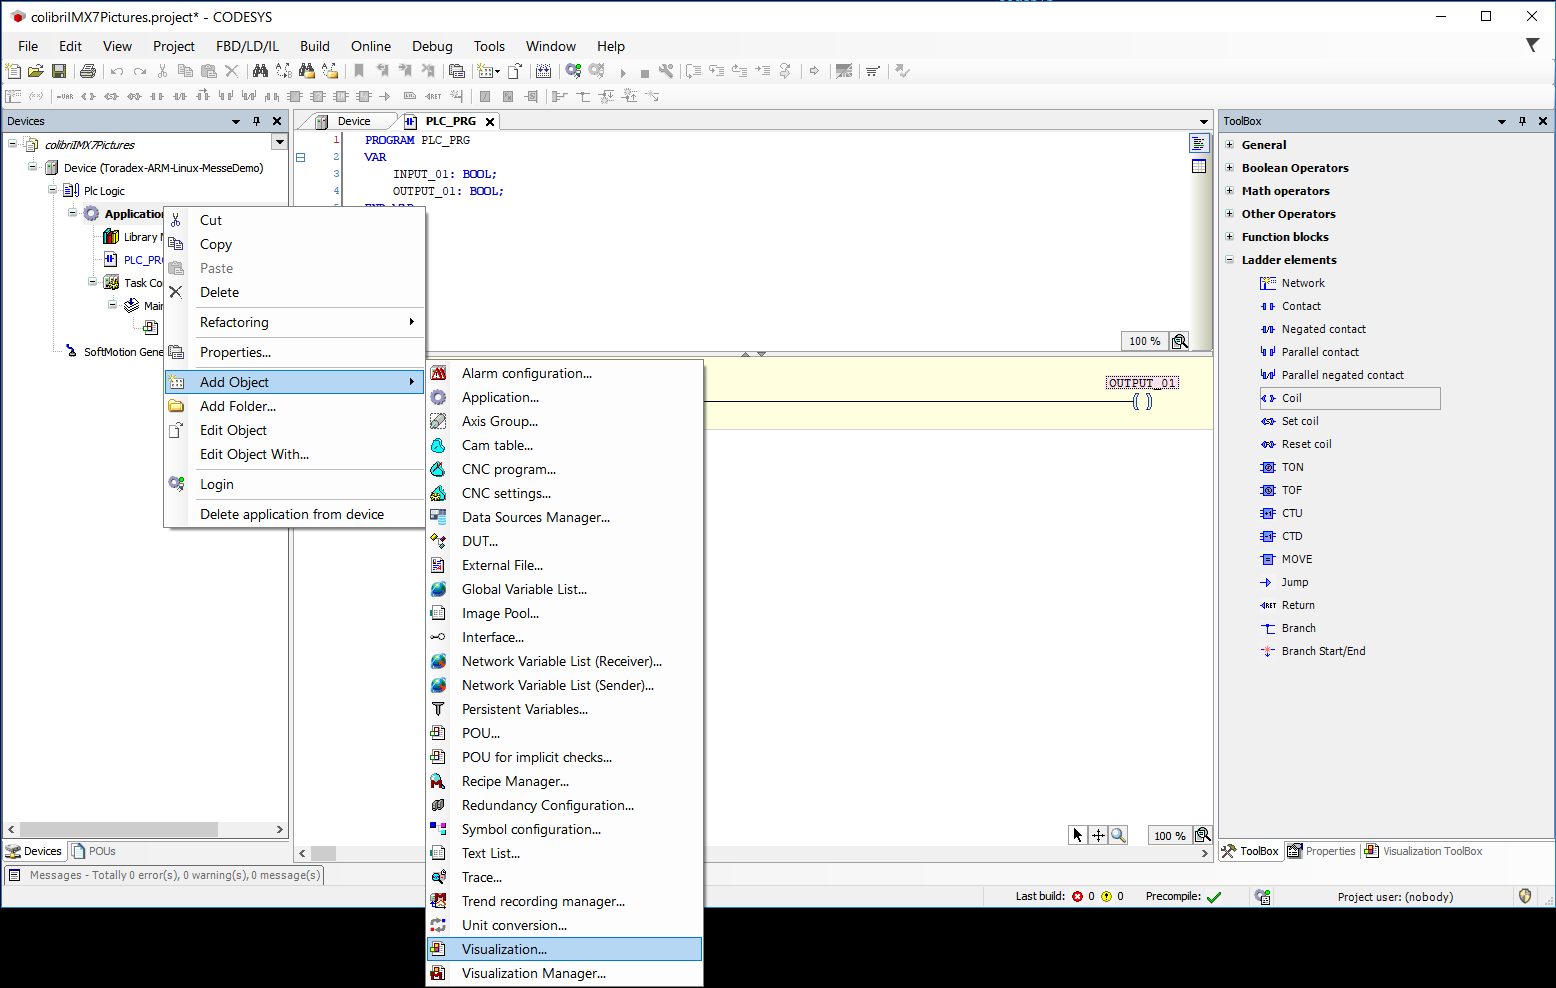
Add a Visualization to the project. In the project tree, right click on Application > Add Object > Visualization:
-
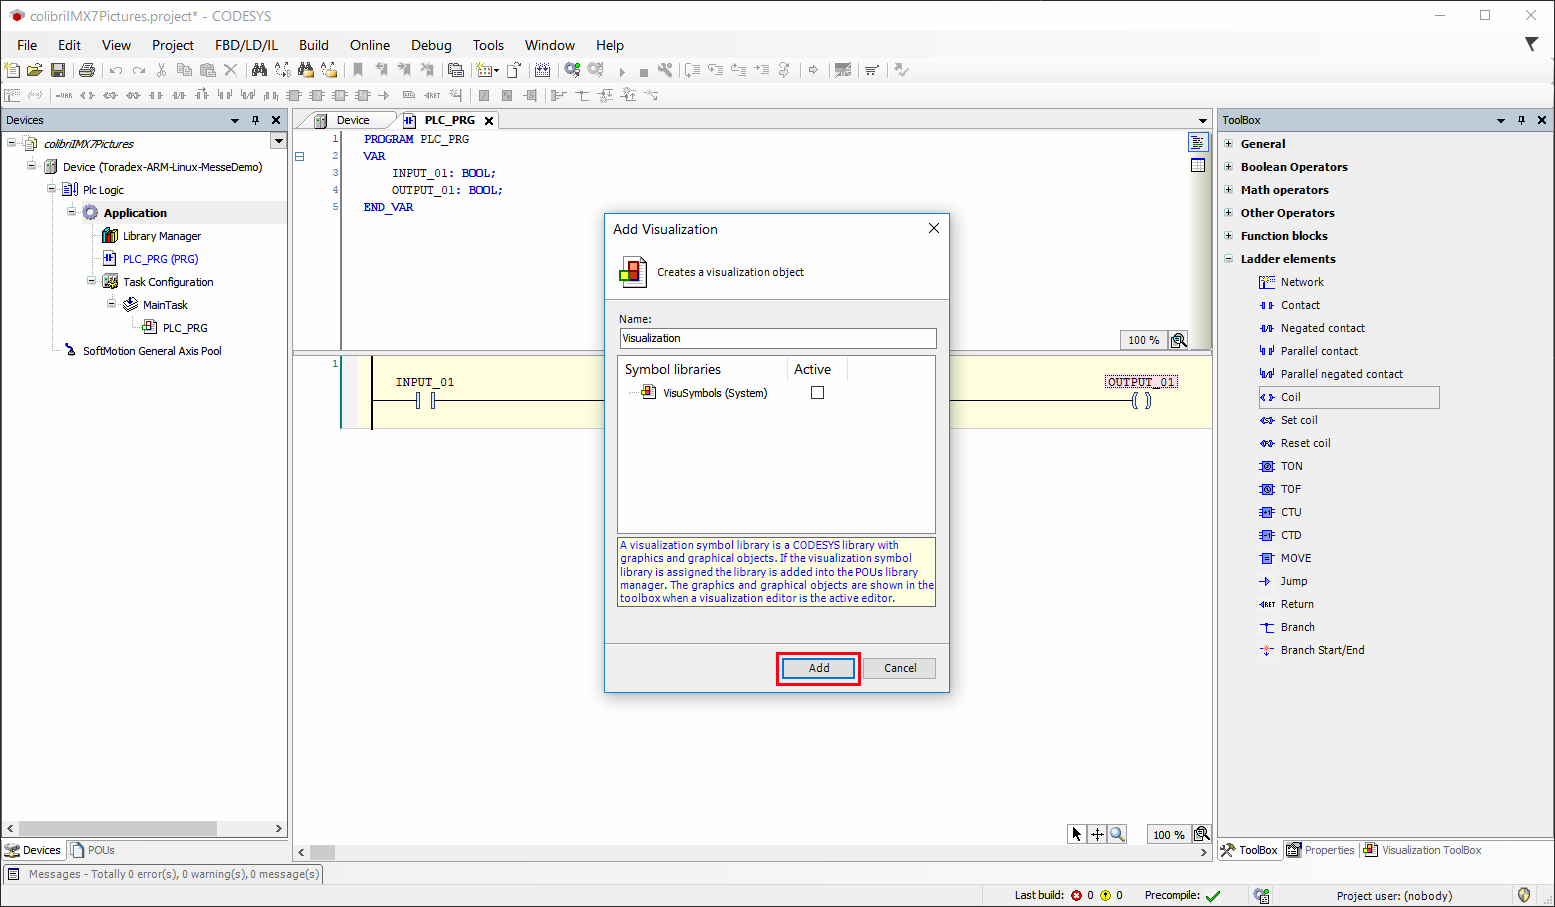
On Add Visualization window just click Add button:
-
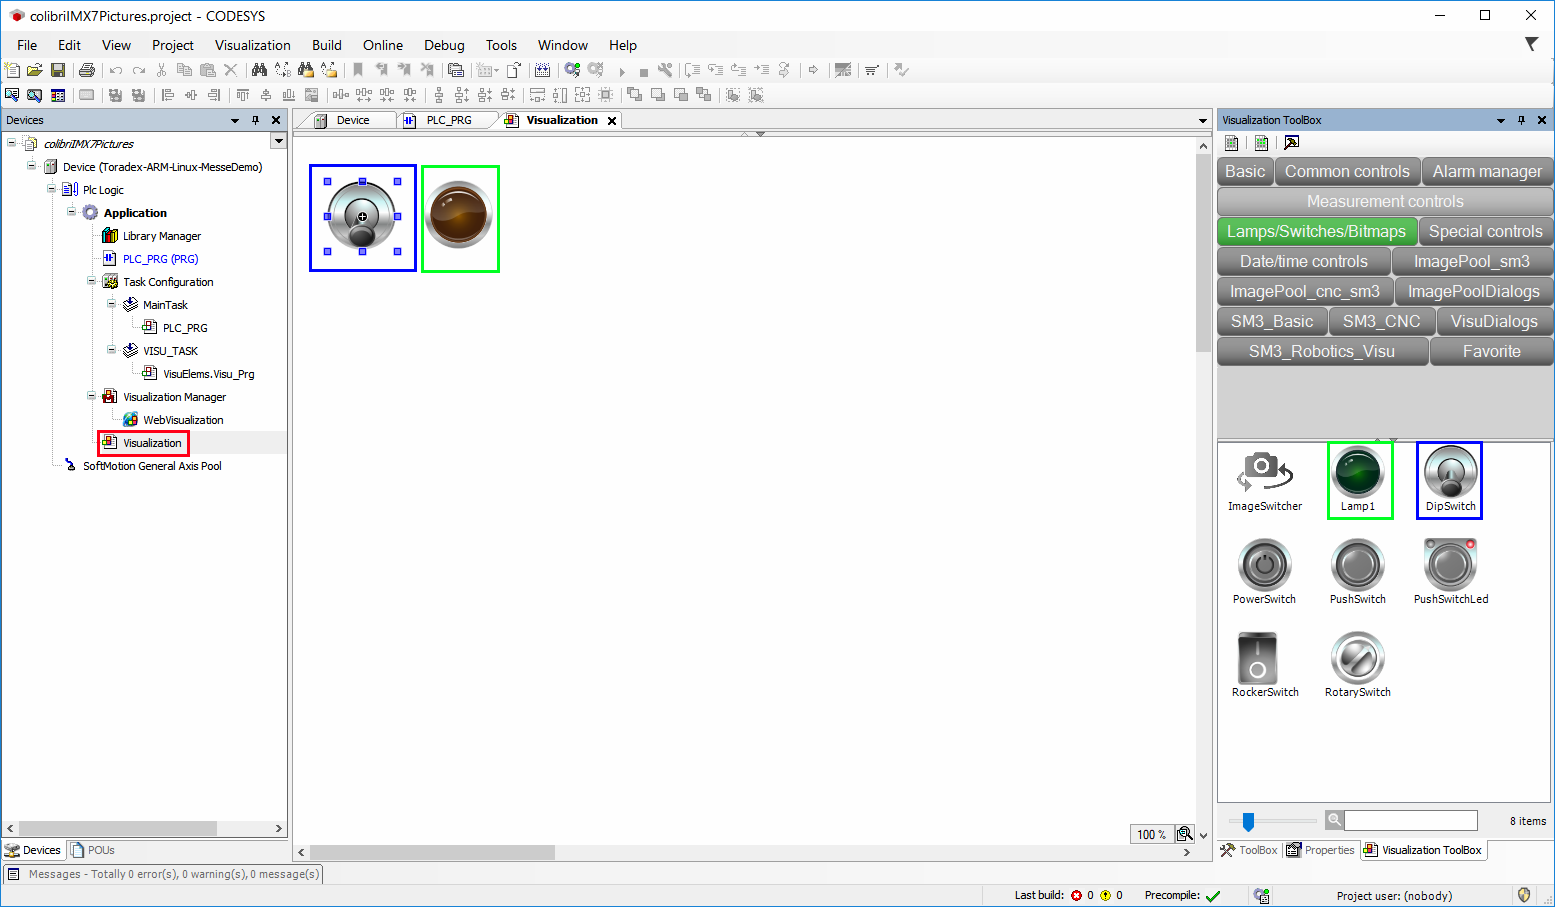
On the Visualization tab, which can be opened with double click on Visualization in the project tree, select Visualization Toolbox > Lamps/Switches/Bitmaps one DipSwitch and one Lamp1, drag and drop one at a time for the Visualization tab:
-
Connect the elements of the visualization to the elements of the ladder.
-
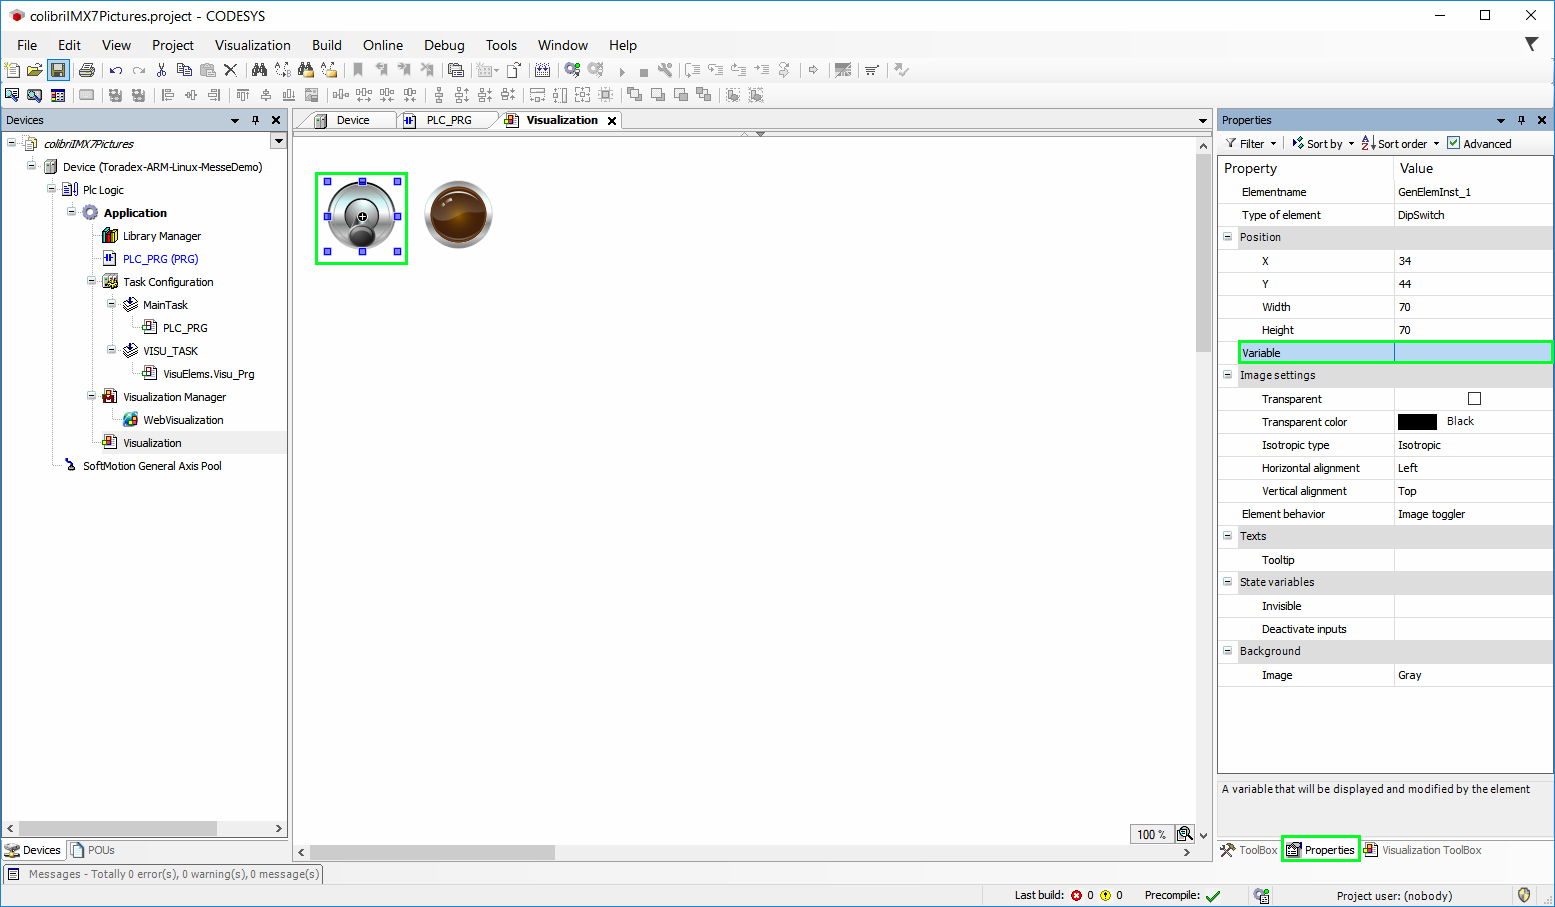
Select DipSwitch and in Properties select Variable:
-
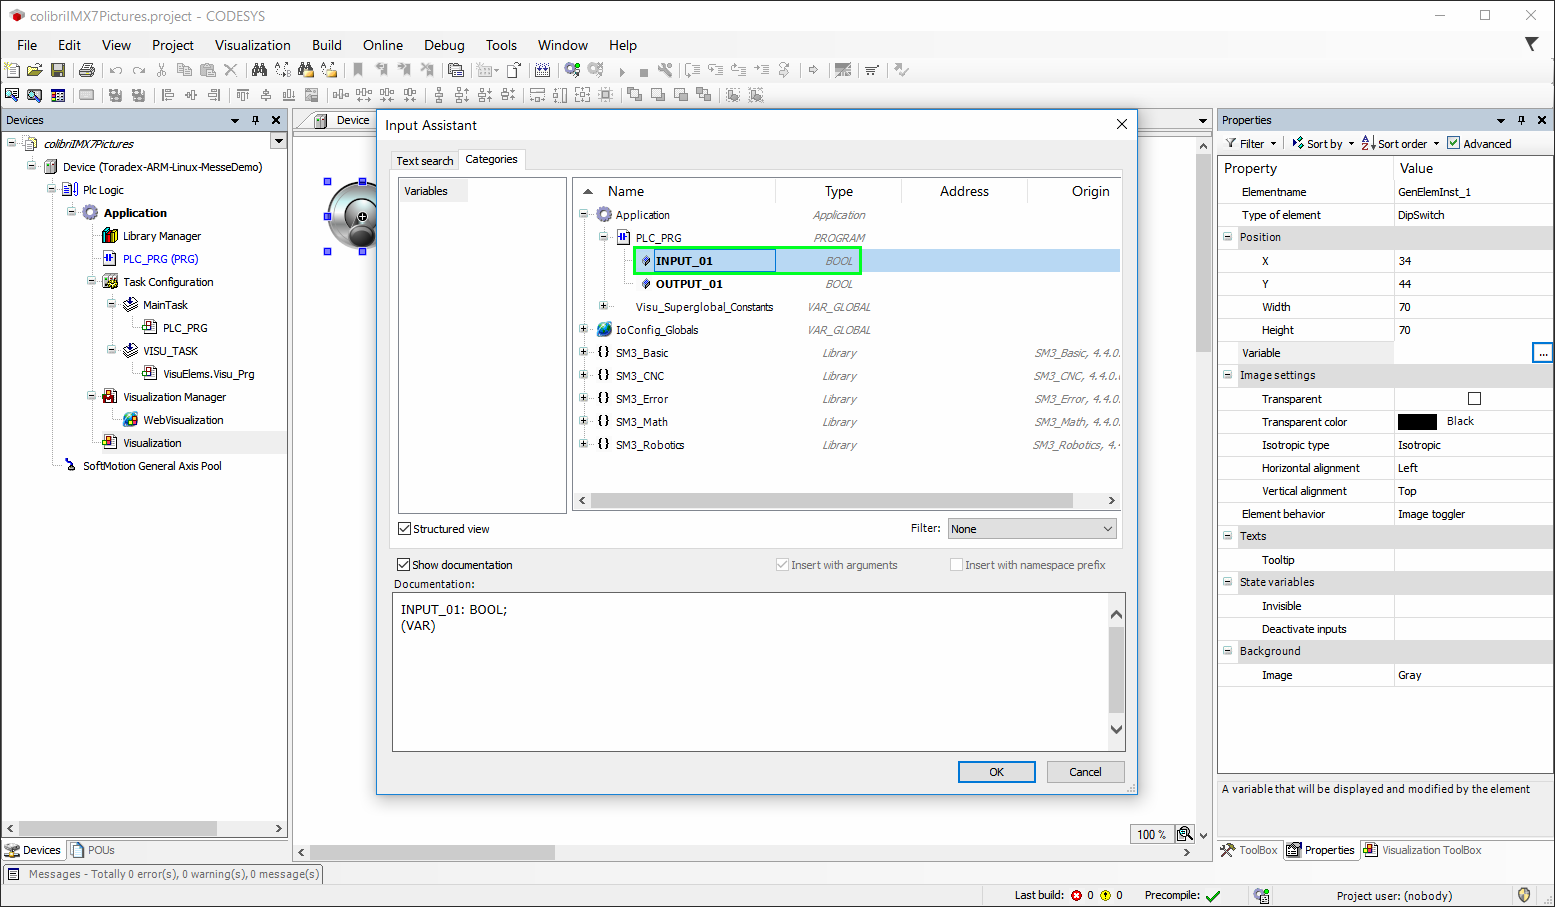
The DipSwitch must be connected to the Contact element of the Ladder. In the window Input Assist select Application > PLC_PRG > INPUT_01 (the variable which has been added to Contact):
-
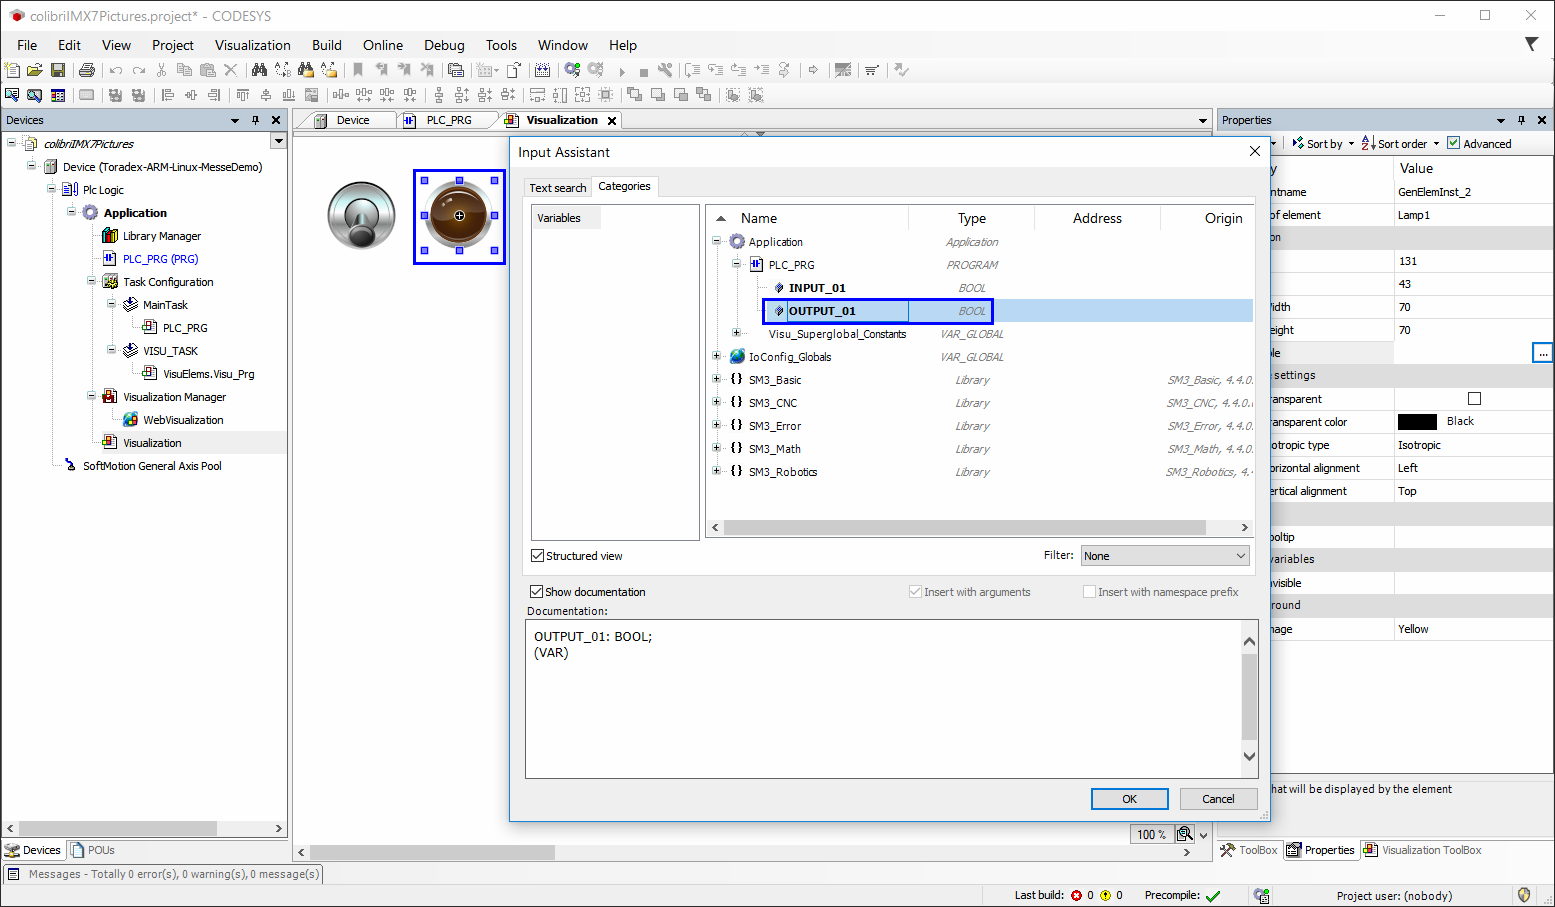
Select Lamp1 and in Properties select Variable. In the window Input Assist select Application > PLC_PRG > OUTPUT_01 (the variable which has been added to Coil):
Run the Application
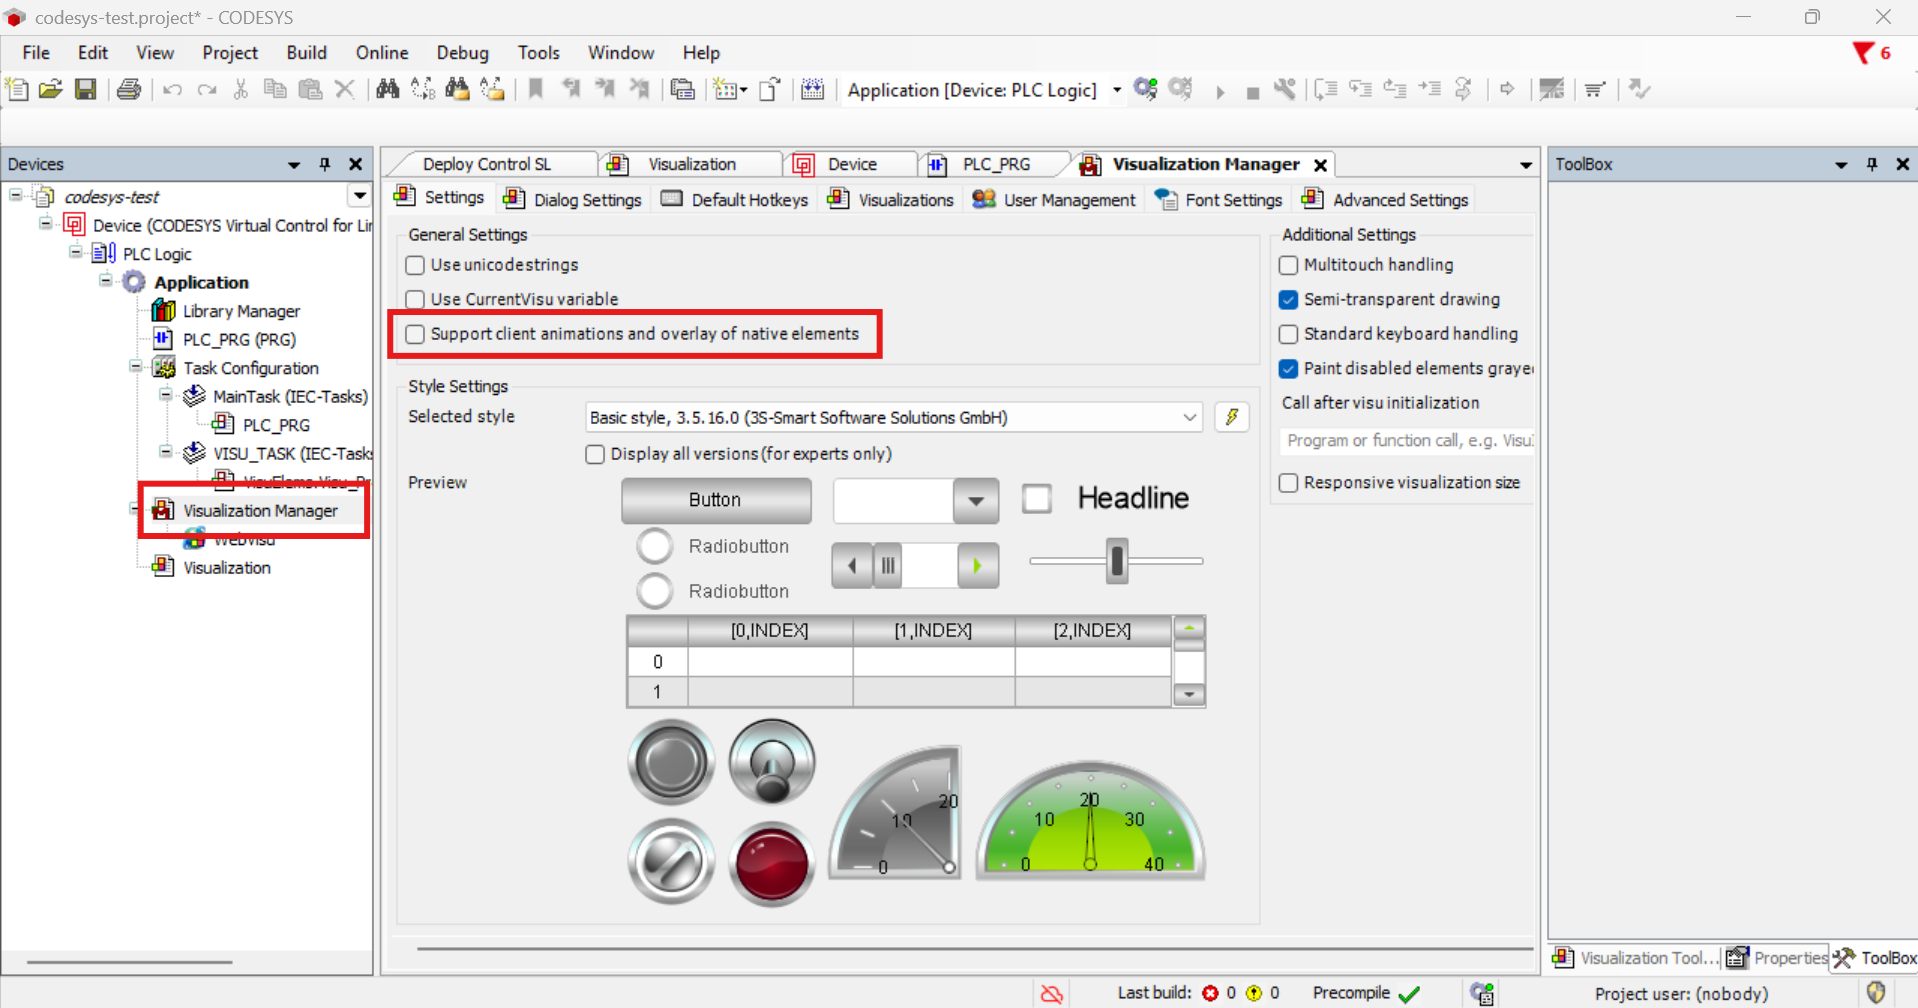
-
Disable the "Support client animations and overlay of native elements" option inside "Visualization Manager".
-
Click the Online menu and select Login (always choose download):

-
With the project downloaded and online, the following screen will be shown and the project will be in the STOP state:
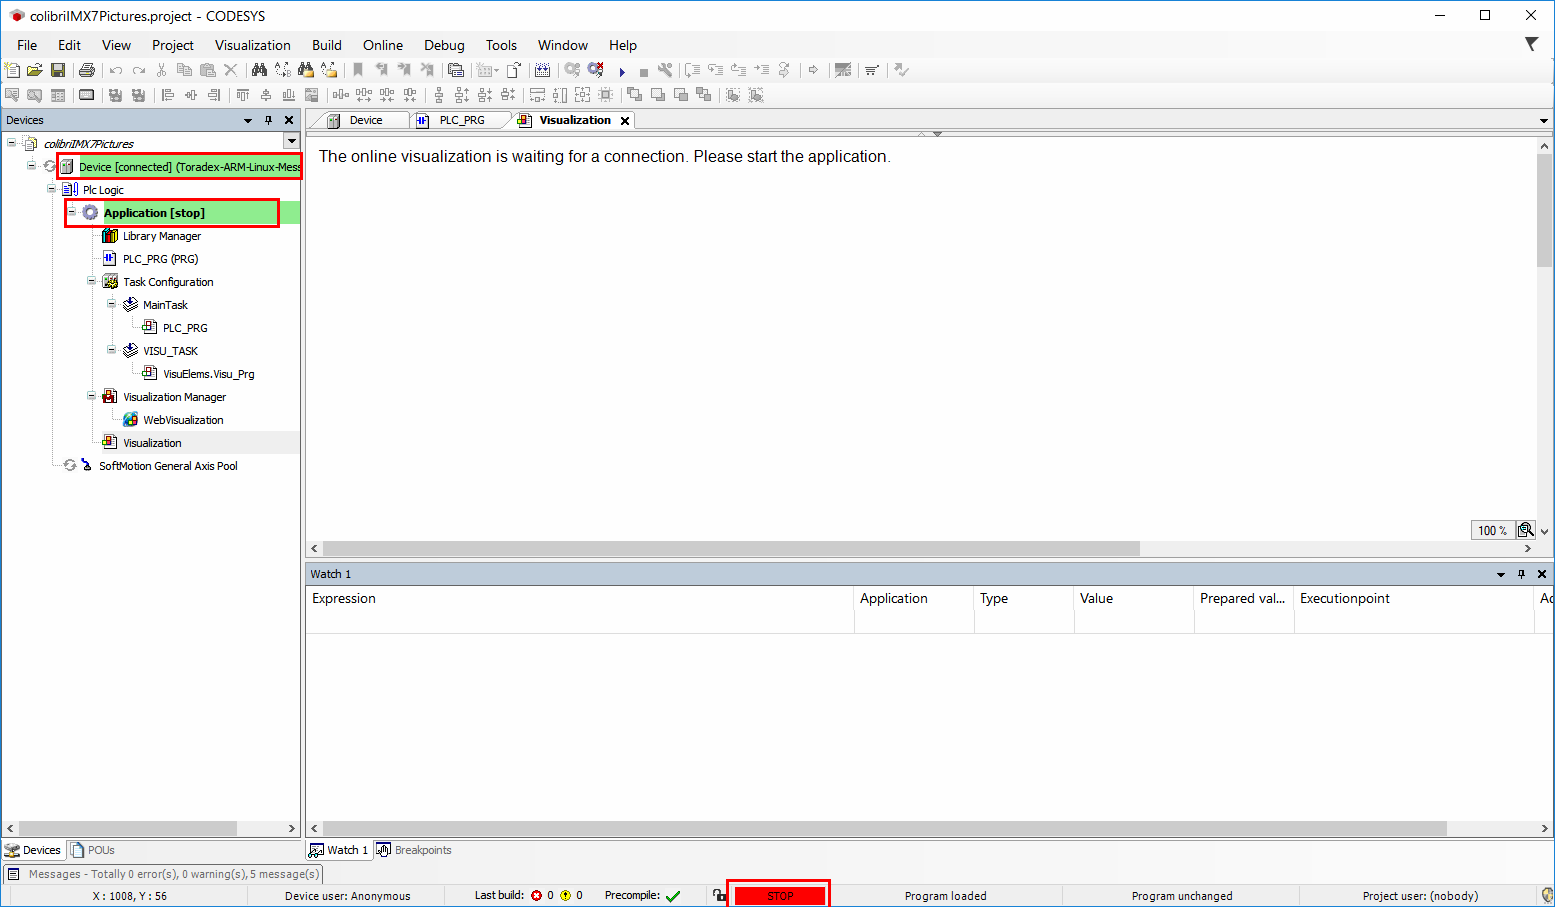
-
Select your board on the display of your target device (as set up in the Initialize the Codesys Runtime section). Enter the user and password you created in the IDE earlier. After a few seconds, the message below should appear on the console of your container. It means the Codesys runtime is only waiting for the application to start.
2025-10-15T17:26:44.549Z: Cmp=CmpTargetVisu, Class=1, Error=0, Info=0, pszInfo= Waiting for registration in the iec visualization (Is the visu application stopped?) -
To start the application, click on play. The application should show up on your device's display, and if you toggle the input DipSwitch, the output Lamp1 should also toggle.
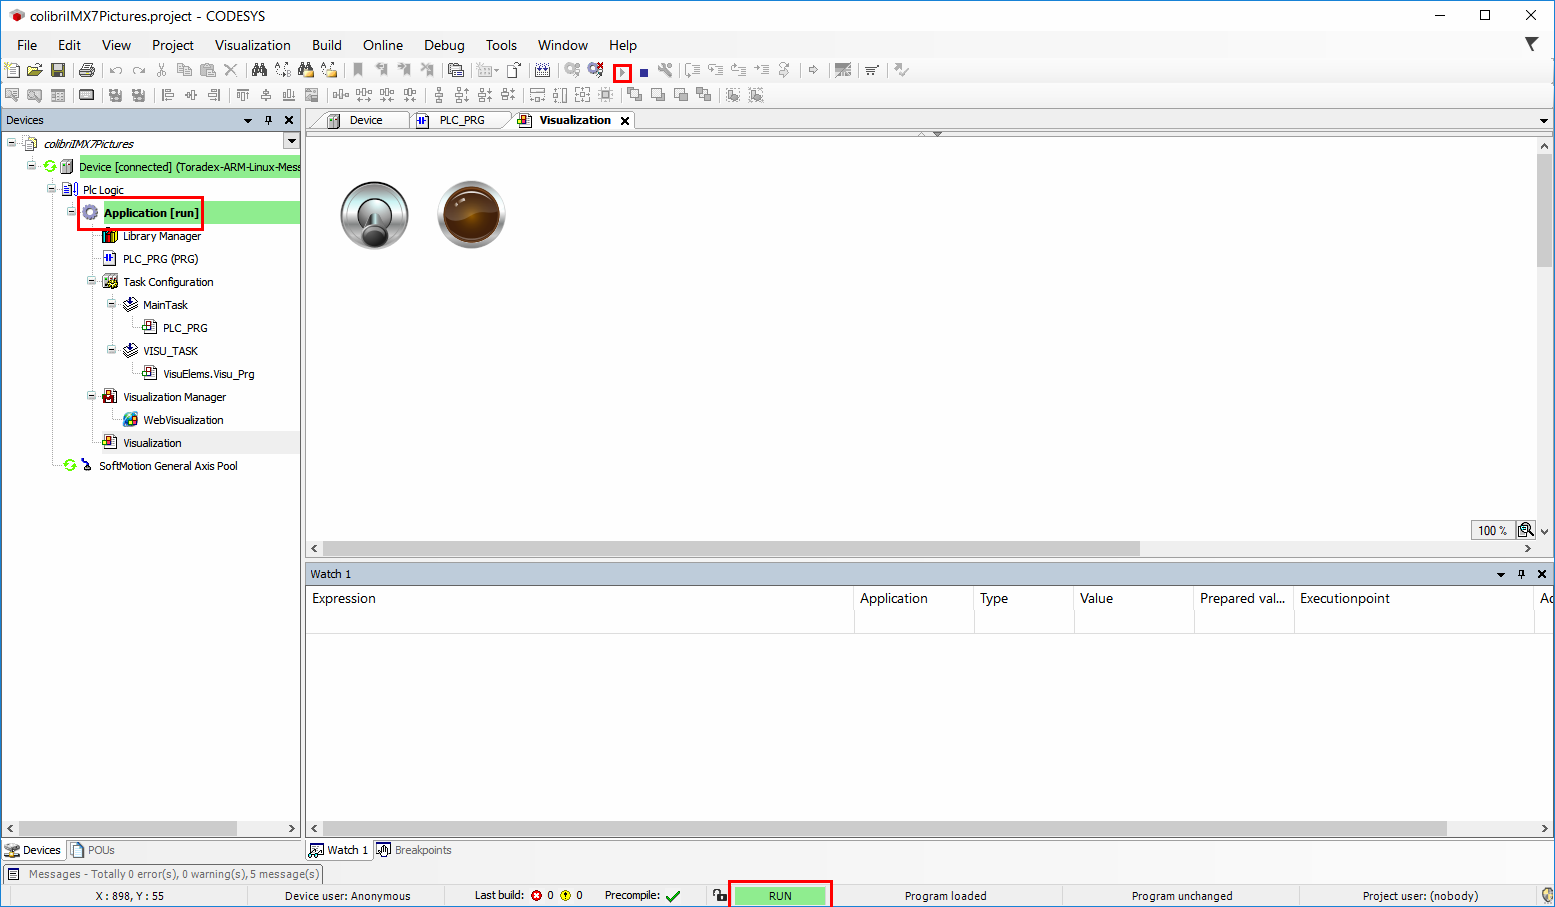
At this point, the application will be in the RUN state. You can interact with it either directly on your target device's display or on the Visualization tab of the IDE. Pressing the DipSwitch should light the Lamp1 on.
Display and Touchscreen Configuration
For the displays recommended by Toradex, go to Setting up Displays with Torizon page.