NXP Hardware Support
- FRDM i.MX 93 Development Board (i.MX93)
How to Get Started
- Download the appropriate Torizon OS image from the Toradex Download Center.
- Flash the
.wicimage to the SDCard, replacing<torizon-os-version>with the version you downloaded and<sdcard-device-node>with your SDCard device node (e.g./dev/sdb).$ zstdcat if=torizon-docker-imx93-11x11-lpddr4x-frdm-<torizon-os-version>.wic.zst | sudo dd of=<sdcard-device-node> - Change the board boot switch to
ON ON OFF OFF(from left to right) to boot from an SDCard. For more information regarding hardware setup, refer to NXP's Quickstart.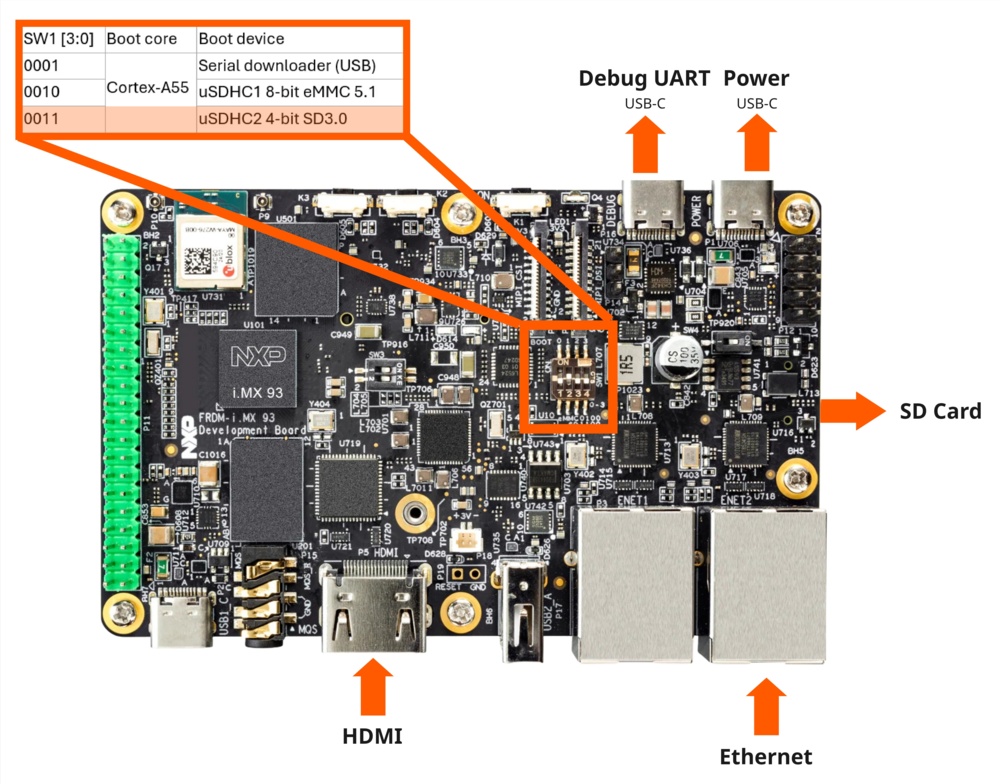
- Insert the SDCard and power on the board.
- Establish a serial connection with the board (e.g. using
picocom) and login with the default credentials. The default password for the usertorizonistorizon. You will be prompted to change it on the first login:$ picocom -b 115200 /dev/ttyUSBx - Create an account on https://app.torizon.io/.
- Go to the
Hardware > Devicestab and click "Provision Device" to connect your device to the Torizon Cloud. - Access the Torizon Demo Gallery and remotely deploy a sample application to the board.
For more information, or if you want to build Torizon OS from source using Yocto, read the full documentation for NXP boards available on the Torizon GitHub.