Synaptics Hardware Support
- Astra Machina SL1680 Dev Kit (SL1680)
- Astra Machina SL2610 Dev Kit (SL2610)
How to Get Started - SL1680 Dev Kit
- Download the appropriate Torizon OS image from the Toradex Download Center.
- Unzip the file.
- Enter Recovery Mode by holding down the
USB-Bootbutton and either powering on the device or pressing theRESETbutton.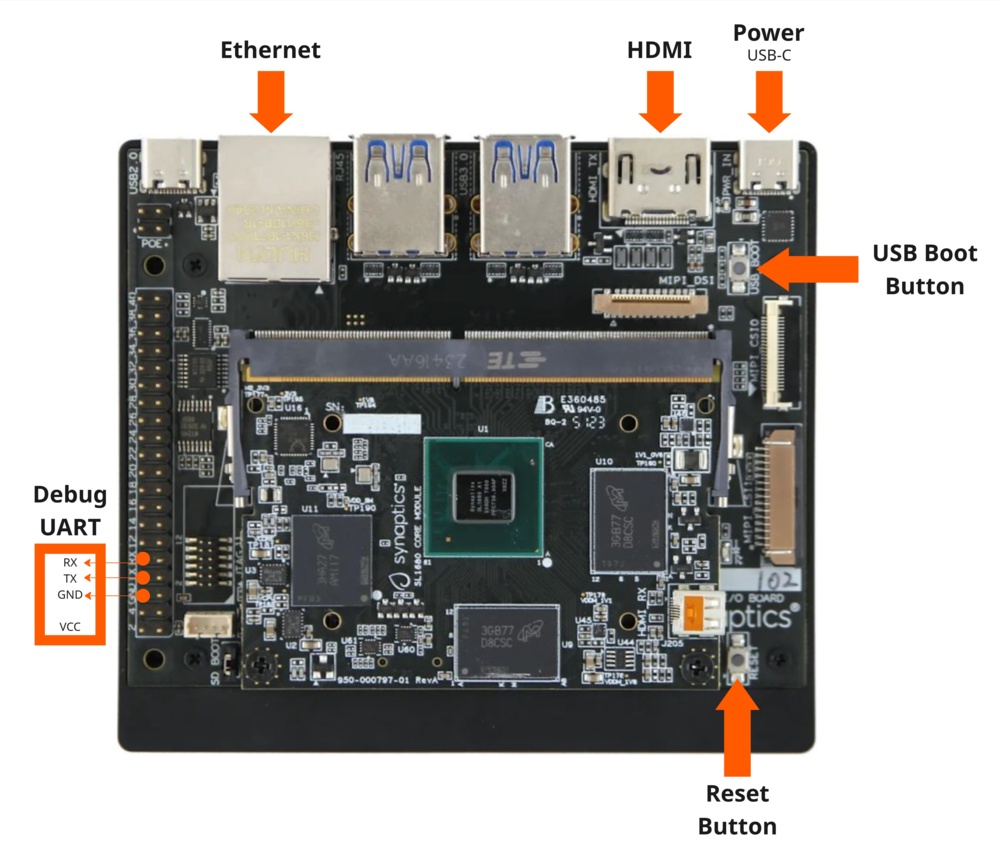
- Execute the flashing script:
$ ./flash-image.sh - Reboot the board.
- Establish a serial connection with the board (e.g. using
picocom) and login with the default credentials. The default password for the usertorizonistorizon. You will be prompted to change it on the first login:$ picocom -b 115200 /dev/ttyUSBx - Create an account on https://app.torizon.io/.
- Go to the
Hardware > Devicestab and click "Provision Device" to connect your device to the Torizon Cloud. - Access the Torizon Demo Gallery and remotely deploy a sample application to the board.
For more information, or if you want to build Torizon OS from source using Yocto, read the full documentation for Synaptics boards available on the Torizon GitHub.
How to Get Started - SL2610 Dev Kit
info
The available image is an Engineering Pre-Release of Torizon OS (based on version 7.5.0) for Synaptics Astra Machina SL2610 (based on Synaptics SDK 2.1.0).
Currently, Astra Machina SL2610 doesn't support Synaptics' usual flashing process using usb-tool.
Therefore, you need a pre-flashed Astra Machina SL2610 device with U-Boot.
- Download the appropriate Torizon OS image from the Toradex Download Center.
- Unzip the file into a FAT formatted USB stick. Please note that the folder name uncompressed into the USB stick will be named SYNAIMG.
- Connect the USB stick it to the Astra Machina SL2610 board.
- Boot the board.
- Establish a serial connection with the board (e.g. using
picocom) and login with the default credentials. The default password for the usertorizonistorizon. You will be prompted to change it on the first login:$ picocom -b 115200 /dev/ttyUSBx - In the U-Boot prompt, execute the flashing script:
> usb reset

> usb2emmc SYNAIMG - Create an account on https://app.torizon.io/.
- Go to the
Hardware > Devicestab and click "Provision Device" to connect your device to the Torizon Cloud. - Access the Torizon Demo Gallery and remotely deploy a sample application to the board.
For more information, or if you want to build Torizon OS from source using Yocto, read the full documentation for Synaptics boards available on the Torizon GitHub.