.NET Core Application Development on Visual Studio Code
Introduction
This article describes the main steps for developing .NET applications for Torizon OS devices using the Torizon IDE extension. To help you test and understand the basics, we will also guide you in setting up and running a sample that uses the GPIO interface.
This article covers the following topics:
- Add NuGet packages to projects.
- Add package dependencies.
- Give containers access to devices.
- Deploy and debug projects.
- Next steps.
This article complies with the Typographic Conventions for Torizon Documentation.
Prerequisites
- Get a Toradex Hardware with Torizon OS installed.
- Set up the Torizon IDE extension Environment.
- Connect a Torizon OS Target Device.
Configure your Package Manager
The Torizon IDE Extension automatically installs the .NET SDK from the Microsoft package repository. However, since both Linux and Microsoft distributions provide .NET packages, the .NET SDK installation mix packages, and you will run into problems. To avoid that, configure your package manager to ignore the .NET packages from the distribution's repository before creating a new project.
When using WSL, the .NET SDK is installed on the Linux side. Thus, the previous information remains relevant.
Create a New Project
Create a new project from the .NET 6 C# Console Application template. The Torizon IDE extension automatically generates the project folder and the essential files.
Sample-specific Steps
Sample-specific Steps
This guideline includes instructions for running a basic GPIO sample to assist your understanding. Note that these steps are set up for a Verdin iMX8MP and a Verdin Development Board V1.1 B. However, with minor adjustments, they can be applied to other boards as well. To replicate the same processes and achieve the same outcomes, refer to the software and hardware subsections below.
Source Code
This sample consists of a C# application that uses the System.Device.Gpio .NET package to control a GPIO pin and turn an LED on.
Copy the following source code and paste it into the Program.cs file, which is located in the project's folder.
Hardware Setup
To test the GPIO pin, you can utilize either a multimeter or an LED to verify the logic level of the connector. When using an LED, ensure you match the voltage and current of both the LED and the GPIO pin. If necessary, consider using a driver circuit to power the LED correctly.
The Verdin Development Board already provides LEDs with driver circuits for quick evaluation.
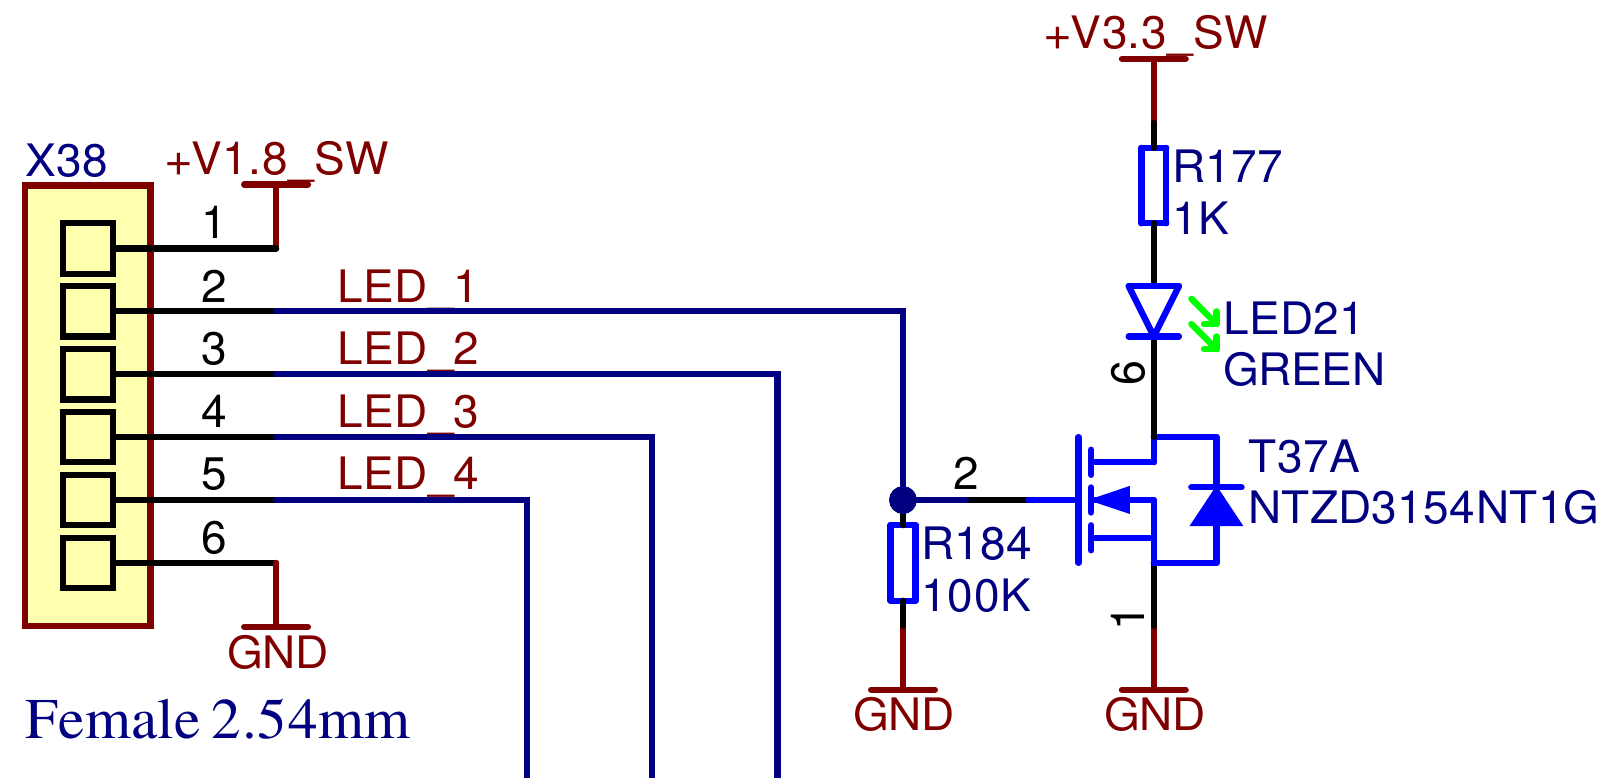
Thus, we can directly connect the GPIO pin to the carrier board's LED interface.
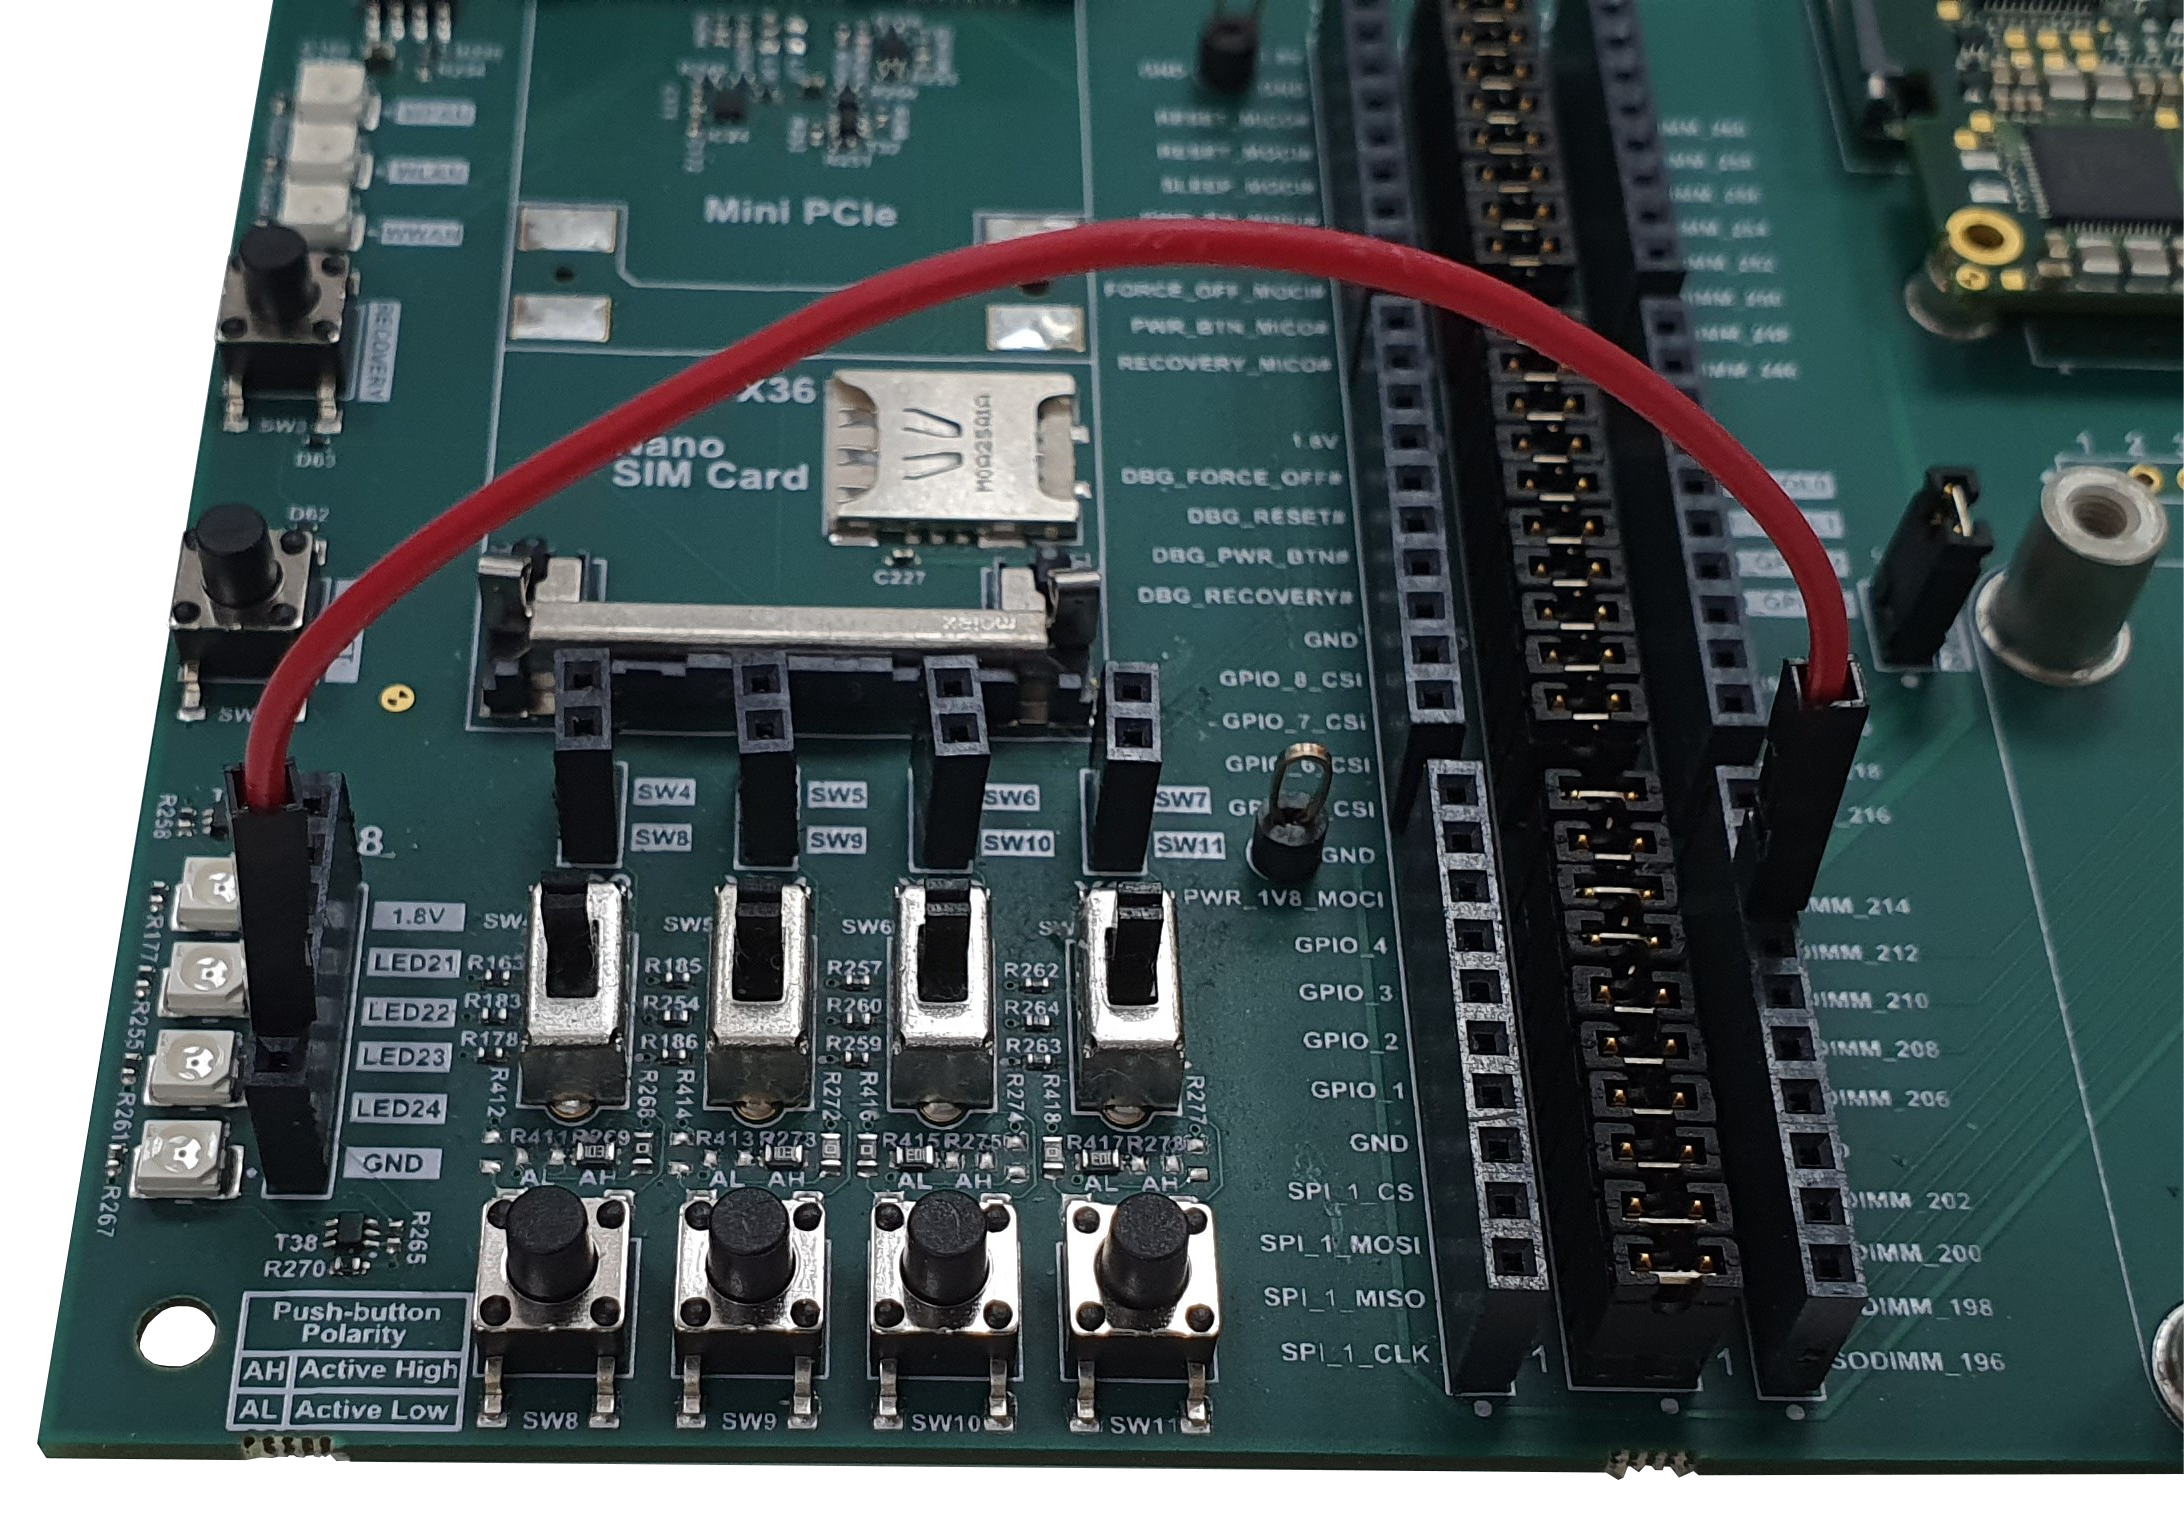
Note that the GPIO_3 pin of the Verdin iMX8M Plus, accessible via the SODIMM_210 pin on the Verdin Development Board, was used. If you have different hardware and are unsure where to begin, refer to the How to Use GPIO on Torizon OS article.
NuGet Packages
While developing your projects, you may need to add .NET packages using the NuGet package manager. It is a way to reuse community code and streamline your application development.
To add .NET packages, run the following command in the VS Code's terminal:
dotnet add package <PackageName>
Note that the provided GPIO sample requires the System.Device.Gpio package, which offers methods for accessing and controlling GPIO pins. The following video shows this package addition.
Package Dependencies
You can search for package dependencies on the NuGet page. However, depending on the package's documentation, you may not find all its dependencies listed. In such cases, you can run your program and check for any missing libraries.
For example, if we try to run our GPIO sample with no additional setups, we may get the following error:
Libgpiod Driver not installed
This implies that we need to add the libgpiod-dev library to our project. For detailed information, refer to the Add Dependencies and Tools to Existing Projects article.
Peripheral Access
Projects that utilize peripherals require additional configuration. You need to specify the devices that the application container will access. On Linux-based OSes like Torizon OS, devices are available in user space through the /dev directory. For more information, see Peripheral Access Overview.
There are two methods to make devices accessible within the container:
- Add flags to the Docker Run command.
- Create a Docker Compose file.
The Torizon IDE extension manages the creation and running of containers. Additionally, it automatically creates the docker-compose.yml file in the project directory, so you only need to add the necessary parameters.
For the provided GPIO sample, the following parameters were added to the docker-compose.yml file.
Docker Compose file for the GPIO Sample
version: "3.9"
services:
  gpio-dotnet-debug:
    build:
      context: .
      dockerfile: Dockerfile.debug
    image: ${LOCAL_REGISTRY}:5002/gpio-dotnet-debug:${TAG}
+   volumes:
+     - '/dev:/dev'
+   device_cgroup_rules:
+     - 'c 254:* rmw'
    ports:
      - 2222:2222

  gpio-dotnet:
    build:
      context: .
      dockerfile: Dockerfile
    image: ${DOCKER_LOGIN}/gpio-dotnet:${TAG}
+   devices:
+     - '/dev/gpiochip0'
Command-Line Arguments
Depending on the development phase of your project, whether you are debugging or have already built a container image, the process of sending arguments to applications varies. For detailed information, refer to the Pass Arguments to Containerized Applications article.
Deploy and Debug
After configuring your project, you can deploy and debug it. Since this is common to all languages supported by the extension, please refer to the Deploy and Debug article.
Next Steps
With the Torizon IDE extension, you can also:
- Create a release container image (optimized image with no debugging configurations and dependencies).
- Push images to container registries.
- Push applications to Torizon Cloud.
For more information, see Build, Test and Push Applications for Production.
Troubleshooting
Configured debug type 'coreclr' is not supported.
CoreCLR is the execution engine in .NET Core. If not installed on VS Code, the following error occurs:
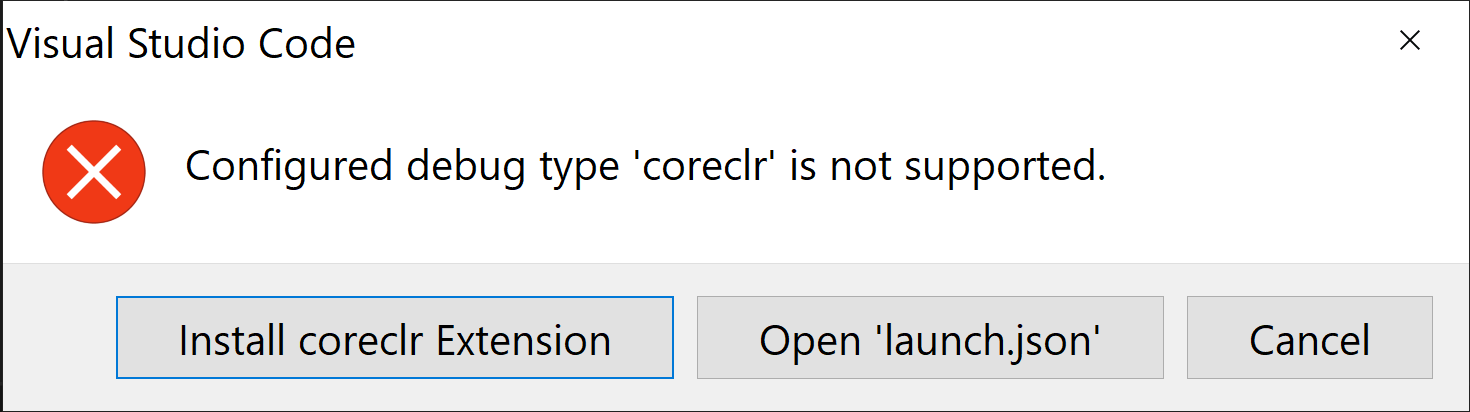
To solve this error, click Install coreclr Extension.
A fatal error occurred. A file not being found, such as fxr, libhostfxr.so, or FrameworkList.xml.
This error is generated by mixed packages and occurs because of conflicts between Microsoft and Ubuntu repositories. To solve this error, configure your package manager to ignore the .NET packages from the distribution's repository.