Build and Run your First Python Application
Overview
When it comes to Linux development, it is possible to choose several IDEs, workflows and programming languages for development. Aiming to simplify your development experience Toradex provides Torizon OS IDE integration with Visual Studio Code for Windows and Linux PCs, and Visual Studio for Windows PCs.
In this module you will:
- Use the Visual Studio Code IDE.
- Develop your application using the Torizon IDE Extension.
- Deploy it to the target module and debug it remotely from your development PC.
Typographic Conventions
Throughout the Toradex documentation, the following typographic conventions are used:
$ (dollar sign) Command in the host computer (e.g. your PC)
$ Command in your PC
$$ (double dollar sign) Command in a container in the host computer (e.g. your PC)
$$ Command inside a container in your PC
# (hashtag) Command in the target device/board (e.g. Linux terminal)
# Command in the target board, e.g. Colibri iMX6
## (double hashtag) Command inside a container in the target device (Torizon)
## Command inside a container in Torizon
> (greater-than sign) Command in the bootloader (e.g. U-Boot console)
> Command in the Bootloader
No symbol: Command output
$ Command waiting for output
Output
Prerequisites
For this lesson:
- Visual Studio Code
- Python extension for Visual Studio Code
- Having a Torizon OS target device connected as instructed in the previous lesson.
Step 1
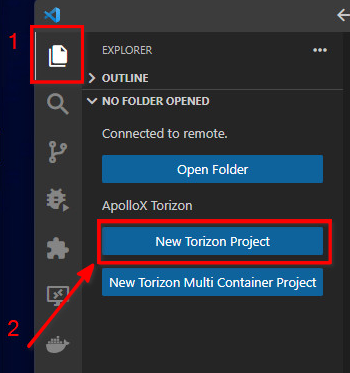
Create a new project: open a new VS Code window (Ctrl + Shift + N). Click the Explorer icon (1) on the left menu bar (Activity Bar). There will be two buttons for creating projects. Click New Torizon Project (2).
Step 2
Select a template: you will see a new tab with a wizard, listing various templates that can be used for the project creation. Click on Python 3 Console Application.
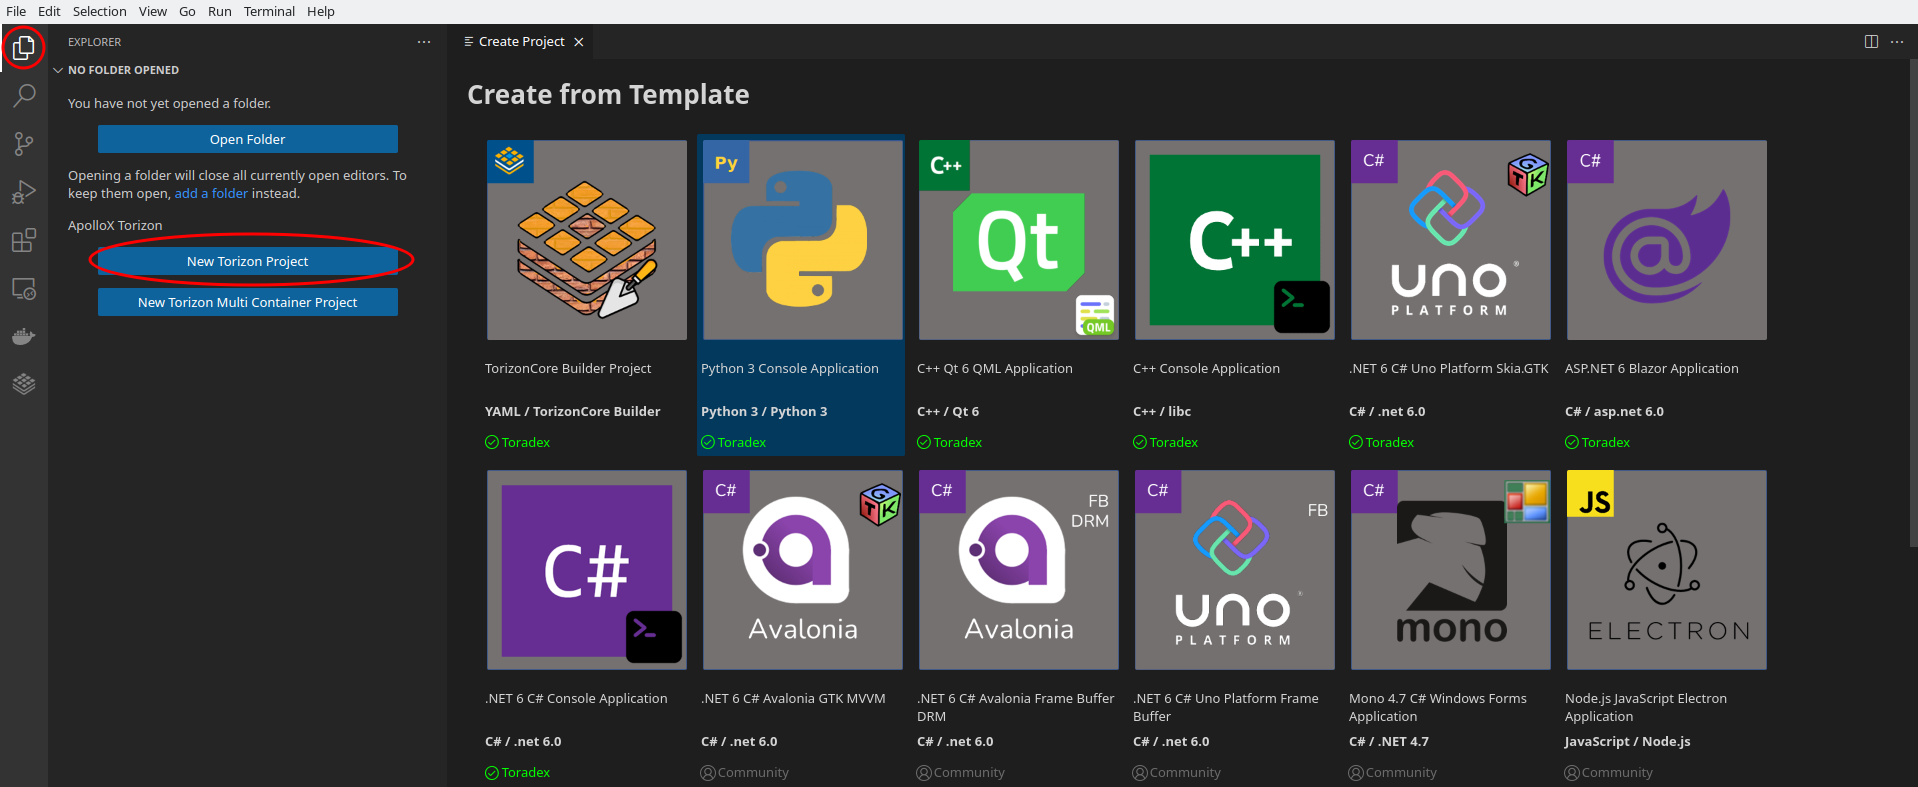
Note that there are Toradex-supported templates and community-supported templates. Toradex-supported templates are templates with development stacks commonly used by customers of the Torizon Cloud. These templates are maintained by the Toradex Torizon team and pass through a quality assurance process. The quality and maintenance of community templates are the sole responsibility of their contributors.
Step 3
Give a name for your project and a name for the container that will run on the module. As an example, we will name it quickstart for both cases.
Do not forget to choose a convenient path where your project will be saved. Once finished, click Create Project.
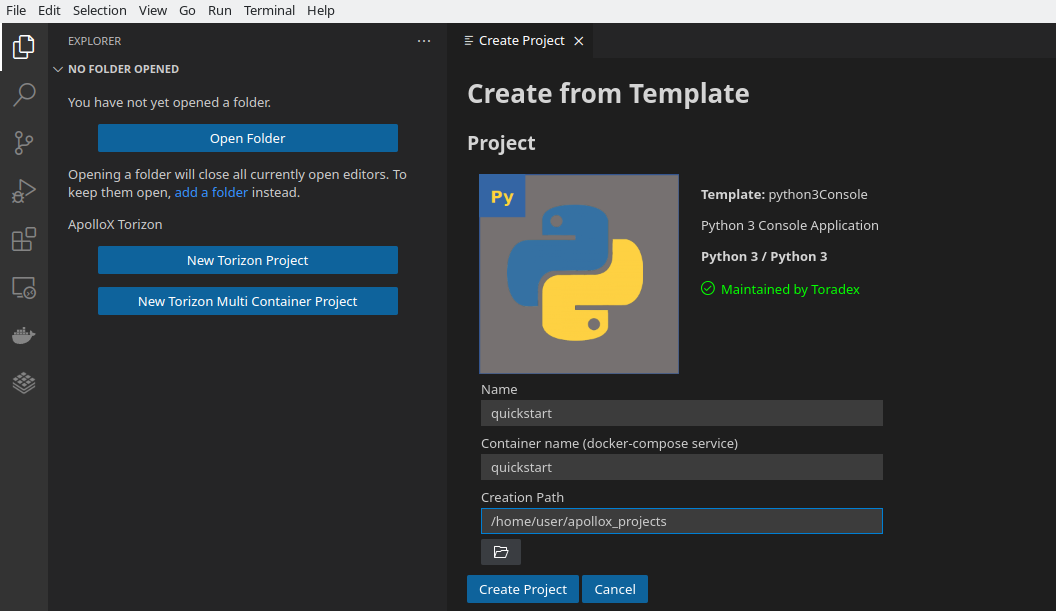
This will trigger the creation project task with the user inputs. You can monitor its process by checking the terminal at the bottom of the VS Code interface. Then, the VS Code window will reload using the newly created project as the default workspace.
Step 4
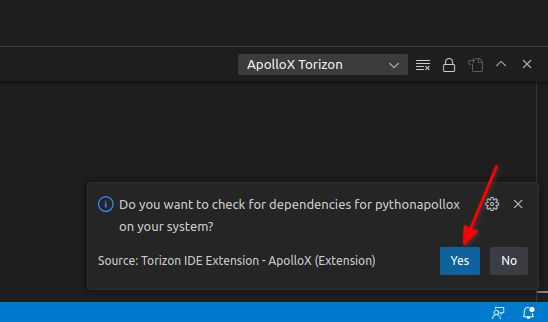
Check for dependencies on your system: during the first load of a new project, the notification Do you want to check for dependencies on your system? will appear.
Click Yes. Then, the extension will check the needed packages to build the project. If there are missing packages, it will install them.
During the first load of a new project, some extra tasks are triggered:
run-torizon-binfmt: it runs the torizon/binfmt Docker image to register foreign architecture interpreters, which is necessary to build containers for arm architecture.
run-docker-registry: it runs a local Docker registry to enable image exchange between the development PC and the target device.
run-share-wsl-ports: This task is specific for Windows users (that need to use WSL 2). By default, services created on a WSL 2 distro are not visible to the external network. This task runs a PowerShell script on the Windows side as administrator, which binds the necessary ports between WSL 2 and Windows to be accessible from the target device.
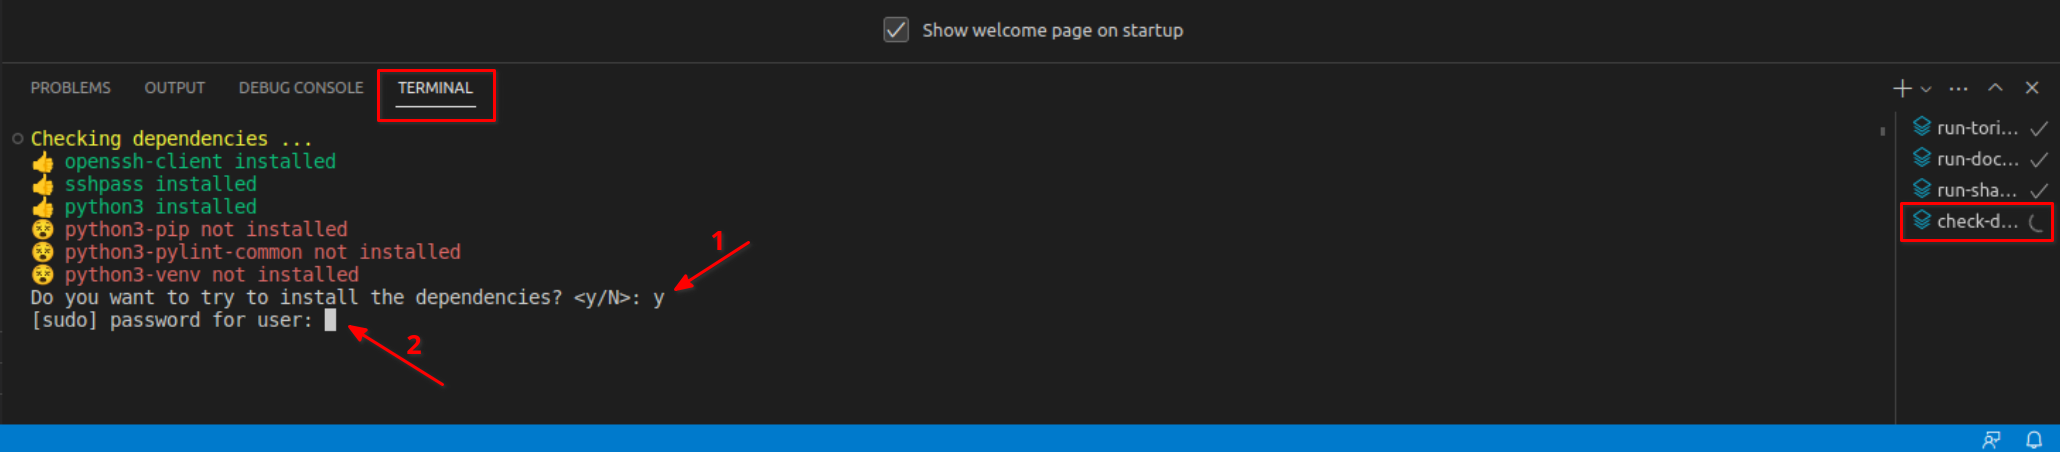
check-deps: This task checks the necessary packages (such as SDK, for example) to build the project. If there are missing packages, it tries to install them.
Step 5
Install dependencies: if any missing dependencies are detected, the check-deps task will try to install them. Confirm the installation and your sudo password will be requested.
Step 6
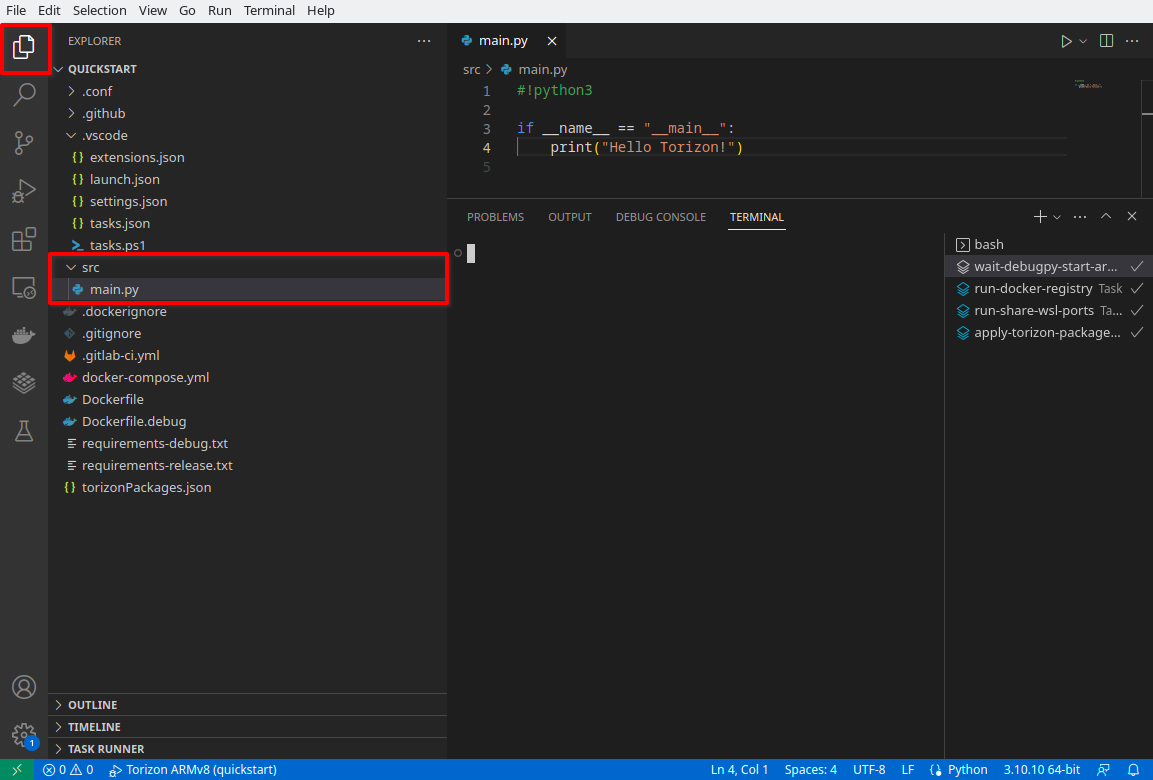
After setup is finished you will see the newly created files loaded in Explorer:
A window will appear and ask if you trust the authors of the file in this folder. Click Yes, I trust the authors.
Open the main.py file and slightly modify it to make our debug fun:
#!python

if __name__ == "__main__":
    counter = 1
    for i in range(5):
        counter = 2*counter
        print("Loop " + str(i) + " - var=" + str(counter))
Step 8
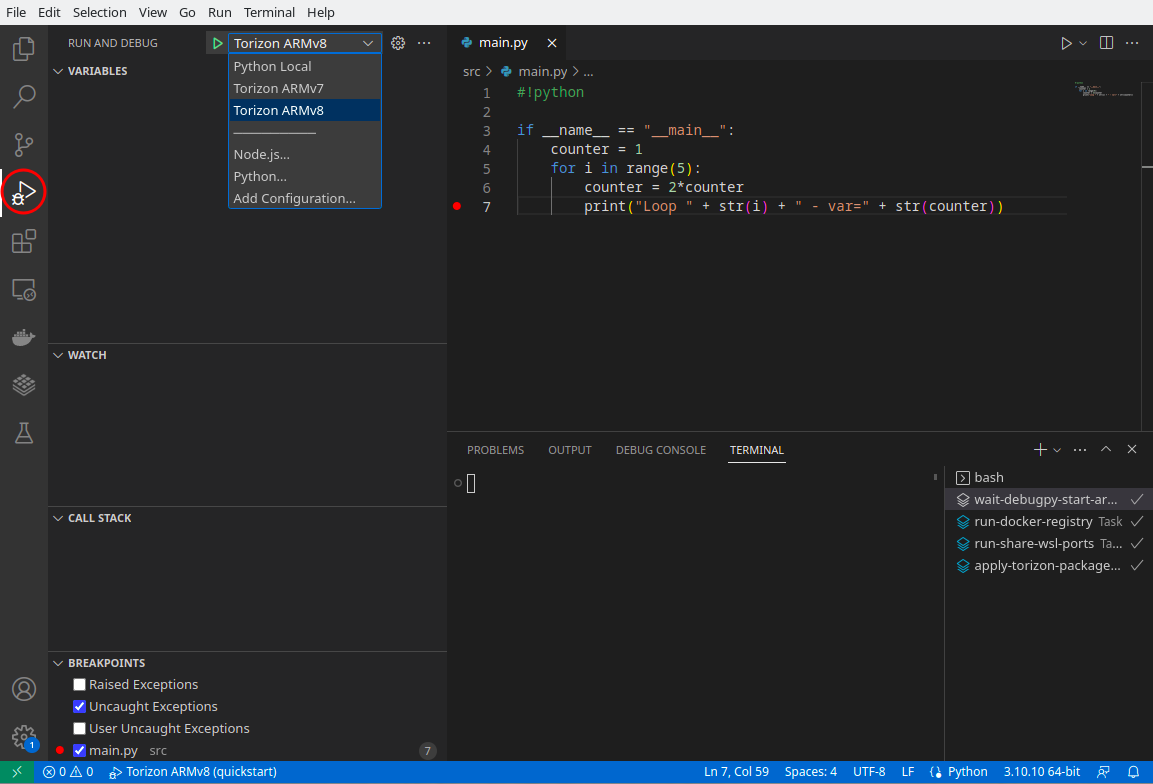
Add a breakpoint on line 7. You just have to click on the beginning of the line:
You may have to enable setting breakpoints anywhere in a file via File > Preferences > Settings > Debug: Allow Breakpoints Everywhere.

Step 9
Let's deploy our simple application on the SoM and debug it. Select the Run and Debug icon in the Activity Bar, then select the corresponding debug option according to your SoM:
- Torizon ARMv7: ARM 32 modules – i.MX6 and i.MX7 SoMs
- Torizon ARMv8: ARM 64 modules – i.MX8 SoMs
Step 10
Press F5 to start the process of deploying your application and debugging. It takes a few minutes when executed for the first time. Shall we grab a coffee?
When the process finishes, the Visual Studio Code will automatically switch to the Debug option on the vertical menu on the left and your code will stop on line 7 where you have inserted the breakpoint:

Step 11
Press F5 or click the Continue icon to run until the next breakpoint and so on. You can see that the values of variables change as you go, and the output of code is printed to the Debug Console:
It is interesting to highlight that you are doing remote debugging, which means that the application is running on the board, not on your development PC!
Takeaway
As the Quickstart is a step-by-step guide, the current lesson is only a brief introduction to application development with Torizon. You can use the Torizon IDE Extension with Visual Studio Code to write your application in C/C++, C#/.NET or Python, or even create your own project templates using other libraries and/or programming languages.
You may not have realized, but after these steps you have created a fully containerized application that, as Torizon OS, is ready for production. One of the many advantages of Torizon is that your development workflows are the same as the production workflows. The same artifacts produced during development are used for production programming and updates.
FAQ
Where do I find more information about the Torizon Visual Studio Code support for Python?
Check out the Torizon IDE Extension Documentation.
Where do I find more information about Visual Studio Code in general?
Check out the Visual Studio Code Official Documentation.
Something went wrong while following the steps from this lesson. How do I proceed?
You can report your issue through the Toradex Community.