Install the Build Environment for Torizon
Overview
When it comes to Linux development, it is possible to choose several IDEs, workflows and programming languages for development. Aiming to simplify your development experience Toradex provides Torizon OS IDE integration with Visual Studio Code for Windows and Linux PCs.
In this module you will:
- Setup the Visual Studio Code IDE for using with Torizon IDE Extension.
Typographic Conventions
Throughout the Toradex documentation, the following typographic conventions are used:
$ (dollar sign) Command in the host computer (e.g. your PC)
$ Command in your PC
$$ (double dollar sign) Command in a container in the host computer (e.g. your PC)
$$ Command inside a container in your PC
# (hashtag) Command in the target device/board (e.g. Linux terminal)
# Command in the target board, e.g. Colibri iMX6
## (double hashtag) Command inside a container in the target device (Torizon)
## Command inside a container in Torizon
> (greater-than sign) Command in the bootloader (e.g. U-Boot console)
> Command in the Bootloader
No symbol: Command output
$ Command waiting for output
Output
Prerequisites
For this Quickstart Guide:
- Host machine with Linux OS - Ubuntu 22.04.
- Successfully completed the previous lessons from this guide.
Preparation
-
Having the build environment for Torizon configured. Please follow the specific instructions.
-
Having Visual Studio Code installed.
dangerYou have to install the Visual Studio Code from its Download page.
The IDE Extension will not work with VS Code installed via Snap or Flatpak!
Step 1
Verify that you have the tooling working before proceeding.
1.1 Check your installation following the official Docker documentation.
Open a terminal, and run:
$ docker --version
This lets you check whether the installation was successful or not.
1.2 Make sure you can run the hello-world image in your Windows machine before going to the next lessons:
$ docker run hello-world
If you have the deprecated IDE Extension installed, please uninstall it before proceeding with the next steps.
Step 2
Click the Extensions icon from the left menu bar in Visual Studio Code.
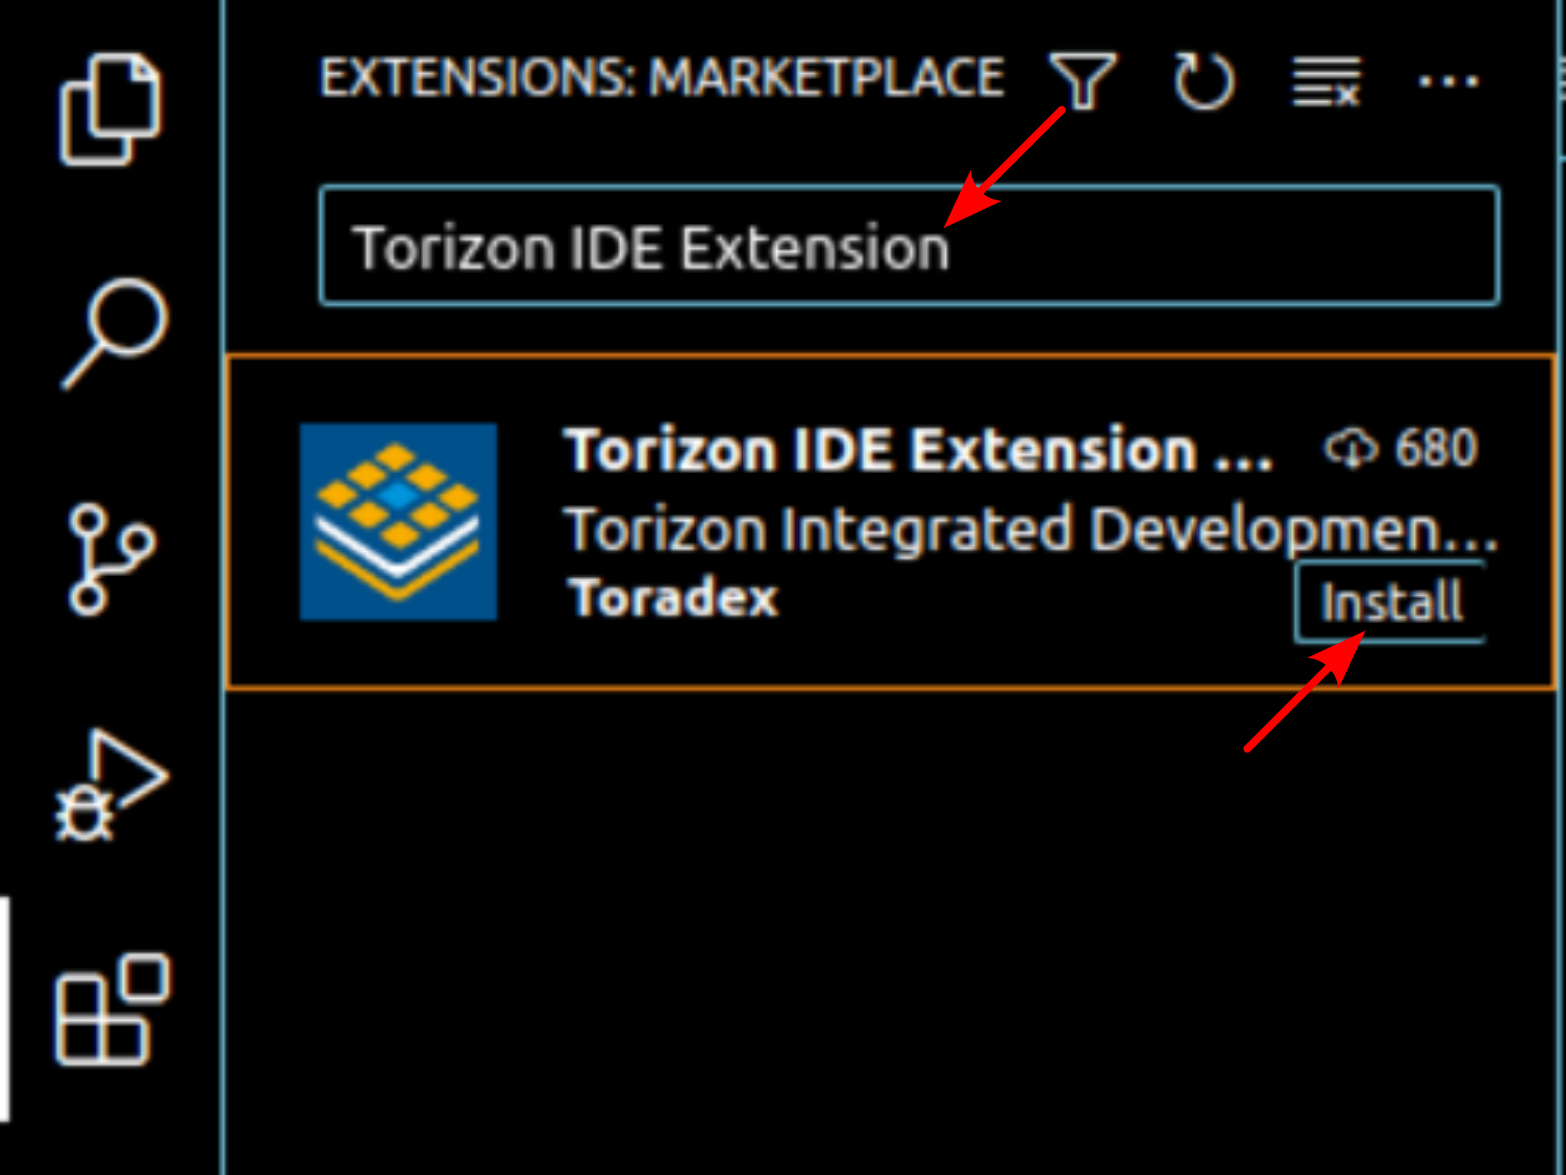
Step 3
Search for Torizon IDE Extension. Click install.
Step 4
Activate the extension: the Torizon icon will appear in the left menu bar. Click on it to activate the extension.
Step 5
Installing dependencies: during the first activation, the extension will check the necessary dependencies. If any missing dependencies are detected, the extension will attempt to install them and prompt you to enter your sudo user password.

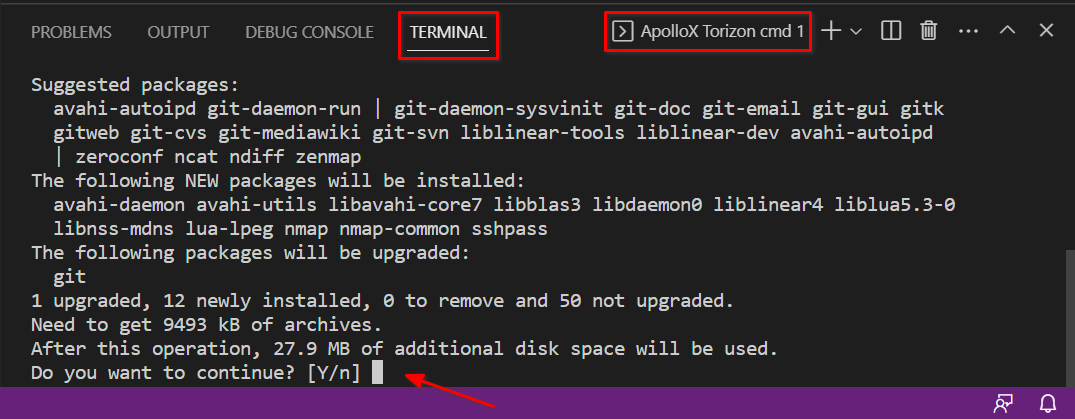
Step 6
Accept the package installation.
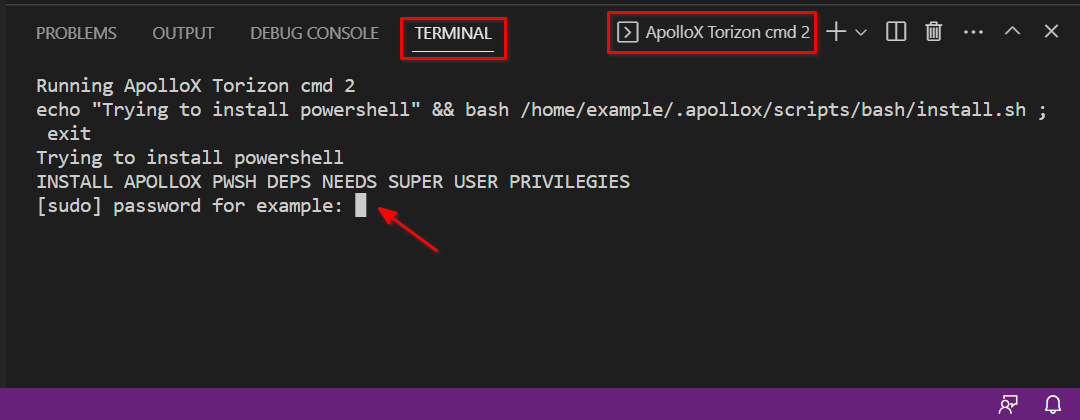
Step 7
Install PowerShell: another terminal will open and try to install PowerShell. Enter your sudo user password.
FAQ
Where do I find more information about Visual Studio Code in general?
Check out the Visual Studio Code Official Documentation.
Something went wrong while following the steps from this lesson. How do I proceed?
You can report your issue through the Toradex Community.