Partner Demo Container - CODESYS
Introduction
The Codesys Demo Container allows you to use your device as a PLC (Programmable Logic Controller) running a basic application. The container is handled entirely via the Codesys IDE, with no need for you to configure the module yourself. This partner demo container is meant for evaluating the technology. It is not suitable for development or production. Learn more about CODESYS Software PLC in our overview article.
The Demo Container is also referred to as the Codesys Runtime or the Codesys Control container. Additionally, this article also shows how to use the Codesys Gateway container, which allows you to use the device itself as the network bridge between the IDE and the Codesys Runtime.
This article covers the basic usage of the Codesys IDE, and it will guide you on how to:
- Deploy and run the Gateway and Codesys Runtime containers to your device through the Codesys IDE
- Create a basic graphical Codesys application
- Host the application through your device, and access it via a web browser
This article complies with the Typographic Conventions for Torizon Documentation.
The CODESYS runtime provided in this guide is meant for demonstration and evaluation purposes and has a limited time to run of 2 hours from the start of the container. Torizon OS currently provides limited support for the CODESYS production licensing mechanism. For production purposes, please contact us.
Prerequisites
-
A Toradex System on Module (SoM) running Torizon OS with Docker (PREEMPT_RT)
To get full performance, CODESYS requires the Linux kernel with the PREEMPT_RT patch applied. The support for PREEMPT_RT on Torizon is in its early stages. For evaluation, you can run this container using the default Torizon OS without PREEMPT_RT at your discretion.
You don't need to apply configurations to your image or run commands on your SoM. This article will show you how to handle the Codesys containers entirely through the Codesys IDE.
Run an Application with the Demo Container
This section shows how to:
- Develop a basic PLC application on Codesys
- Use your device as a Codesys Gateway, which runs the logic of your application and exposes it through an URL.
By the end of this section, you will be able to view and interact with a basic Codesys application through a web browser. This browser can be run on the controller device or on an external device connected to the same network.
Install the Codesys IDE
-
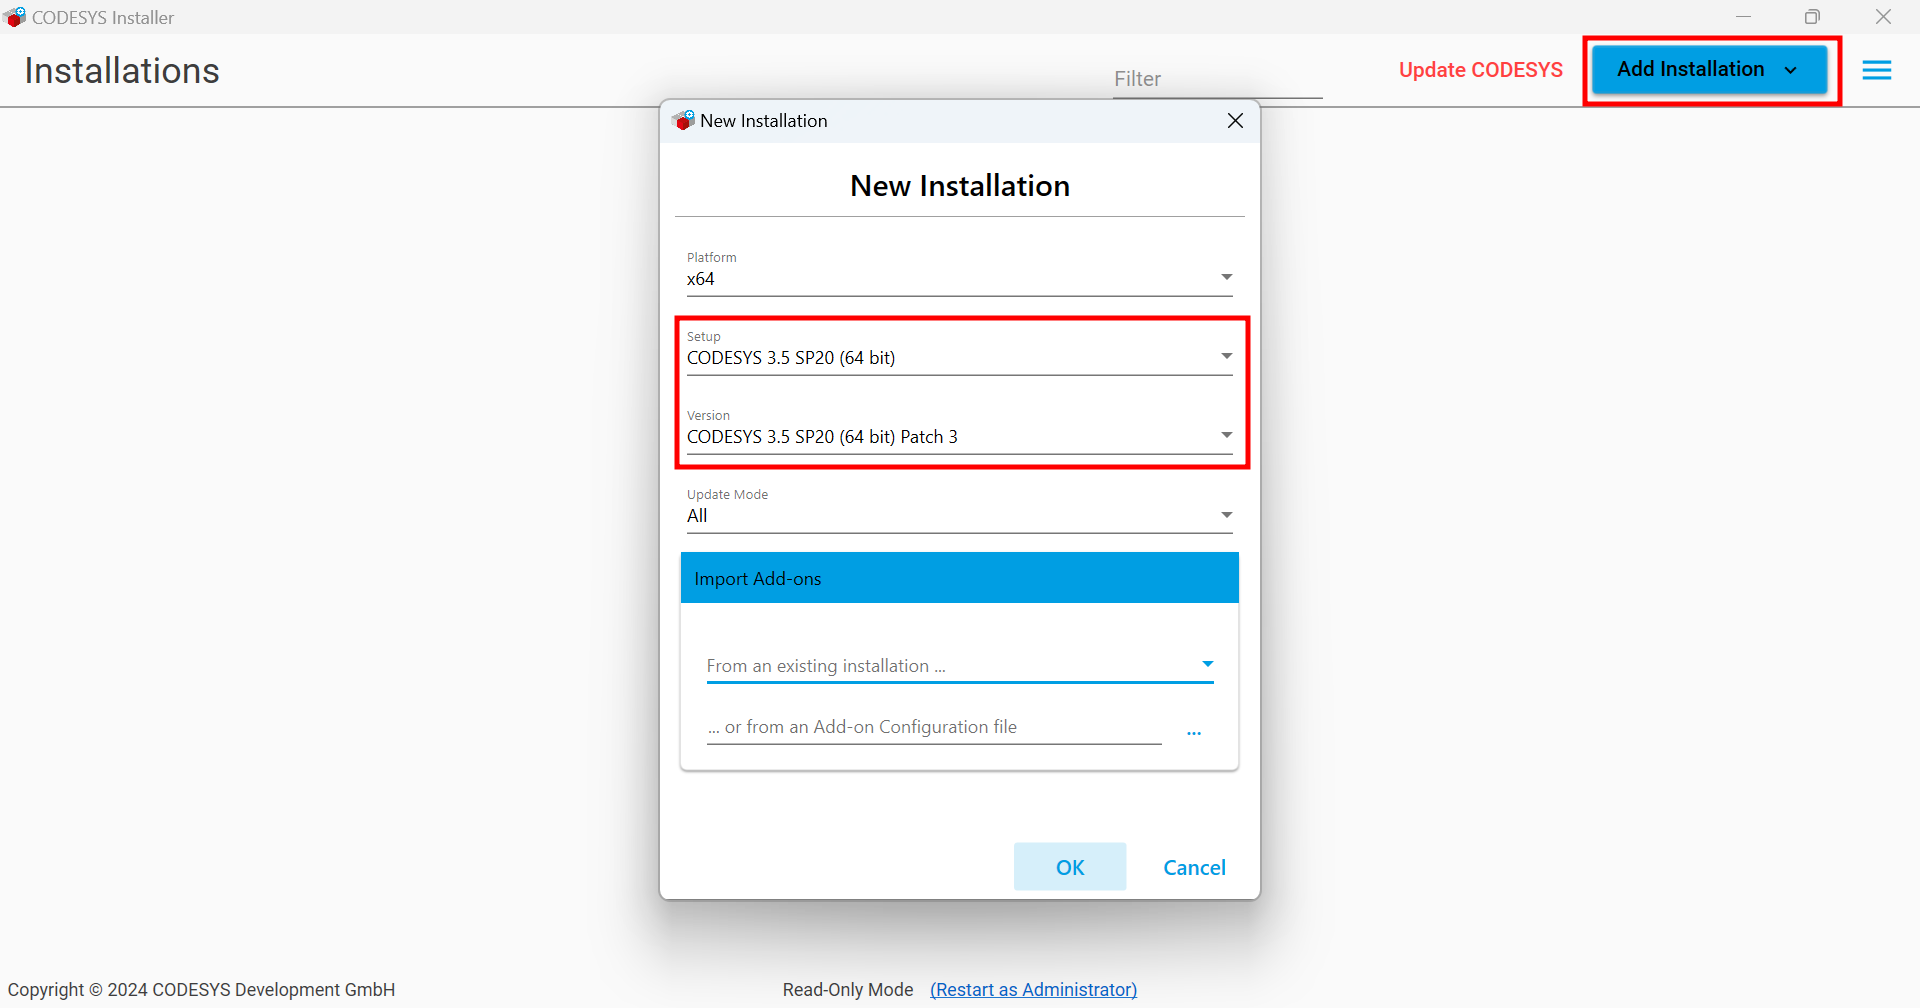
Download the CODESYS Installer from the Codesys store;

-
Install the lastest version of the Codesys Development System;
-
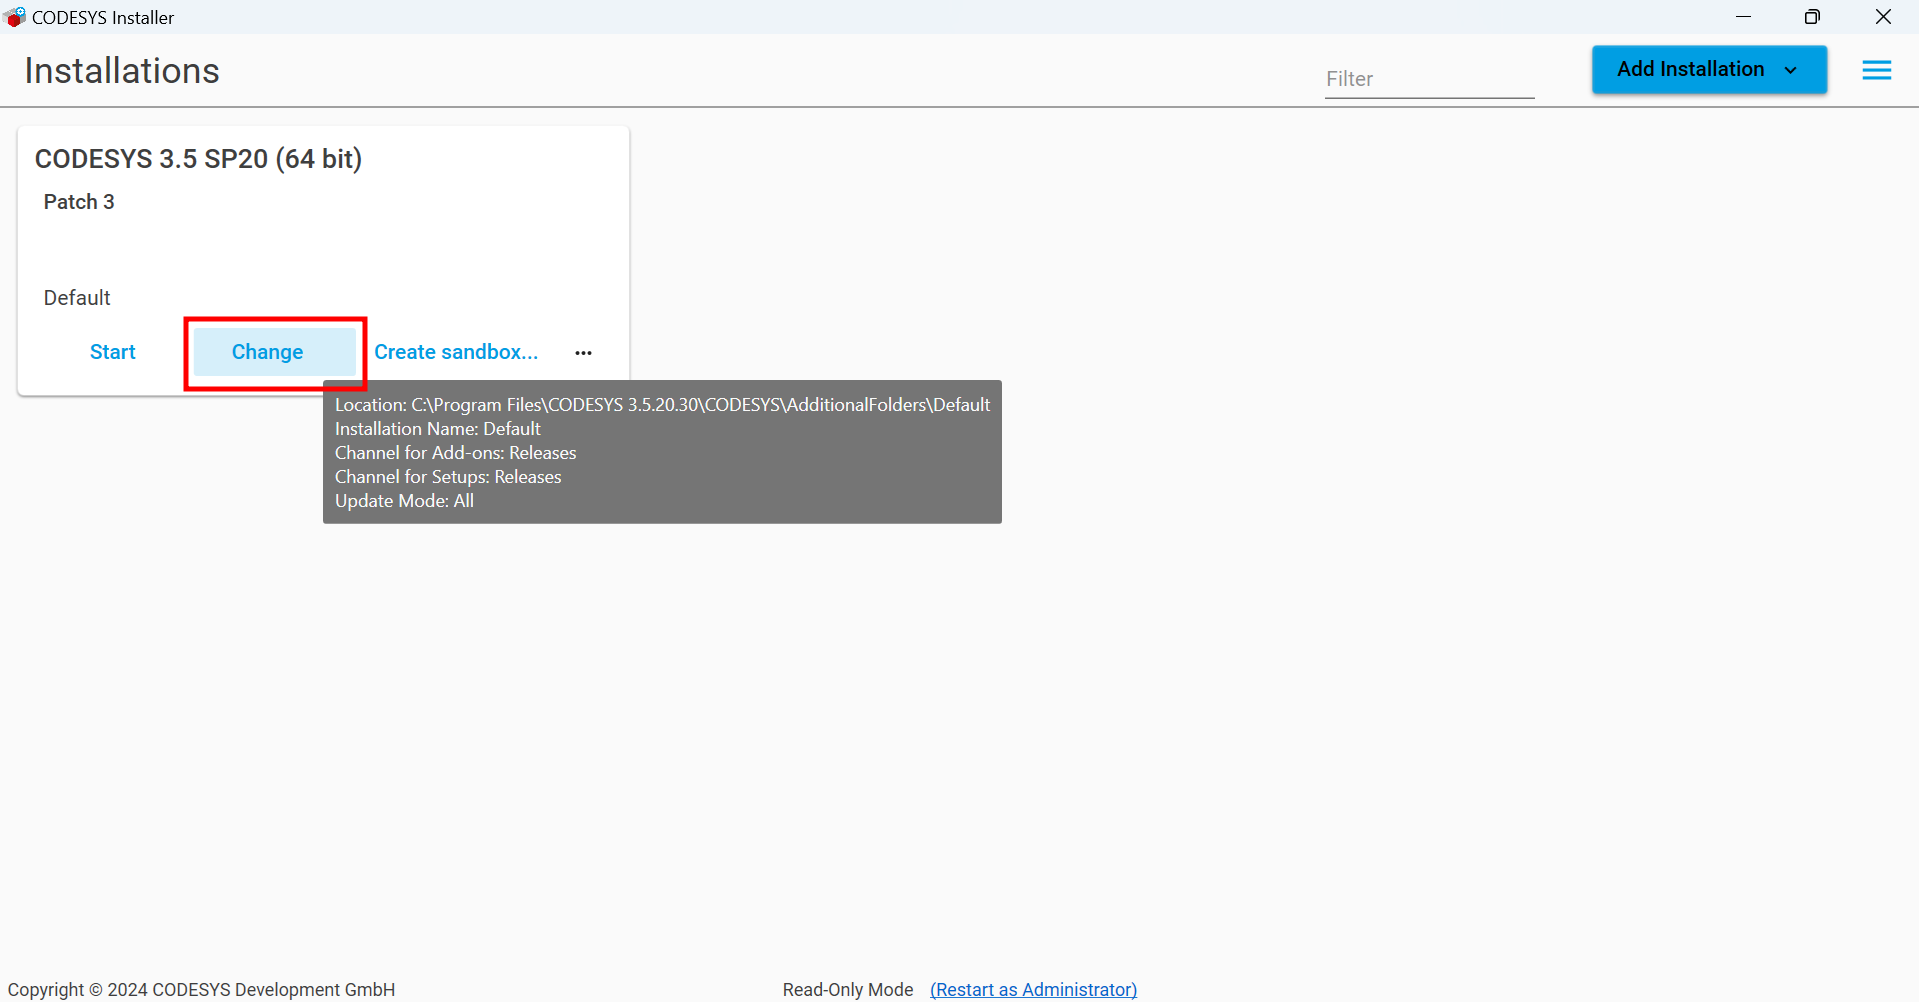
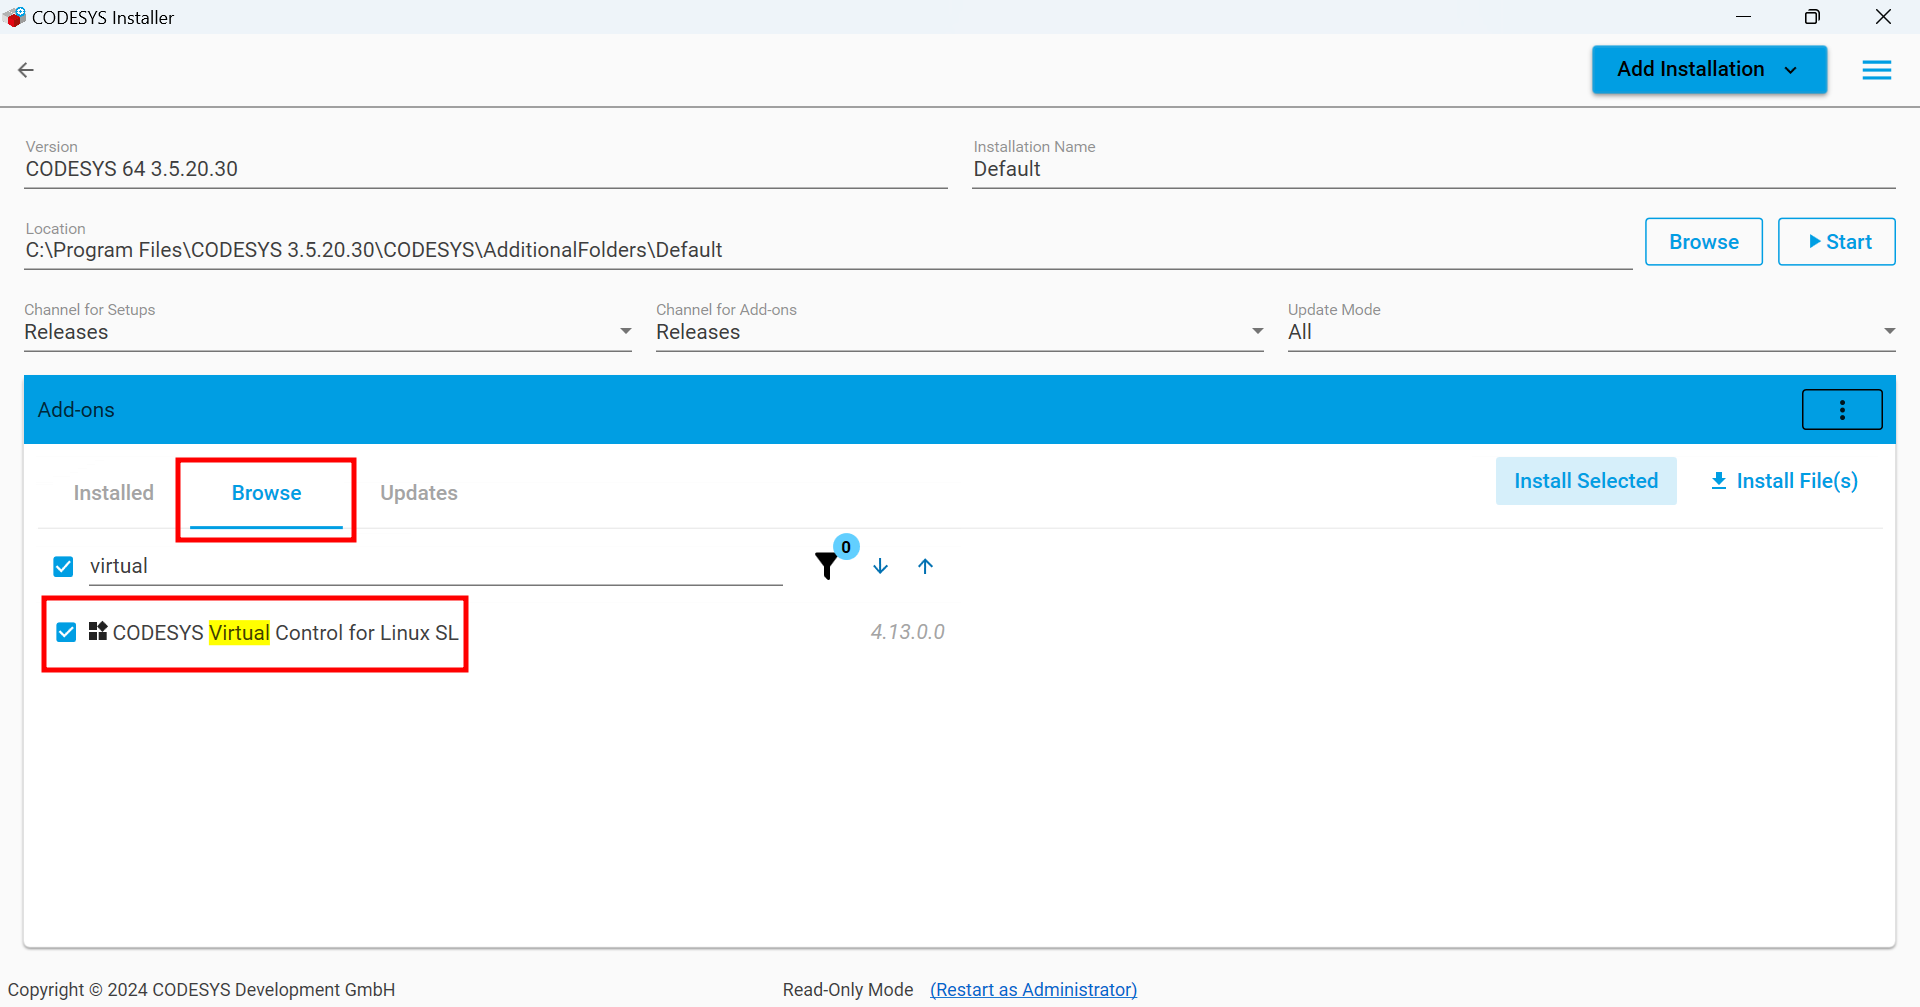
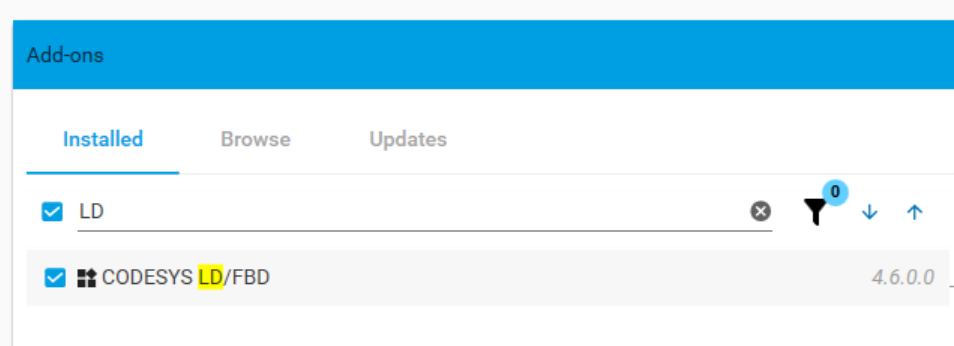
Install the following Add-Ons:
- CODESYS Virtual Control for Linux SL
- CODESYS LD/FBD
Download and Deploy the Demo Container
-
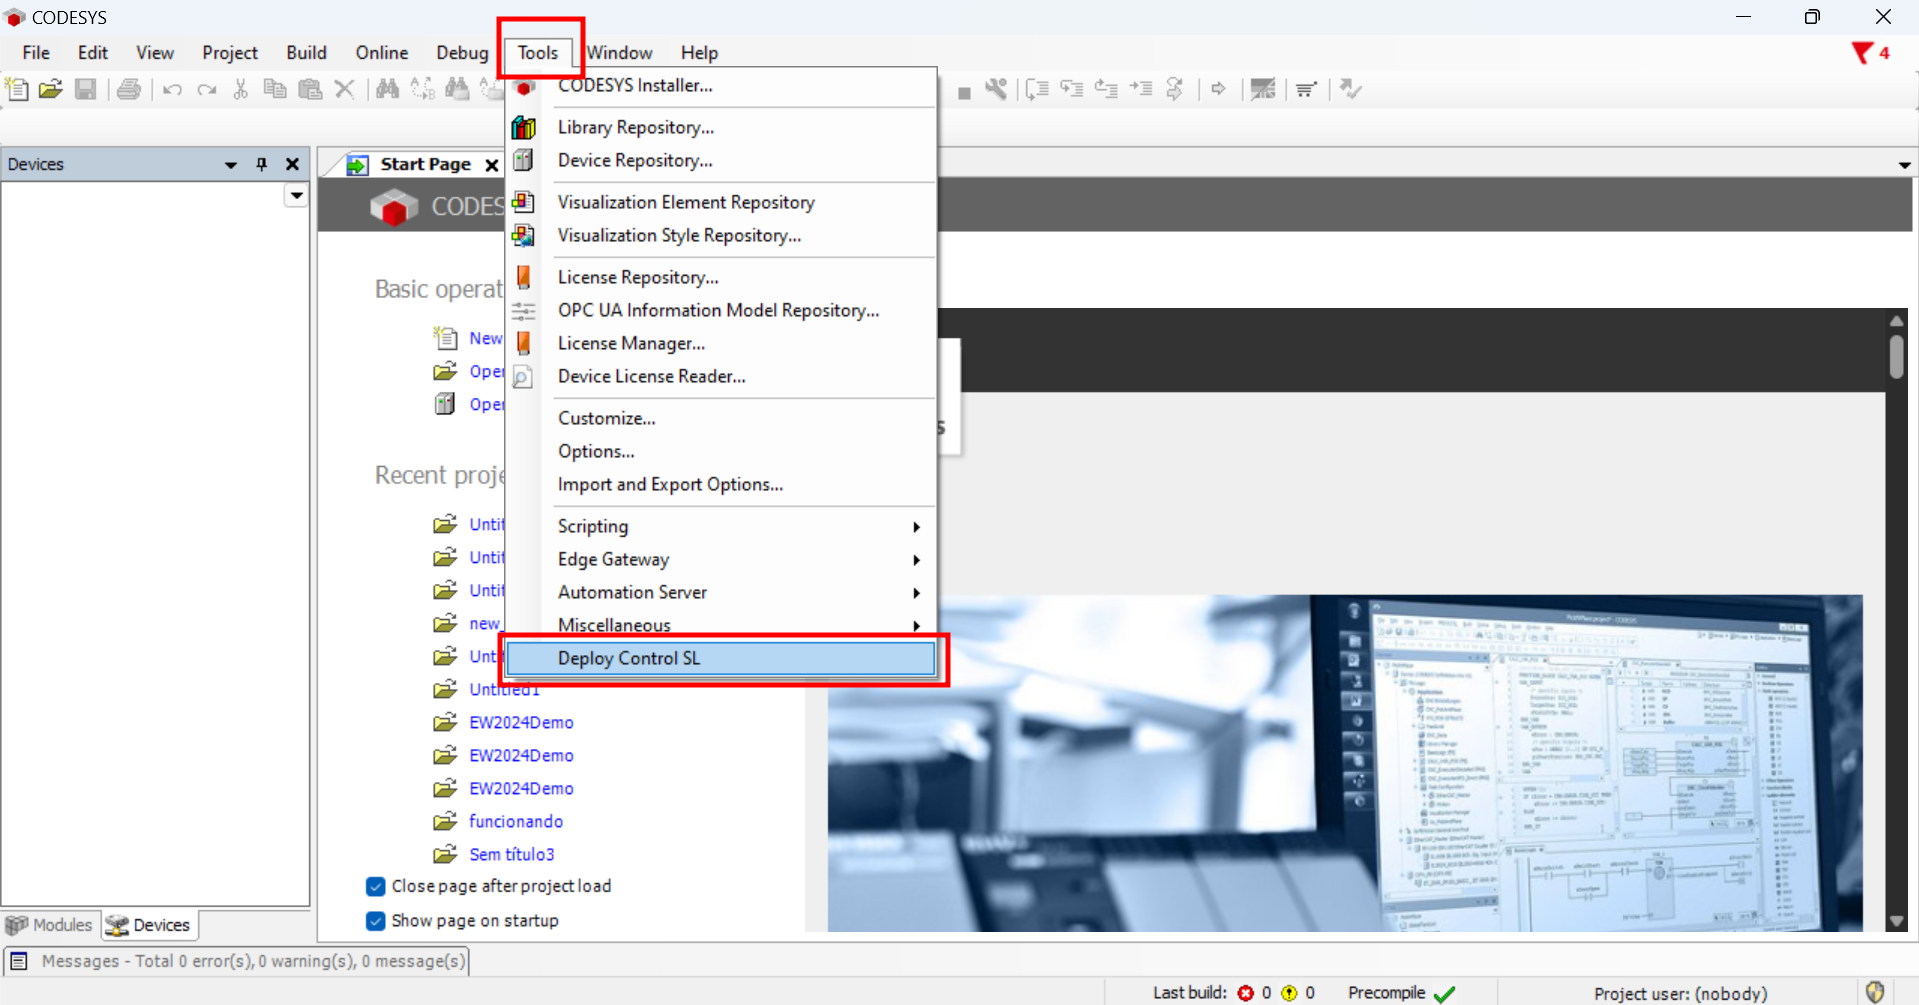
Click the Tools tab and Open the Deploy Control SL Menu;
noteIf you can't see the Deploy Control SL option, check if Virtual Control for Linux SL was installed correctly in step 3.
-
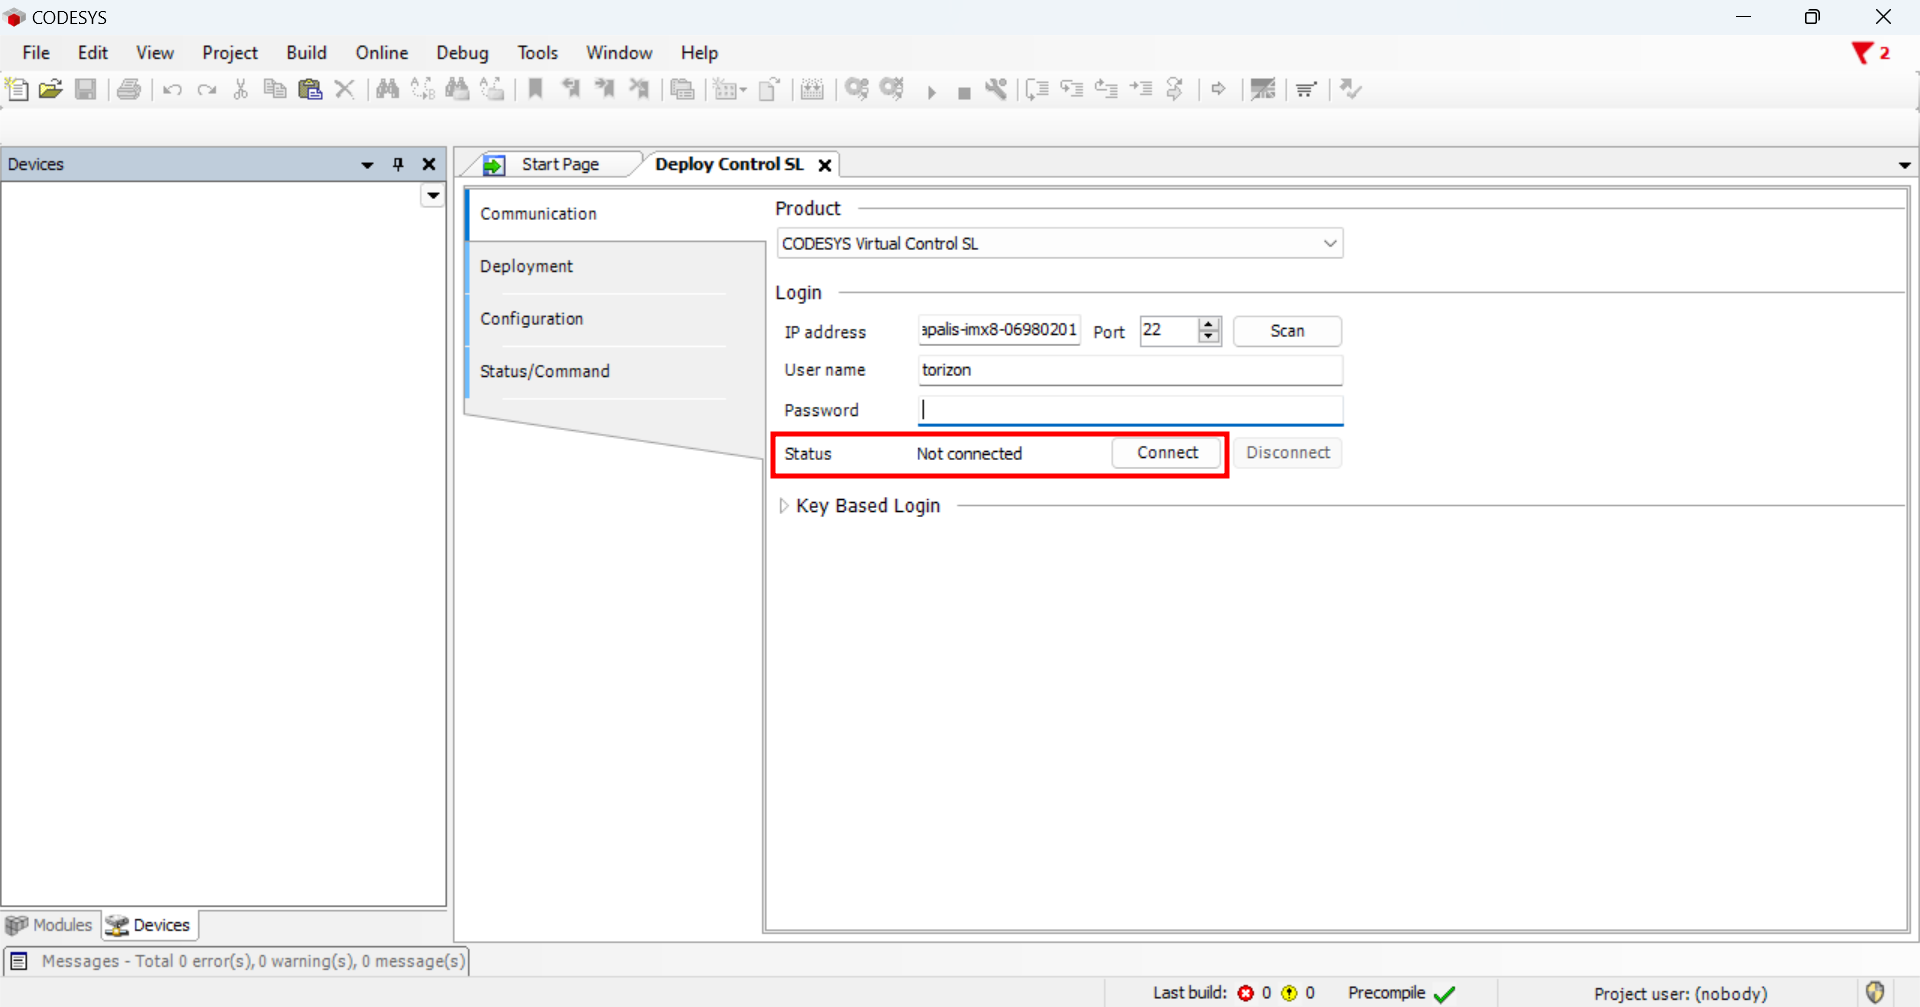
Connect to the Target Device. You can connect using the hostname or the IP address of your target device. You should see the Connected status.
-
In the "Deployment" tab, install the Codesys Virtual Control and Virtual Edge Gateway containers.
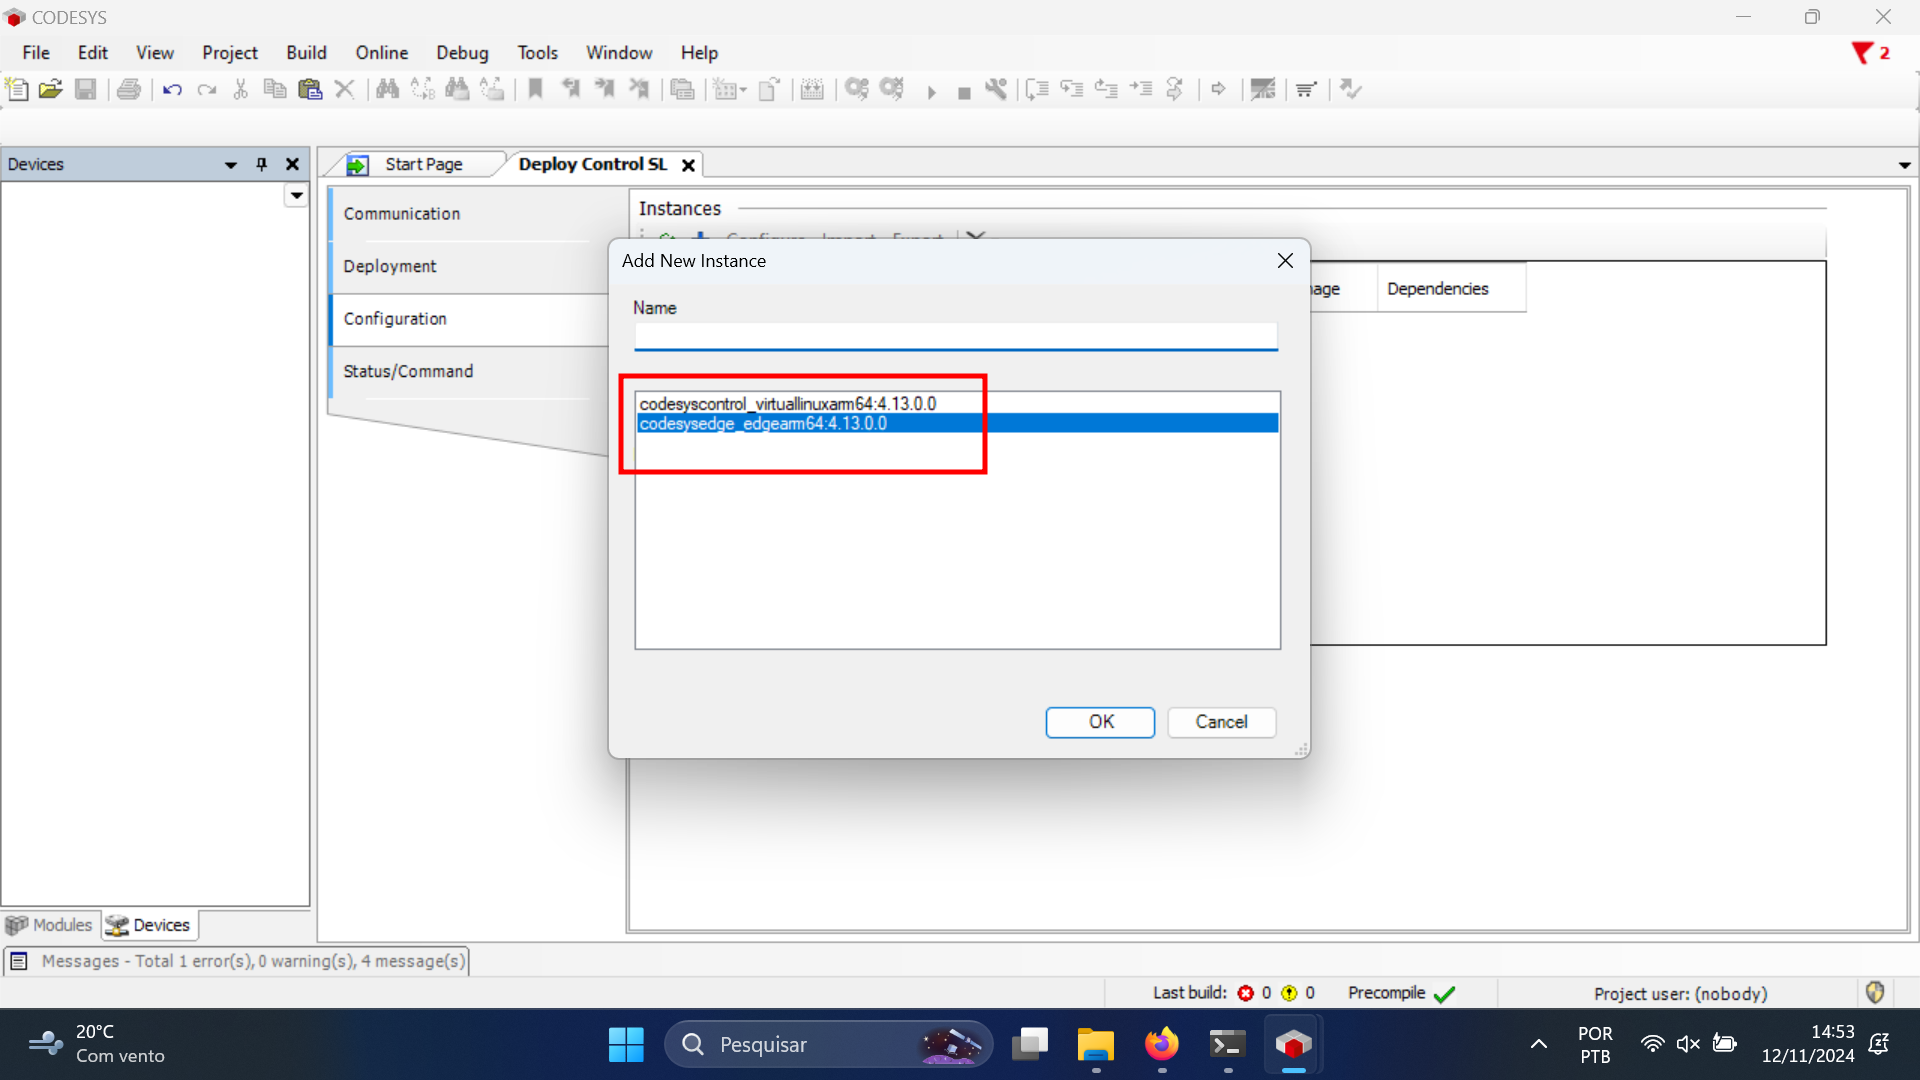
infoThe
edgearmis a Gateway Application and thevirtuallinuxarmis the Runtime Application.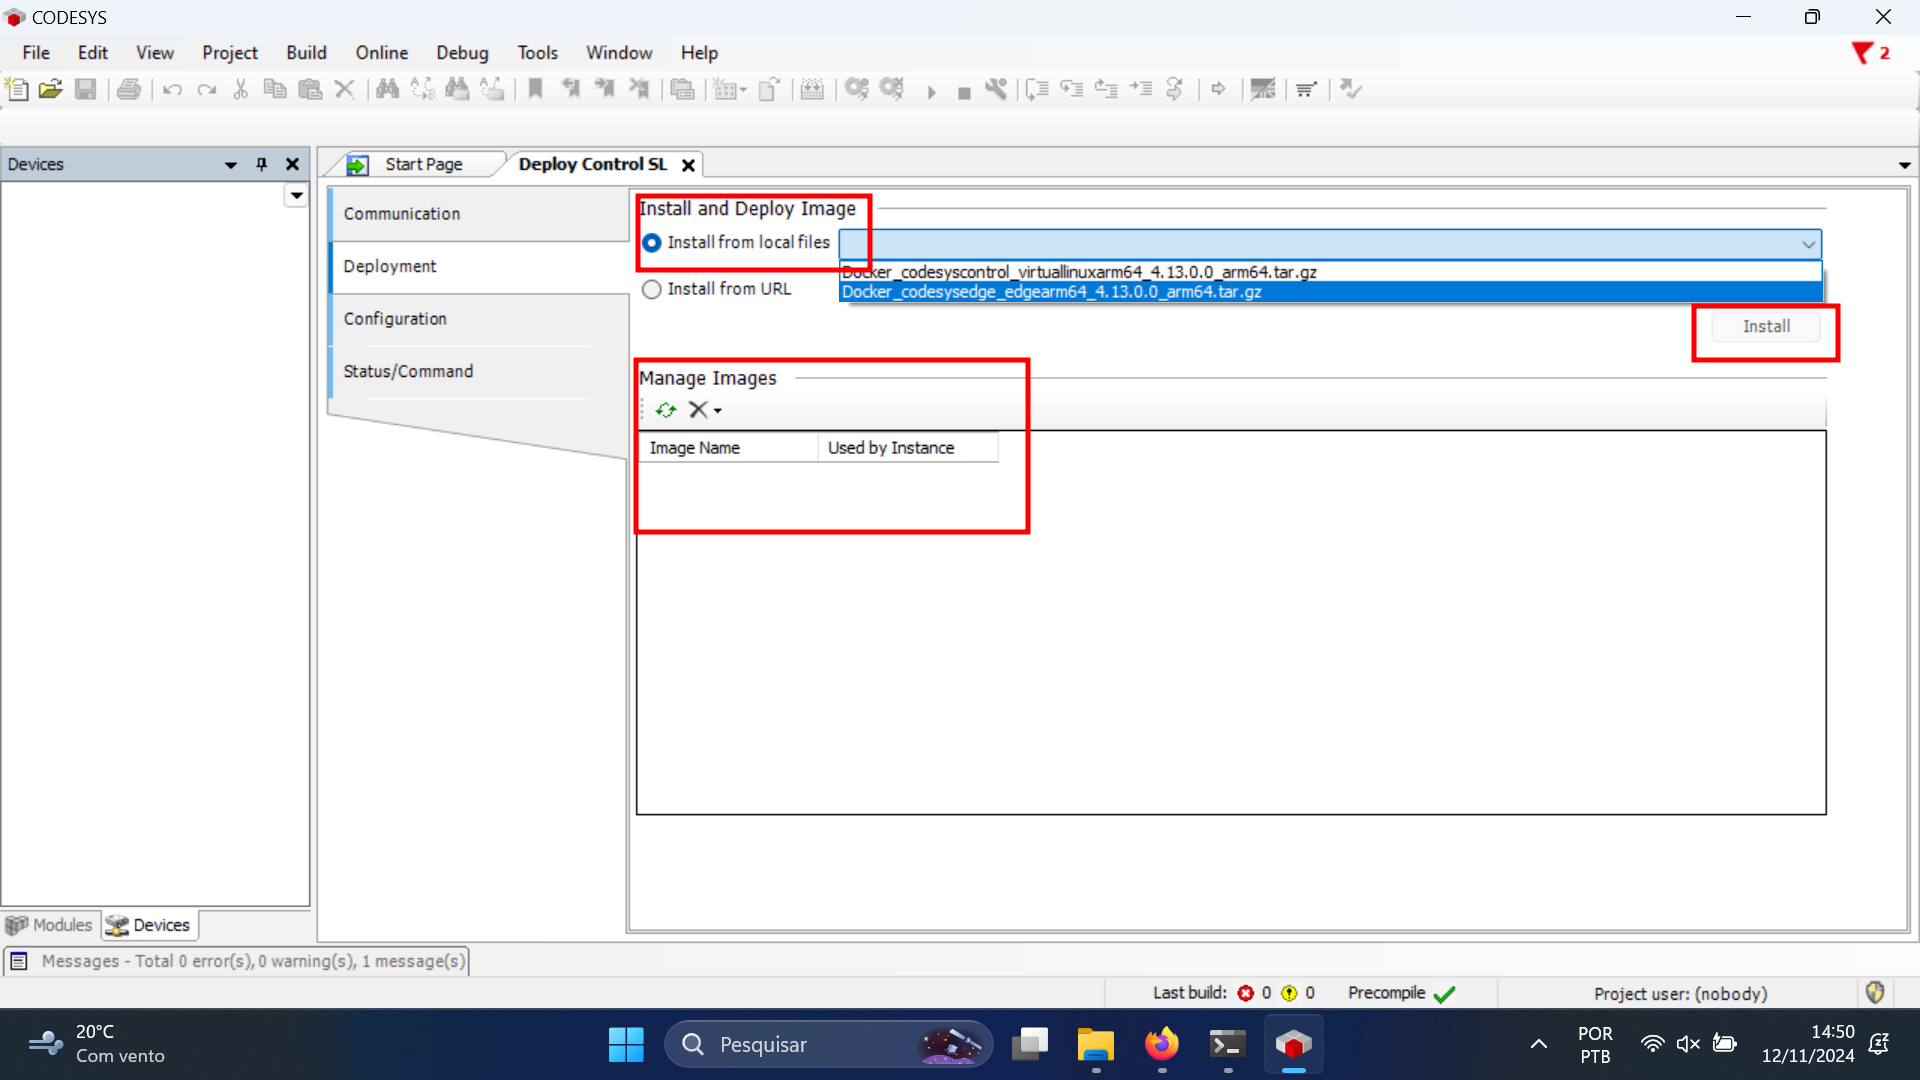
-
In the "Operation" tab, add instances (images) of each of the containers installed in the last step. For this example, we named the images
codesys_gatewayandcodesys_control.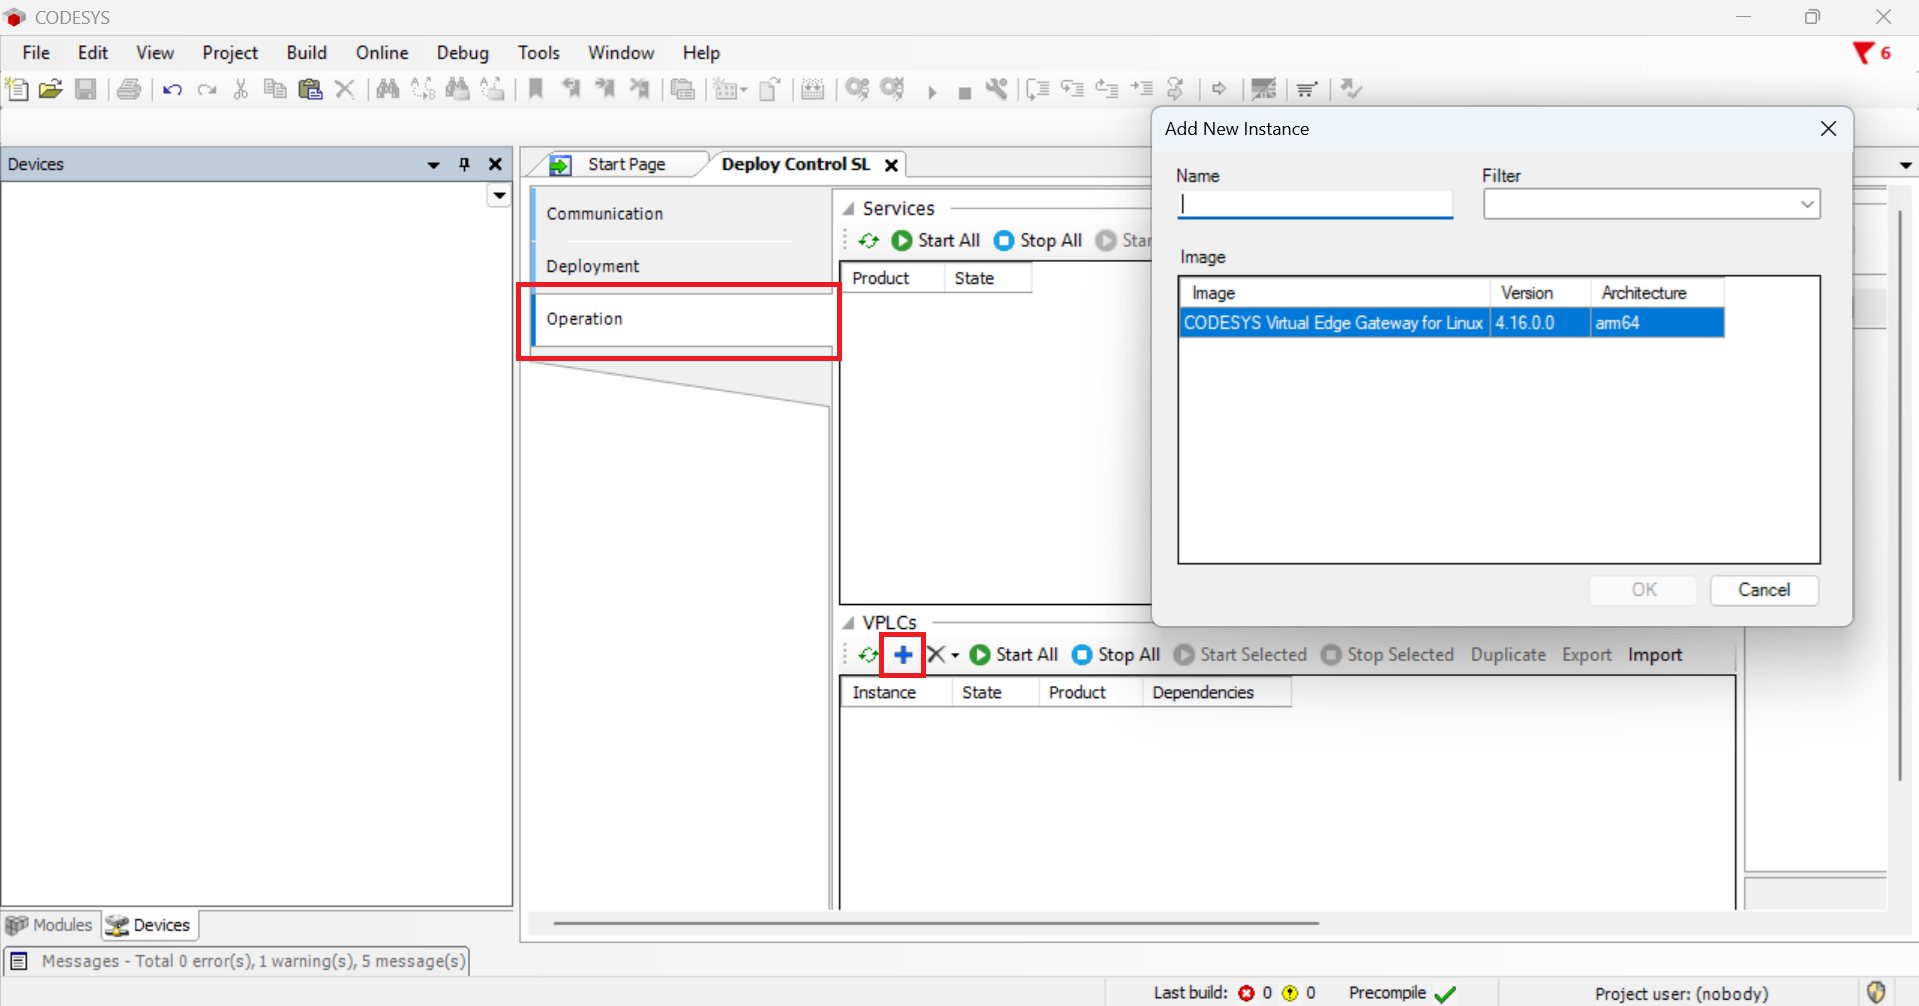
-
Configure the Codesys Control container to expose port 8080 and save. This is the port that you will use to access the application interface at the end of this guide. If you have trouble finding the interface to configure the container, select it, close all other tabs and scroll to the side.
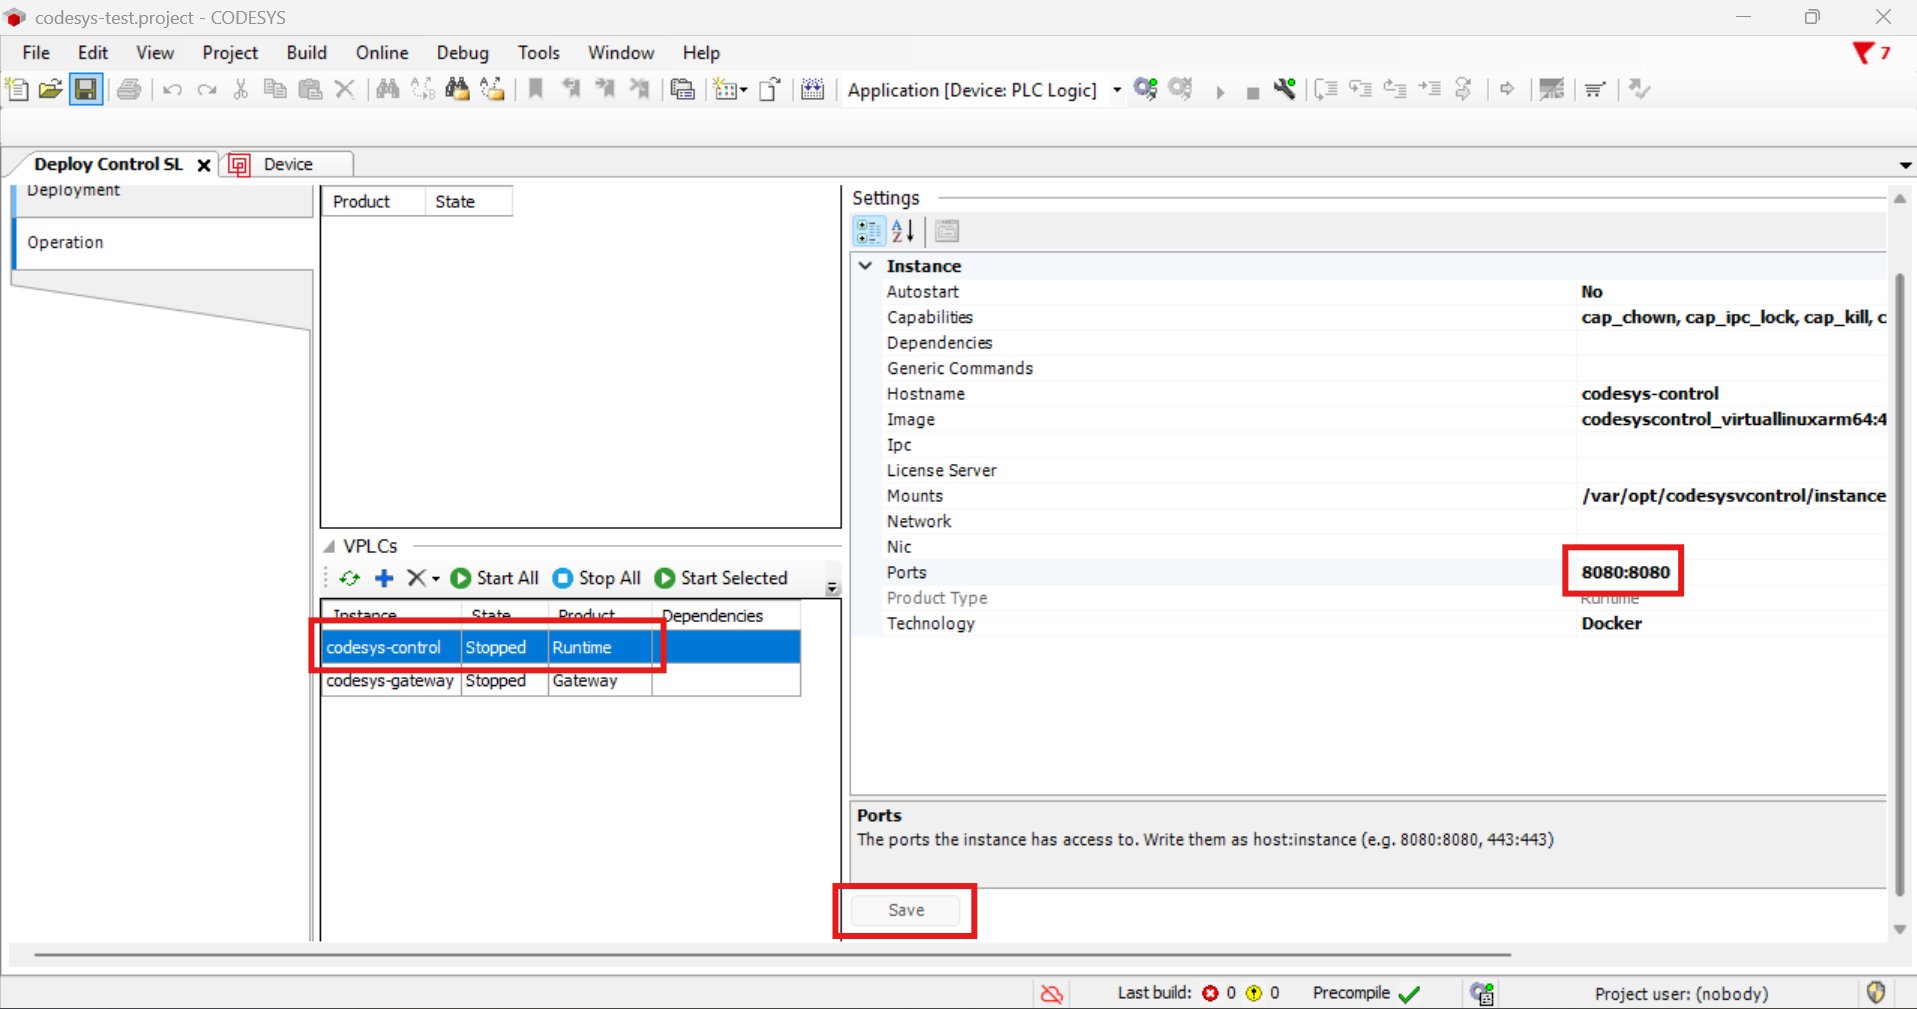
-
Start all the containers. The status on all images should change to "Running":
Create a Basic Application
-
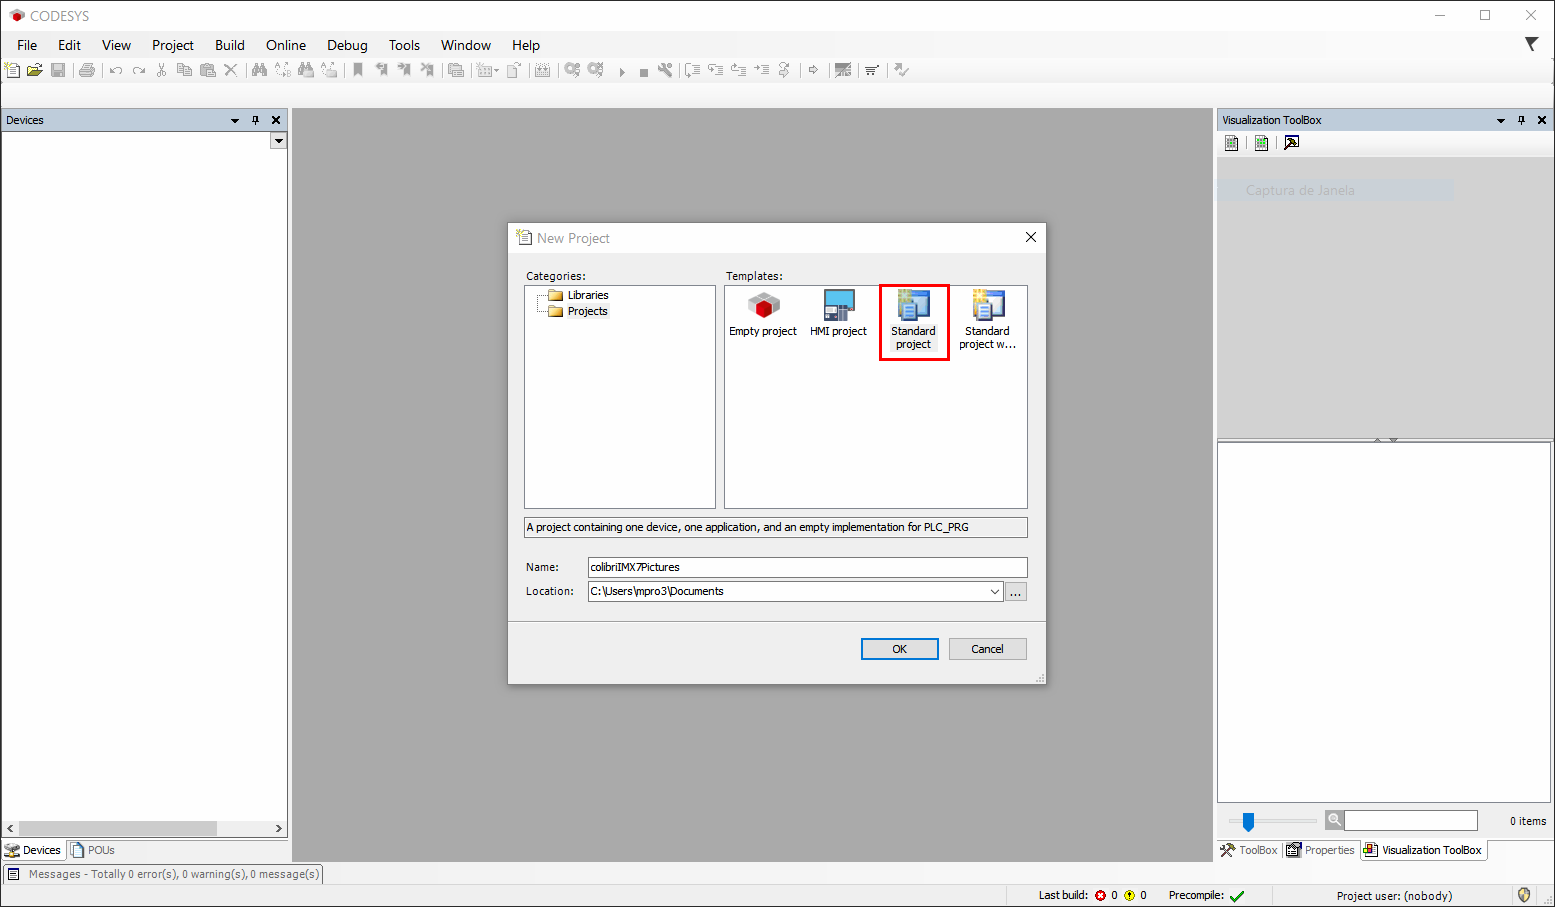
Create a new Standard project, give the project a name and click ok:
-
Select the
Virtual Control for Linux SL. In PLC_PRG select Ladder Logic Diagram (LD):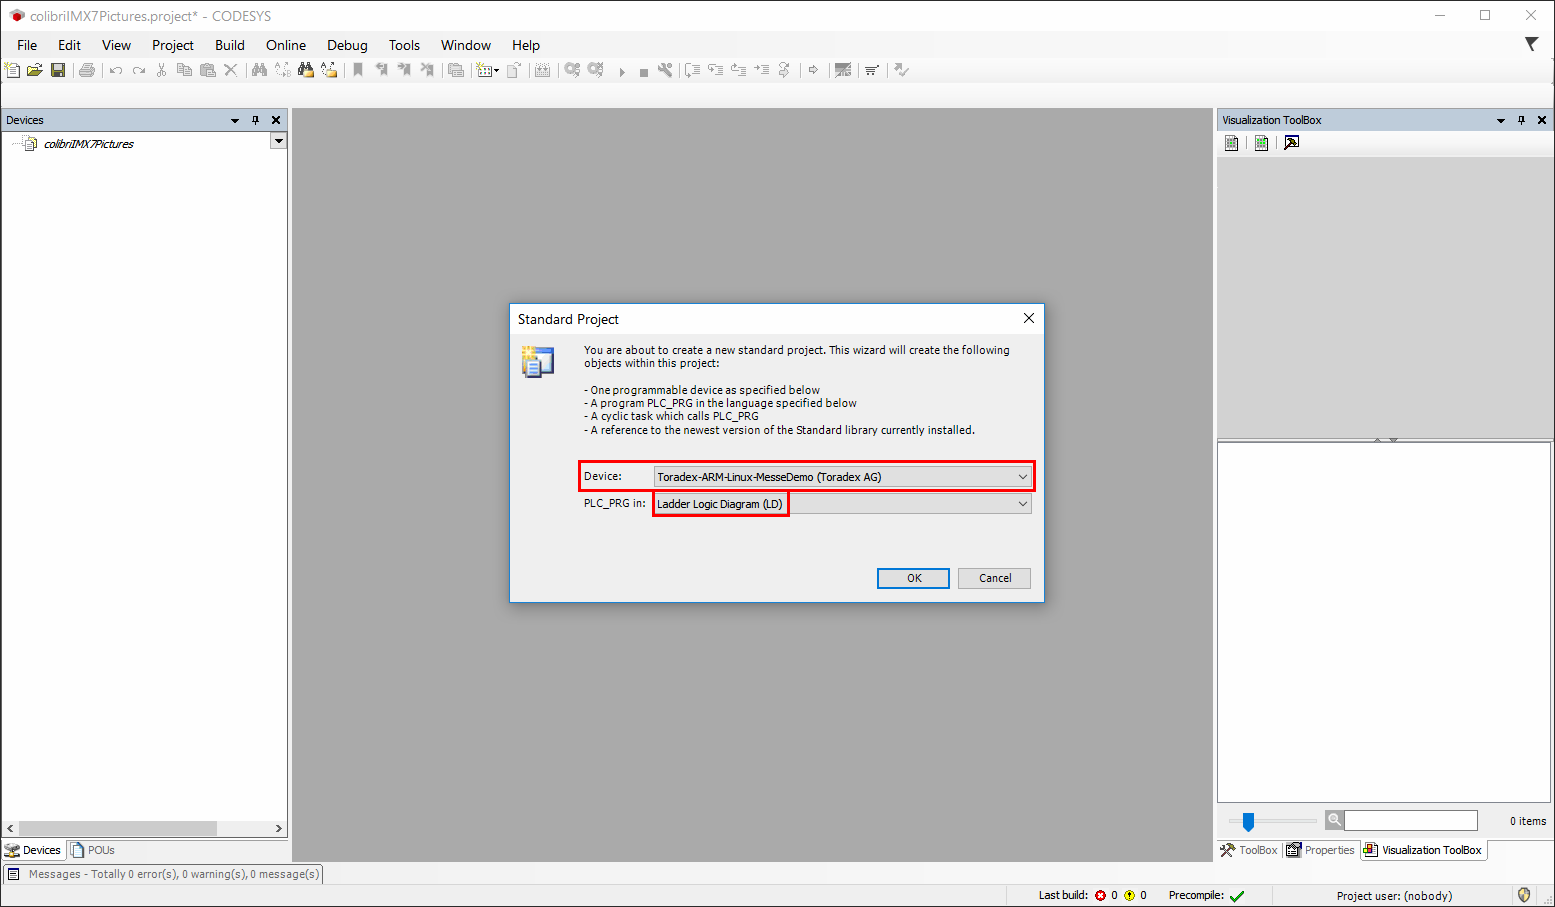
-
Now a new project is created. You will see a menu listed on the left-hand side of the project window.
-
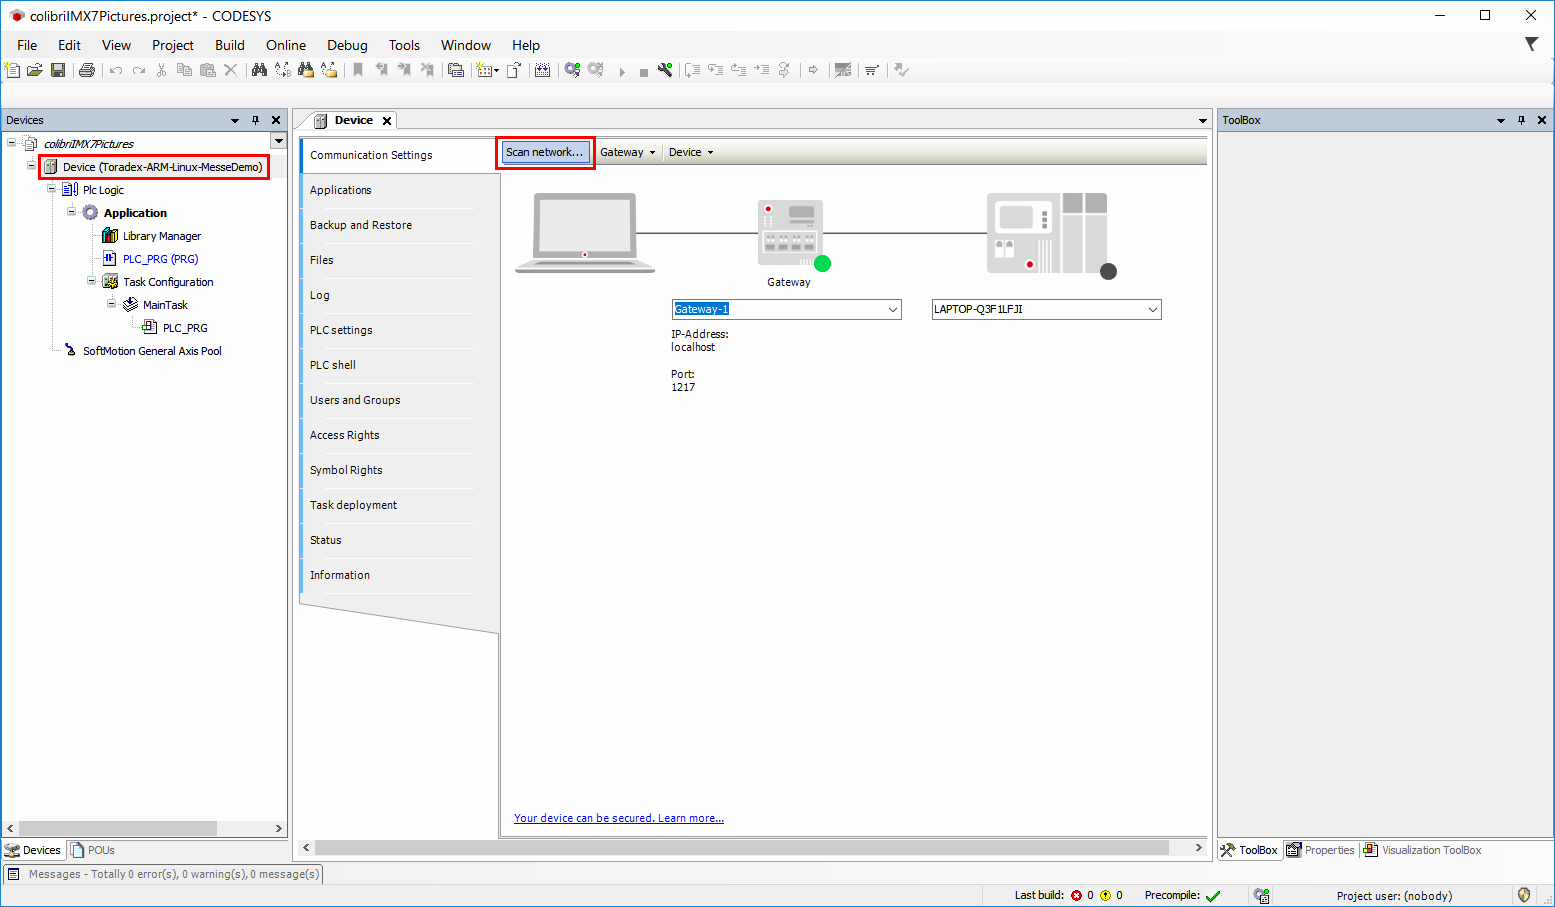
Double click on Device. A new tab will open. Click on Gateway -> Manage Gateways:
-
Click Add to create a new Gateway using the target device IP:
-
Change to the new Gateway and Click Scan Network:
-
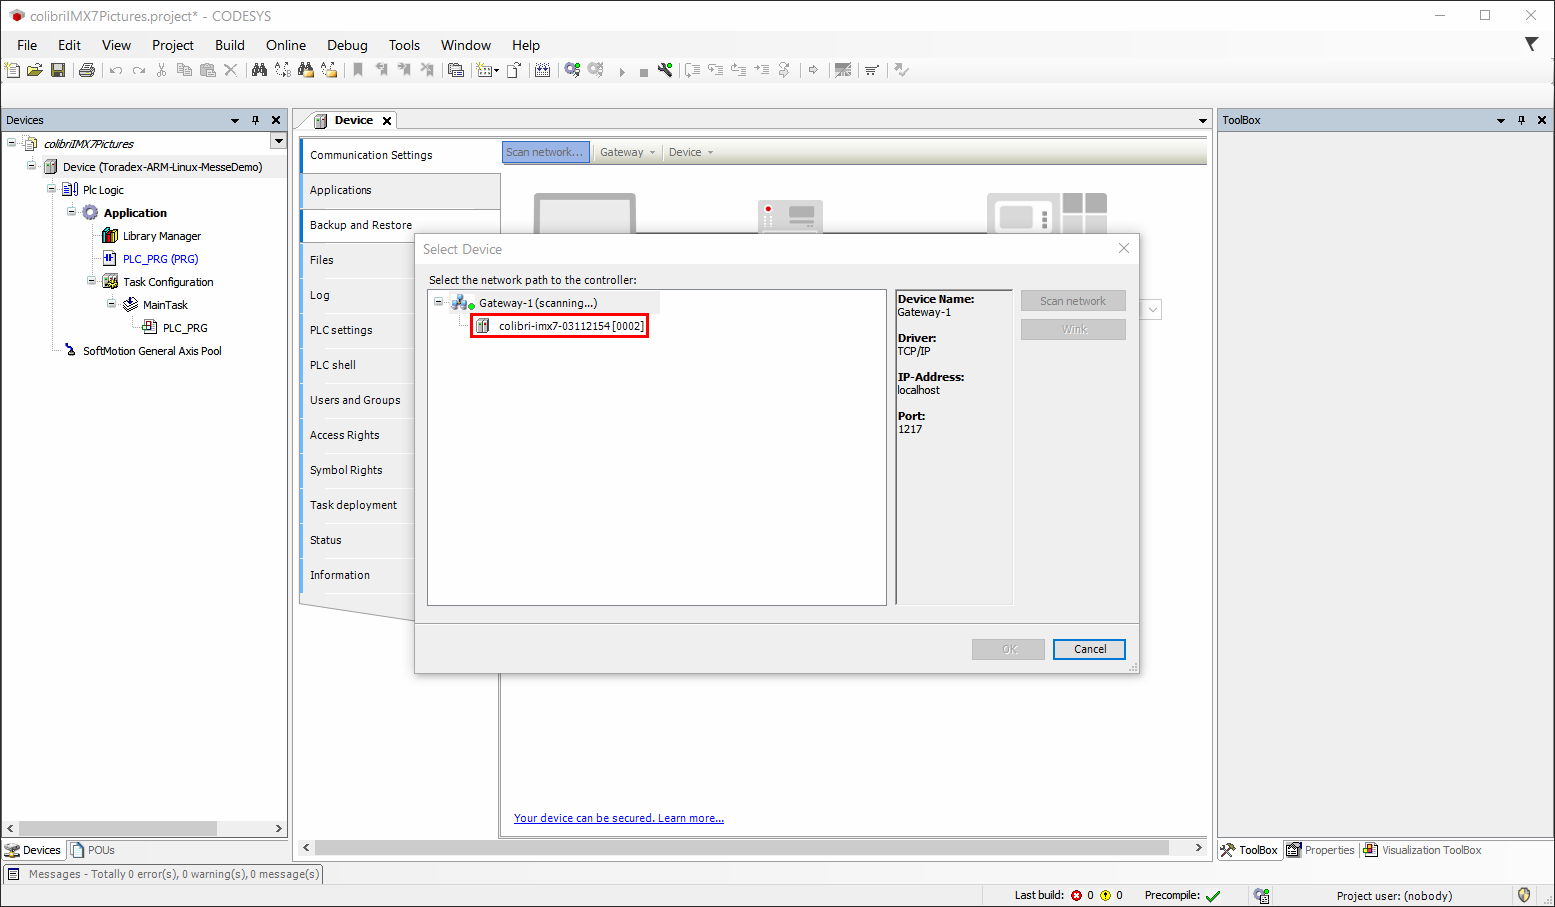
In the Select Device window make sure the device was found and then double click on it. If no device is found under the Gateway, verify if the Codesys Control container is running.
-
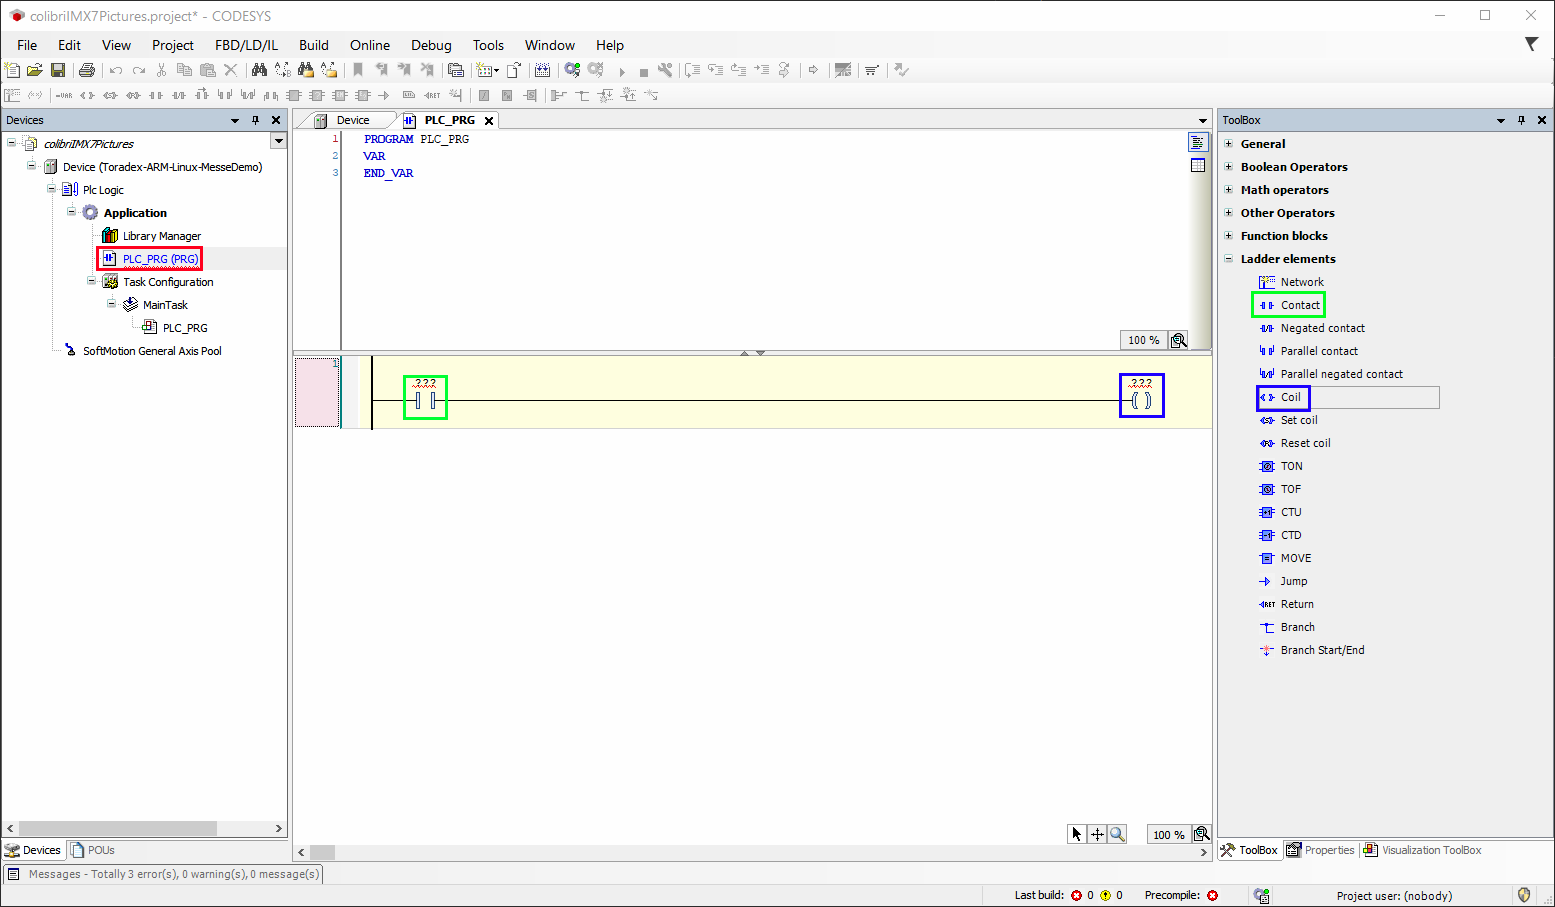
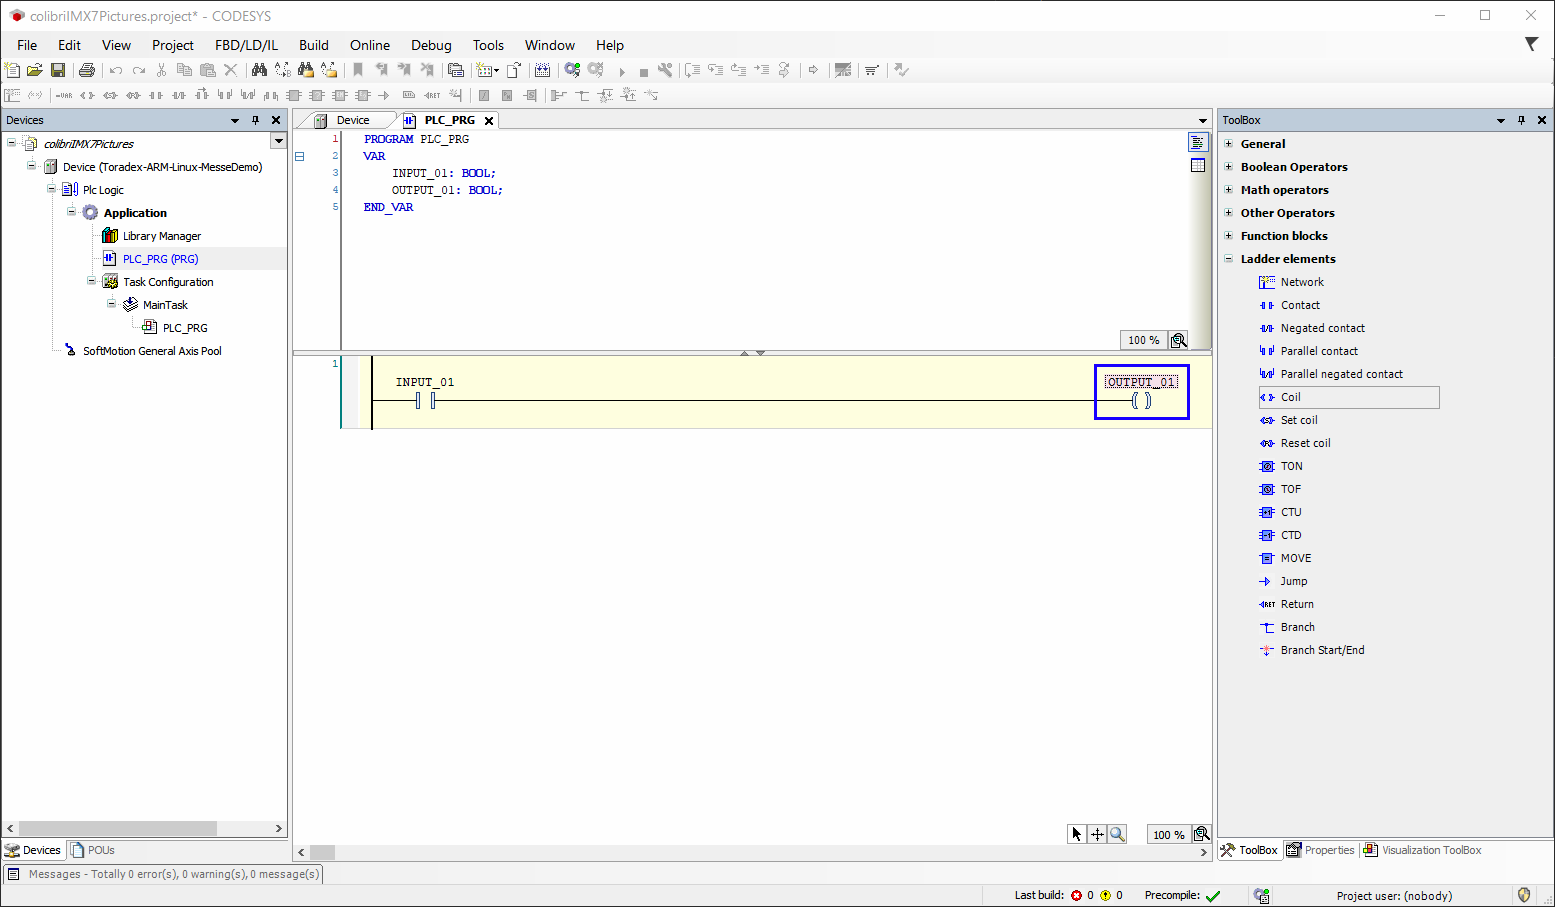
With the device connected to the development environment, we can start programming the logic. Click PLC_PRG in the project tree. In Toolbox drag and drop a Contact and a Coil to the Ladder area:
-
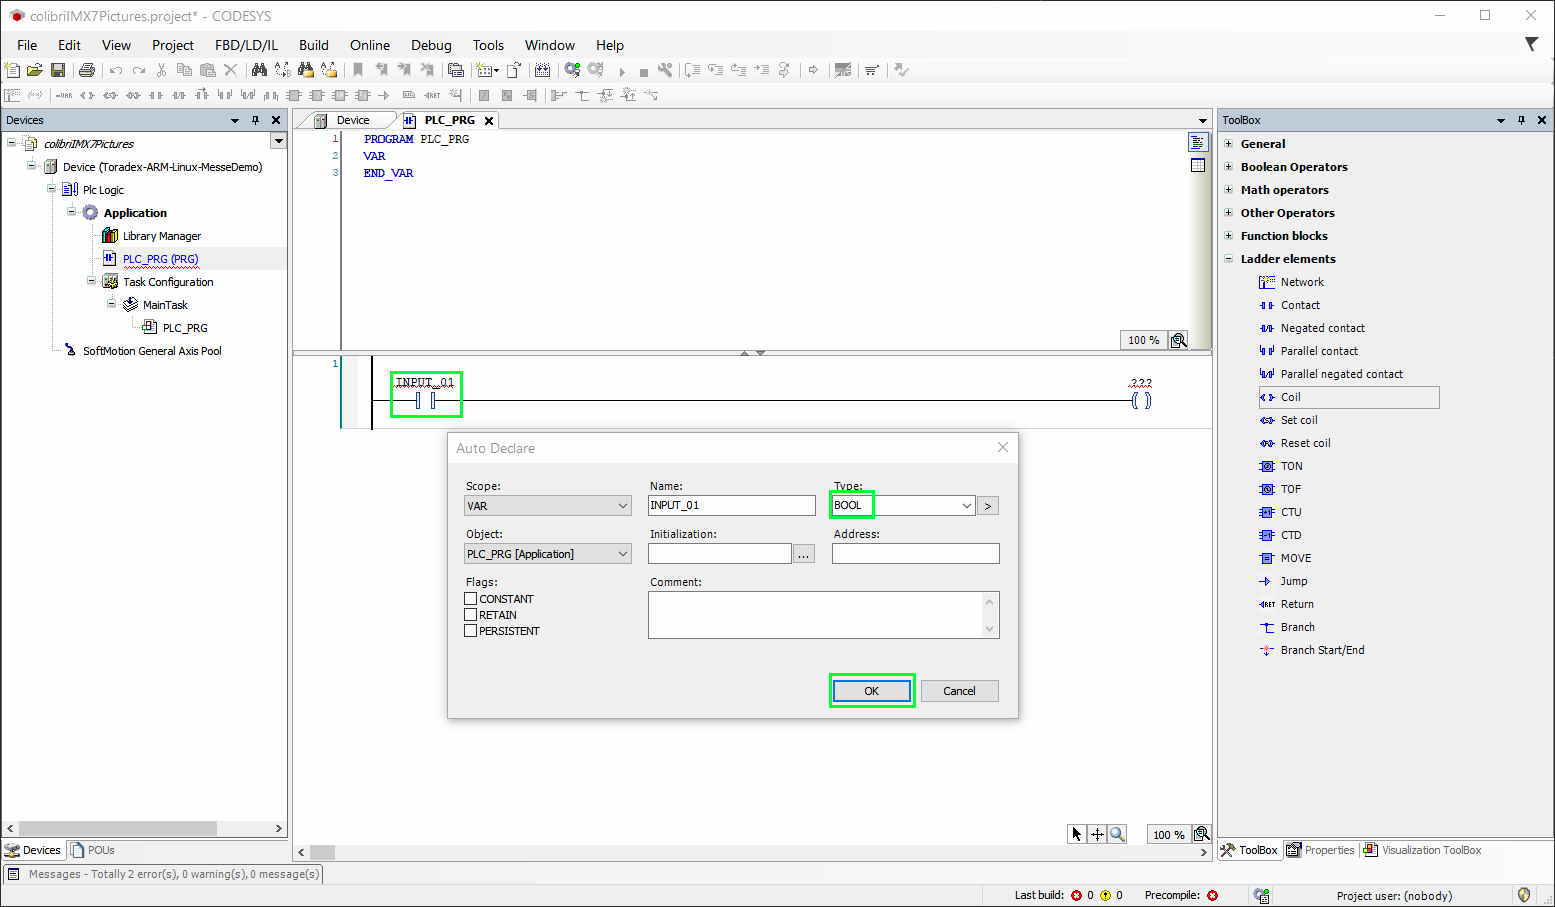
Add the INPUT_01 variable name in the Contact text box and select as type BOOL:
-
Add the OUTPUT_01 variable name in the Coil text box and select as type BOOL:
-
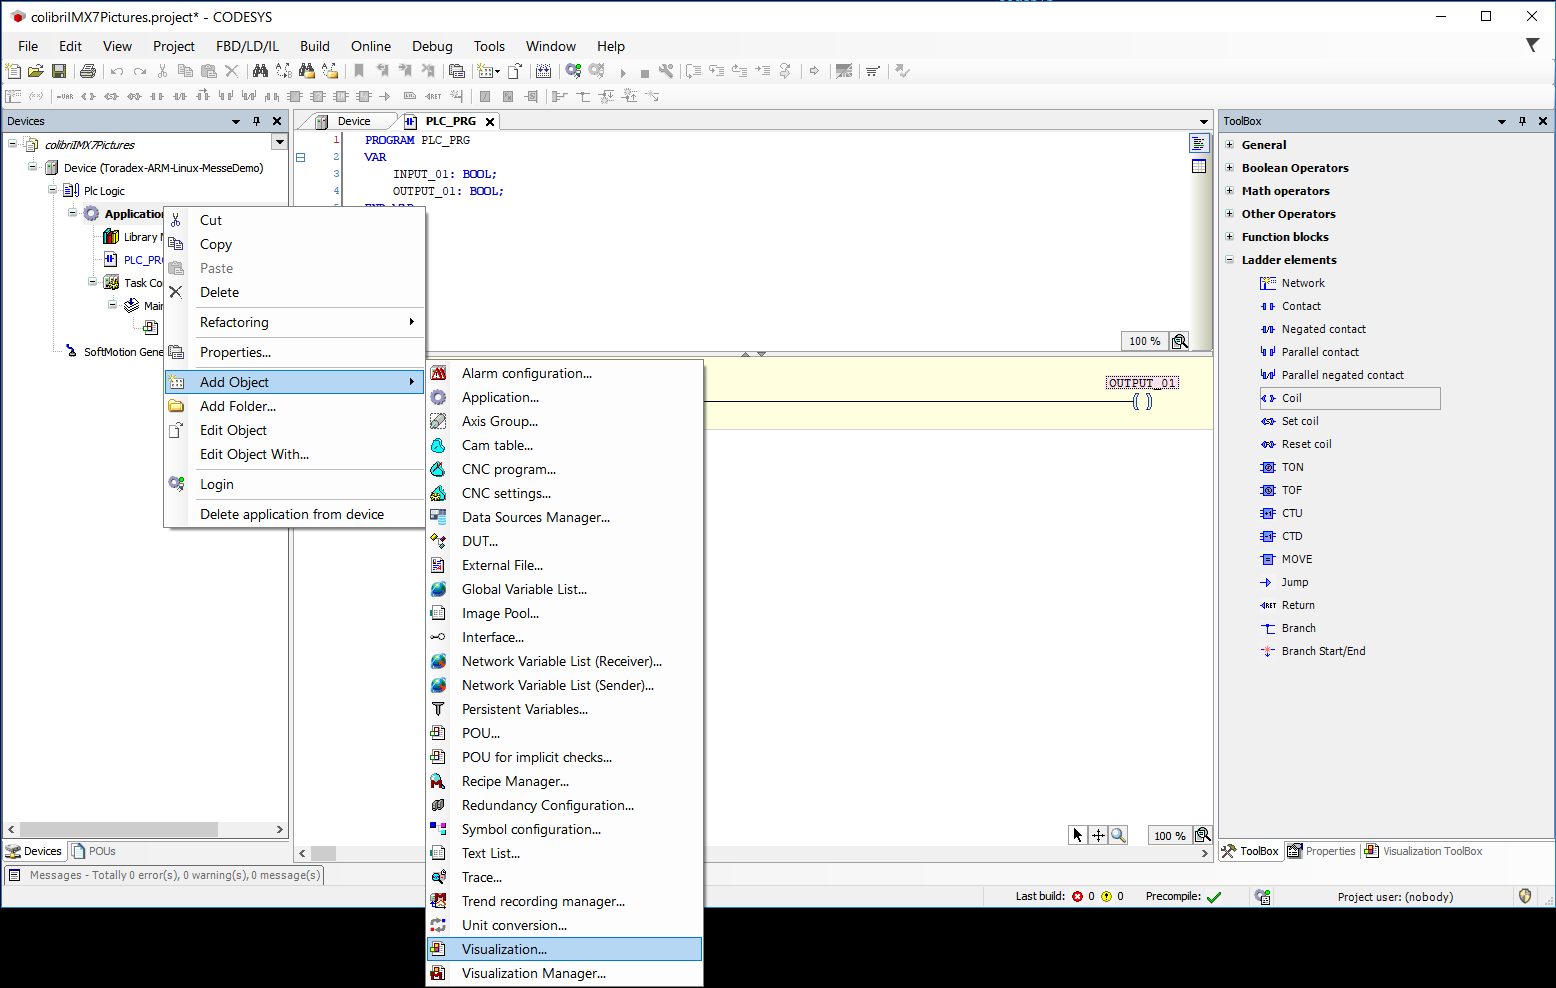
Add a Visualization to the project. In the project tree, right click on Application > Add Object > Visualization:
-
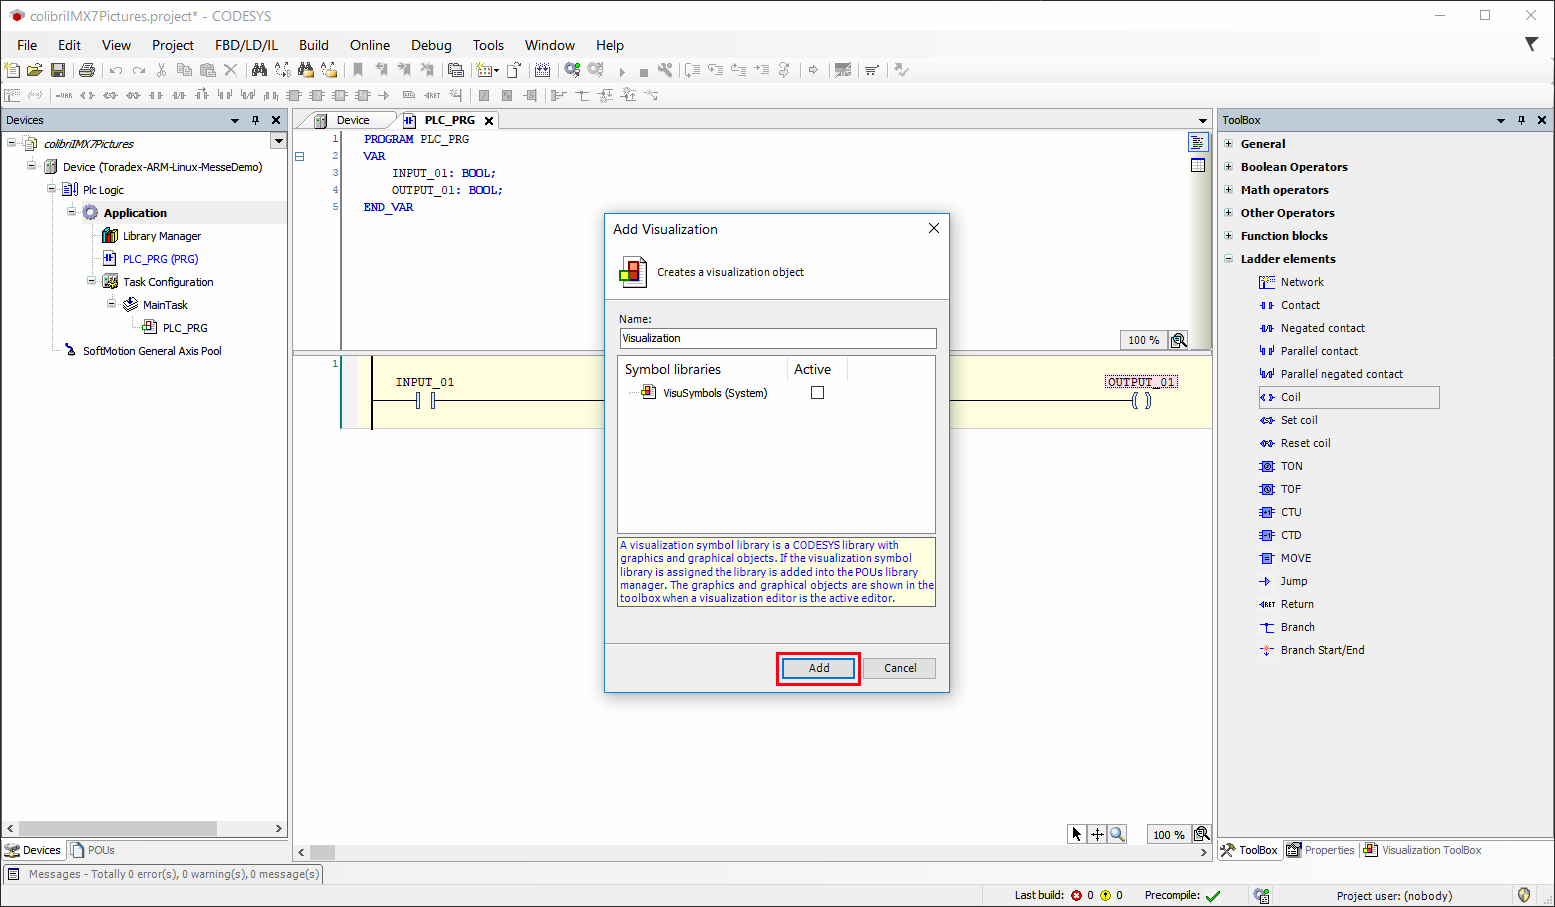
On Add Visualization window just click Add button:
-
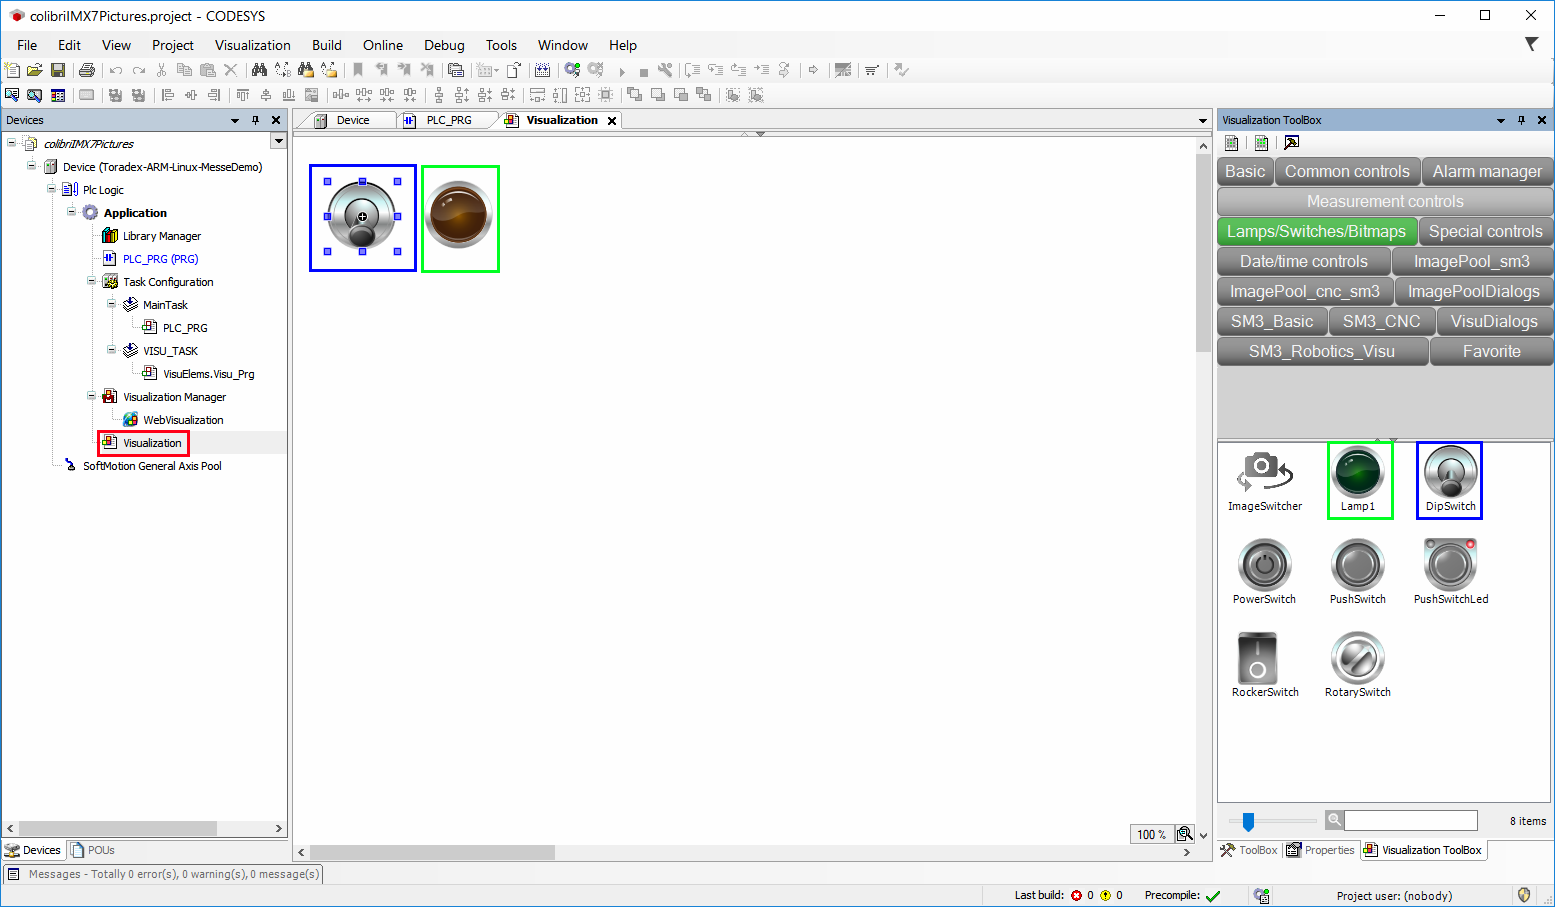
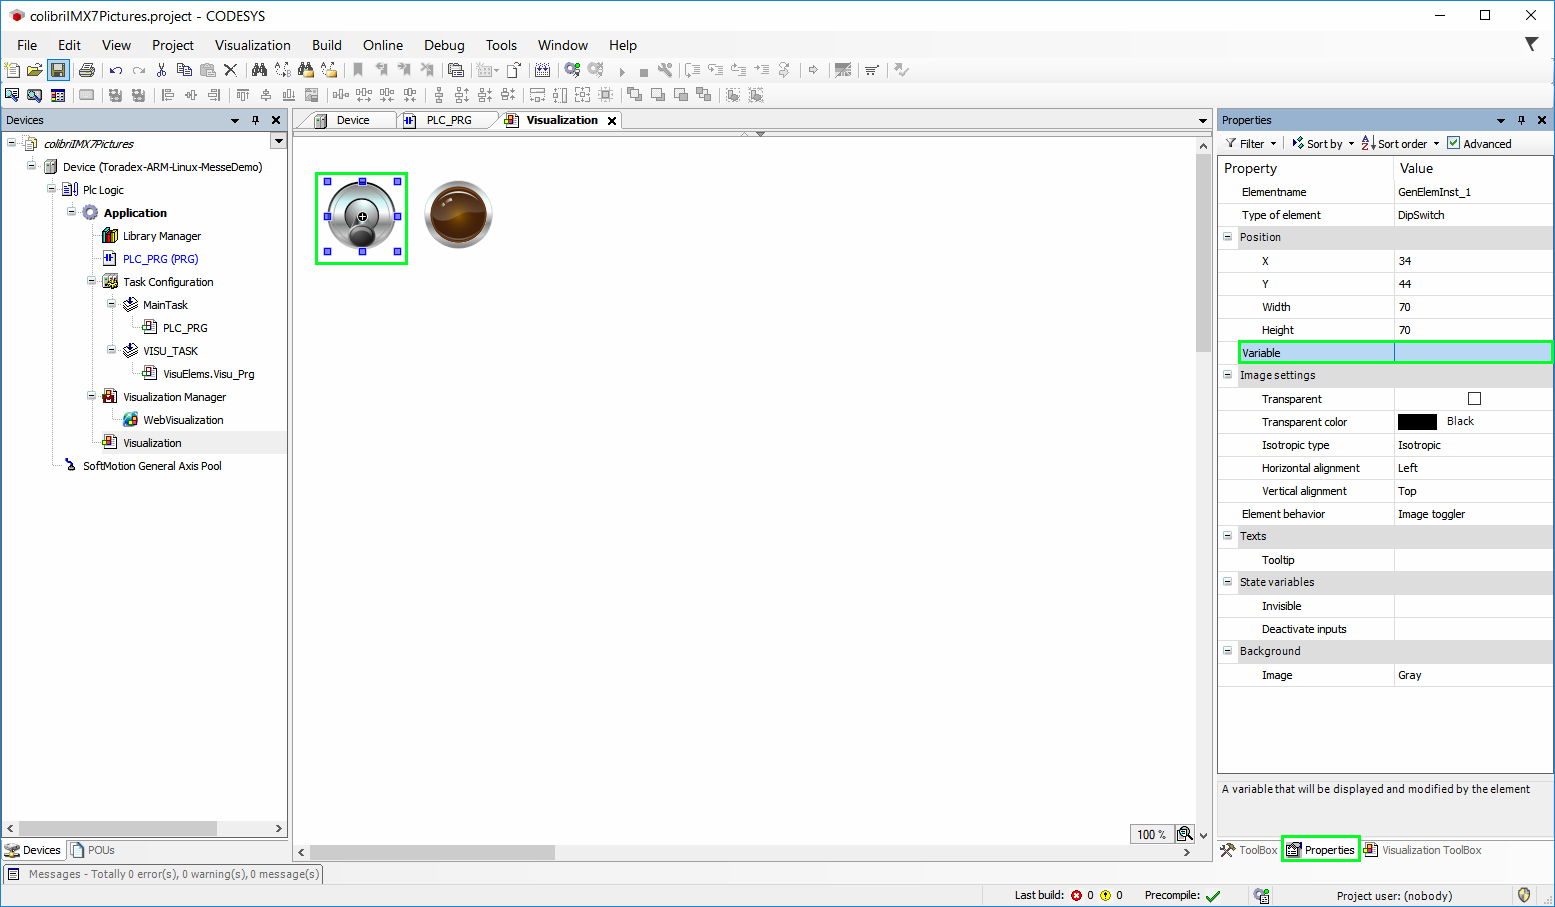
On the Visualization tab, which can be opened with double click on Visualization in the project tree, select Visualization Toolbox > Lamps/Switches/Bitmaps one DipSwitch and one Lamp1, drag and drop one at a time for the Visualization tab:
-
Connect the elements of the visualization to the elements of the ladder.
-
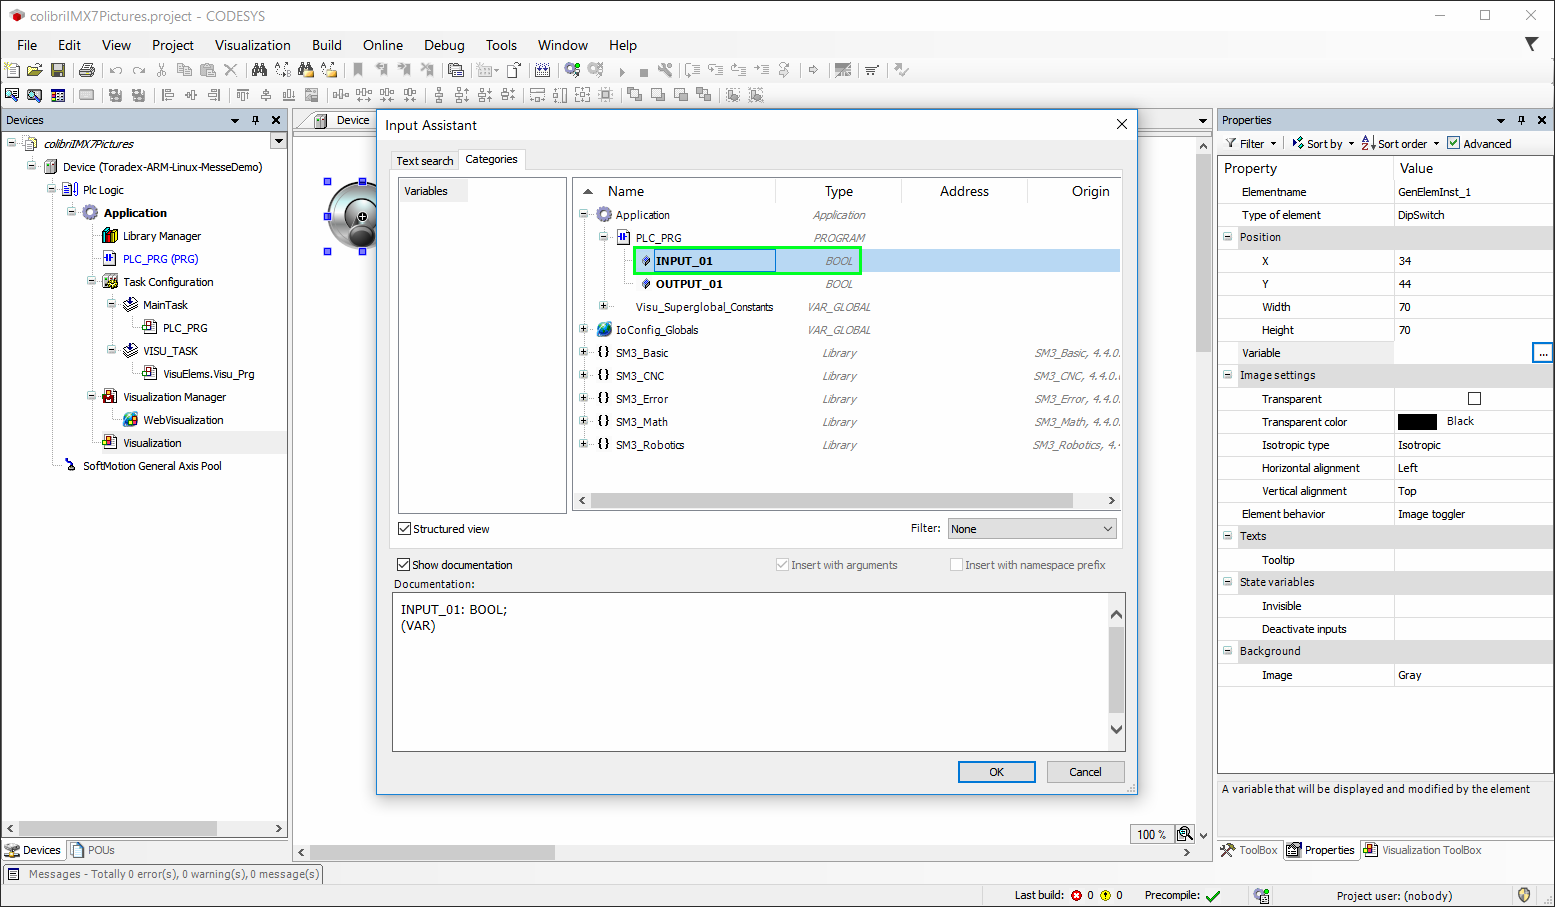
Select DipSwitch and in Properties select Variable:
-
The DipSwitch must be connected to the Contact element of the Ladder. In the window Input Assist select Application > PLC_PRG > INPUT_01 (the variable which has been added to Contact):
-
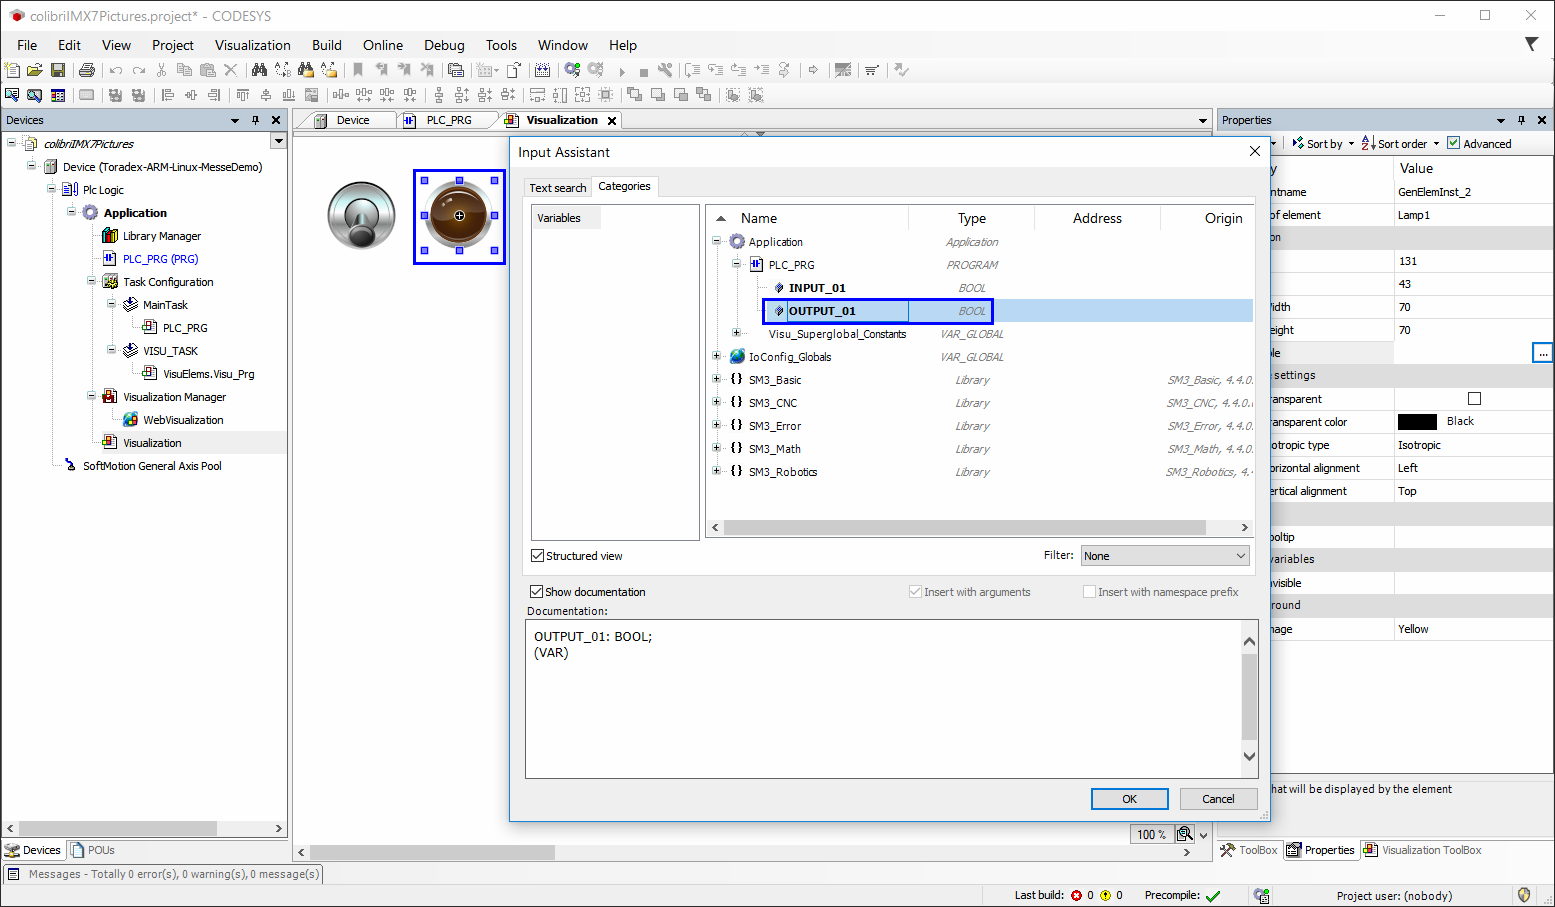
Select Lamp1 and in Properties select Variable. In the window Input Assist select Application > PLC_PRG > OUTPUT_01 (the variable which has been added to Coil):
Run the Application
-
With the connections made, we expect that on toggling the input DipSwitch, the output Lamp1 also toggles. To test, download the project for the device. Click the Online menu and select Login (always choose download):

-
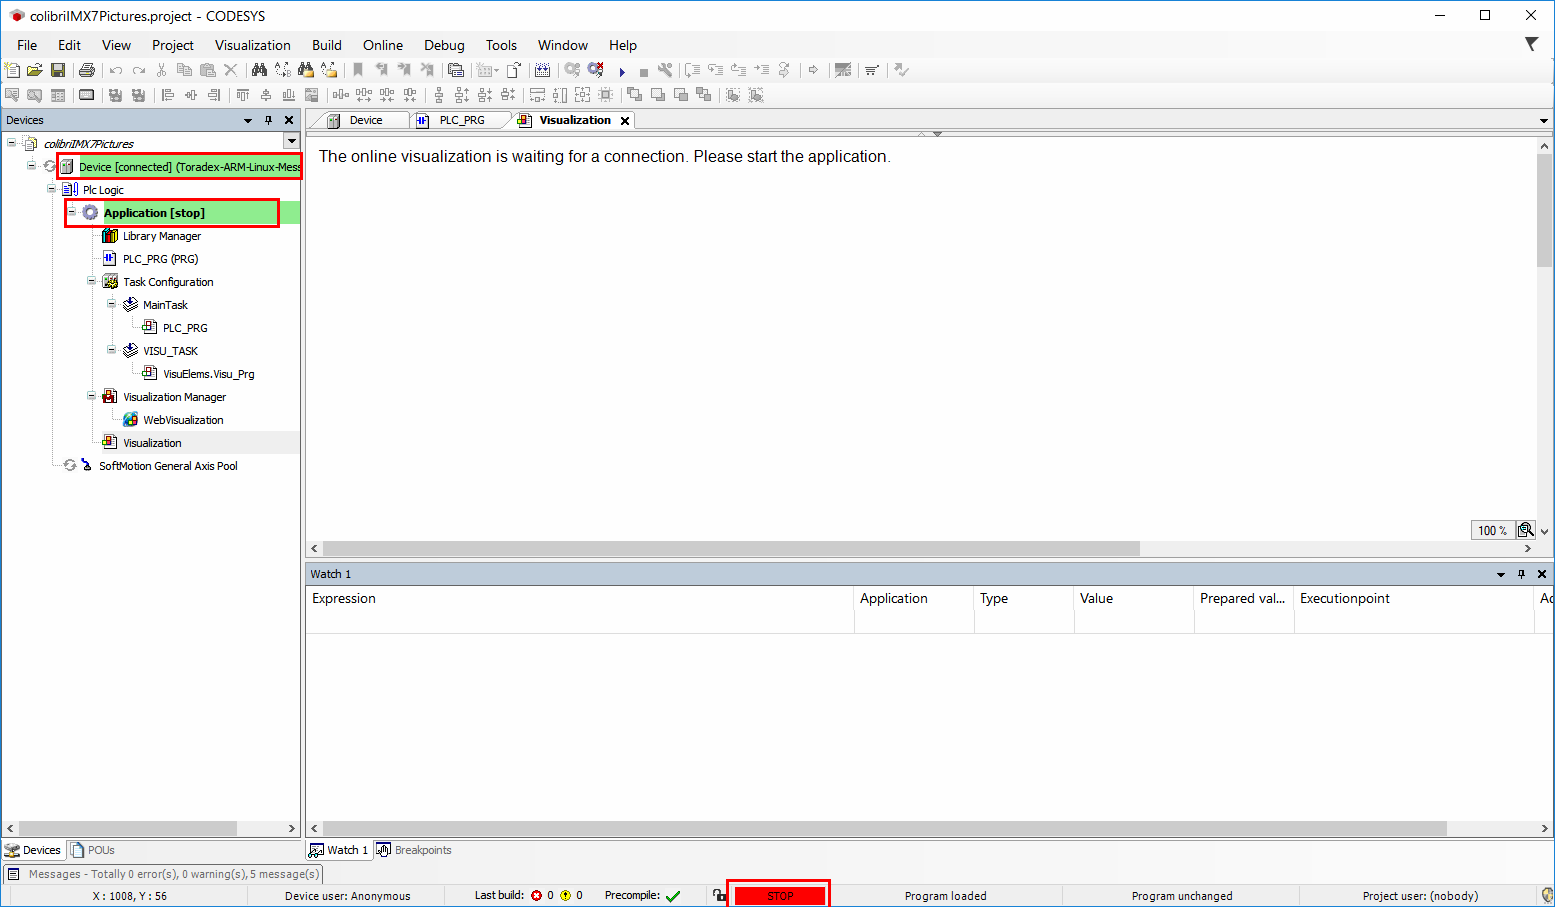
With the project downloaded and online, the following screen will be shown and the project will be in the STOP state:
-
To start the application, click on play:
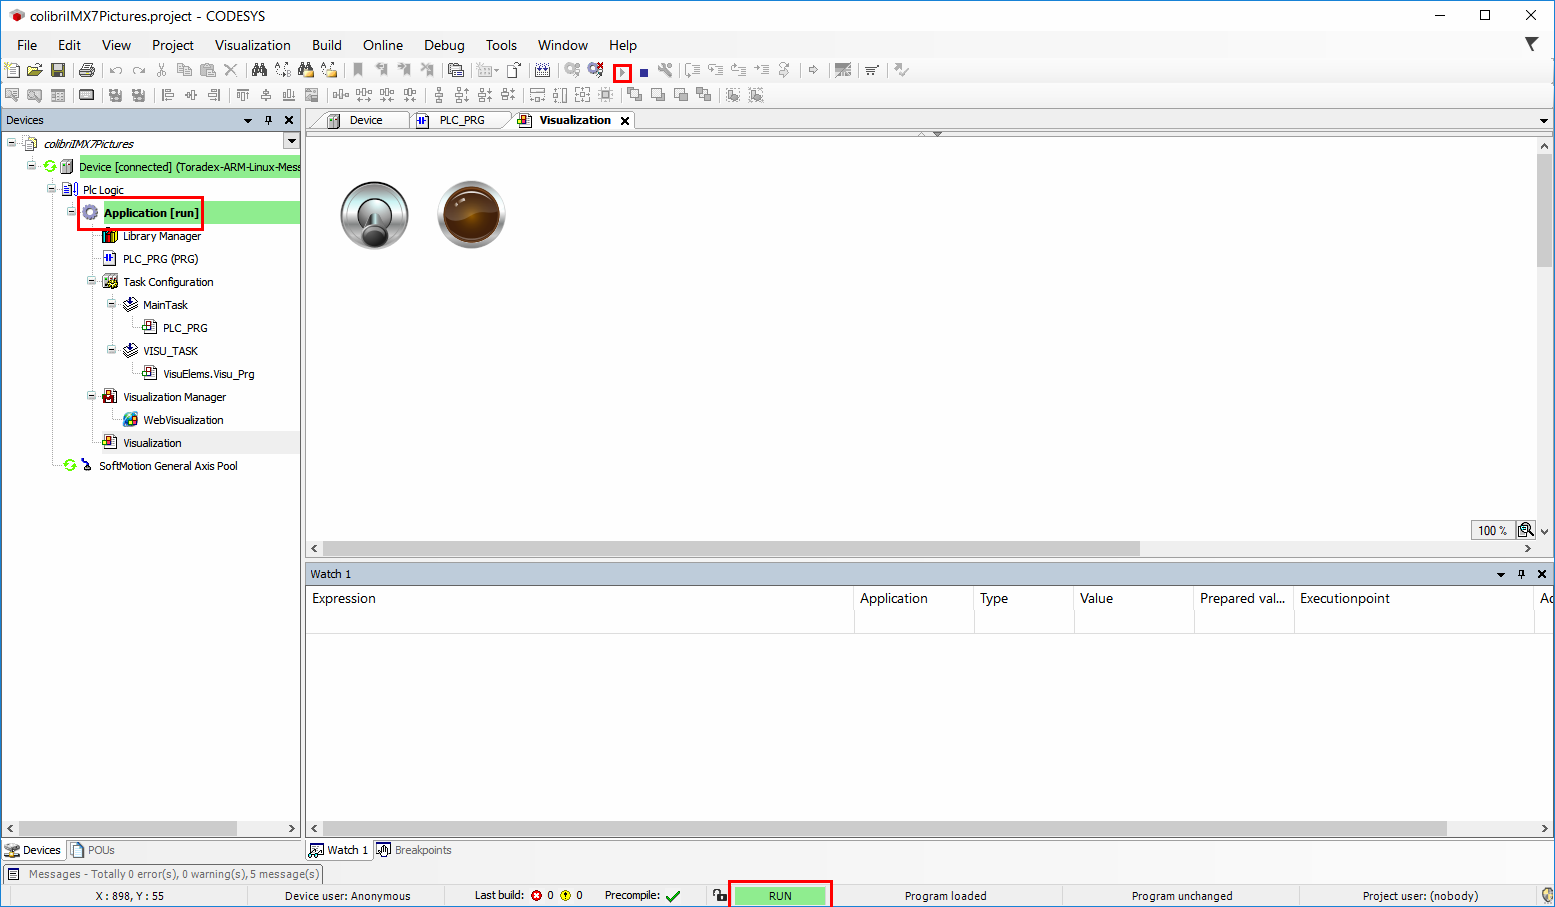
At this point, the application will be in the RUN state. On the Visualization the elements can already be tested. Pressing the DipSwitch should light the Lamp1 on.
-
The Visualization feature also adds to the project the WebVisualization. Click on Visualization Manager -> WebVisualization on project tree. In the WebVisualization tab you can find the settings:
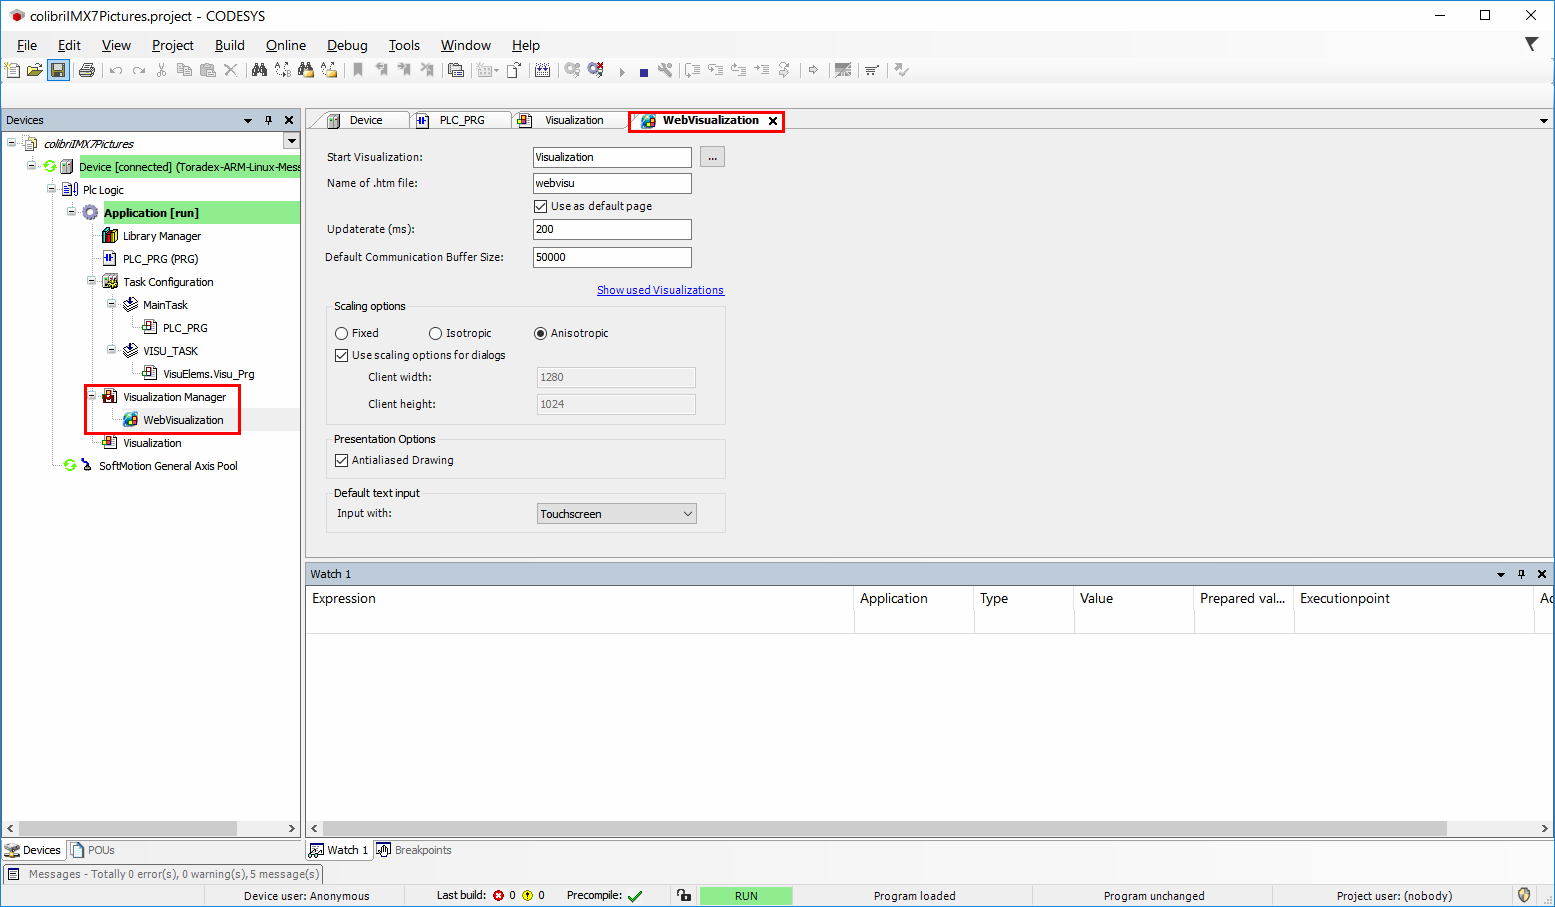
You can open your browser and remotely connect to the web visualization tool using the board hostname and port 8080:
http://<hostname>:8080/webvisu.htmTriggering the DipSwitch will act both on the WebVisualization of the browser as in development environment Visualization:
Local WebVisualization
To visualize the application on your target device (instead of accessing it from another machine's browser), you can also run a web browser in full screen (kiosk) mode on a touch screen display connected to the target device. To do that, you need to create two separate containers in addition to the Codesys Demo Container:
- Run a Torizon Weston Container as the graphical backend.
- Run a Chromium Container, passing it the
http://<hostname>:8080/webvisu.htmURL to it as an argument.
Next Steps
To be able to display your graphical application on the target device's graphical backend, without running it inside a browser, refer to the CODESYS TargetVisu Container article.
This container is a demonstration meant solely for evaluation purposes. For more information and custom requests (for instance if you need a solution ready to deploy on the field), please contact one of our partners BE.services, CODESYS GmbH or neXo.