Installing the Operating System
Overview
Toradex Easy Installer is a tool that enables you to flash an OS image to the Computer on Module with a few clicks and very easily. It comes pre-installed from factory for seamless out-of-the-box and production programming experiences.
In this module you will:
- Power on your system.
- Use the Toradex Easy Installer graphical user interface to flash Torizon.
Typographic Conventions
Throughout the Toradex documentation, the following typographic conventions are used:
$ (dollar sign) Command in the host computer (e.g. your PC)
$ Command in your PC
$$ (double dollar sign) Command in a container in the host computer (e.g. your PC)
$$ Command inside a container in your PC
# (hashtag) Command in the target device/board (e.g. Linux terminal)
# Command in the target board, e.g. Colibri iMX6
## (double hashtag) Command inside a container in the target device (Torizon)
## Command inside a container in Torizon
> (greater-than sign) Command in the bootloader (e.g. U-Boot console)
> Command in the Bootloader
No symbol: Command output
$ Command waiting for output
Output
Prerequisites
For this lesson:
- Have all cables connected and setup
Step 1

If you don't have a monitor attached to your device, headless setup can be achieved through VNC.
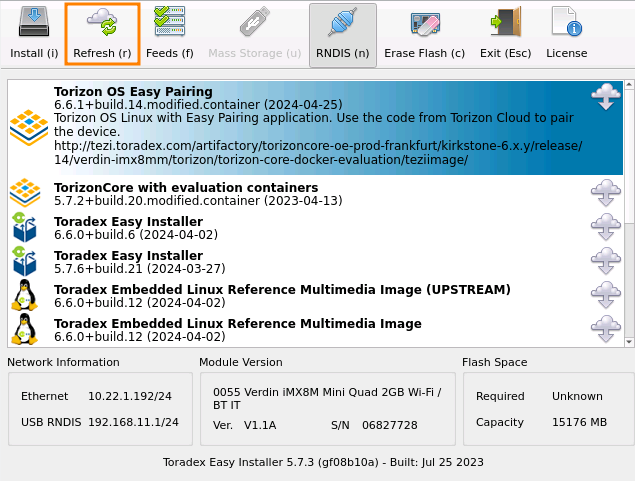
If your module doesn't have the Toradex Easy Installer
Your module should have come with the Toradex Easy Installer pre-installed.
If this isn't the case, you can follow the link below to deploy the Toradex Easy Installer to the module before proceeding:
Loading Toradex Easy Installer
Step 2
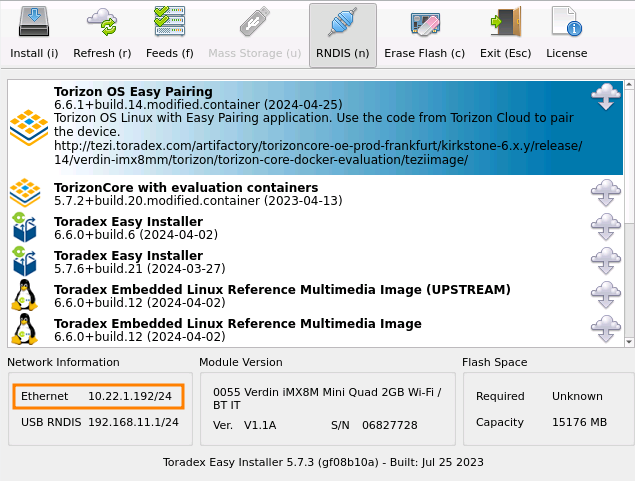
Take note of your board's IP address, as highlighted in the picture below. You will need it for the next lessons. The /24 at the end is just the ip mask, please disregard it. To use ssh, stick to the default port 22.

As observed in the screenshot above, the IP address in the example is 192.168.15.199.
Step 3
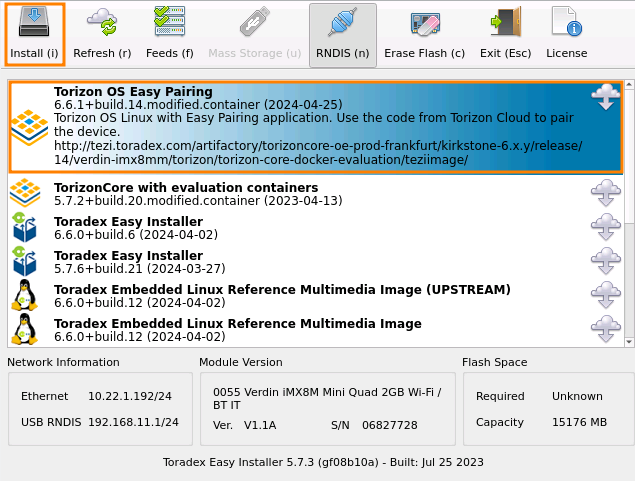
To install Torizon use the connected keyboard arrow key buttons to navigate and select the latest version of TorizonCore with evaluation containers, press i to install and Enter to confirm:

While executing this step make sure your board is connected to the internet and connection is established successfully.
Step 4
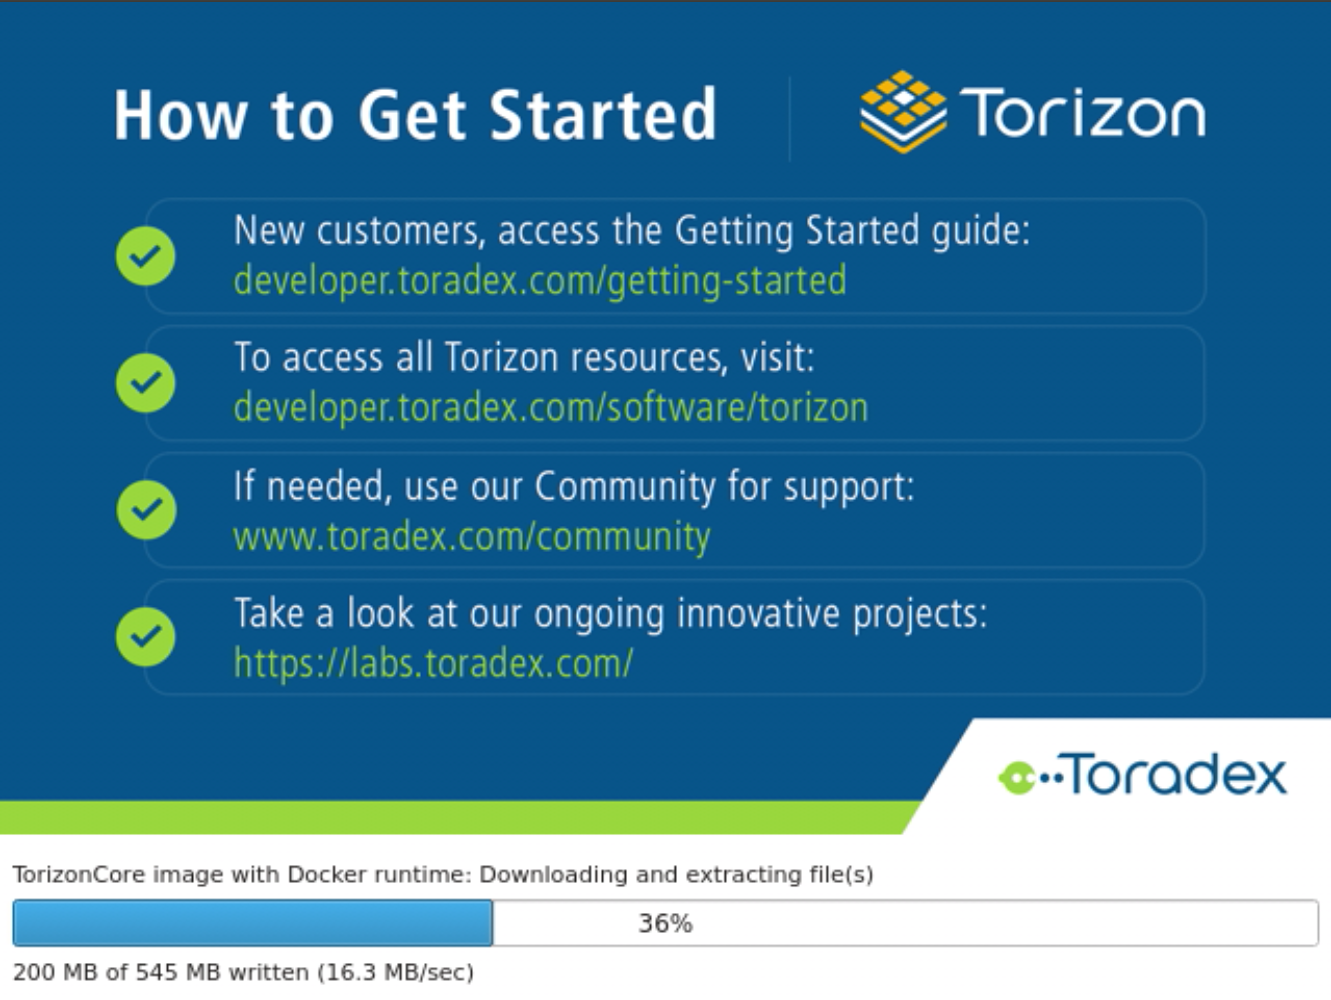
Wait for the image to be downloaded and installed:

Step 5
After the Image Installed message pops-up, select the Power off option to shut down the system.

Takeaway
Notice that there are two types of images for Torizon. You have installed one that provides the best out-of-the-box user experience:
TorizonCore with evaluation containers: to provide the best out-of-the-box experience, this image comes with Portainer, a graphical container manager, pre-installed. We'll use this image on the Quickstart Guide and you will learn more about Portainer in the next lessons.TorizonCore: this image does not have any evaluation containers pre-installed. It is best suitable for later steps of development. For instance, once you start to customize the TorizonCore base image using tools as the TorizonCore Builder Tool, you'll most likely want to use theTorizonCoreimage.
FAQ
How can I perform an offline install using the Toradex Easy Installer?
You can use removable media such as an SD card or a pen drive. Refer to the Providing the images section in the Getting Started tab of the Toradex Easy Installer article.
My company firewall does not allow the board to access the internet. How should I proceed?
You can perform an offline install. Refer to the question "How can I perform an offline install using the Toradex Easy Installer" from this FAQ.
My module does not have Toradex Easy Installer. How can I load it into the module?
Refer to the Load Toradex Easy Installer article.
What OS options do I have besides Torizon?
Refer to the Load Toradex Easy Installer article.
I don't have a display or monitor. Can I perform a headless install?
There are two approaches to overcome this situation:
1) Access the graphical user interface using a VNC viewer software, such as Remmina or Vinagre. Refer to the section Displaying the GUI from the Getting Started tab of the Toradex Easy Installer article.
2) Perform an unattended install. Refer to the Detailed Manual, more specifically the sections Auto Installation and alternatively Unattended Flashing Over Ethernet.
I had an issue following the steps from this lesson. How should I proceed?
You can find a similar issue in the Troubleshoot from the Toradex Easy Installer article.
If your issue persists, ask a question in the Toradex community.