Create a Single-Container Project
Introduction
This article guides you on creating a single-container project using the Torizon IDE Extension. The extension provides templates to start from and automates the dependency installation process. By the end of this article, you will be ready to choose the correct template for your project and start your application development.
The instructions of this article work for both Linux and Windows environments. When required for a particular OS environment, additional instructions will be provided.
Prerequisites
- Read the basics of Torizon IDE Extension.
- Toradex System on Module (SoM) with Torizon OS installed.
Start a New Project from a Template
Create a new project:
- Open a new VS Code window (
Ctrl + Shift + N). - Click the
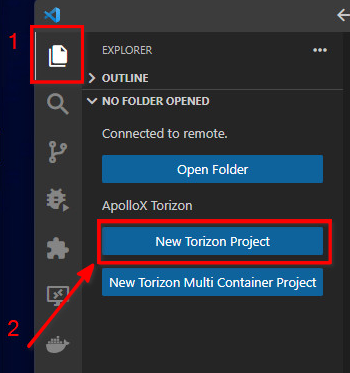
Explorericon (1) on the left menu bar. - There will be two buttons for creating projects. Click
New Torizon Project(2).
- Open a new VS Code window (
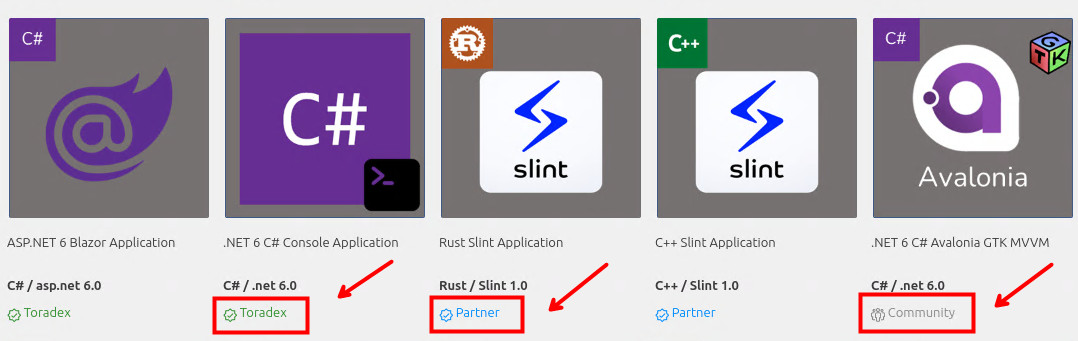
Select a template: You will see a new tab with a list of templates that can be used for project creation. Select the template that closely matches your project requirements.
 info
infoNote that there are Toradex-supported, partner-supported and community-supported templates. Toradex-supported templates contain development stacks commonly used by customers of Torizon Cloud. Those templates are maintained by the Toradex team and pass through a quality assurance process. The quality and maintenance of partner and community templates are the sole responsibility of their contributors.
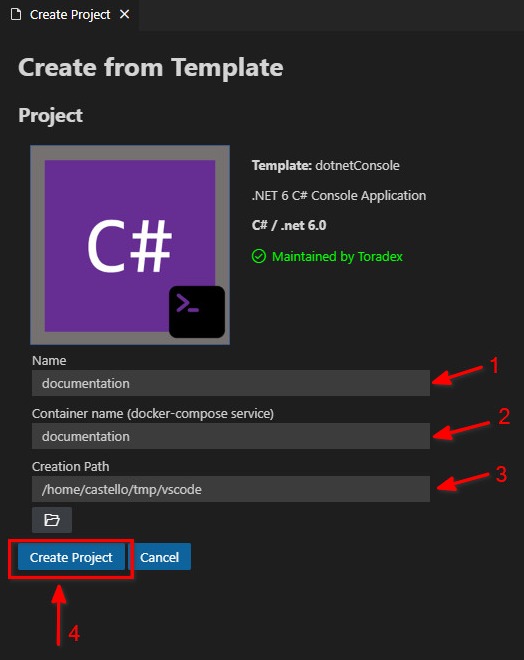
Input the project name, container name and creation path. Then, click
Create Project:- Use only letters and numbers in your project name.
- The container name also accepts the
-symbol. - The
Creation pathis the system folder in which the project files will be stored.
 caution
On Windows, creating and using the project in the Windows filesystem (on
/mnt/c/...for example) may lead to unexpected errors and behaviors. So, the path where the project folder will be created must be in the Linux filesystem, inside WSL. Later if you need, you can then easily access the Linux filesystem files (where your project's folder is) from the Windows side both on Windows File Explorer and on PowerShell, as explained in this Microsoft article.You can monitor the project creation by checking the terminal at the bottom of the VS Code interface.

After configuring the project, VS Code will reload the window using the newly created project as the default workspace, enabling the use of VS Code debugger and tasks.
During the first load of a new project, the following tasks are triggered:
run-torizon-binfmt: It runs thetorizon/binfmtDocker image to register foreign architecture interpreters, which is necessary to build containers for the ARM architecture.run-docker-registry: It runs a local Docker registry to enable optimized image exchange between the development PC and the target device.run-share-wsl-ports(Windows-only): By default, services created on a WSL 2 distro are not visible to the external network. This task runs a PowerShell script on the Windows side. That script binds the necessary ports in WSL to make it accessible from the target device. Since that requires administrator user permissions, aUser Account Controlwindow will appear:
Click
Yes. After the confirmation, a new empty terminal will pop up. Do not close it. The terminal will run the script and then will close automatically.
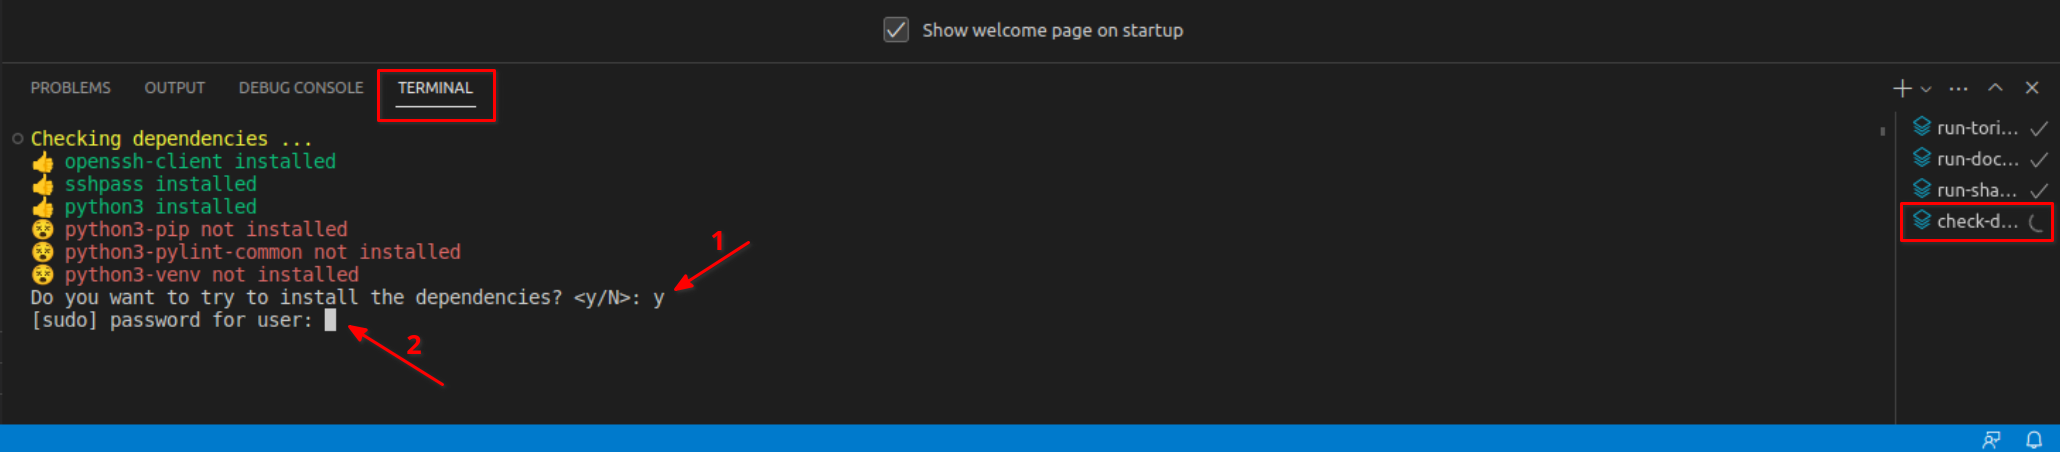
Check for dependencies on your system: During the first load of a new project, the notification
Do you want to check for dependencies on your system?will appear. ClickYes.
The extension will then trigger the
check-depstask, which checks the necessary local packages (on the development host, such as SDKs) to build the project. In some cases, the dependency will be installed through a script (like the .NET SDK package, for example). For more information, see Check Host Machine Dependencies Required by the Project.tipYou can manually trigger the
check-depstask. For more information, see Workspace - Tasks.Confirm the installation and your
sudopassword will be requested.