Connect a Target Device
Introduction
This article describes how to connect a device to the Torizon IDE Extension. That allows you to use a connected SoM as the target for remote debugging and deployment of projects directly from Visual Studio Code. Also, it shows you how to manage SoMs' containers and images through the Docker VS Code extension.
The instructions provided in this article work for both Linux and Windows environments.
Prerequisites
- Toradex System on Module (SoM) with Torizon OS installed.
- Set up the extension environment
- Create a Single-Container Project
Scan your Network and Connect a Target Device
-
Scan your network: Click the Torizon icon in the left menu bar to scan your local network for devices.
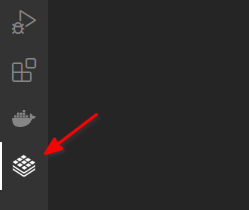 warning
The target device must be on the same network as the development machine.
You can also rescan your network by clicking the
Refresh Devicesicon.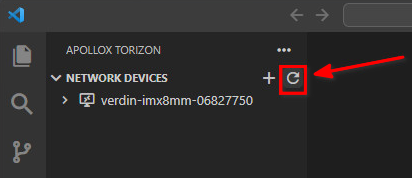
-
Connect your target device: After the scan, expand the device entry and click
Connect.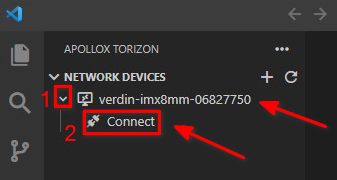
-
Input the SoM's
userandpassword: These credentials are the same you use for accessing your SoM from the command-line.
-
Check if the connection was established: You can follow the progress in the footer of the VS Code window.

After the connection, the device will be listed under
CONNECTED DEVICES, and the footer will show the connection status.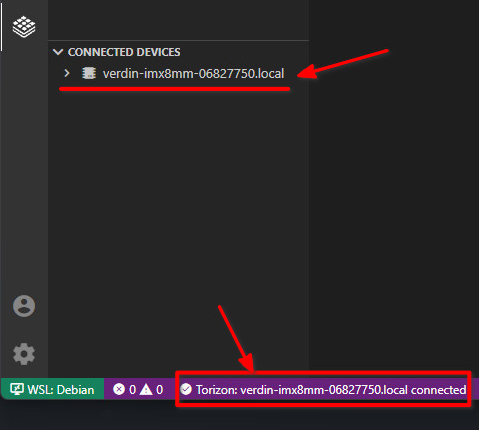
Manually Add Devices
In some network configurations, your device may not be detected. If that is your case, you can manually add devices by clicking the + icon and inputting the devices' IP.
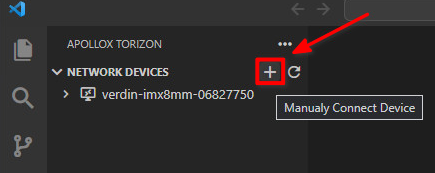
If you do not know how to get your device's IP, see Scan your local network to find the board IP and MAC address.
Engineering Mode
When connecting to a device, the Torizon IDE Extension sets it up to be in Engineering Mode (Development Mode).

In Engineering Mode, some debugging and deployment features are enabled, affecting the following configurations:
-
Enable password or SSH key sharing between the SoM and the development computer.
-
Enable the Docker API broadcast over HTTP on the SoM.
-
Enable your development PC's IP as an insecure container registry. That is required for pulling container images (stored on your development PC) from the target device. That configuration is added to Torizon OS at
/etc/docker/daemon.jsonas follows:{
"insecure-registries" : ["<your development PC's IP>"]
} -
Set up the Message of the Day (MOTD) to alert that the device is in engineering mode.
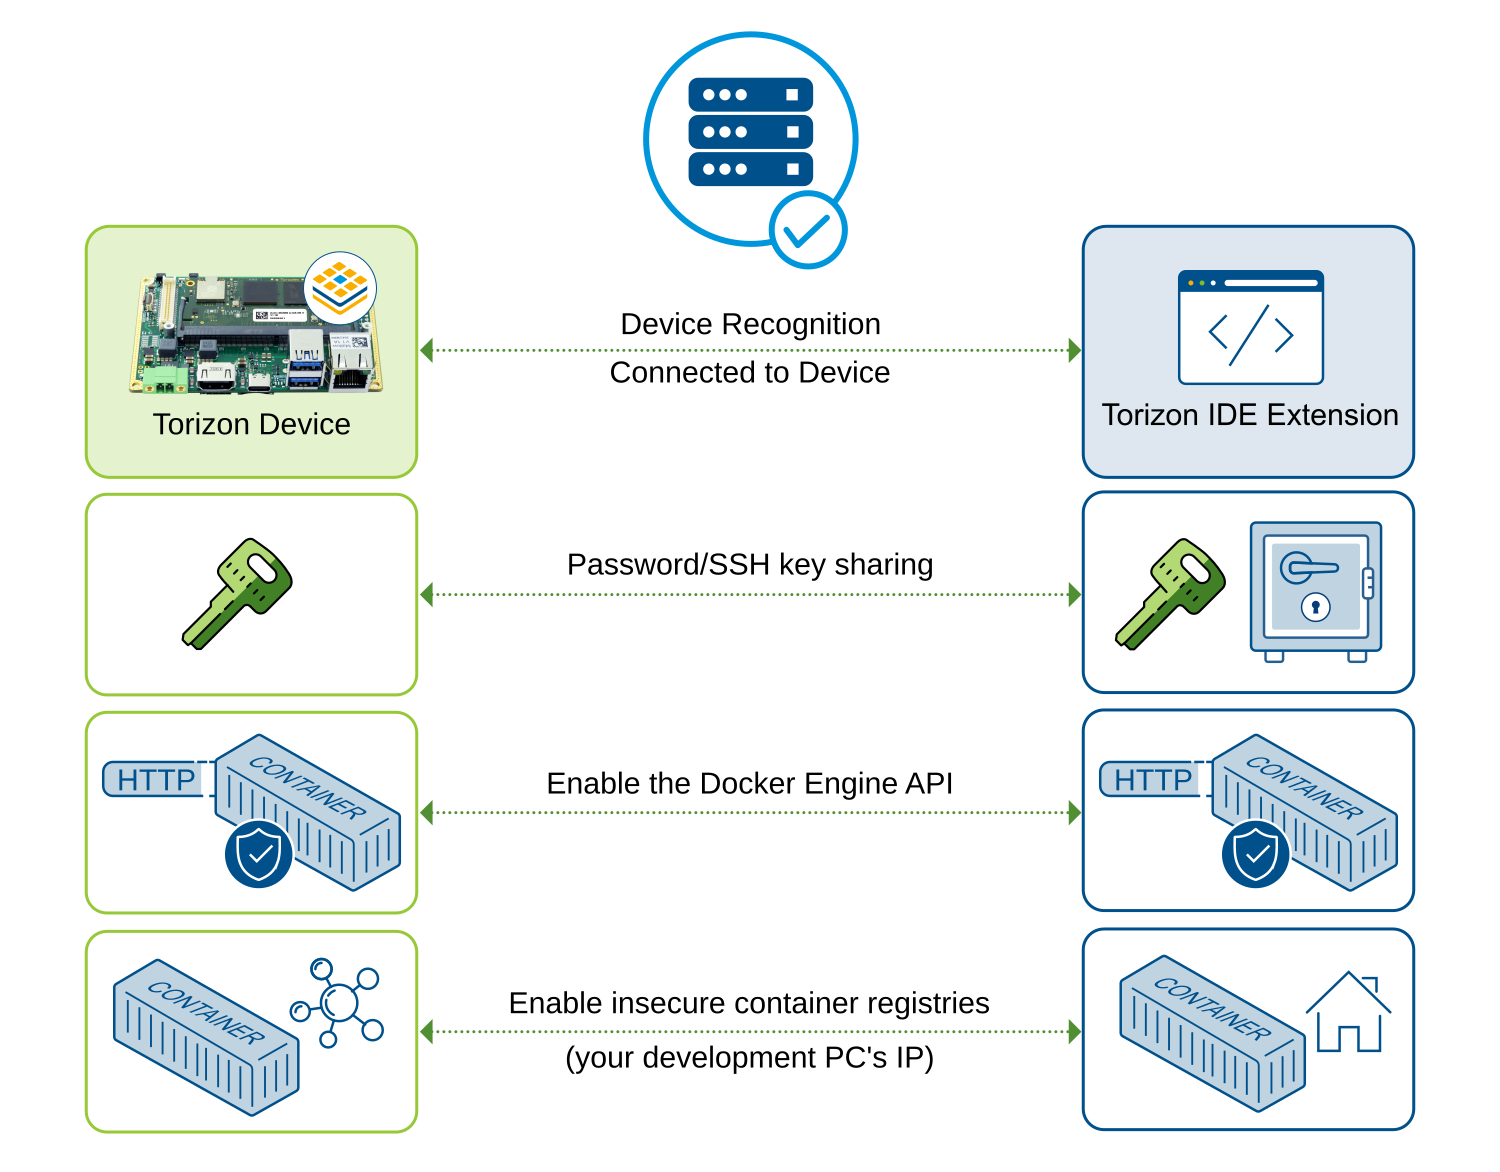
Those settings should only be used during the development phase. Since the changes that your application can make to the board in engineering mode are unlimited, there is no supported mechanism to revert a device into standard mode. The safest method is to reflash the device with a clean OS install.
Those settings are erased when you flash your module with a new OS image.
Set a Torizon OS Device as Default
The IDE extension automatically configures your project's settings.json file based on the default device. Therefore, always set a device as default when creating a new project or opening one from a different machine.
Even with multiple devices connected, the IDE Extension's tasks only target the default device.
The Extension uses the settings.json file to perform different tasks:
- Build containers for the default device's architecture and GPU.
- Deploy your project on the default device and start a remote debugging session.
- Create a release container image and run it on the default device.
To set a device as default, proceed as follows:
-
Expand a connected device entry, and click
Set Default: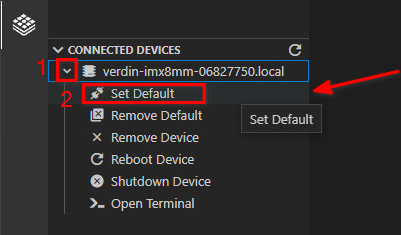
The
bullseyeicon indicates which device is being used as the default target by your project.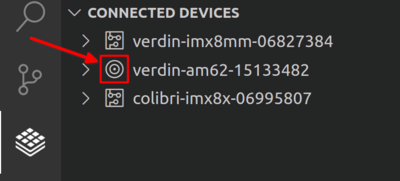
The Docker VS Code extension uses the default device as the Docker context for running containers. You can confirm that by checking the DOCKER_HOST environment variable in the Docker's view:
- Open the Docker's view (1).
- Click on the CONTEXTS tab (2).
- Mouse hover over the default context to check IP address (3) of
DOCKER_HOST.
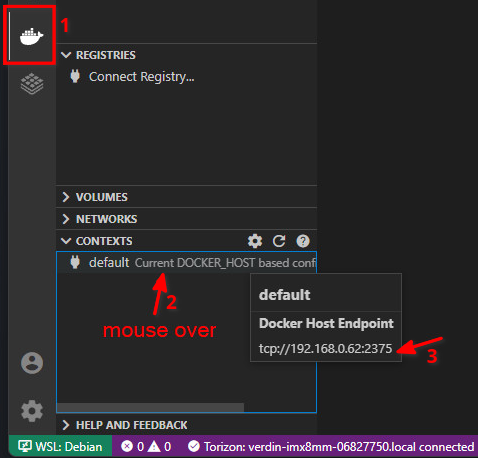
Once a Torizon device is set as default, you can manage its containers, images, volumes and networks through the Docker VS Code extension.