Partner Demo Container - CODESYS
Introduction
This article shows how to run the CODESYS partner container on Toradex hardware.
Learn more about CODESYS Software PLC in our overview article.
This article complies with the Typographic Conventions for Torizon Documentation.
About the Partner Demo Container
Intended Use
This partner demo container is meant for evaluating the technology. It is not suitable for development or production.
The CODESYS runtime provided in this guide is meant for demonstration purposes and has a limited time to run of 2 hours from the start of the container. See the section Licensing Information for more details.
Licensing Information
If you want to License Codesys on Toradex hardware, contact our partners CODESYS GmbH or Nexo.
For licensing information, check:
Supported Modules
The following Computer on Modules are supported:
- Aquila AM69
- Verdin iMX8M Plus
- Verdin iMX8M Mini
- Verdin AM62
- Apalis iMX8
- Apalis iMX6
- Colibri iMX8X
- Colibri iMX7 1GB
- Colibri iMX6DL
- Colibri iMX6ULL 1GB
Supported OS
The following platform and configuration are supported:
To get full performance, CODESYS requires the Linux kernel with the PREEMPT_RT patch applied and configured to be fully preemptive. The support for PREEMPT_RT on Torizon is in its early stages. For evaluation, you can run this container using the default Torizon OS without PREEMPT_RT at your discretion. Alternatively, you can install the nightly build of Torizon OS with PREEMPT_RT from our Toradex Easy Installer CI feeds, if available at all. Note that images from the CI feeds are not supported by Toradex. Use them at your discretion.
To follow-up on the PREEMPT_RT topic, subscribe for updates on the Torizon OS Release Roadmap.
Getting Started
Setup the Development Environment
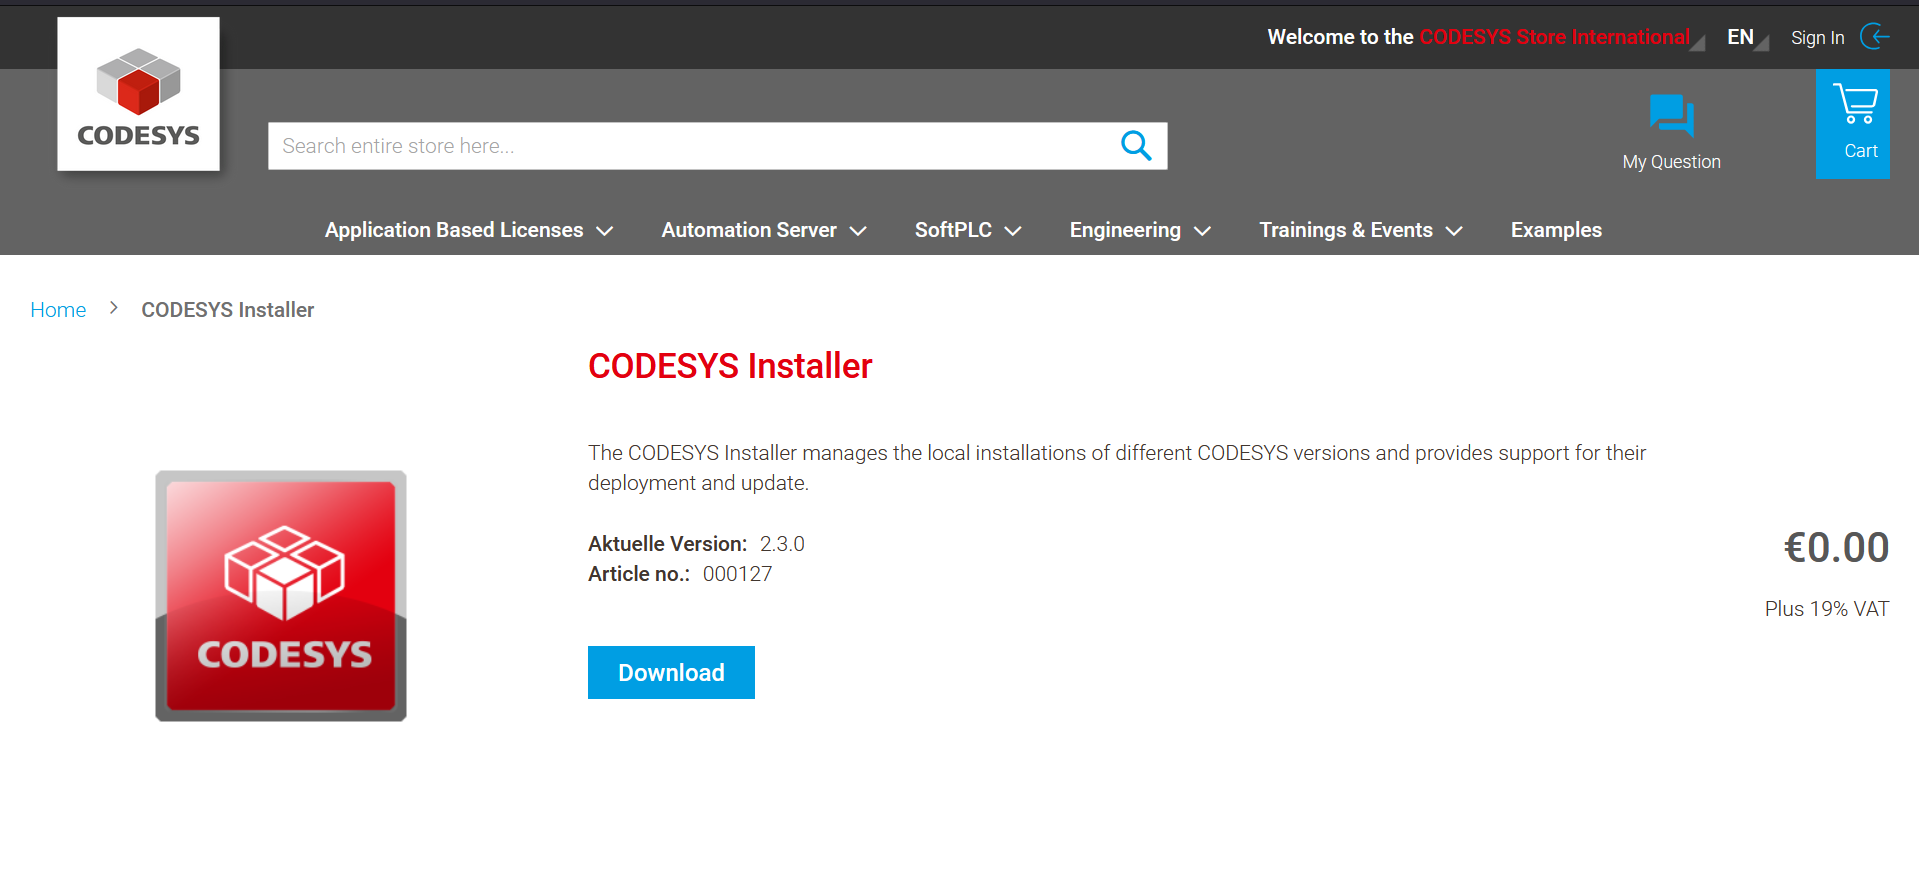
Download the CODESYS Installer from the Codesys store;
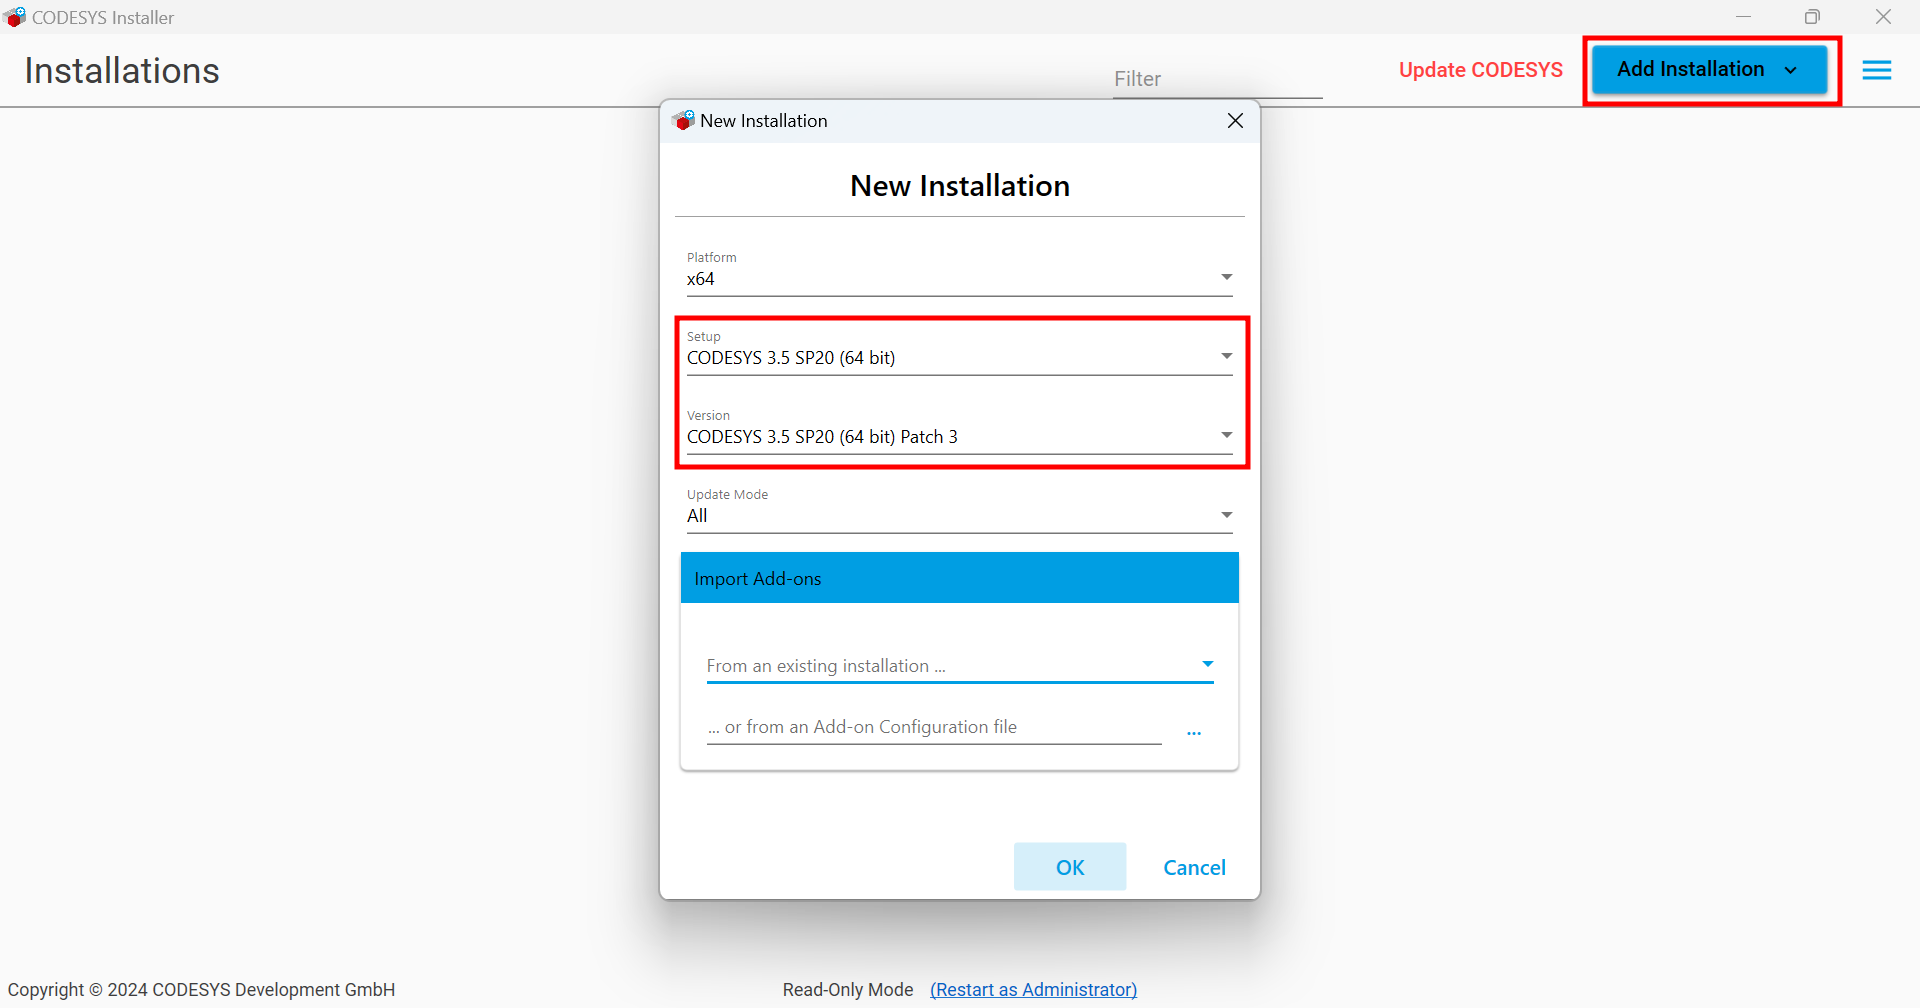
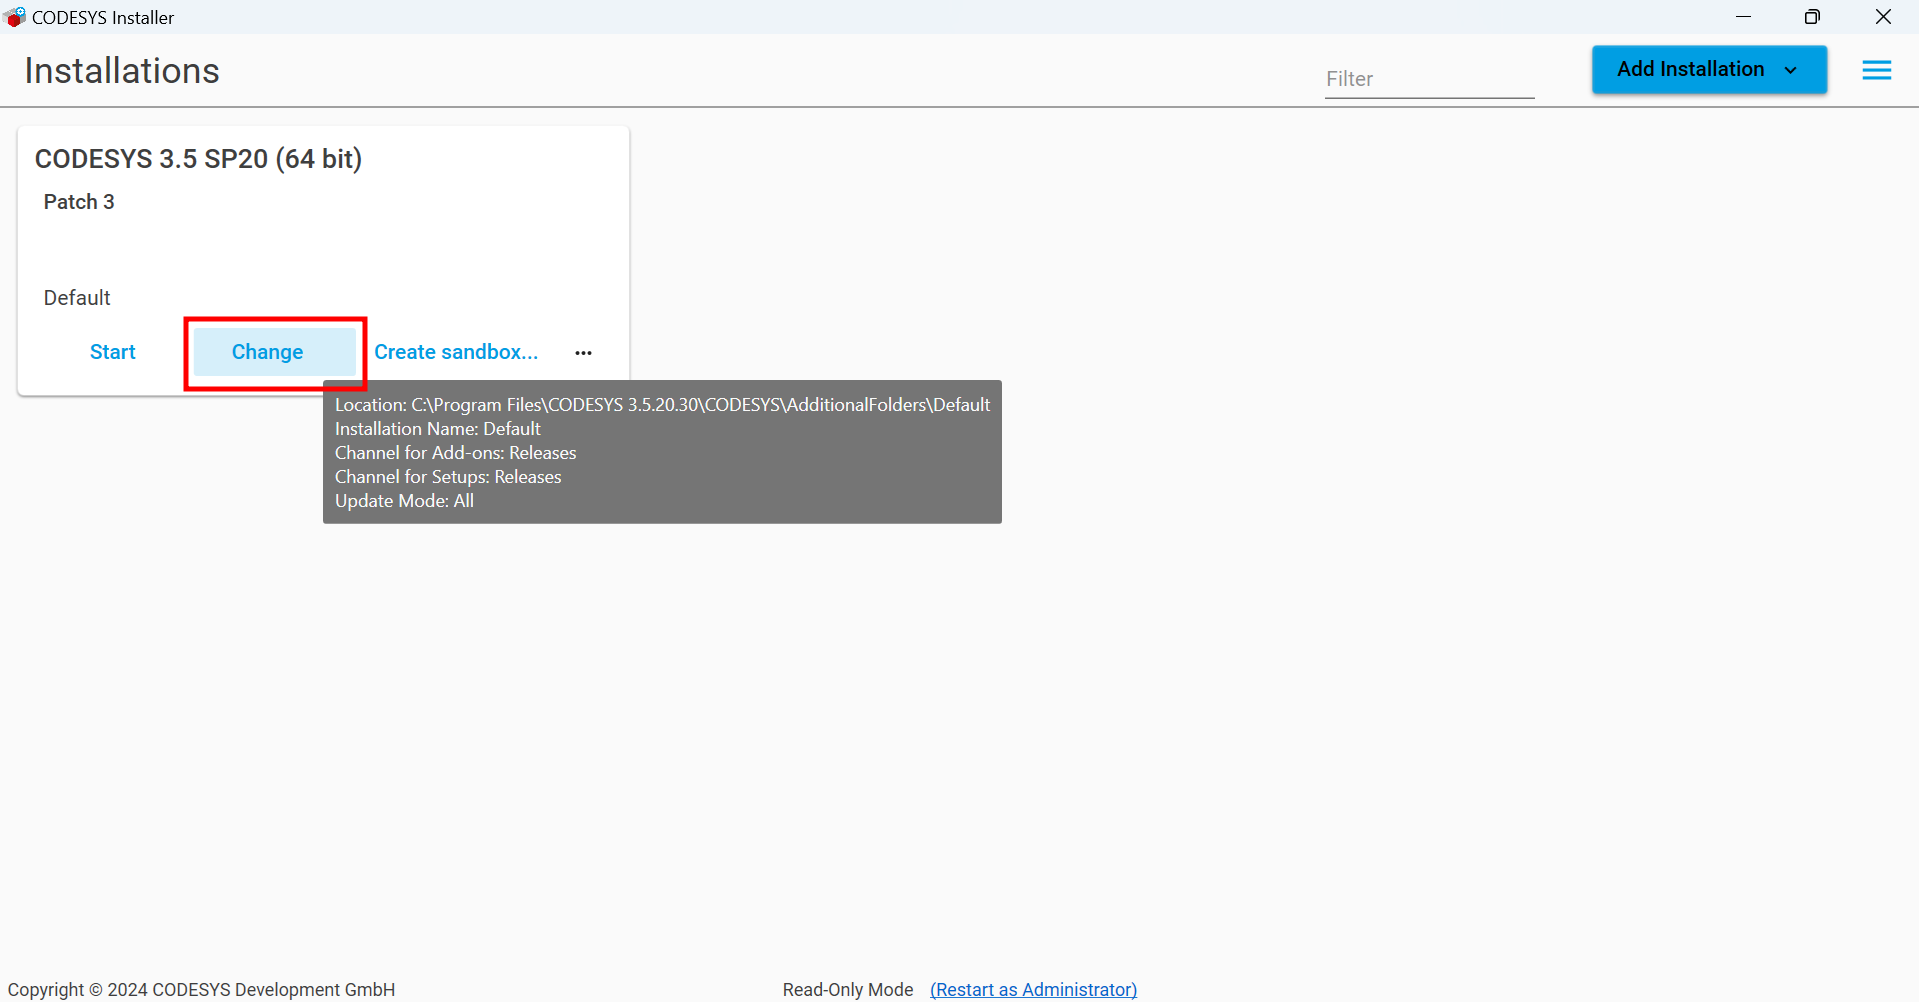
Install the lastest version of the Codesys Development System;
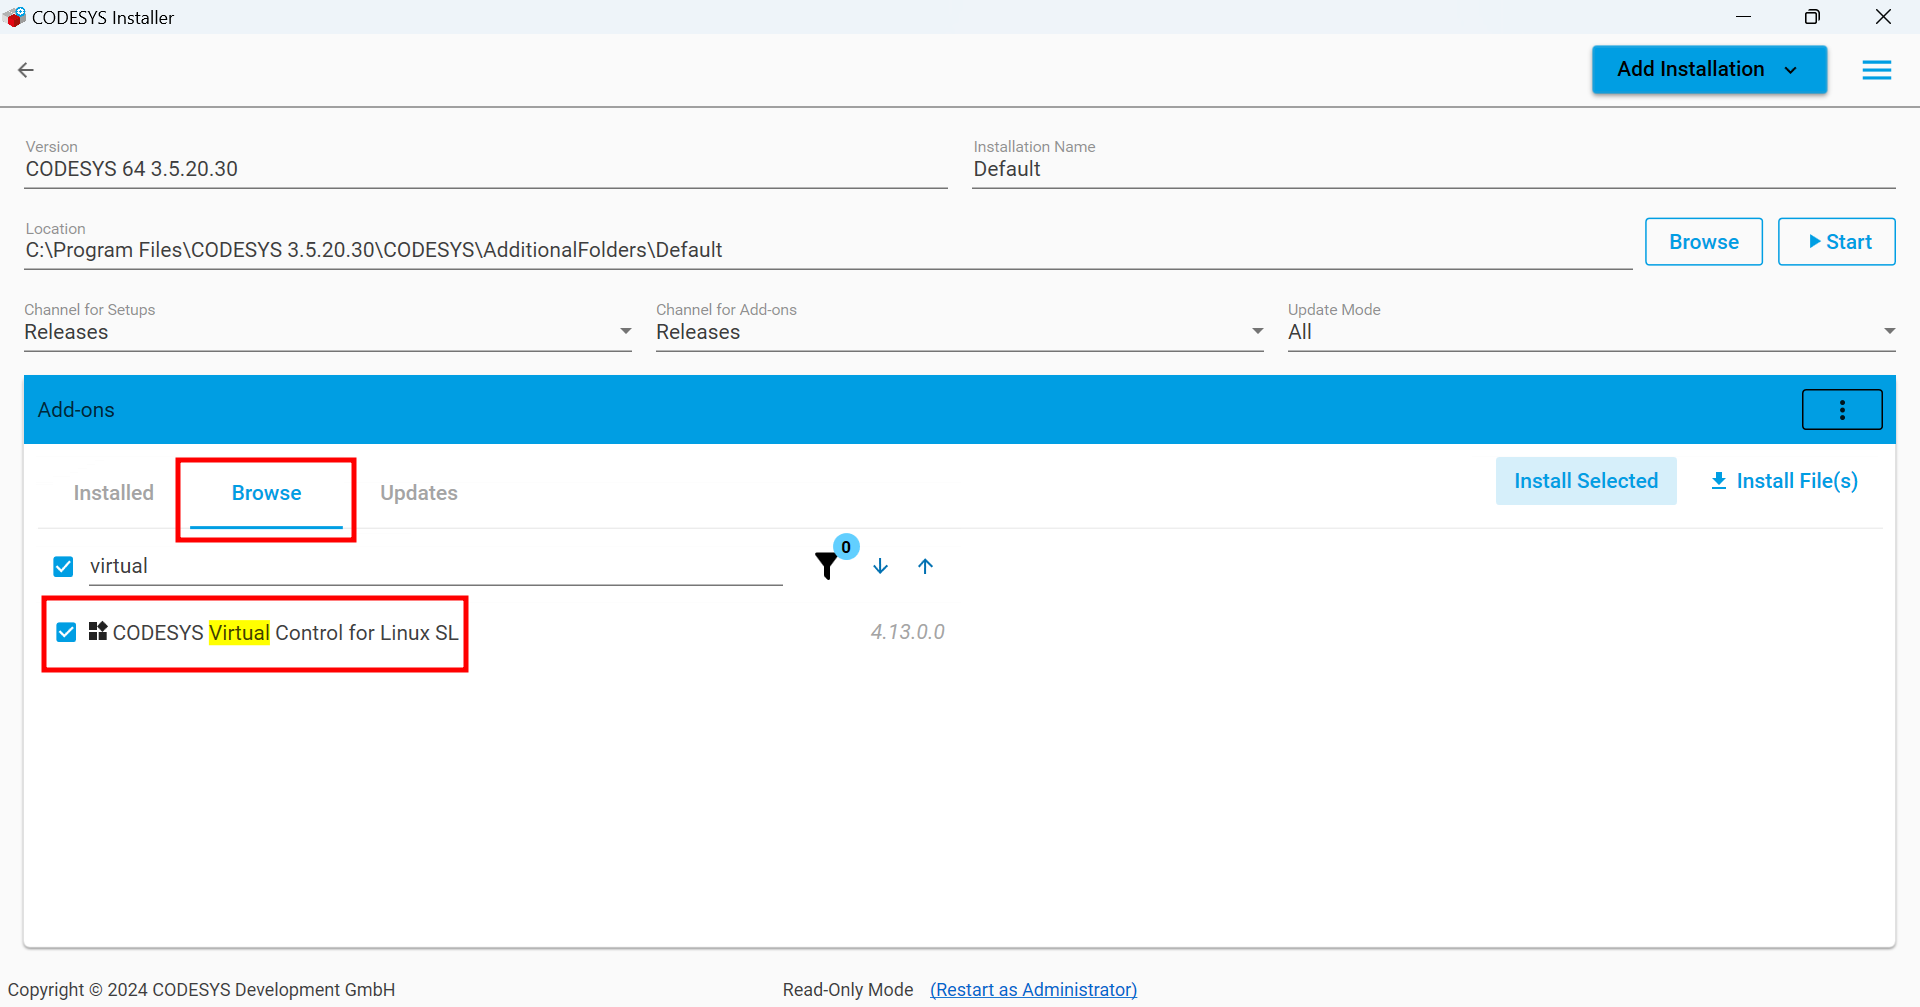
Install the Virtual Control for Linux SL Addon;
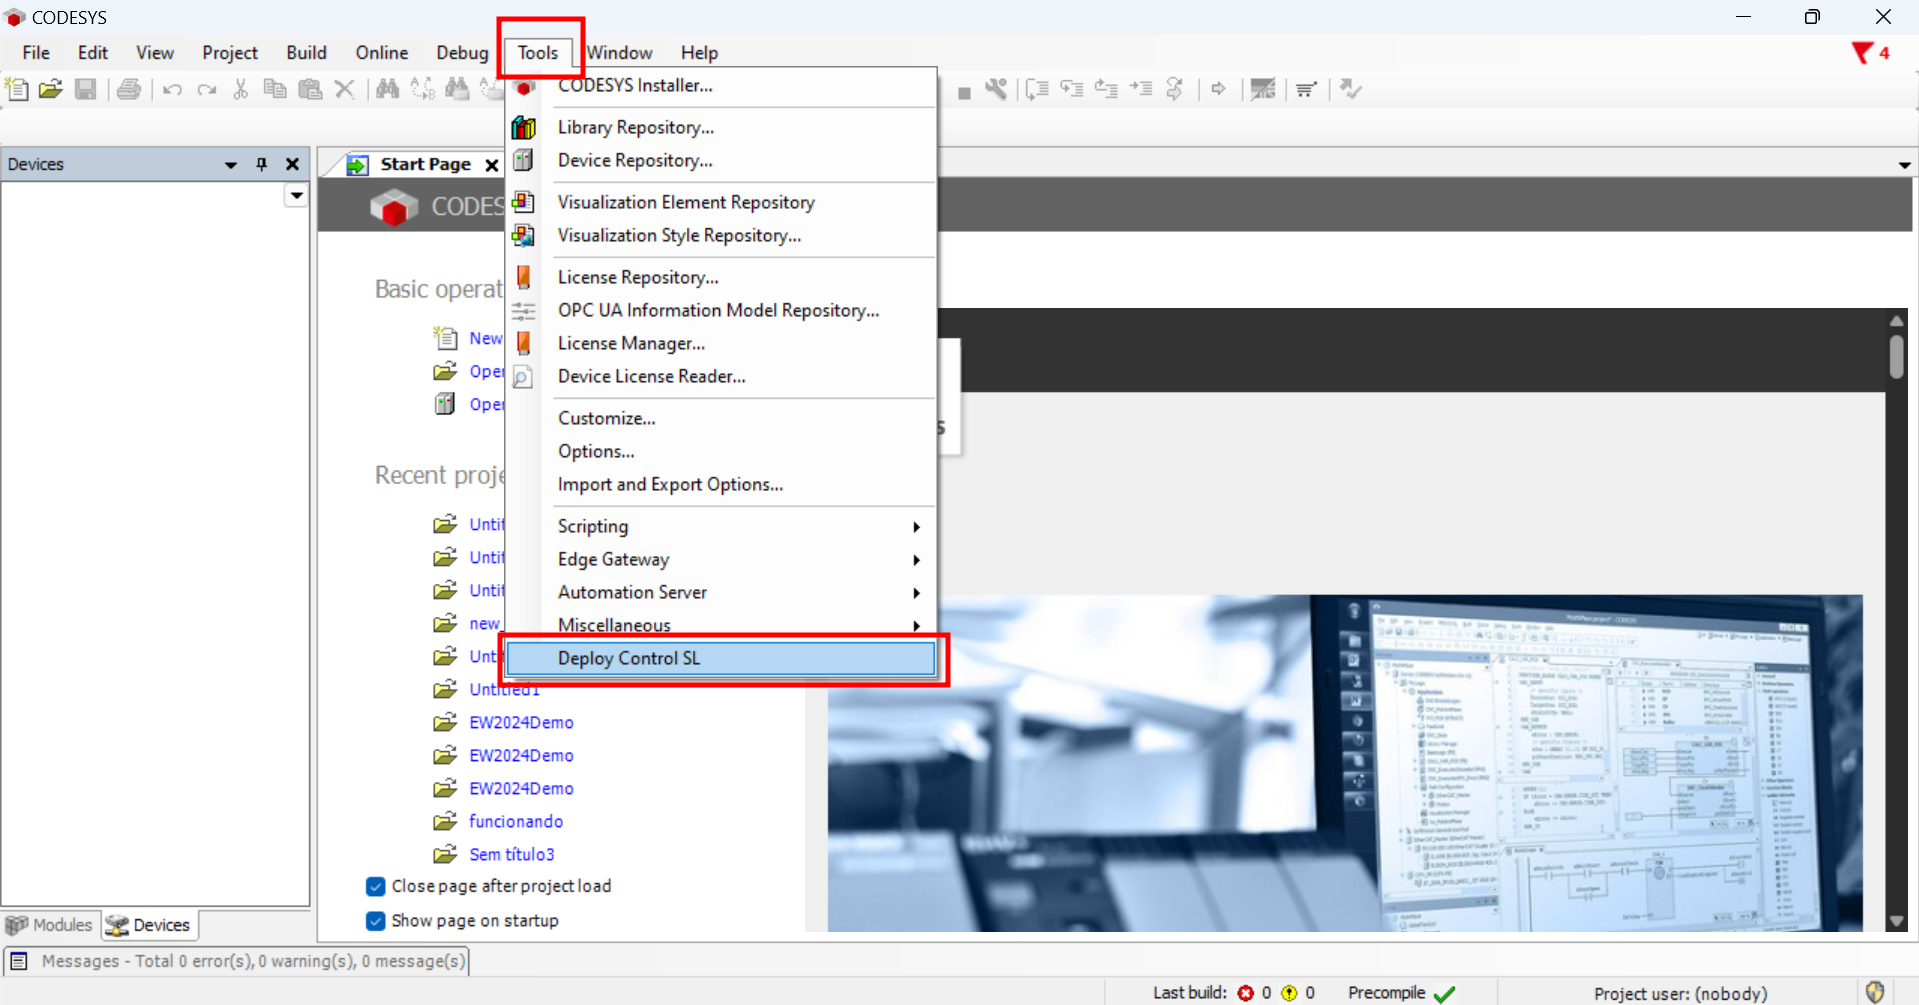
Click the Tools tab and Open the Deploy Control SL Menu;
noteIf you can't see the Deploy Control SL option, check the installation of the Virtual Control for Linux SL Addon.
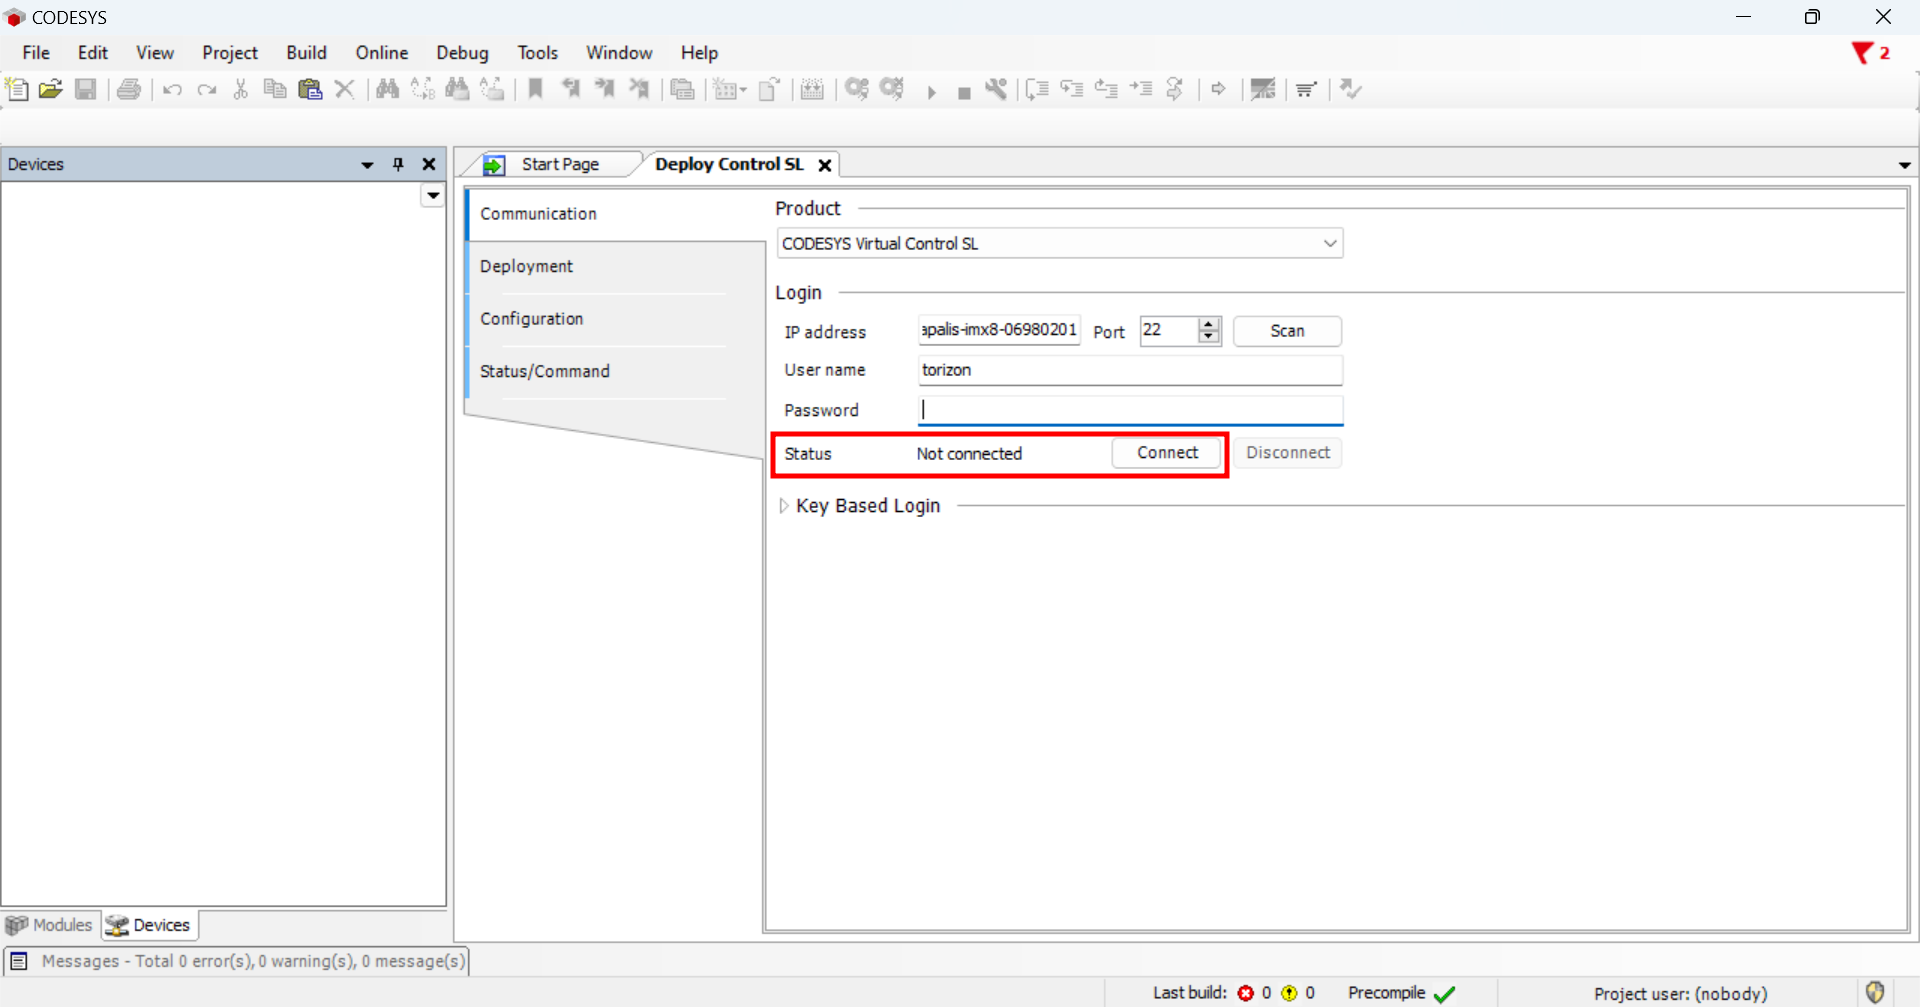
Connect to the Target Device. You should see the connected status;
noteYou can connect using the hostname or the IP address.
Install, create an App Instance and Run the Gateway and Runtime Containers on the Target Device, you should see the running status;
infoThe
edgearmis a Gateway Application and thevirtuallinuxarmis the Runtime Application.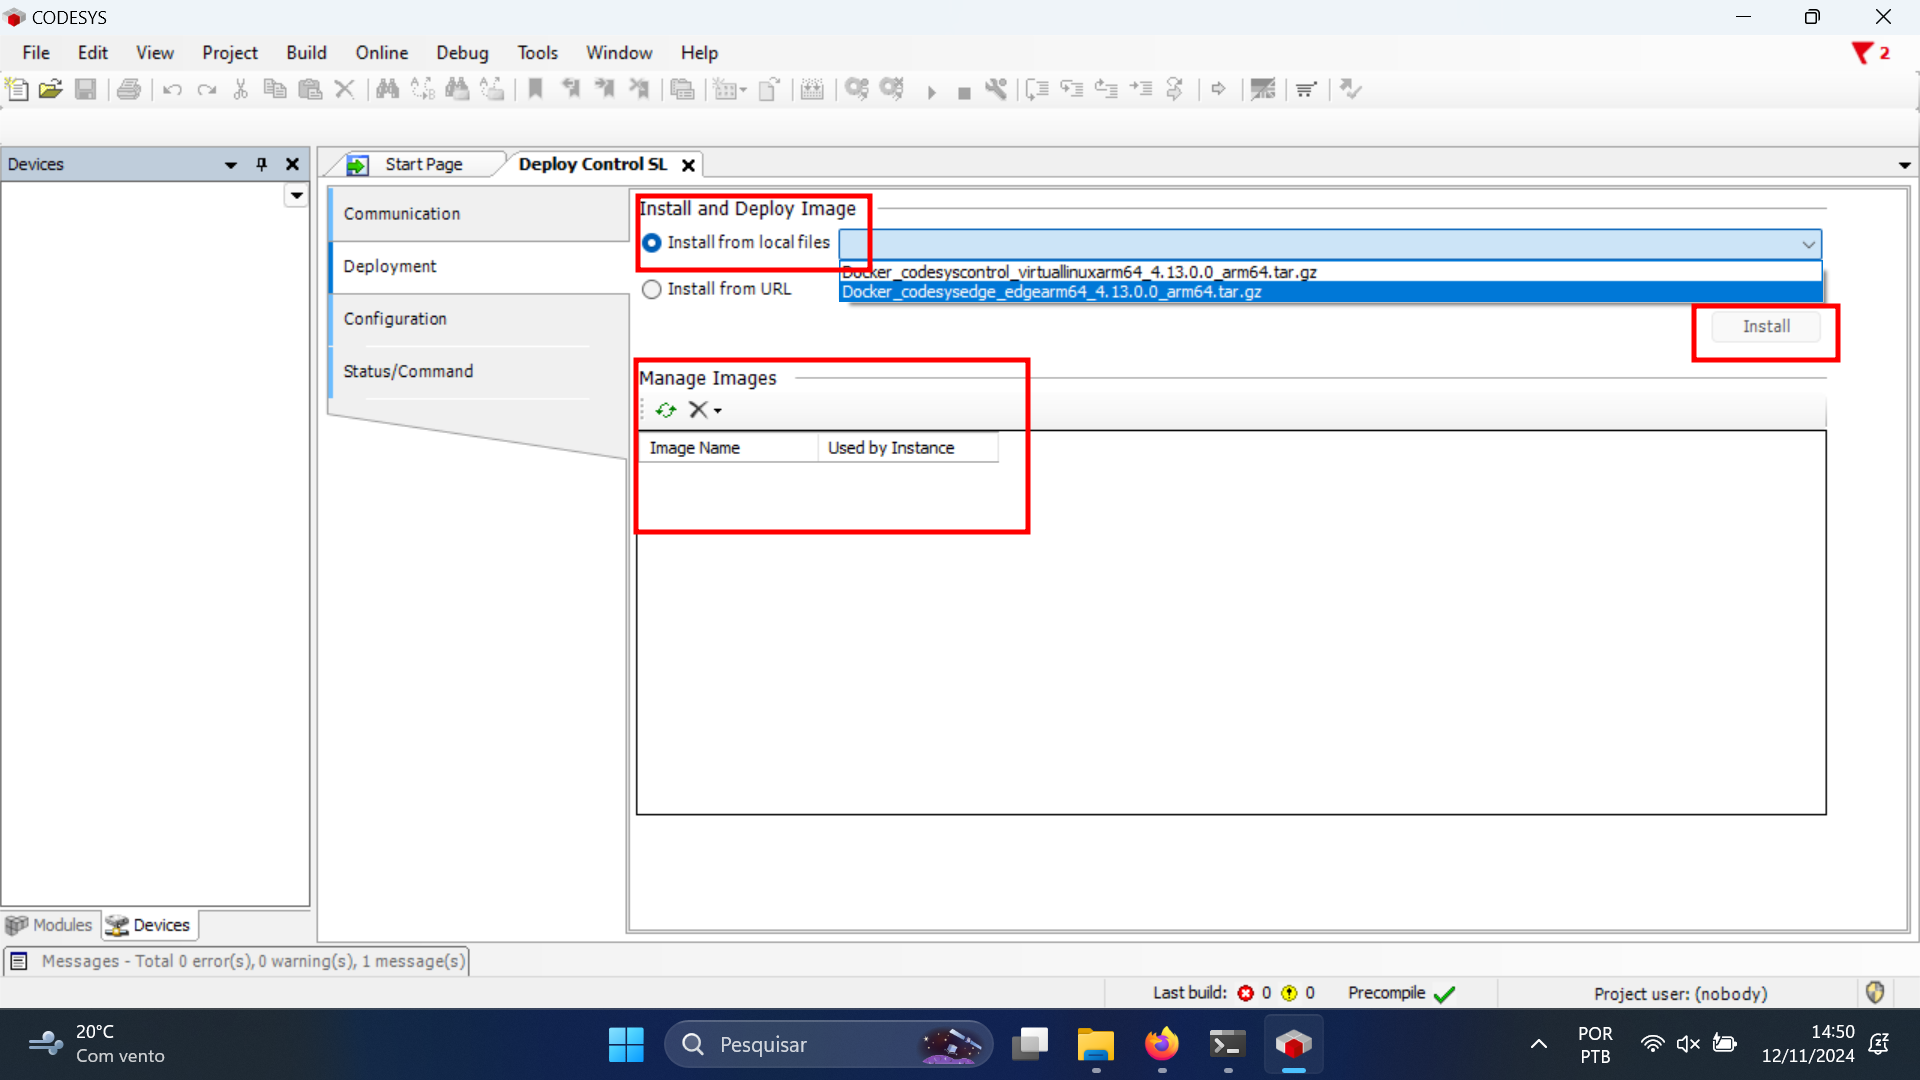
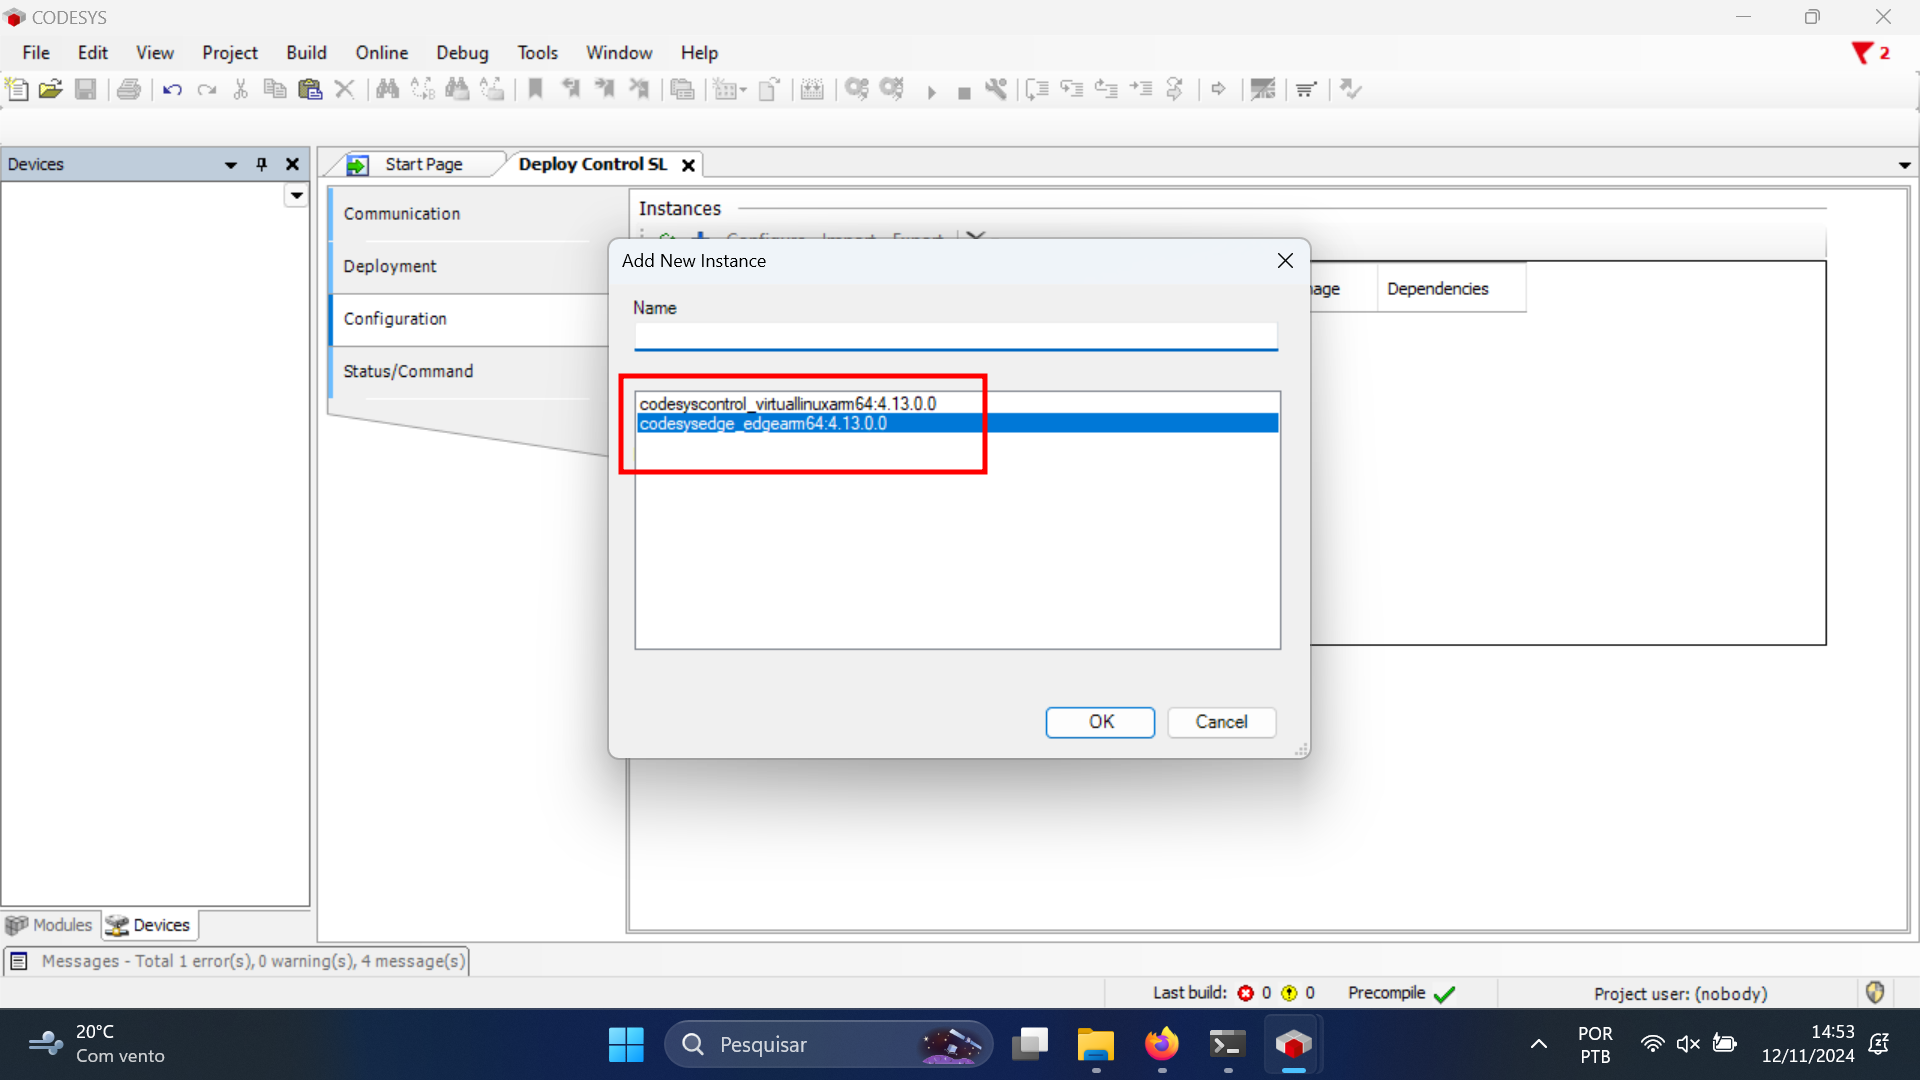
From here, you should be able to create a Gateway and connect to your target device.
Create a New Project
Create a new Standard project, give the project a name and click ok:
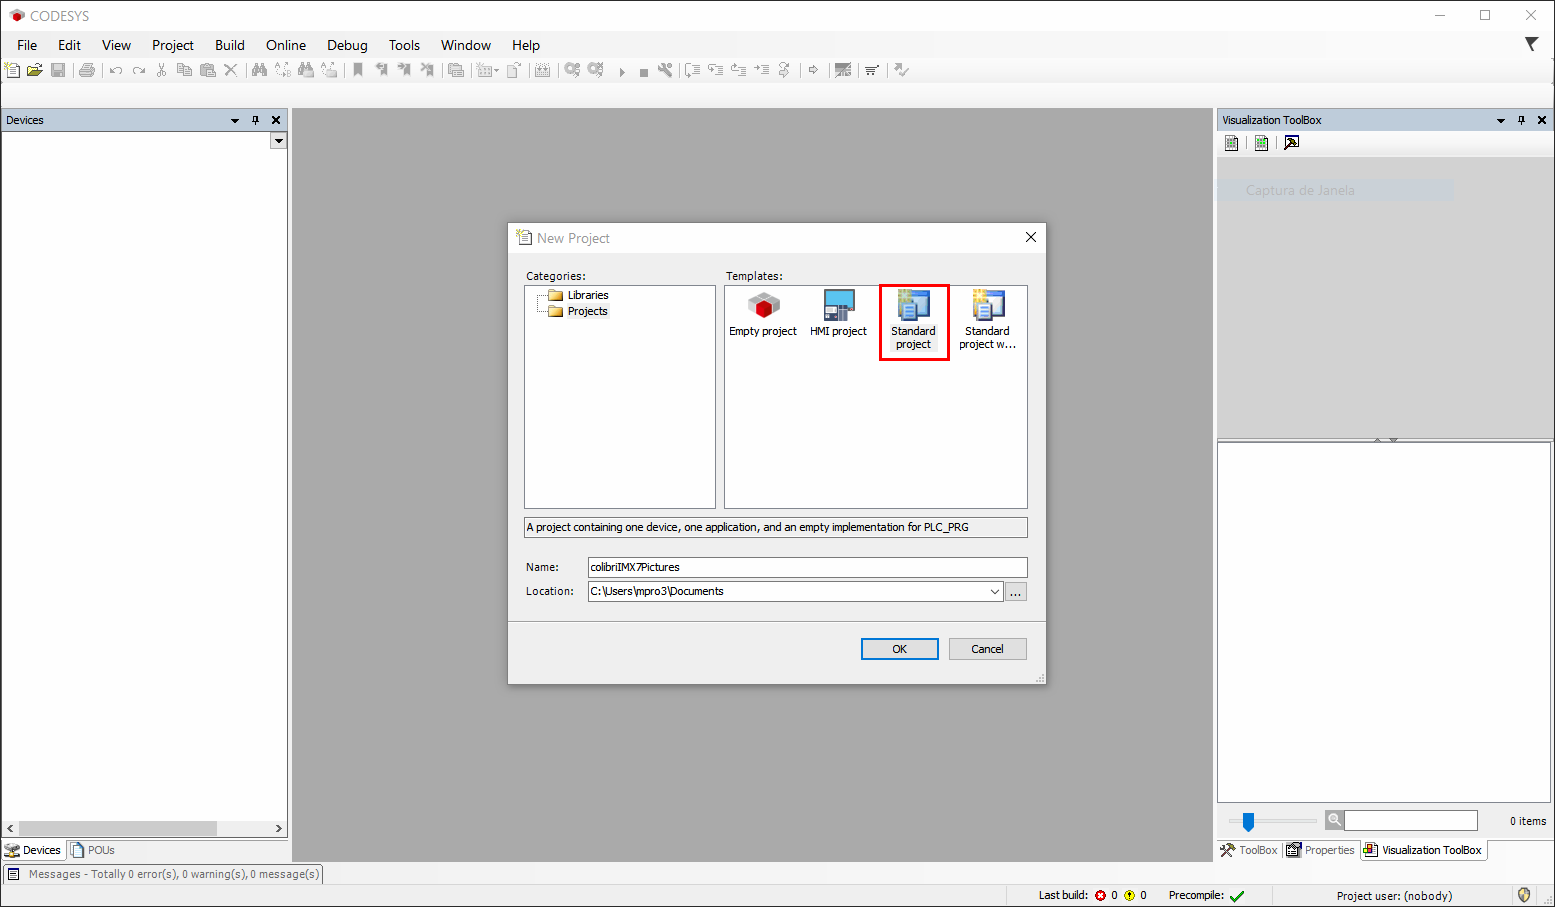
Select the
Virtual Control for Linux SL. In PLC_PRG select Ladder: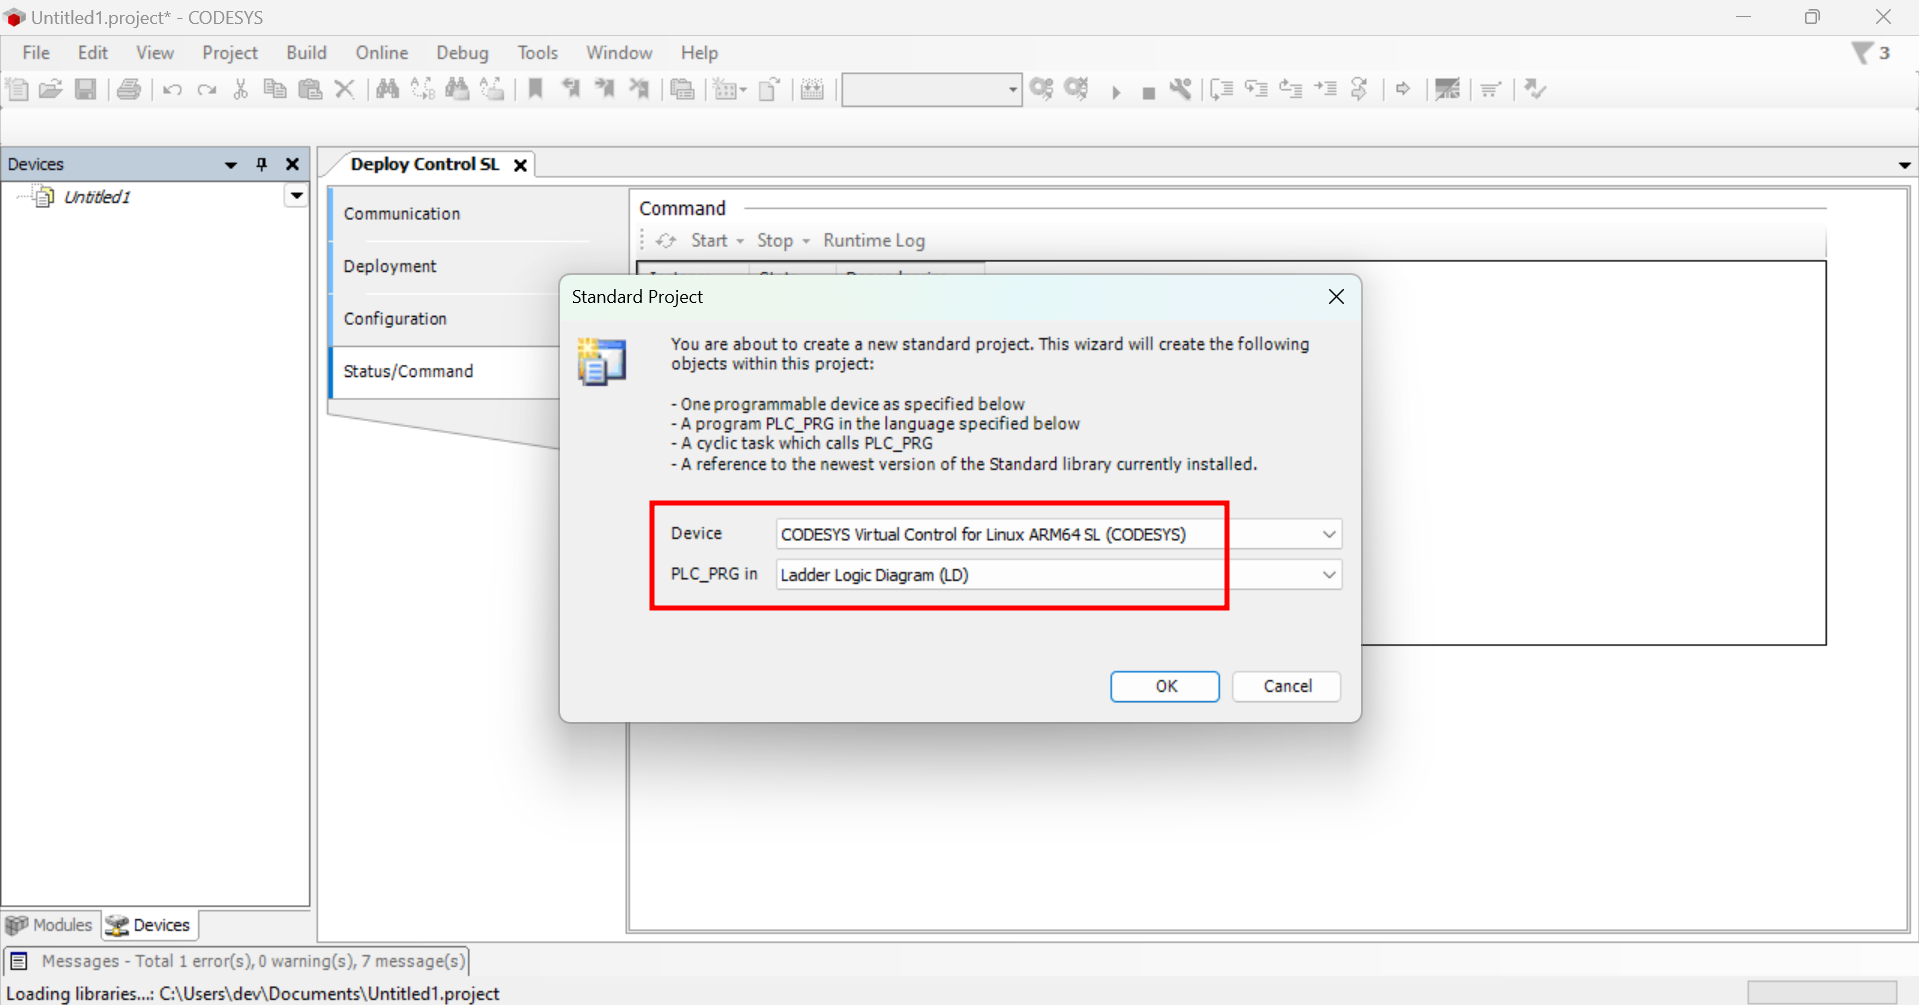
Now a new project is created. You will see a menu listed on the left-hand side of the project window.
Double click on Device. A new tab will open. Click on Gateway -> Manage Gateways:
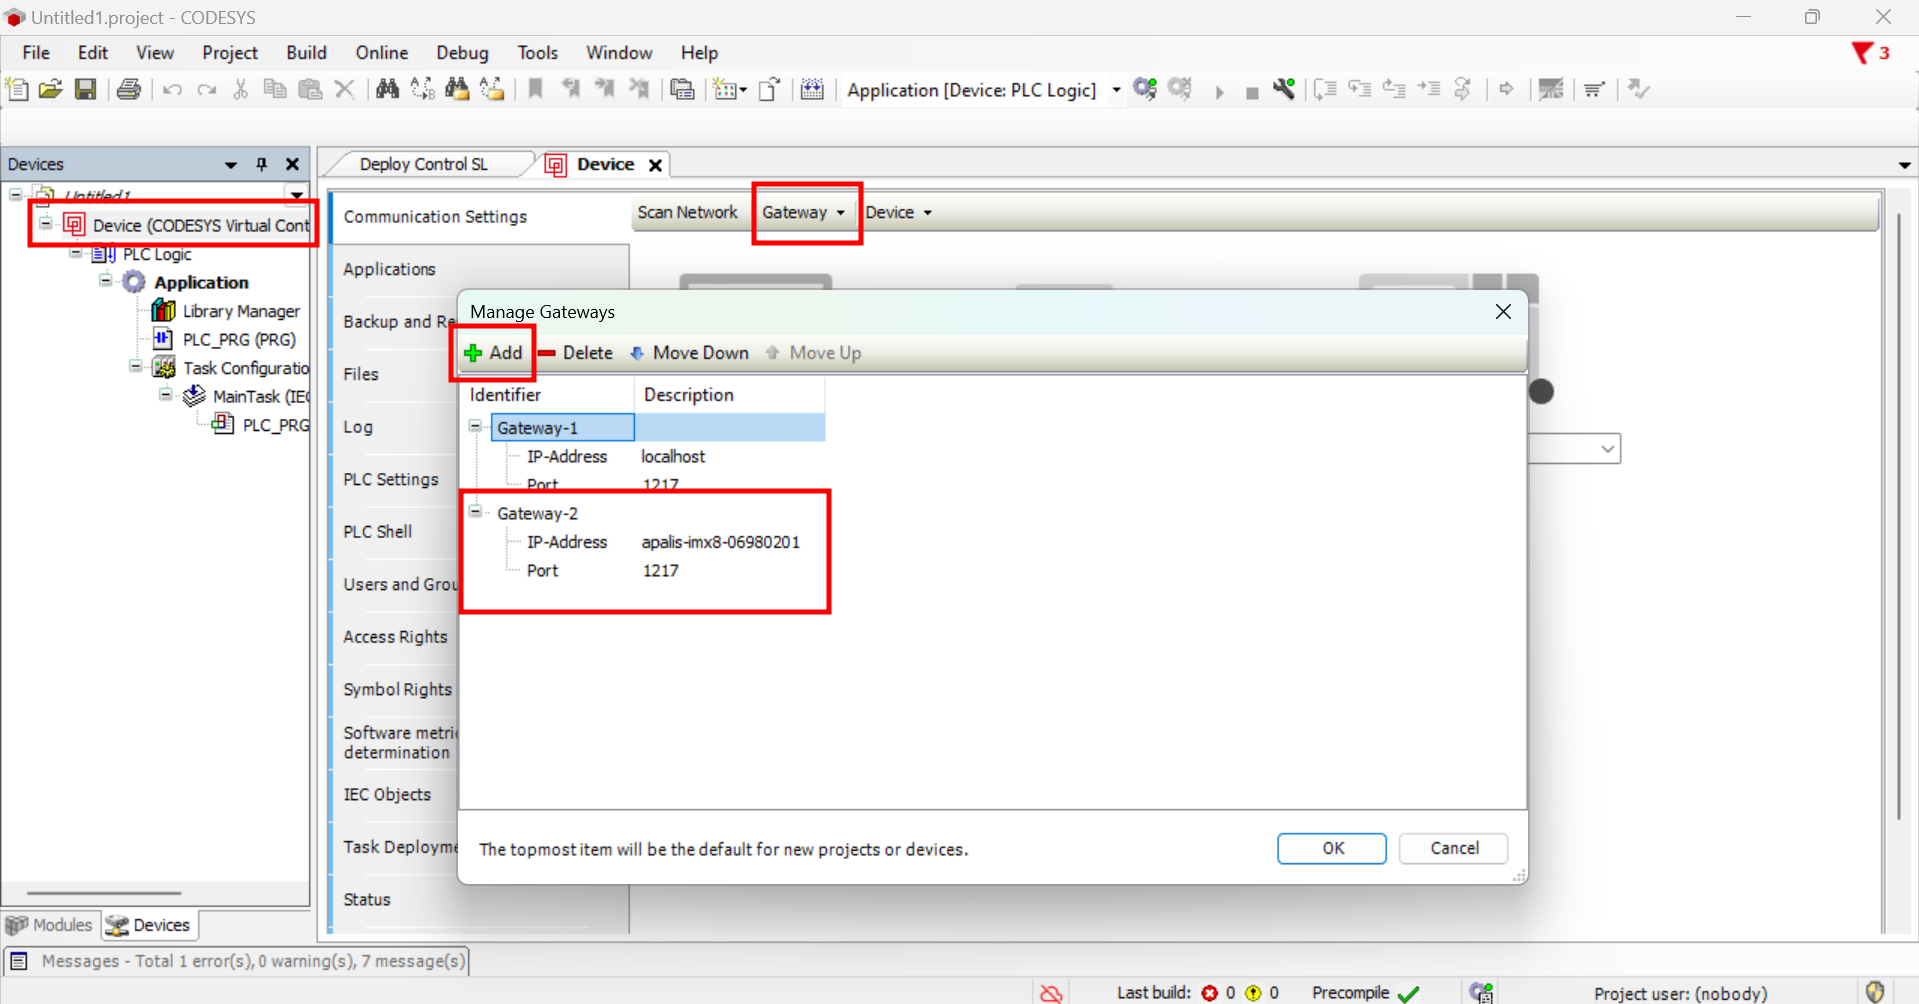
Click Add to create a new Gateway using the target device IP:
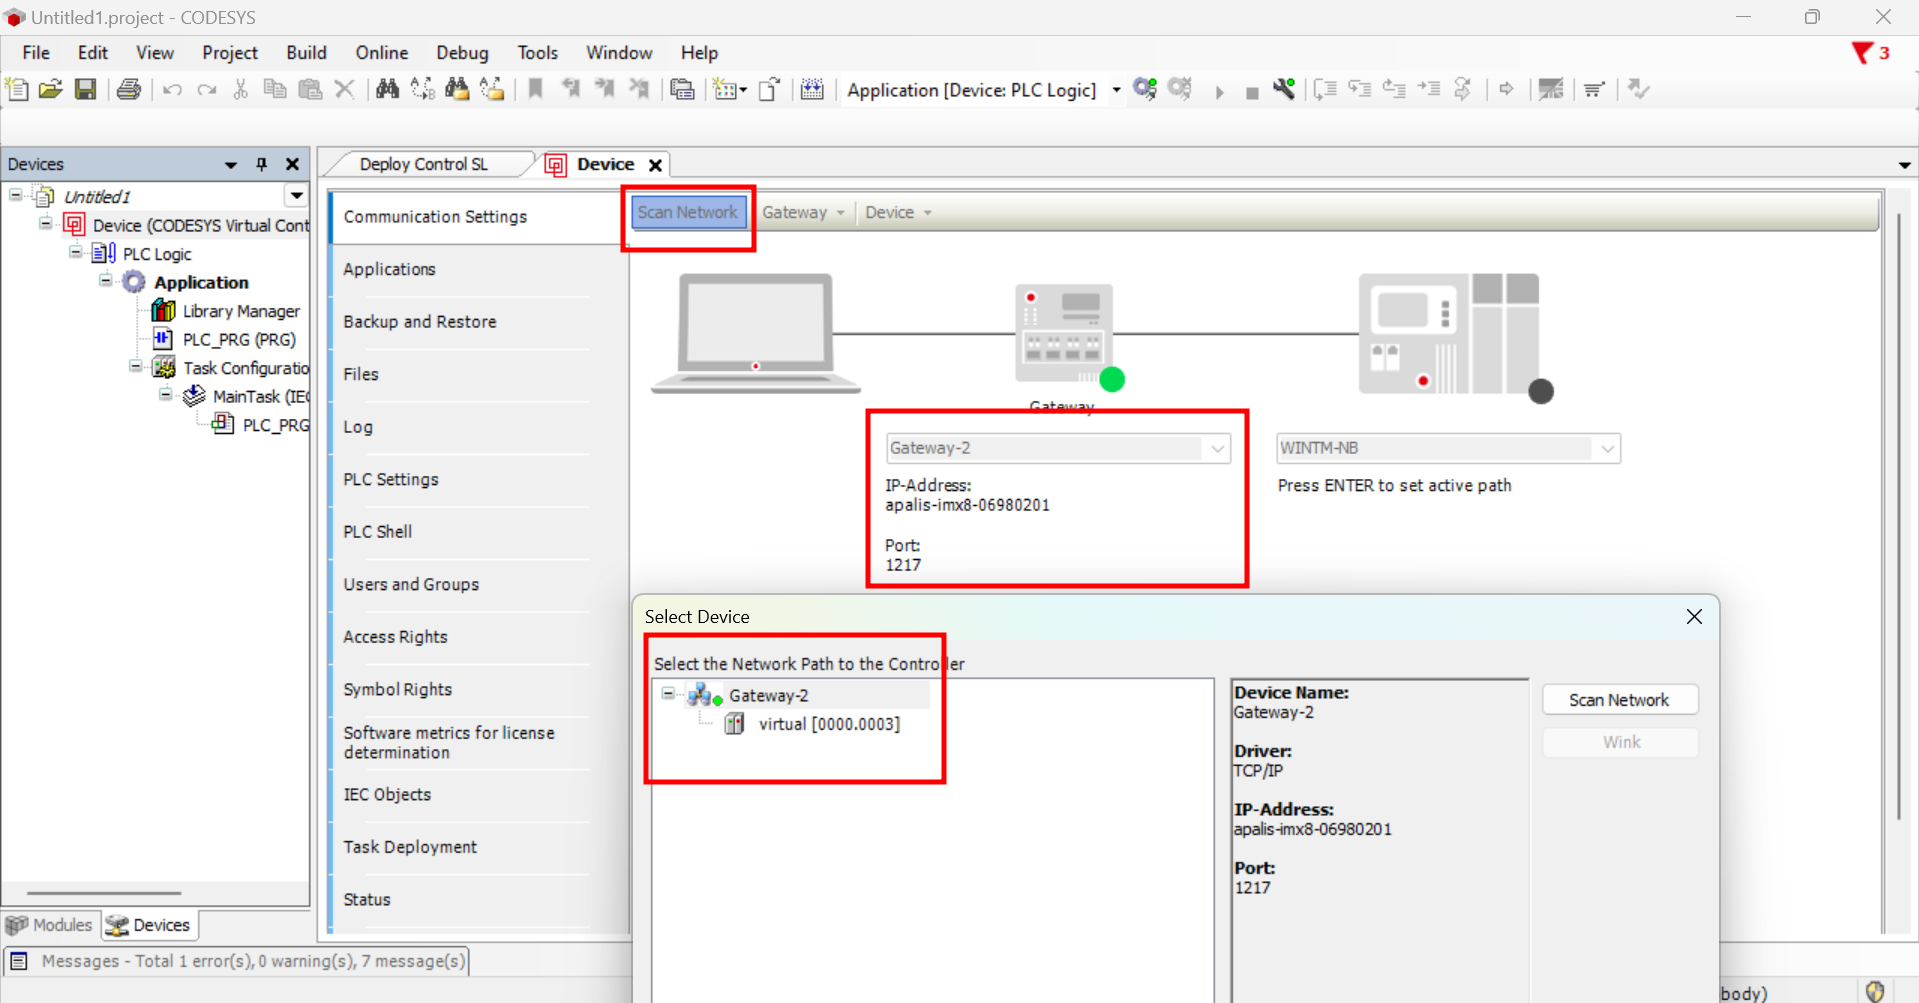
Change to the new Gateway and Click Scan Network:
In the Select Device window make sure the device was found and then double click on it:
With the device connected to the development environment, we can start programming the logic. Click PLC_PRG in the project tree. In Toolbox drag and drop a Contact and a Coil to the Ladder area:
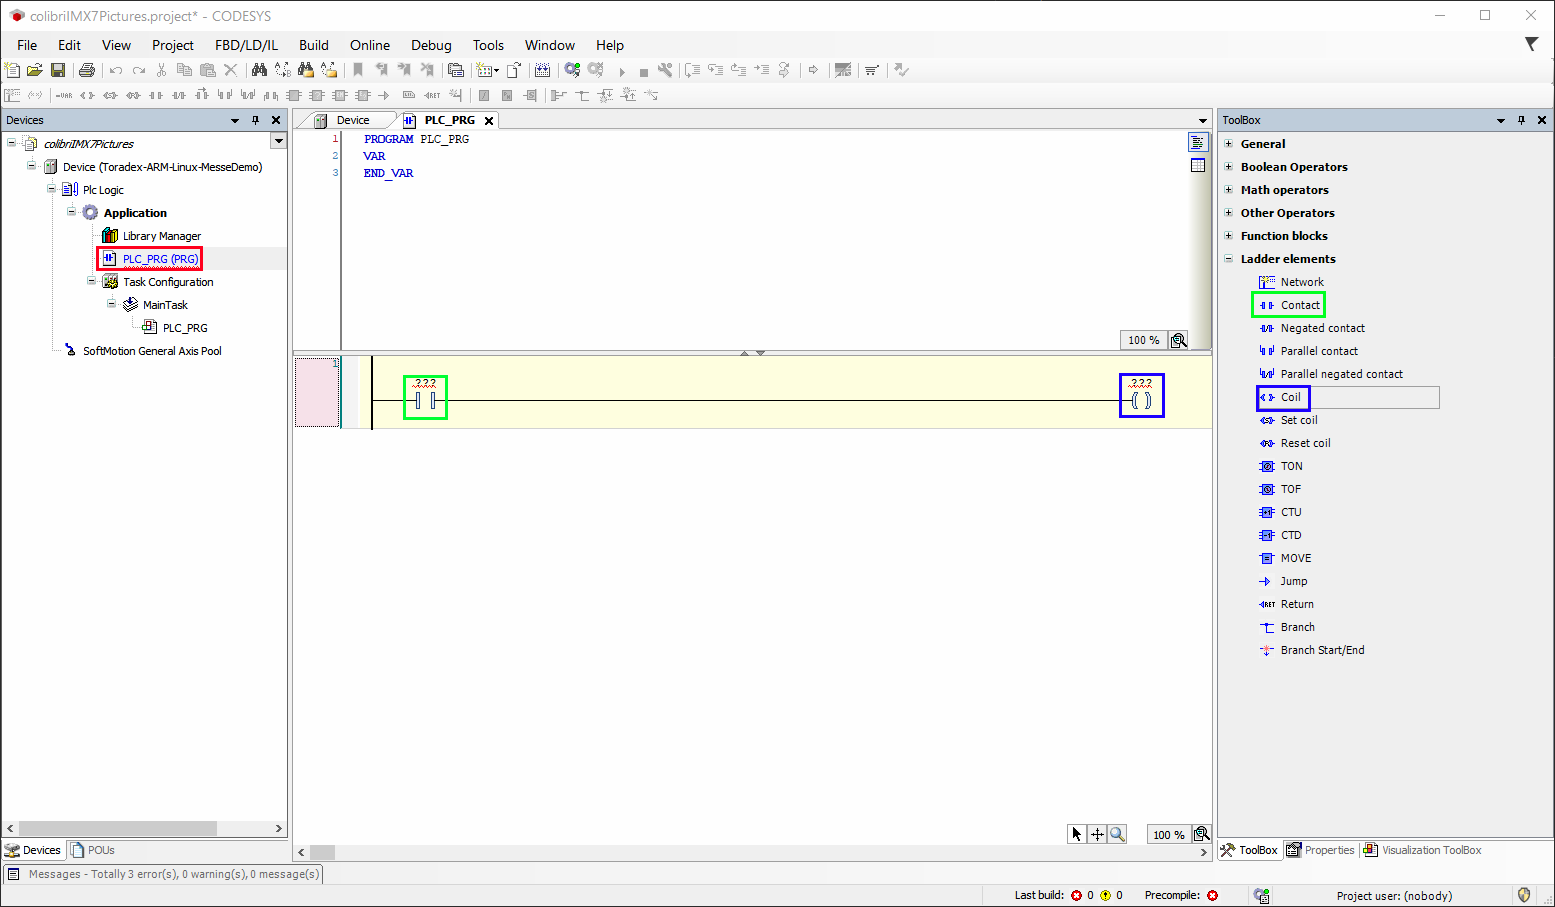
Add the INPUT_01 variable name in the Contact text box and select as type BOOL:
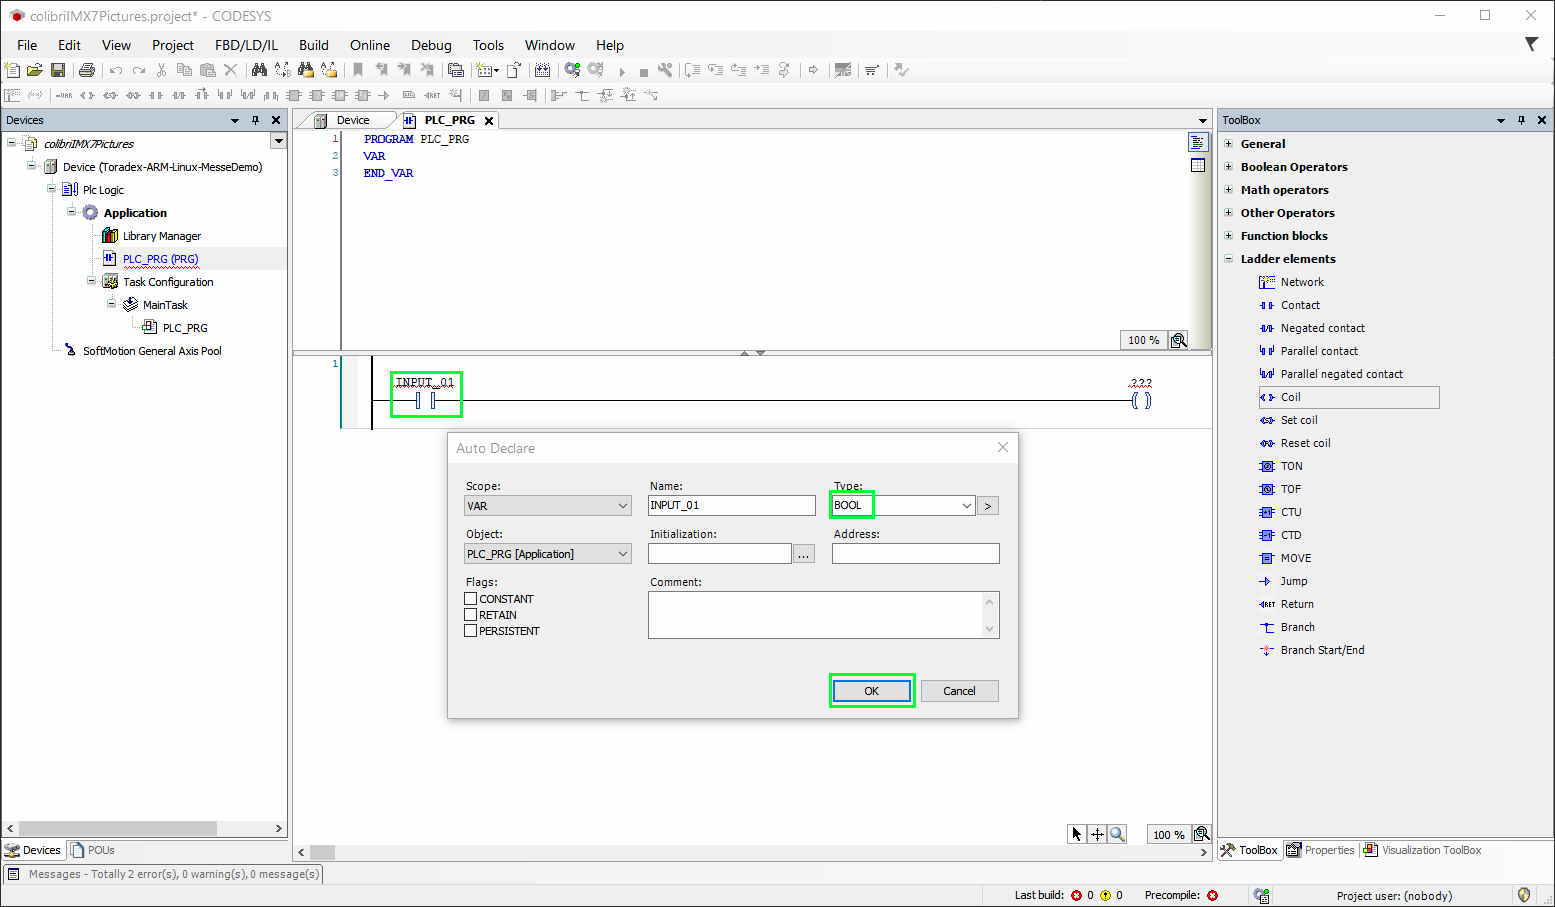
Add the OUTPUT_01 variable name in the Coil text box and select as type BOOL:
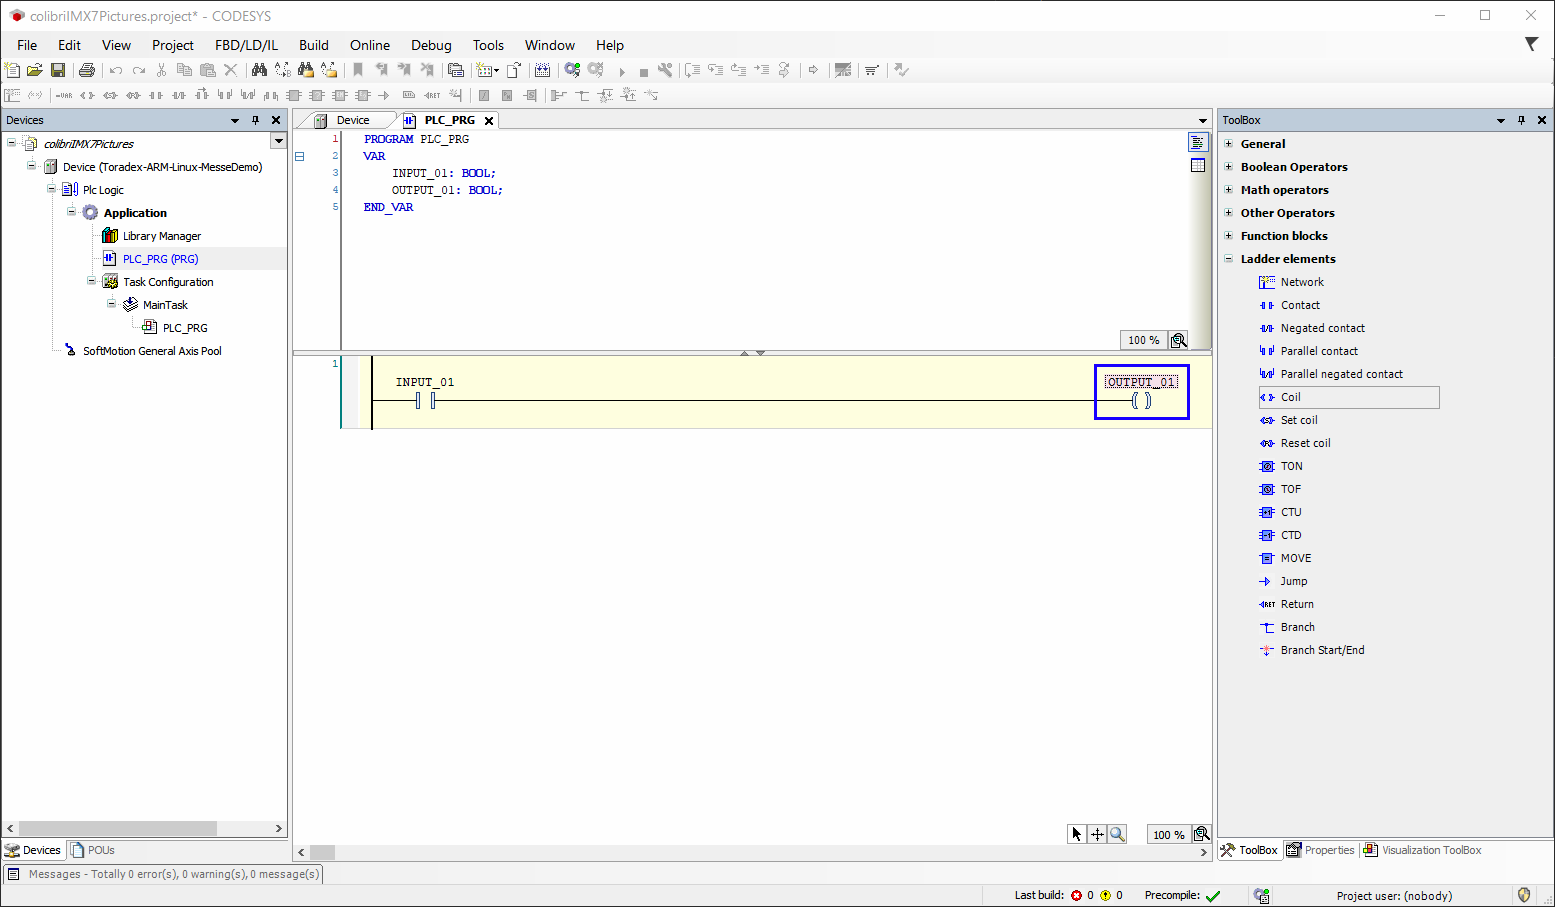
Add a Visualization to the project. In the project tree, right click on Application > Add Object > Visualization:
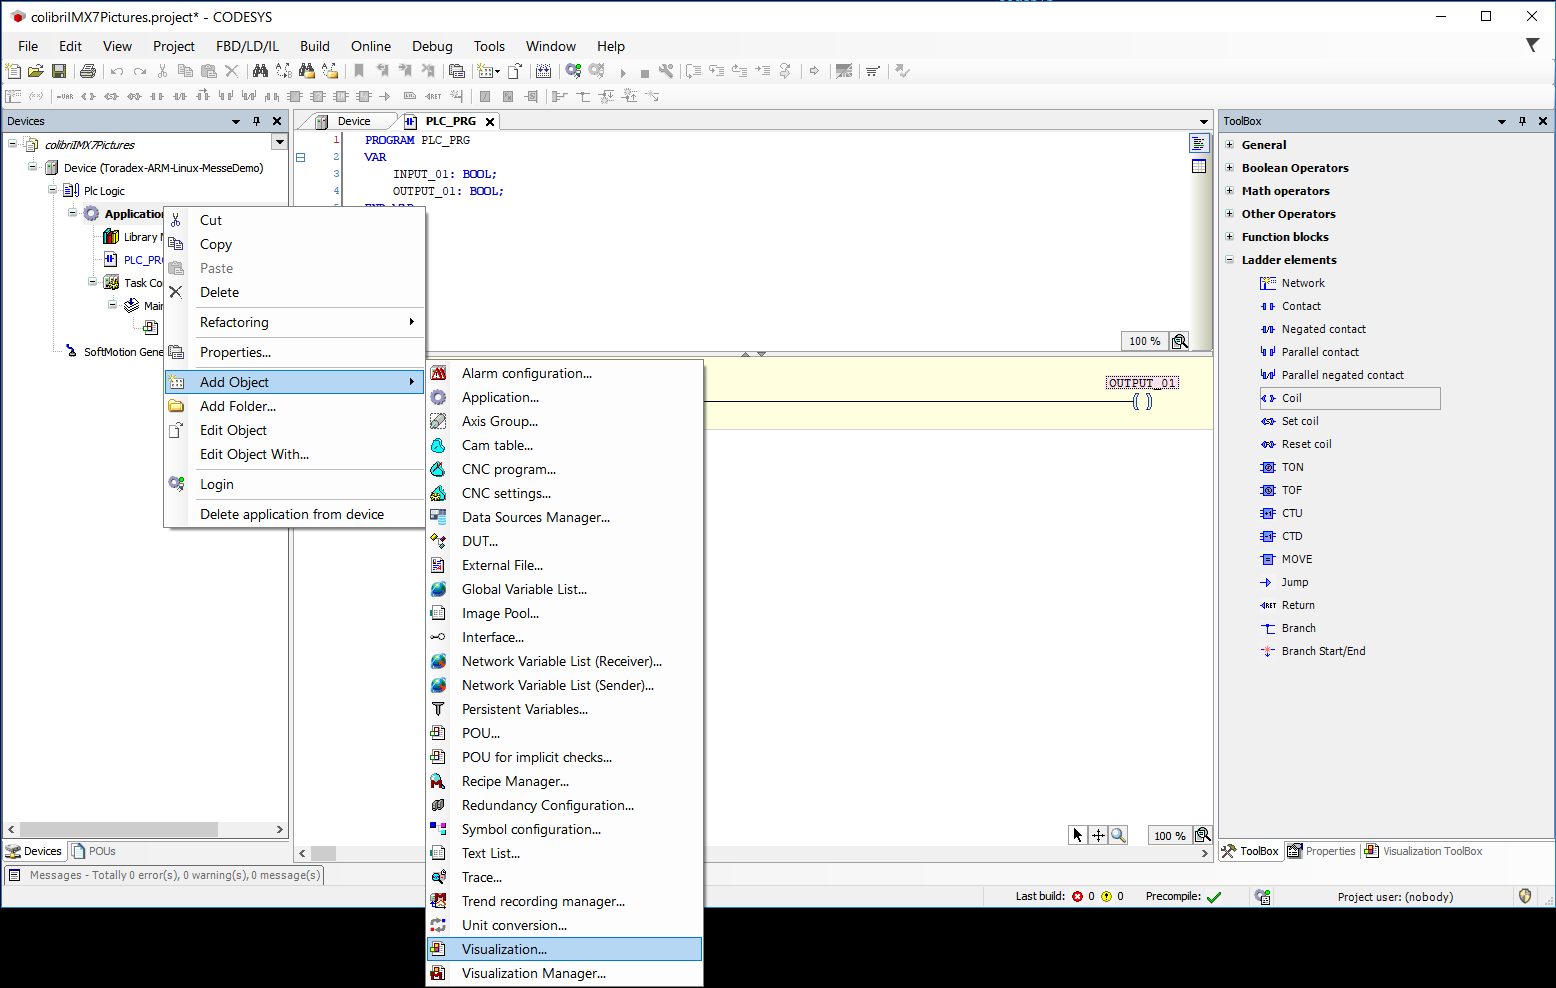
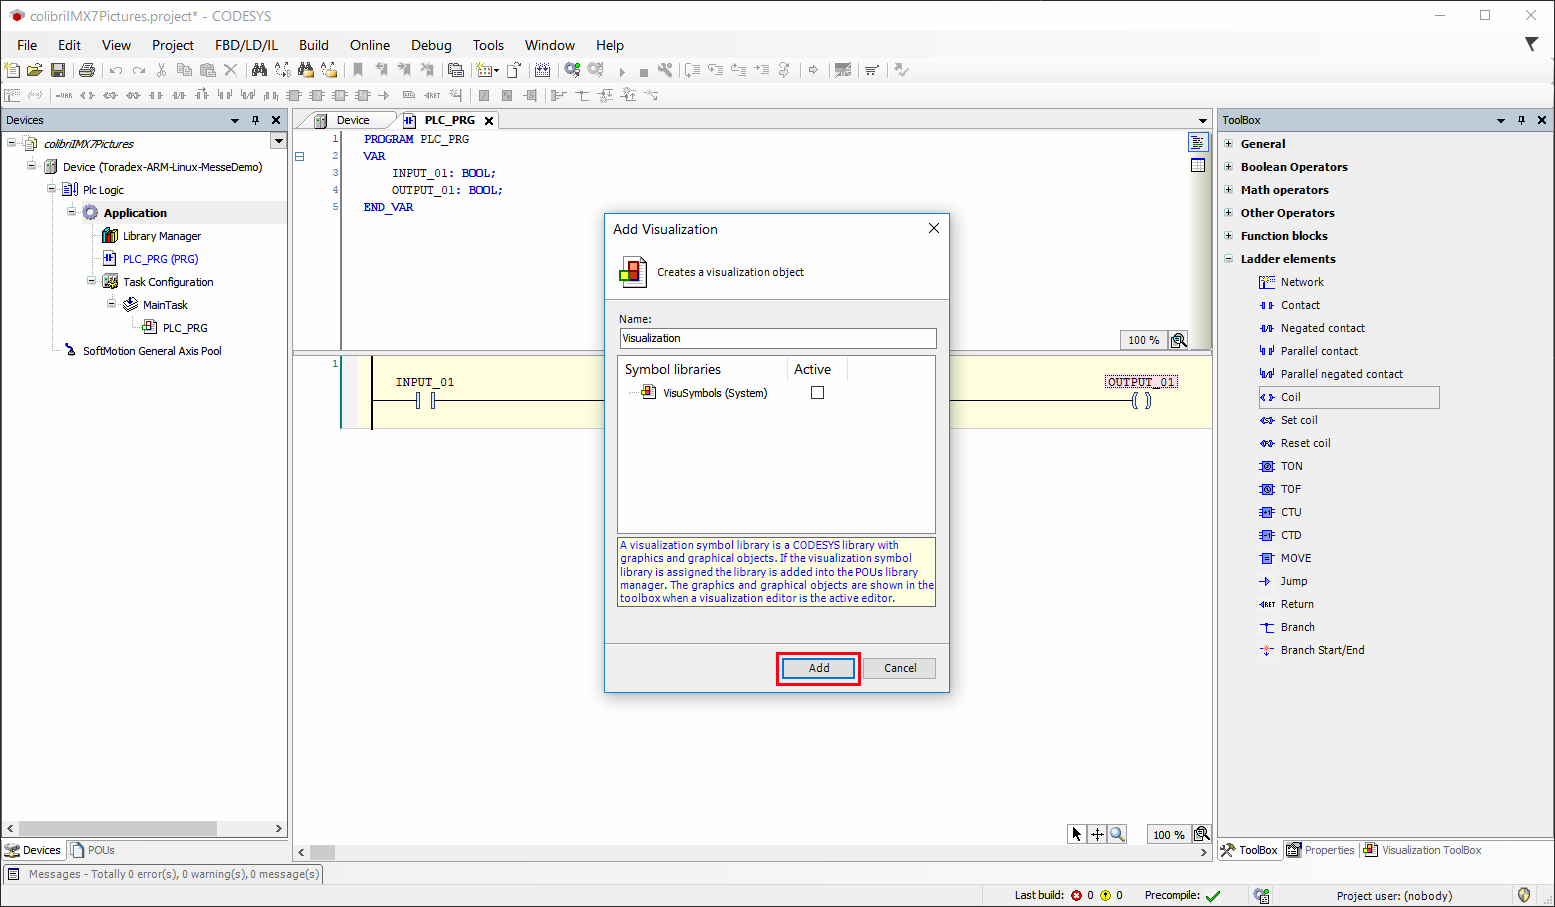
On Add Visualization window just click Add button:
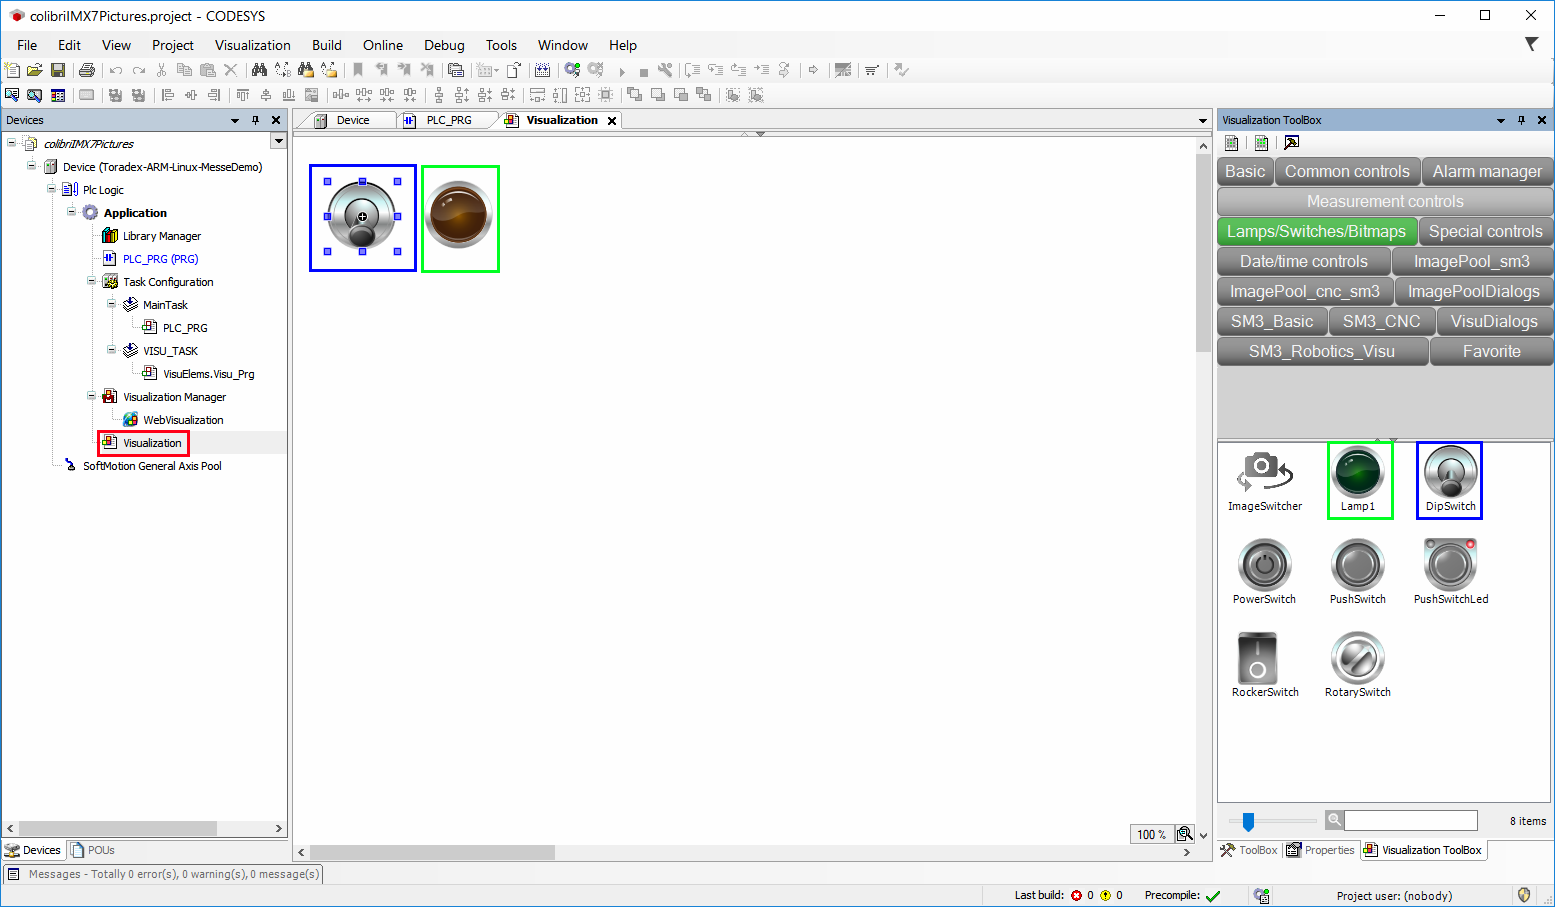
On the Visualization tab, which can be opened with double click on Visualization in the project tree, select Visualization Toolbox > Lamps/Switches/Bitmaps one DipSwitch and one Lamp1, drag and drop one at a time for the Visualization tab:
Connect the elements of the visualization to the elements of the ladder.
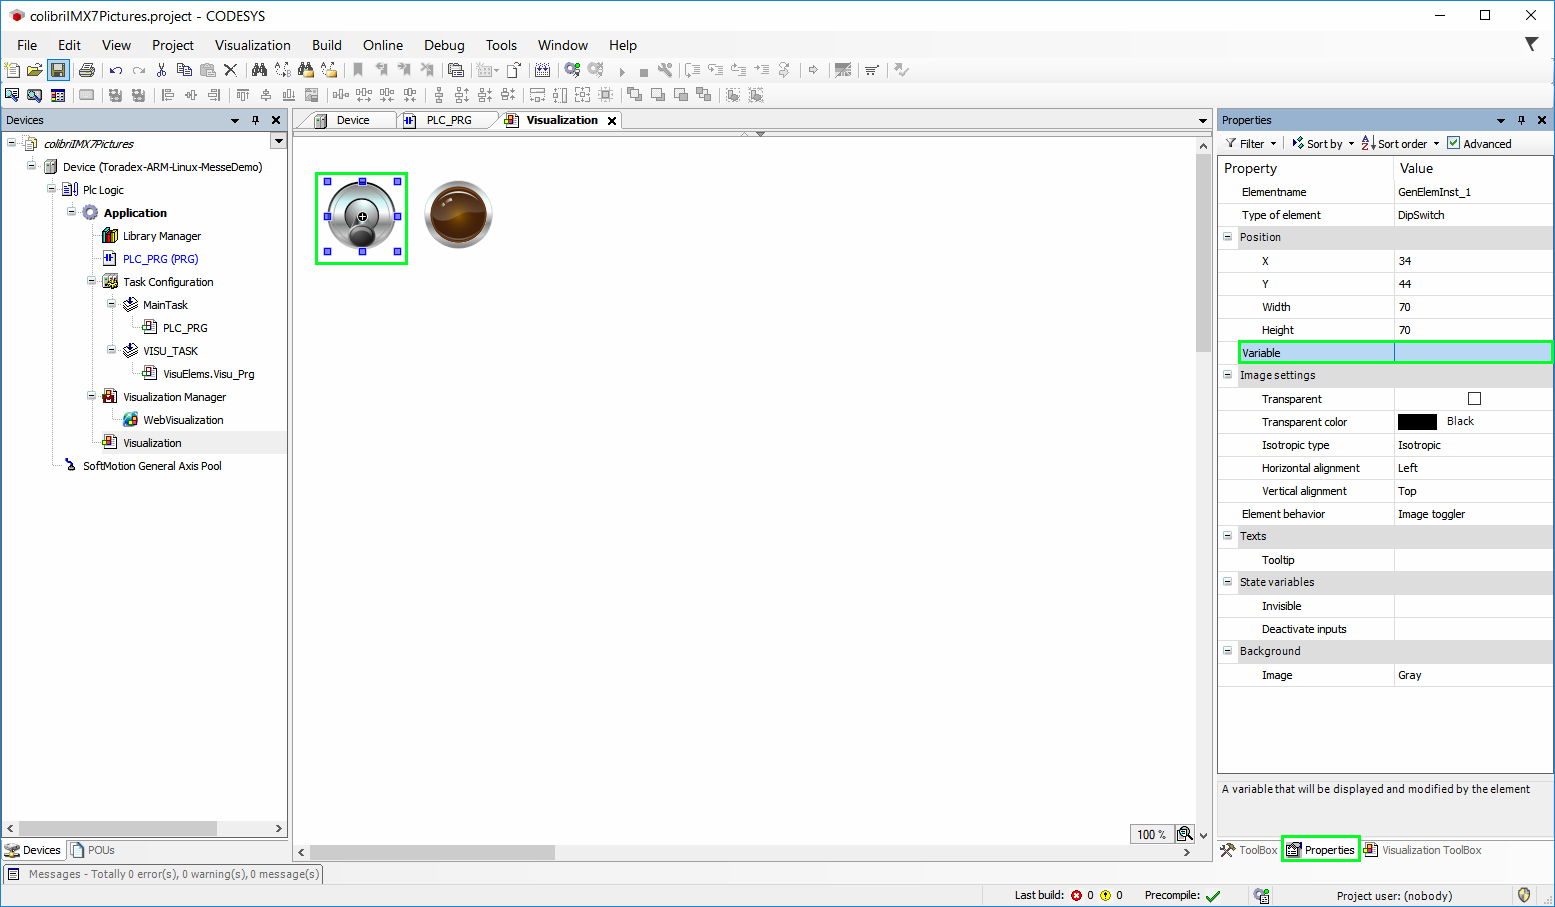
Select DipSwitch and in Properties select Variable:
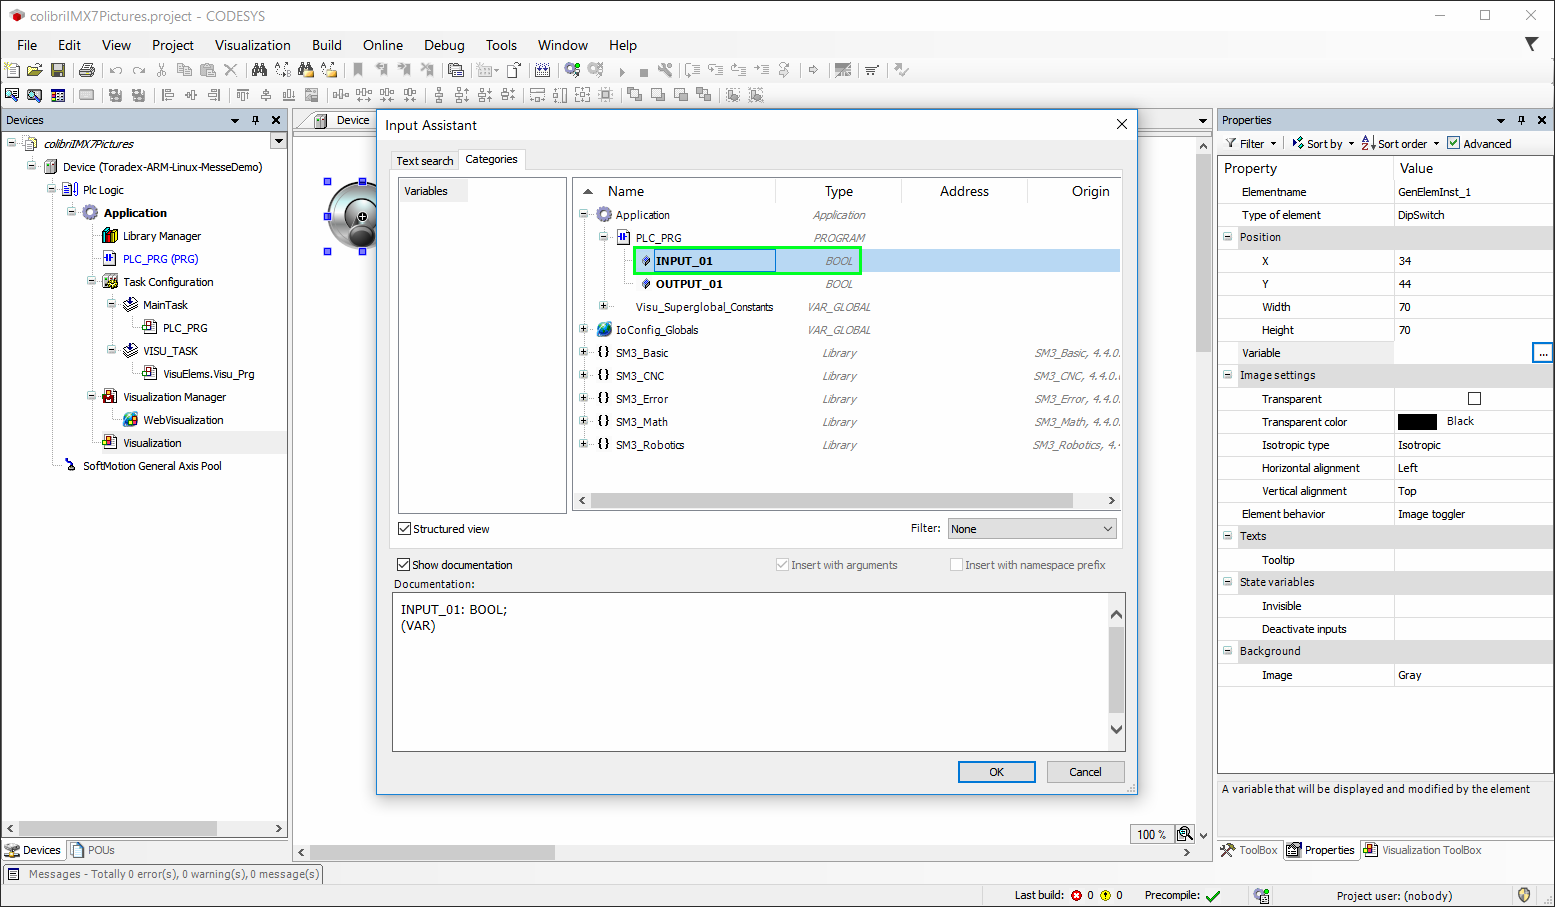
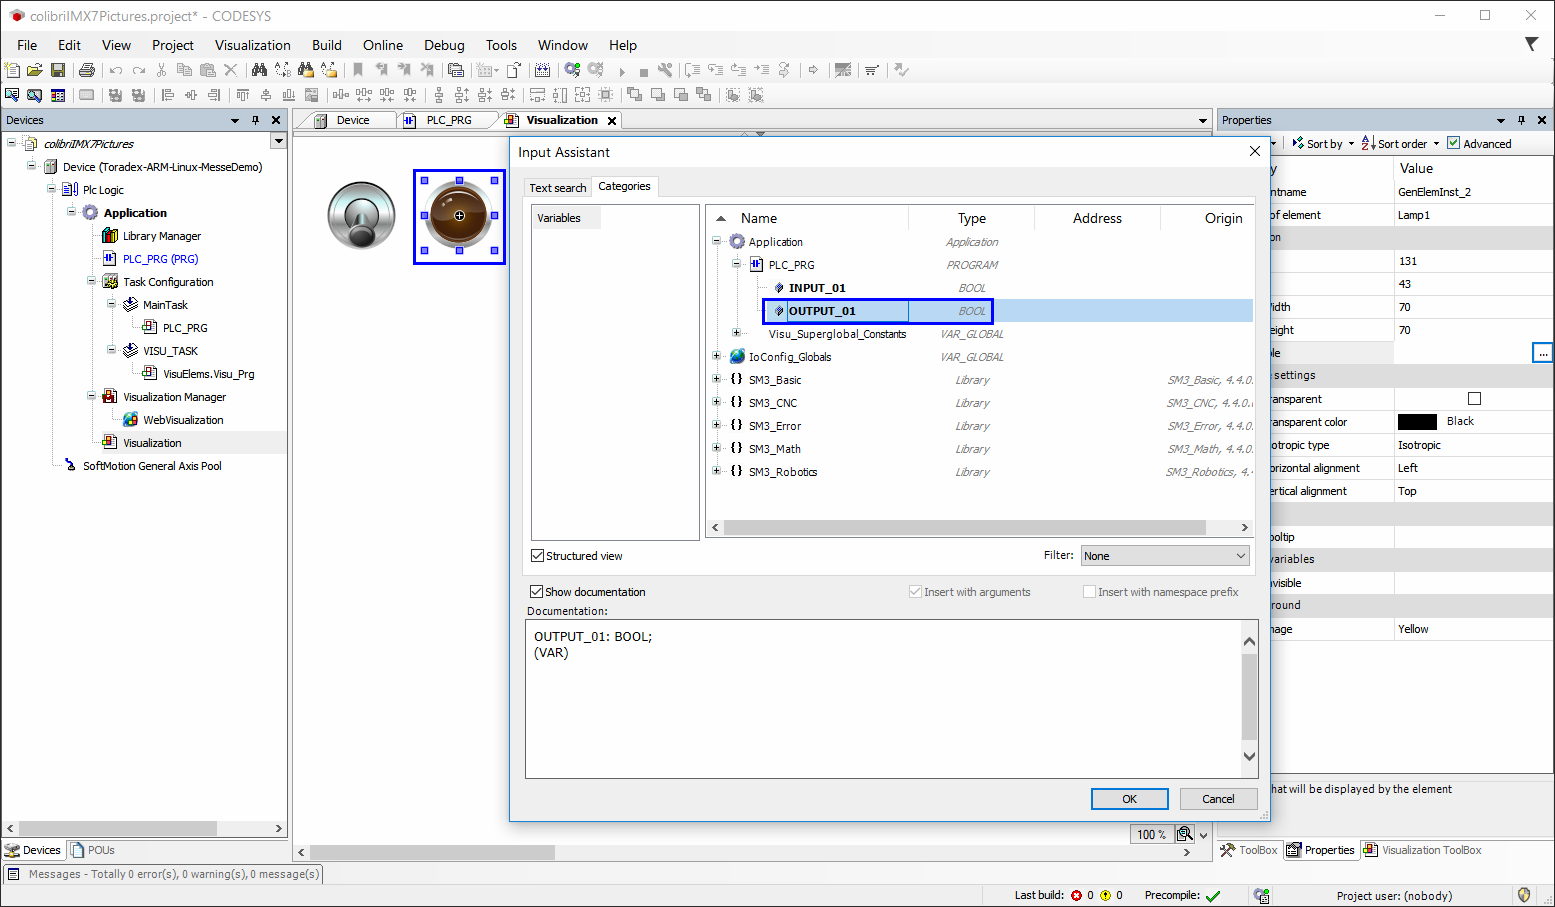
The DipSwitch must be connected to the Contact element of the Ladder. In the window Input Assist select Application > PLC_PRG > INPUT_01 (the variable which has been added to Contact):
Select Lamp1 and in Properties select Variable. In the window Input Assist select Application > PLC_PRG > OUTPUT_01 (the variable which has been added to Coil):
With the connections made, we expect that on toggling the input DipSwitch, the output Lamp1 also toggles. To test, download the project for the device. Click the Online menu and select Login (always choose download):

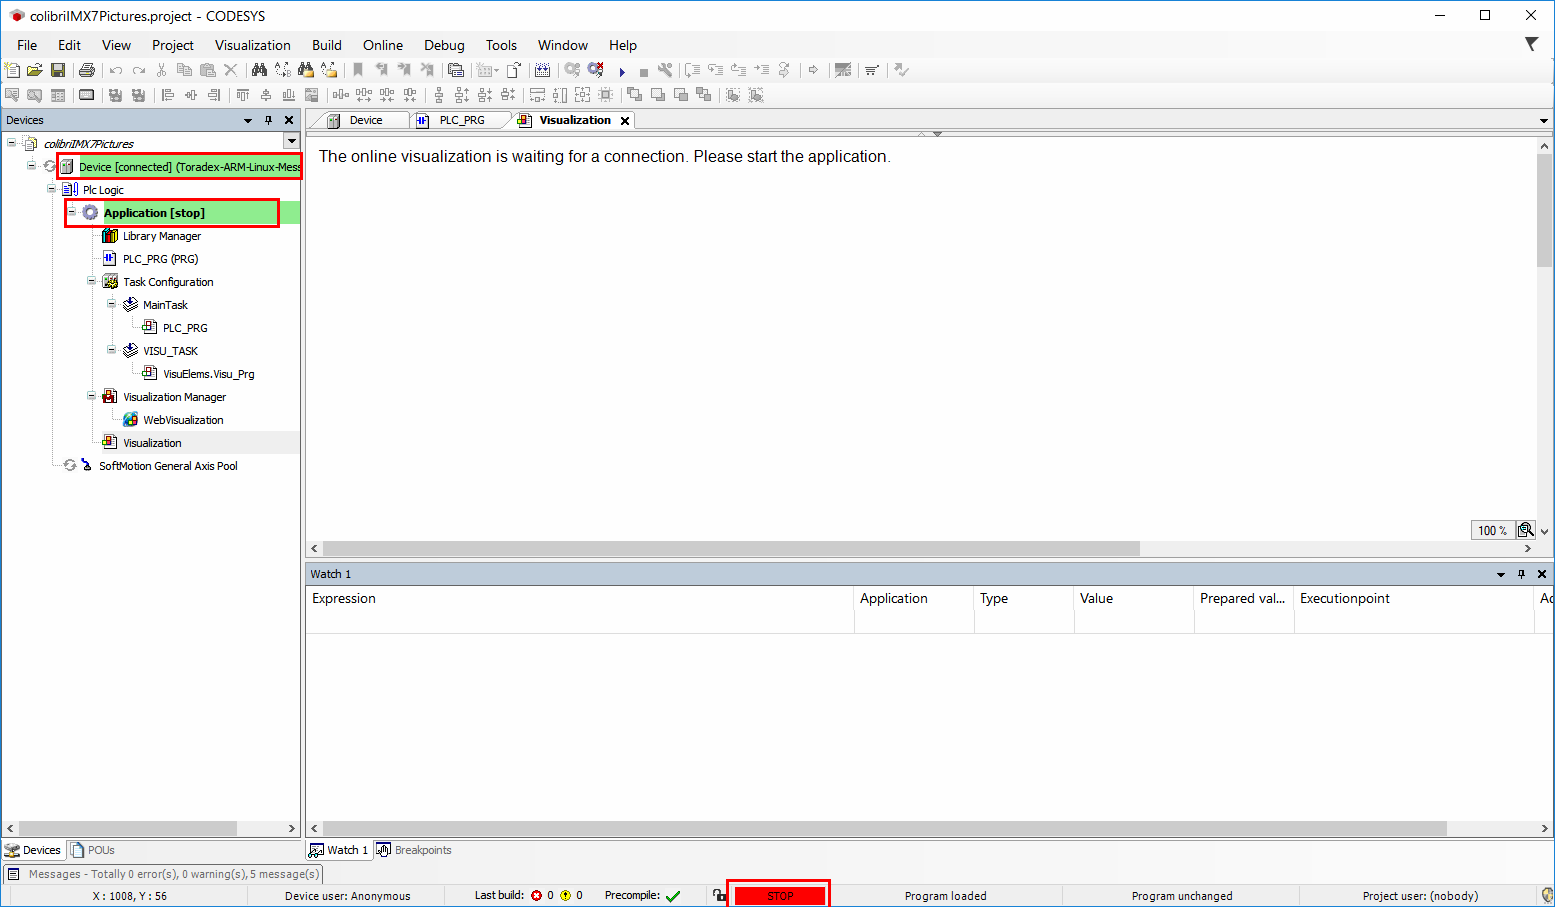
With the project downloaded and online, the following screen will be shown and the project will be in the STOP state:
To start the application, click on play:
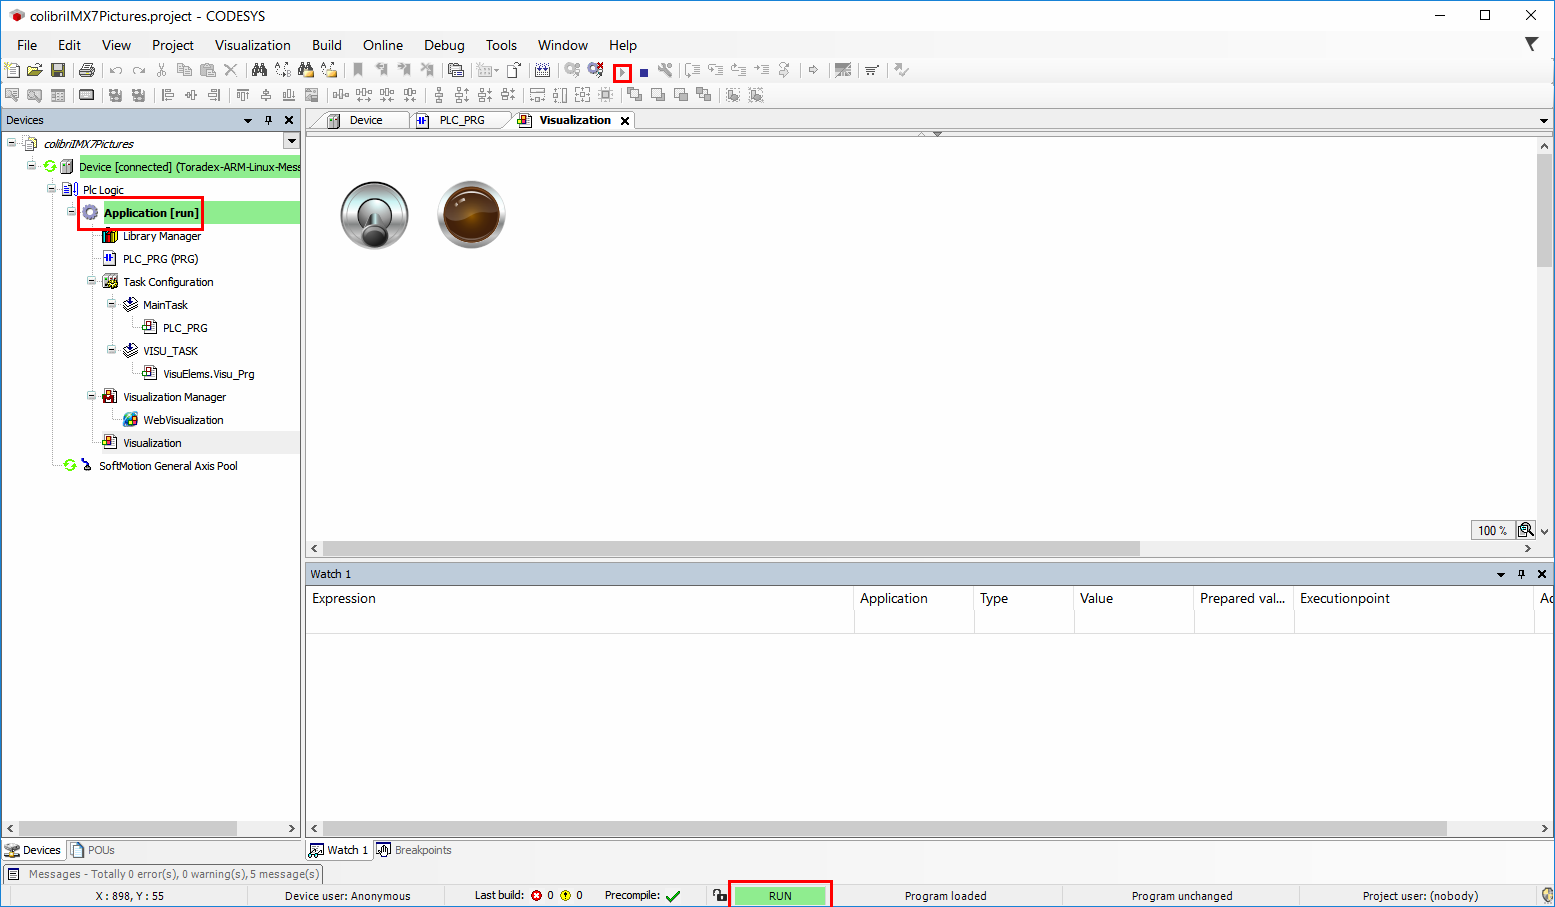
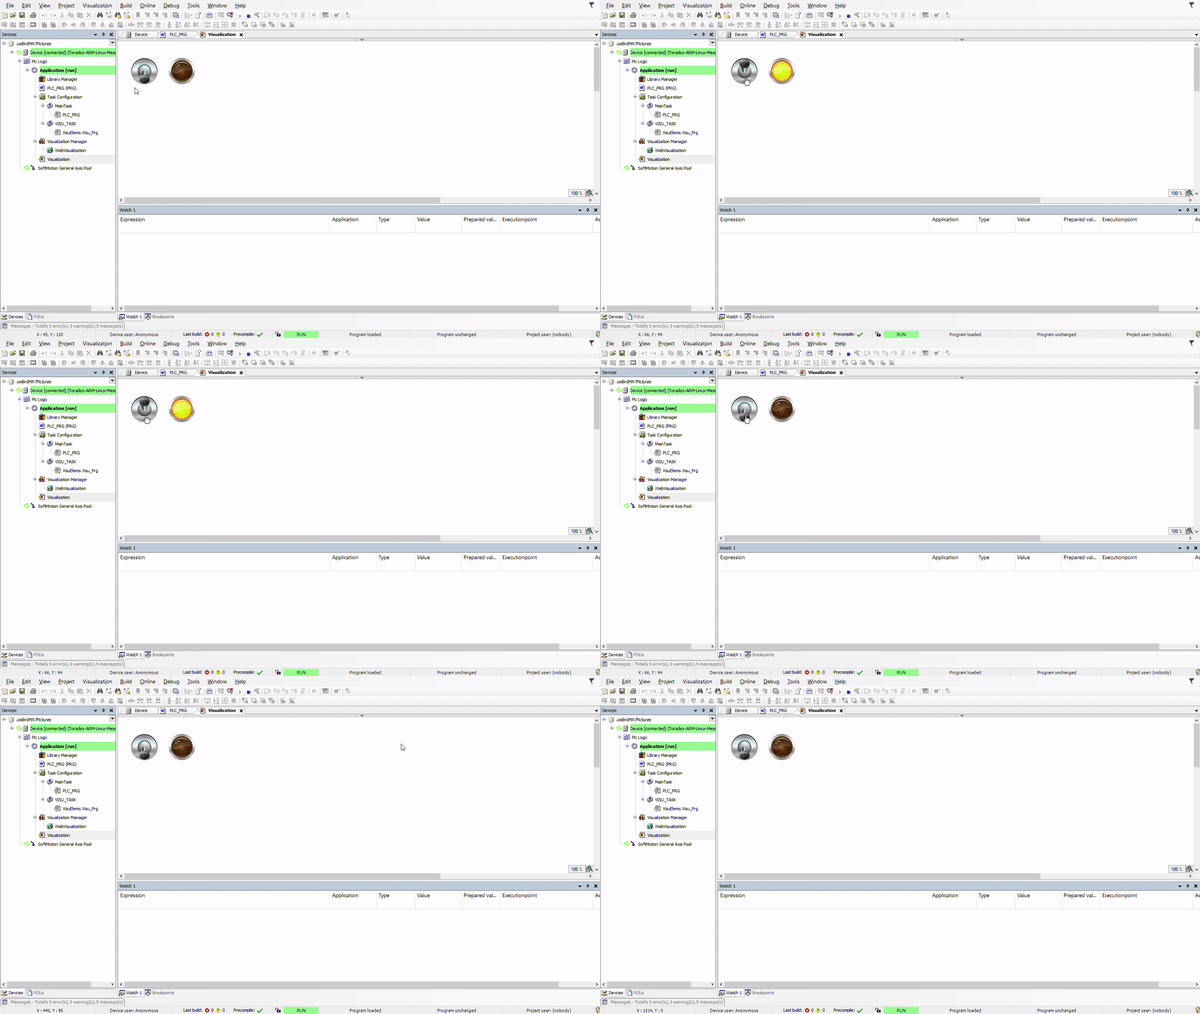
At this point, the application will be in the RUN state. On the Visualization the elements can already be tested. Pressing the DipSwitch should light the Lamp1 on.
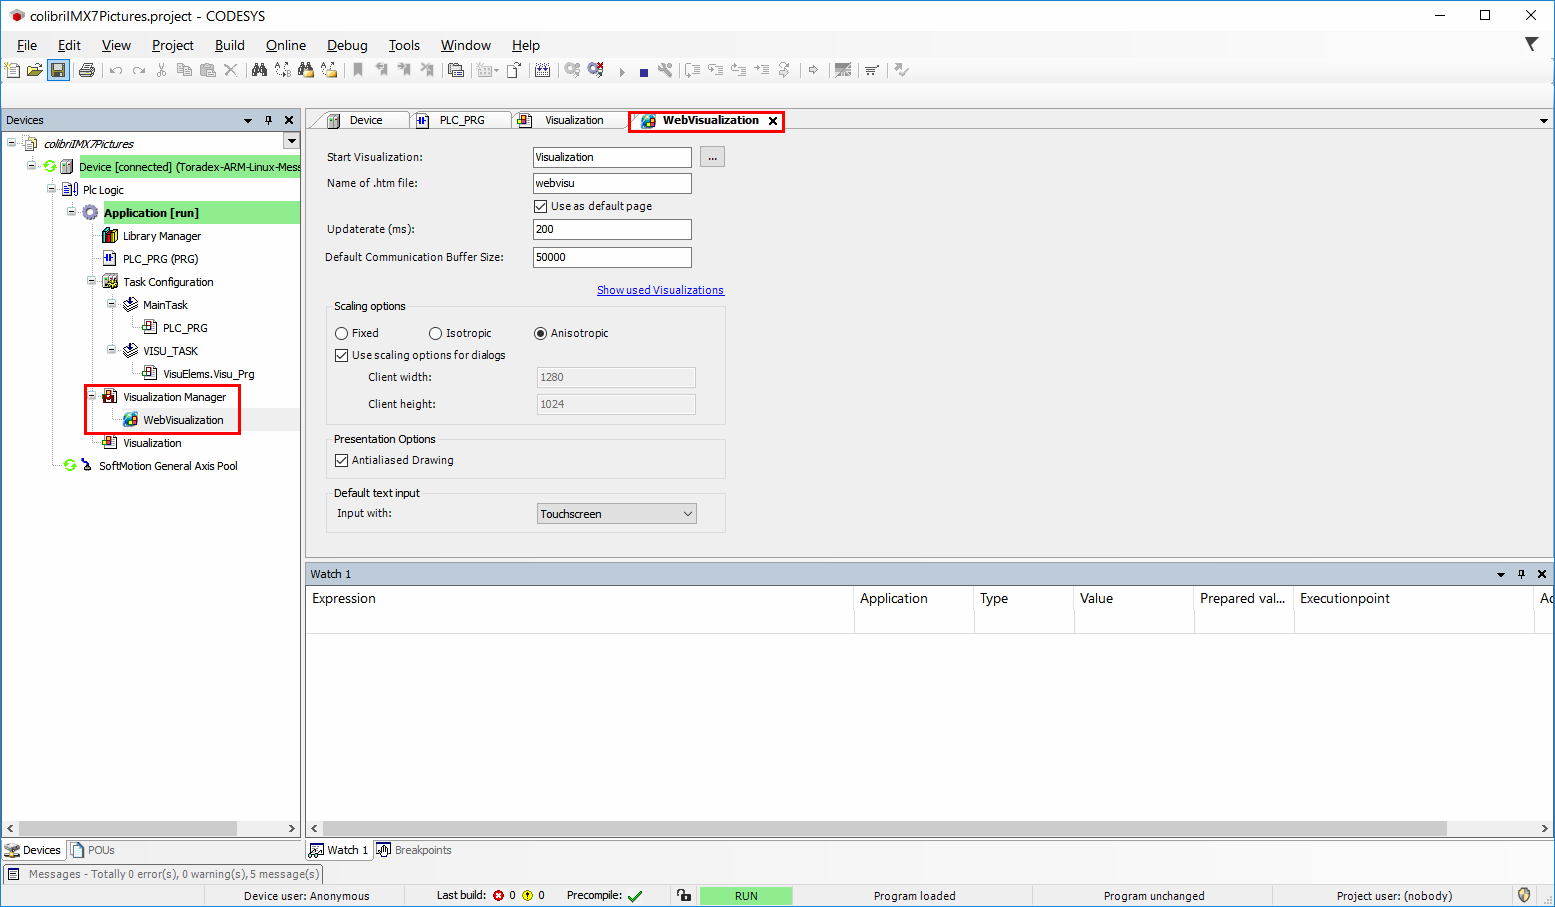
The Visualization feature also adds to the project the WebVisualization. Click on Visualization Manager -> WebVisualization on project tree. In the WebVisualization tab you can find the settings:
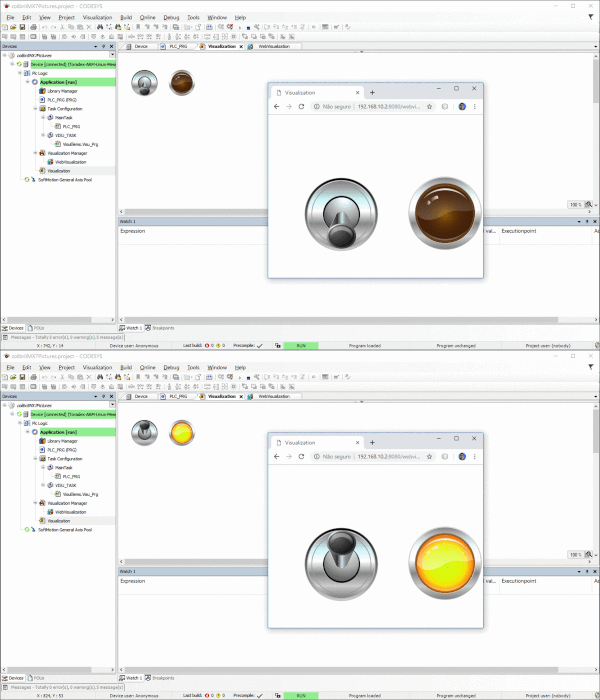
You can open your browser and remotely connect to the web visualization tool using the board hostname and port 8080:
http://<hostname>:8080/webvisu.htmTriggering the DipSwitch will act both on the WebVisualization of the browser as in development environment Visualization:
Local WebVisualization
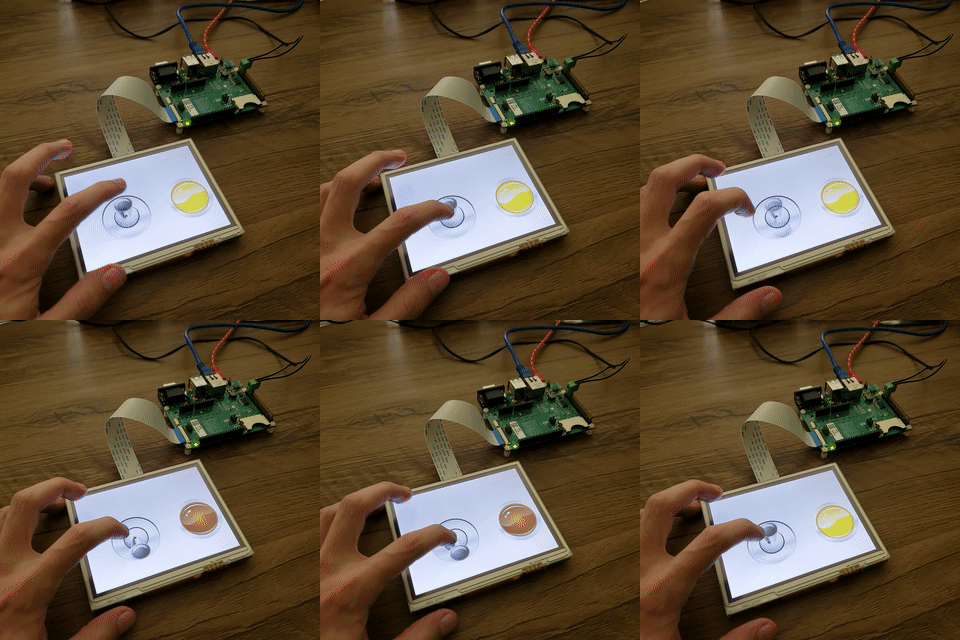
To complement this demo, you can also run a web browser in full screen (kiosk) mode for WebVisualization on a touch screen connected to the target device.
You can use the Torizon base Weston container as the graphical backend and a container running Chromium to serve the WebVisualization locally. Then access http://<hostname>:8080/webvisu.htm.
Next Steps
If you want to build the CODESYS demo container for any reason, the Dockerfile and related resources are available in the CODESYS Virtual Control for Linux SL 4.13.0.0 folder.
This container is a demonstration meant solely for evaluation purposes. For more information and custom requests (for instance if you need a solution ready to deploy on the field), please contact one of our partners BE.services, CODESYS GmbH or neXo.
Display and Touchscreen Configuration
For the displays recommended by Toradex, go to Setting up Displays with Torizon page.