How to Setup Bluetooth Audio Profiles (Linux)
Introduction
This article presents the step-by-step procedures to configure Bluetooth audio profiles on Toradex modules with a Toradex Reference Images installed. Beyond it, the article brings use cases on how to implement audio profiles.
Bluetooth Audio in Linux
Used worldwide, Bluetooth is a wireless technology standard for transmitting data at short range. To use it for audio data transmission, Linux uses the BlueALSA backend, enabling audio data exchange via Bluetooth with audio playback/capture devices, such as smartphones, laptops, headsets, and/or speakers.
The following sections have examples of how to:
-
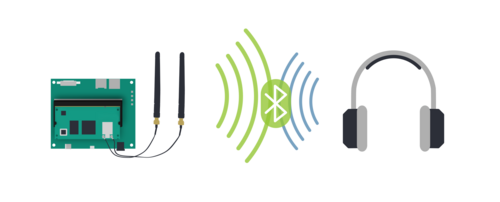
Play an audio file in a Bluetooth speaker connected to the module
-
Use the module as a Bluetooth speaker or Bluetooth headphones for your host device
-
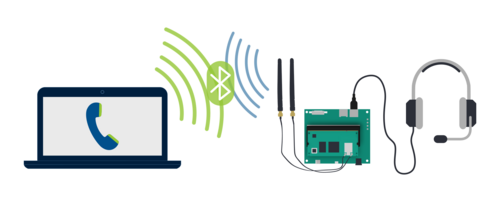
Use the module as a headset on a call on your host device
Why use BlueALSA
BlueALSA is a backend that combines the ALSA (Advanced Linux Sound Architecture) API with the BlueZ Linux Bluetooth protocol stack. It allows the use of audio devices connected via Bluetooth without needing PipeWire or PulseAudio, though with restricted audio processing features. For a better understanding of how it works, check the project GitHub.
Bluetooth Audio Profiles
In order to make the use cases previously mentioned work, the appropriate Bluetooth audio profiles must be enabled. These profiles allow specific audio functionalities of Bluetooth to work between devices that support the same profiles. Furthermore, each device has two possible roles: one as a gateway (source), acting as an audio player, and the other as a target (sink), behaving as an audio renderer. Then, considering the use cases, you are going to need the:
-
Advanced Audio Distribution Profile (A2DP) in the target role to use the module as a Bluetooth speaker for the phone (recommended for streaming music since it transmits stereo audio).
-
Hands-Free Profile (HFP) handled by oFono to use the module as a headset on a call (since BlueALSA does not implement any call features of HFP, the oFono support is needed). Hence, while using this profile, the module behaves as a gateway (source) and a target (sink).
Furthermore, the A2DP gateway and A2DP target profiles (a2dp-source and a2dp-sink) are available out of the box in the Toradex modules.
You can check for more information about the Bluetooth audio profiles in the following BlueALSA GitHub links:
Prerequisites
- Have a Toradex SoM that features Bluetooth hardware or a compatible external Bluetooth adapter
- Configure the antennas for the Toradex module that features Bluetooth hardware for connecting via this protocol
- Have a Bluetooth headset or speaker
- Be capable of building a Reference Image with Yocto Project/OpenEmbedded
- (Optional) Understand about digital audio regarding buffer size, latency, and sampling rate
Build the BlueALSA Recipe
In order to use the BlueALSA backend capabilities, it is first necessary to edit and enable the required recipe when building a Toradex Reference Image for Yocto Project. Follow the instructions of the aforementioned link to configure the build, then continue the process in the sections below.
Enable oFono in the BlueALSA Recipe
Since one of the objectives of this article is to use the module as a headset on a call, the oFono stack should be enabled in the recipe as “BlueALSA has limited built-in support for HFP-AG and HFP-HF roles.” (for more information, access Using BlueALSA with HFP and HSP Devices - HFP). Also, as standard, the BlueALSA recipe in the Toradex Reference Images does not bring this feature enabled. Then, in order to provide it with oFono, add the package as follows:
SUMMARY = "Bluetooth Audio ALSA Backend"
HOMEPAGE = "https://github.com/Arkq/bluez-alsa"
SECTION = "libs"

LICENSE = "MIT"
LIC_FILES_CHKSUM = "file://LICENSE;md5=8449a4f133a93f6254b496d4fb476e83"

SRC_URI = "git://github.com/Arkq/bluez-alsa.git;protocol=https;branch=master"

SRCREV = "dd05a1baa261b94da9ba977b5e3392c8b4dc7a5e"
PV = "4.0.0+git${SRCPV}"

S  = "${WORKDIR}/git"

DEPENDS += "alsa-lib bluez5 dbus glib-2.0 sbc"

-PACKAGECONFIG ??= "aplay cli hcitop ${@bb.utils.filter('DISTRO_FEATURES', 'systemd', d)}"
+PACKAGECONFIG ??= "aplay cli hcitop ${@bb.utils.filter('DISTRO_FEATURES', 'systemd', d)} ofono"
PACKAGECONFIG[a2dpconf]  = "--enable-a2dpconf,--disable-a2dpconf"
PACKAGECONFIG[aac]  = "--enable-aac,--disable-aac,fdk-aac"
PACKAGECONFIG[aplay] = "--enable-aplay,--disable-aplay"
PACKAGECONFIG[cli] = "--enable-cli,--disable-cli"
PACKAGECONFIG[coverage] = "--with-coverage,--without-coverage,lcov-native"
PACKAGECONFIG[debug] = "--enable-debug,--disable-debug"
PACKAGECONFIG[debug-time] = "--enable-debug-time,--disable-debug-time"
PACKAGECONFIG[faststream] = "--enable-faststream,--disable-faststream"
PACKAGECONFIG[hcitop] = "--enable-hcitop,--disable-hcitop,libbsd ncurses"
PACKAGECONFIG[libunwind] = "--with-libunwind,--without-libunwind,libunwind"
PACKAGECONFIG[mp3lame] = "--enable-mp3lame,--disable-mp3lame,lame"
PACKAGECONFIG[mpg123] = "--enable-mpg123,--disable-mpg123,mpg123,mpg123"
PACKAGECONFIG[ofono] = "--enable-ofono,--disable-ofono,ofono"
PACKAGECONFIG[payloadcheck] = "--enable-payloadcheck,--disable-payloadcheck"
PACKAGECONFIG[rfcomm] = "--enable-rfcomm,--disable-rfcomm"
PACKAGECONFIG[systemd] = "--enable-systemd --with-systemdsystemunitdir=${systemd_system_unitdir} \
                          --with-systemdbluealsaargs='${SYSTEMD_BLUEALSA_ARGS}' --with-systemdbluealsaaplayargs='${SYSTEMD_BLUEALSA_APLAY_ARGS}',--disable-systemd,systemd"
PACKAGECONFIG[test] = "--enable-test,--disable-test,libcheck libsndfile1"
PACKAGECONFIG[upower] = "--enable-upower,--disable-upower,,upower"

inherit autotools pkgconfig systemd

EXTRA_OECONF = " \
    --disable-aptx \
    --disable-lc3plus \
    --disable-ldac \
    --disable-manpages \
"

PACKAGE_BEFORE_PN = "${PN}-aplay"
RRECOMMENDS:${PN} = "${PN}-aplay"

FILES:${PN}-aplay = "${bindir}/bluealsa-aplay"
FILES:${PN} += "${libdir}/alsa-lib/*"

SYSTEMD_PACKAGES += "${PN}-aplay"
SYSTEMD_SERVICE:${PN} = "bluealsa.service"
SYSTEMD_SERVICE:${PN}-aplay = "bluealsa-aplay.service"

SYSTEMD_AUTO_ENABLE:${PN}-aplay = "disable"

# Choose bluez-alsa arguments to be used in bluealsa systemd service
# Usually could choose profiles with it: a2dp-source a2dp-sink hfp-hf hfp-ag hsp-hs hsp-ag hfp-ofono
# Enable bluez-alsa arguments by default:
-SYSTEMD_BLUEALSA_ARGS ?= "-p a2dp-source -p a2dp-sink"
+SYSTEMD_BLUEALSA_ARGS ?= "-p a2dp-source -p a2dp-sink -p hfp-ofono"

# Choose bluealsa-aplay arguments to be used in bluealsa-aplay systemd service
# Defaults to be empty:
SYSTEMD_BLUEALSA_APLAY_ARGS ?= ""
Edit the Build Configuration File
Make sure that the layer meta-toradex-demos is added to build/conf/bblayers.conf:
${TOPDIR}/../layers/meta-toradex-demos \
Then, add the necessary packages to build/conf/local.conf:
CORE_IMAGE_EXTRA_INSTALL += "bluealsa alsa-utils curl"
Build the Customized Image
To build the image with the modifications previously made, follow the instructions in the article Build a Reference Image with Yocto Project/OpenEmbedded. After this procedure, flash the final image to the module.
Configure the Bluetooth
For setting up Bluetooth, access a Linux terminal on the Toradex module flashed with the custom image from the last step and follow the command lines as described below. In the case of using a Toradex module supported by a USB Bluetooth adapter, one should run lsusb to check if it is detected.
To allow the use of Bluetooth, start the Bluetooth service:
# systemctl start bluetooth.service
Then, enable it:
# connmanctl enable bluetooth
If using an external Bluetooth adapter, one can verify if Bluetooth is working correctly by running the command hciconfig.
Restart the BlueALSA Service and Grant Access to it
To do that, run:
# systemctl restart bluealsa.service
Then, edit the file bluetooth.conf as described to grant user permission to the org.bluealsa service in the D-Bus policy file, enabling access to the configured audio devices:
...
+    <policy user="bluealsa">
+        <allow send_destination="org.bluez"/>
+    </policy>
 </busconfig>
After this, restart the bluealsa.service again.
Assure that BlueALSA Service is Activated
Check whether the bluealsa.service is activated and running:
# systemctl status bluealsa.service
One should see something like this:
● bluealsa.service - BlueALSA service
     Loaded: loaded (/lib/systemd/system/bluealsa.service; enabled; vendor preset: enabled)
     Active: active (running) since Tue 2023-05-16 13:40:04 UTC; 52min ago
       Docs: man:bluealsa(8)
   Main PID: 758 (bluealsa)
      Tasks: 4 (limit: 1670)
     Memory: 956.0K
     CGroup: /system.slice/bluealsa.service
             └─ 758 /usr/bin/bluealsa -p a2dp-source -p a2dp-sink

May 16 13:40:03 colibri-imx8x-06995758 systemd[1]: Starting BlueALSA se…..
May 16 13:40:04 colibri-imx8x-06995758 systemd[1]: Started BlueALSA ser…e.
Hint: Some lines were ellipsized, use -l to show in full.
In case the BlueALSA service is not active, try restarting it again. If the problem persists, check whether the modified BlueALSA recipe bluealsa_git.bb is the same as presented in the Enable oFono in the BlueALSA Recipe section.
Connect to the Bluetooth Devices
First of all, check if the Bluetooth hardware component of your module is either hardware or software blocked:
# rfkill list
0: phy0: Wireless LAN
        Soft blocked: yes
        Hard blocked: no
1: hci0: Bluetooth
        Soft blocked: yes
        Hard blocked: no
In case it is, unblock it:
# rfkill unblock 1
# rfkill list
0: phy0: Wireless LAN
        Soft blocked: yes
        Hard blocked: no
1: hci0: Bluetooth
        Soft blocked: no
        Hard blocked: no
Then, follow the instructions in the Bluetooth (Linux) article to scan, pair, and connect to the Bluetooth devices. In case of connecting your phone as a host device, the following image gives an output example of an Android device connected to a Colibri iMX8X:
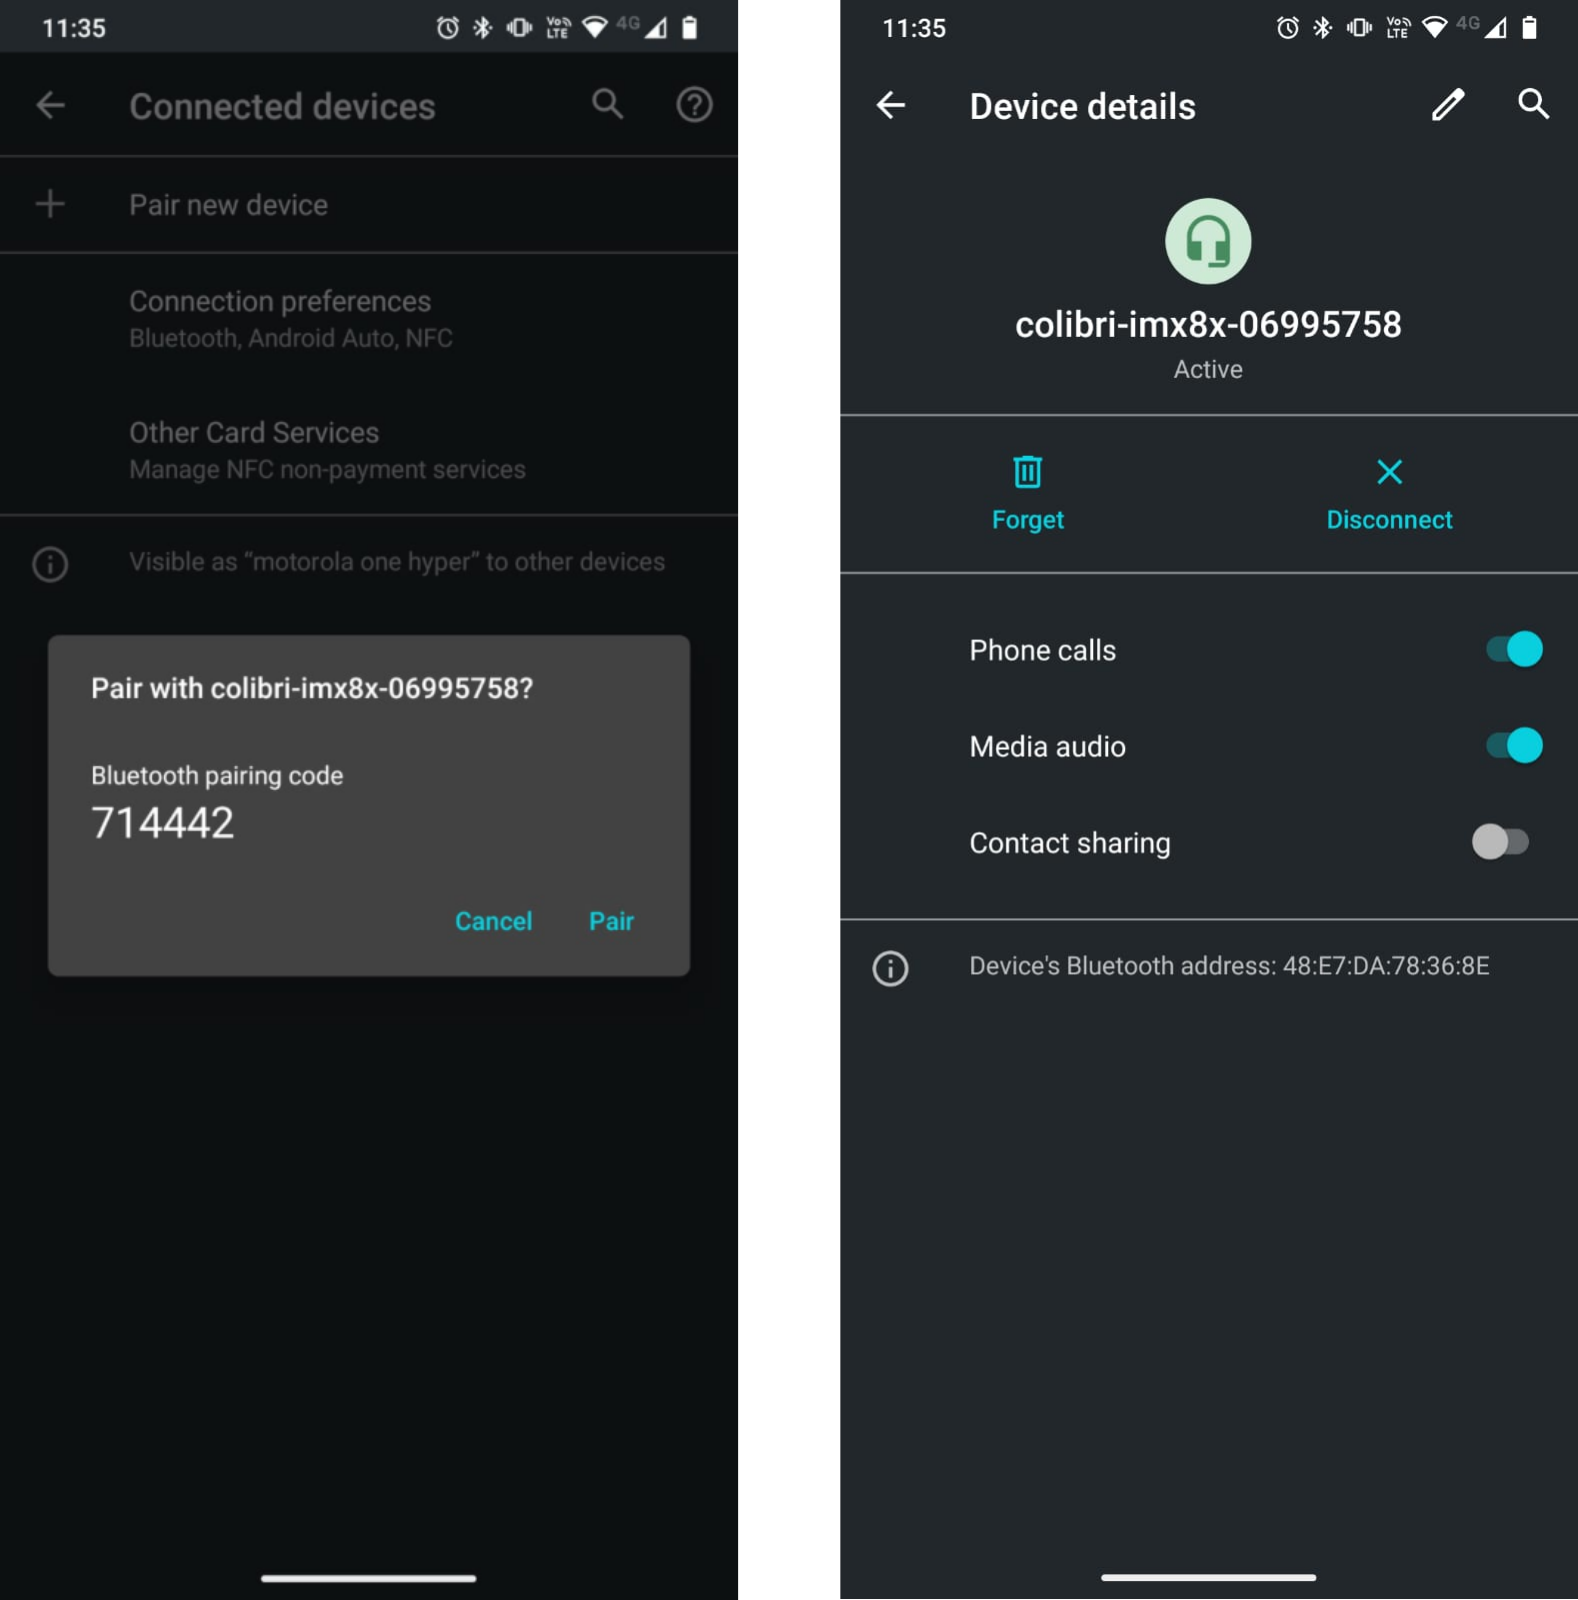
As it is possible to see, the “Phone calls” and ”Media audio” capabilities are enabled. Make sure that these functionalities are enabled considering your Bluetooth device, otherwise, some use cases described in the following sections may not function.
After the Bluetooth device is connected, enter quit in the terminal to continue the next steps.
Check the Sound Cards
Available Sound Cards for Playback and Capture Devices
It is possible to see the available sounds cards for playback and capture devices through the commands aplay -l, and arecord -l, respectively (the outputs correspond to the usage of a Colibri iMX8X with a Colibri Evaluation Board):
# aplay -l
**** List of PLAYBACK Hardware Devices ****
card 0: imx8qxpsgtl5000 [imx8qxp-sgtl5000], device 0: 59040000.sai-sgtl5000 sgtl5000-0 [59040000.sai-sgtl5000 sgtl5000-0]
  Subdevices: 1/1
  Subdevice #0: subdevice #0
# arecord -l
**** List of CAPTURE Hardware Devices ****
card 0: imx8qxpsgtl5000 [imx8qxp-sgtl5000], device 0: 59040000.sai-sgtl5000 sgtl5000-0 [59040000.sai-sgtl5000 sgtl5000-0]
  Subdevices: 1/1
  Subdevice #0: subdevice #0
For both playback and capture devices, the sound card available is sysdefault:CARD=imx8qxpsgtl5000, which can also be referred to as hw:0,0 (or plughw:0,0) with regards to the card 0 and device 0. An interesting point to mention is that the hw devices give direct access to the hardware without any parameter conversion. To be able to use them, you need to be able to set up the correct sample rate, sample format, and other parameters. In case of missing any of them or trying to use something that is not supported by the driver, you may face an error. On the other hand, the plughw devices try to set up conversions when they are needed. In conclusion, using the plughw devices should be easier, but if the application does not tolerate automatic sample rate conversions, for example, then maybe the hw devices would be a better approach.
Connected Sound Cards via Bluetooth
After connecting the Bluetooth devices, one should be able to see the connected sound cards via Bluetooth ( the DEV address is the Bluetooth address of the device connected to the module and not the address of the Bluetooth controller of the module):
# bluealsa-aplay -L
bluealsa:SRV=org.bluealsa,DEV=08:CC:27:00:C4:01,PROFILE=a2dp
    motorola one hyper, trusted phone, capture
    A2DP (SBC): S16_LE 2 channels 44100 Hz
bluealsa:SRV=org.bluealsa,DEV=08:CC:27:00:C4:01,PROFILE=sco
    motorola one hyper, trusted phone, playback
    SCO (CVSD): S16_LE 1 channel 8000 Hz
bluealsa:SRV=org.bluealsa,DEV=08:CC:27:00:C4:01,PROFILE=sco
    motorola one hyper, trusted phone, capture
    SCO (CVSD): S16_LE 1 channel 8000 Hz
Considering the command bluealsa-aplay, the following table brings important information:
| Sound Card | Type | Profile | Data Format | Quantity of Channels | Sampling |
|---|---|---|---|---|---|
bluealsa:SRV=org.bluealsa,DEV=08:CC:27:00:C4:01,PROFILE=a2dp | Input (Host Device → Bluetooth → Module) | a2dp (to use the module as a Bluetooth speaker) | S16_LE (Signed 16 bits, Little Endian) | 2 | 44100 Hz |
bluealsa:SRV=org.bluealsa,DEV=08:CC:27:00:C4:01,PROFILE=sco | Output (Module → Bluetooth → Host Device) | sco (to use the module as a microphone on a call) | S16_LE (Signed 16 bits, Little Endian) | 1 | 8000 Hz |
bluealsa:SRV=org.bluealsa,DEV=08:CC:27:00:C4:01,PROFILE=sco | Input (Host Device → Bluetooth → Module) | sco (to use the module as a speaker on a call) | S16_LE (Signed 16 bits, Little Endian) | 1 | 8000 Hz |
You may also want to try bluealsa-aplay -l:
**** List of PLAYBACK Bluetooth Devices ****
hci0: 08:CC:27:00:C4:01 [motorola one hyper], trusted phone
  SCO (CVSD): S16_LE 1 channel 8000 Hz
**** List of CAPTURE Bluetooth Devices ****
hci0: 08:CC:27:00:C4:01 [motorola one hyper], trusted phone
  A2DP (SBC): S16_LE 2 channels 44100 Hz
  SCO (CVSD): S16_LE 1 channel 8000 Hz
Put the Use Cases in Practice
After following the previous steps, all the necessary configuration is set up. Then, guide through the next sections to perform the use cases described at the beginning of this article.
Also, after following the instructions for any use case, you may want to increase/decrease the audio volume. For that, use Alsamixer or amixer, depending on the carrier board you are using:
# alsamixer
or
# amixer -D default:<device's_sound_card> set 'Headphone' <0~100>%
Play an Audio File in a Bluetooth Speaker or Bluetooth Headphones Connected to the Module
This use case demands connecting a speaker or headphones to the module via Bluetooth. Ensure you did it right after following these command lines and run bluealsa-aplay -L or bluealsa-aplay -l, just like we did in the previous section with a phone. This way, you may see that your speaker is available.
If you do not have an audio file to use as an example, you can download the Gong.wav audio sample to your module:
curl https://docs.toradex.com/113218-gong.wav -o Gong.wav
To play the audio file, run the following (do not forget to change the parameter <BT-addr_device> to the Bluetooth address of your Bluetooth device, the parameter <audio_file_name>, and <format> to the audio format):
# aplay -D bluealsa:SRV=org.bluealsa,DEV=<BT-addr_device>,PROFILE=a2dp <audio_file_name>.<format>
You can also record an audio file by running (do not forget to plug a microphone into the carrier board):
# arecord -d <record_time_in_seconds> -c 2 -r 48000 -f s16_le -Dplughw:0,0 <audio_file_name>.<format>
Attention to the segment plughw:0,0, because both the numbers zero represent the card and device indexes. Thus, check the output of arecord -l to see whether these are the indexes for you.
Use the Module as a Bluetooth Speaker for your Host Device

For this example, we plugged a headset into the carrier board to behave as headphones (no microphone needed).
Create a file named alsaloop_music.sh and add the following according to your Module Family. Do not forget to change the parameter <BT-addr_device> to the Bluetooth address of your Bluetooth device.
alsaloop -g /dev/stdin <<EOF
-C bluealsa:DEV=<BT-addr_device>,PROFILE=a2dp -P plughw:0,0 -r 48000 -c 2 -f s32_le --sync=simple -t 200000 -T 1
EOF
Then, run:
# sh alsaloop_music.sh
After this, you may listen to your host device’s output on the speaker/headphones plugged into your board.
Use the Module as a Headset on a Call on your Host Device
Firstly, ensure the headset is properly plugged into the carrier board for using its speakers and microphone. Then, create a file named alsaloop_call.sh and add the following according to your Module Family. Do not forget to change the parameter <BT-addr_device> to the Bluetooth address of your Bluetooth device.
alsaloop -g /dev/stdin <<EOF
-C bluealsa:SRV=org.bluealsa,DEV=<BT-addr_device>,PROFILE=sco -P plughw:0,0 -r  8000 -c 1 --buffer=300 -f s16_le --sync=simple -T 1
-C plughw:0,0 -P bluealsa:SRV=org.bluealsa,DEV=<BT-addr_device>,PROFILE=sco -r  8000 -c 1 -f s16_le --sync=simple -T 2
EOF
Attention to the segment plughw:0,0, because both the numbers zero represent the card and device indexes according to the output of aplay -l for line 2 in the code snippet, and arecord -l in line 3.
Further, tests showed that sending audio to the module via Bluetooth requires setting the buffer size. However, the tests also showed that no buffer size setup is needed when the module receives audio via Bluetooth. Verify which option is better for your device by changing the flags --sync and --buffer.
Then, run:
# sh alsaloop_call.sh
After this, you may listen and speak in a call running on your host device through the headset plugged into your board.