ESP8266 WiFi module
Overview
Many of you must have already heard about super low cost ESP8266 chip developed by Espressif which is Low-power, highly-integrated Wi-Fi solution, it uses just 7 external components, supports wide temperature range: -40°C to +125°C, embedded with upto 8MBit FLASH as mentioned on their website.
Lot of external companies have started using this chip and rolling out WiFi modules with integrated antenna on PCB or an option of chip and/or SMA antenna connector.
The SLIP protocol (Serial Line Interface Protocol) allows you to to use the ESP8266 as a network interface, thus providing internet access through its Wi-Fi capabilities.
Toradex do not recommend or endorse this WiFi chip /module, this article is just an example showing how this WiFi solution could be used on our platform. It is developers responsibility to evaluate reliability and other parameters before putting it on to the design.
Using ESP8266 (ESP12 with NodeMcu board) as Wi-Fi interface on Linux via SLIP (Serial Line IP)
It is possible to use the popular ESP8266 board as a Wi-Fi adapter for embedded Linux systems by making use of the SLIP (Serial Line IP) protocol. This allows an internet connection to be routed via common RX and TX serial lines.
Install the SDK and the ESP8266 firmware
On your host computer, download and install esp-open-sdk. You can test it by compiling and uploading the "blinky" example to the board.
In another directory, clone the esp_slip_router repository. Modify the Makefile to change the BUILD_AREA environment variable. Modify user/user_config.h with your desired settings, such as SSID and password.
Run
$ make
if compilation is successful, flash the compiled firmware to your board (which must be connected via USB, if using a NodeMCU board) with
$ make flash
after flashing, the board should automatically reset.
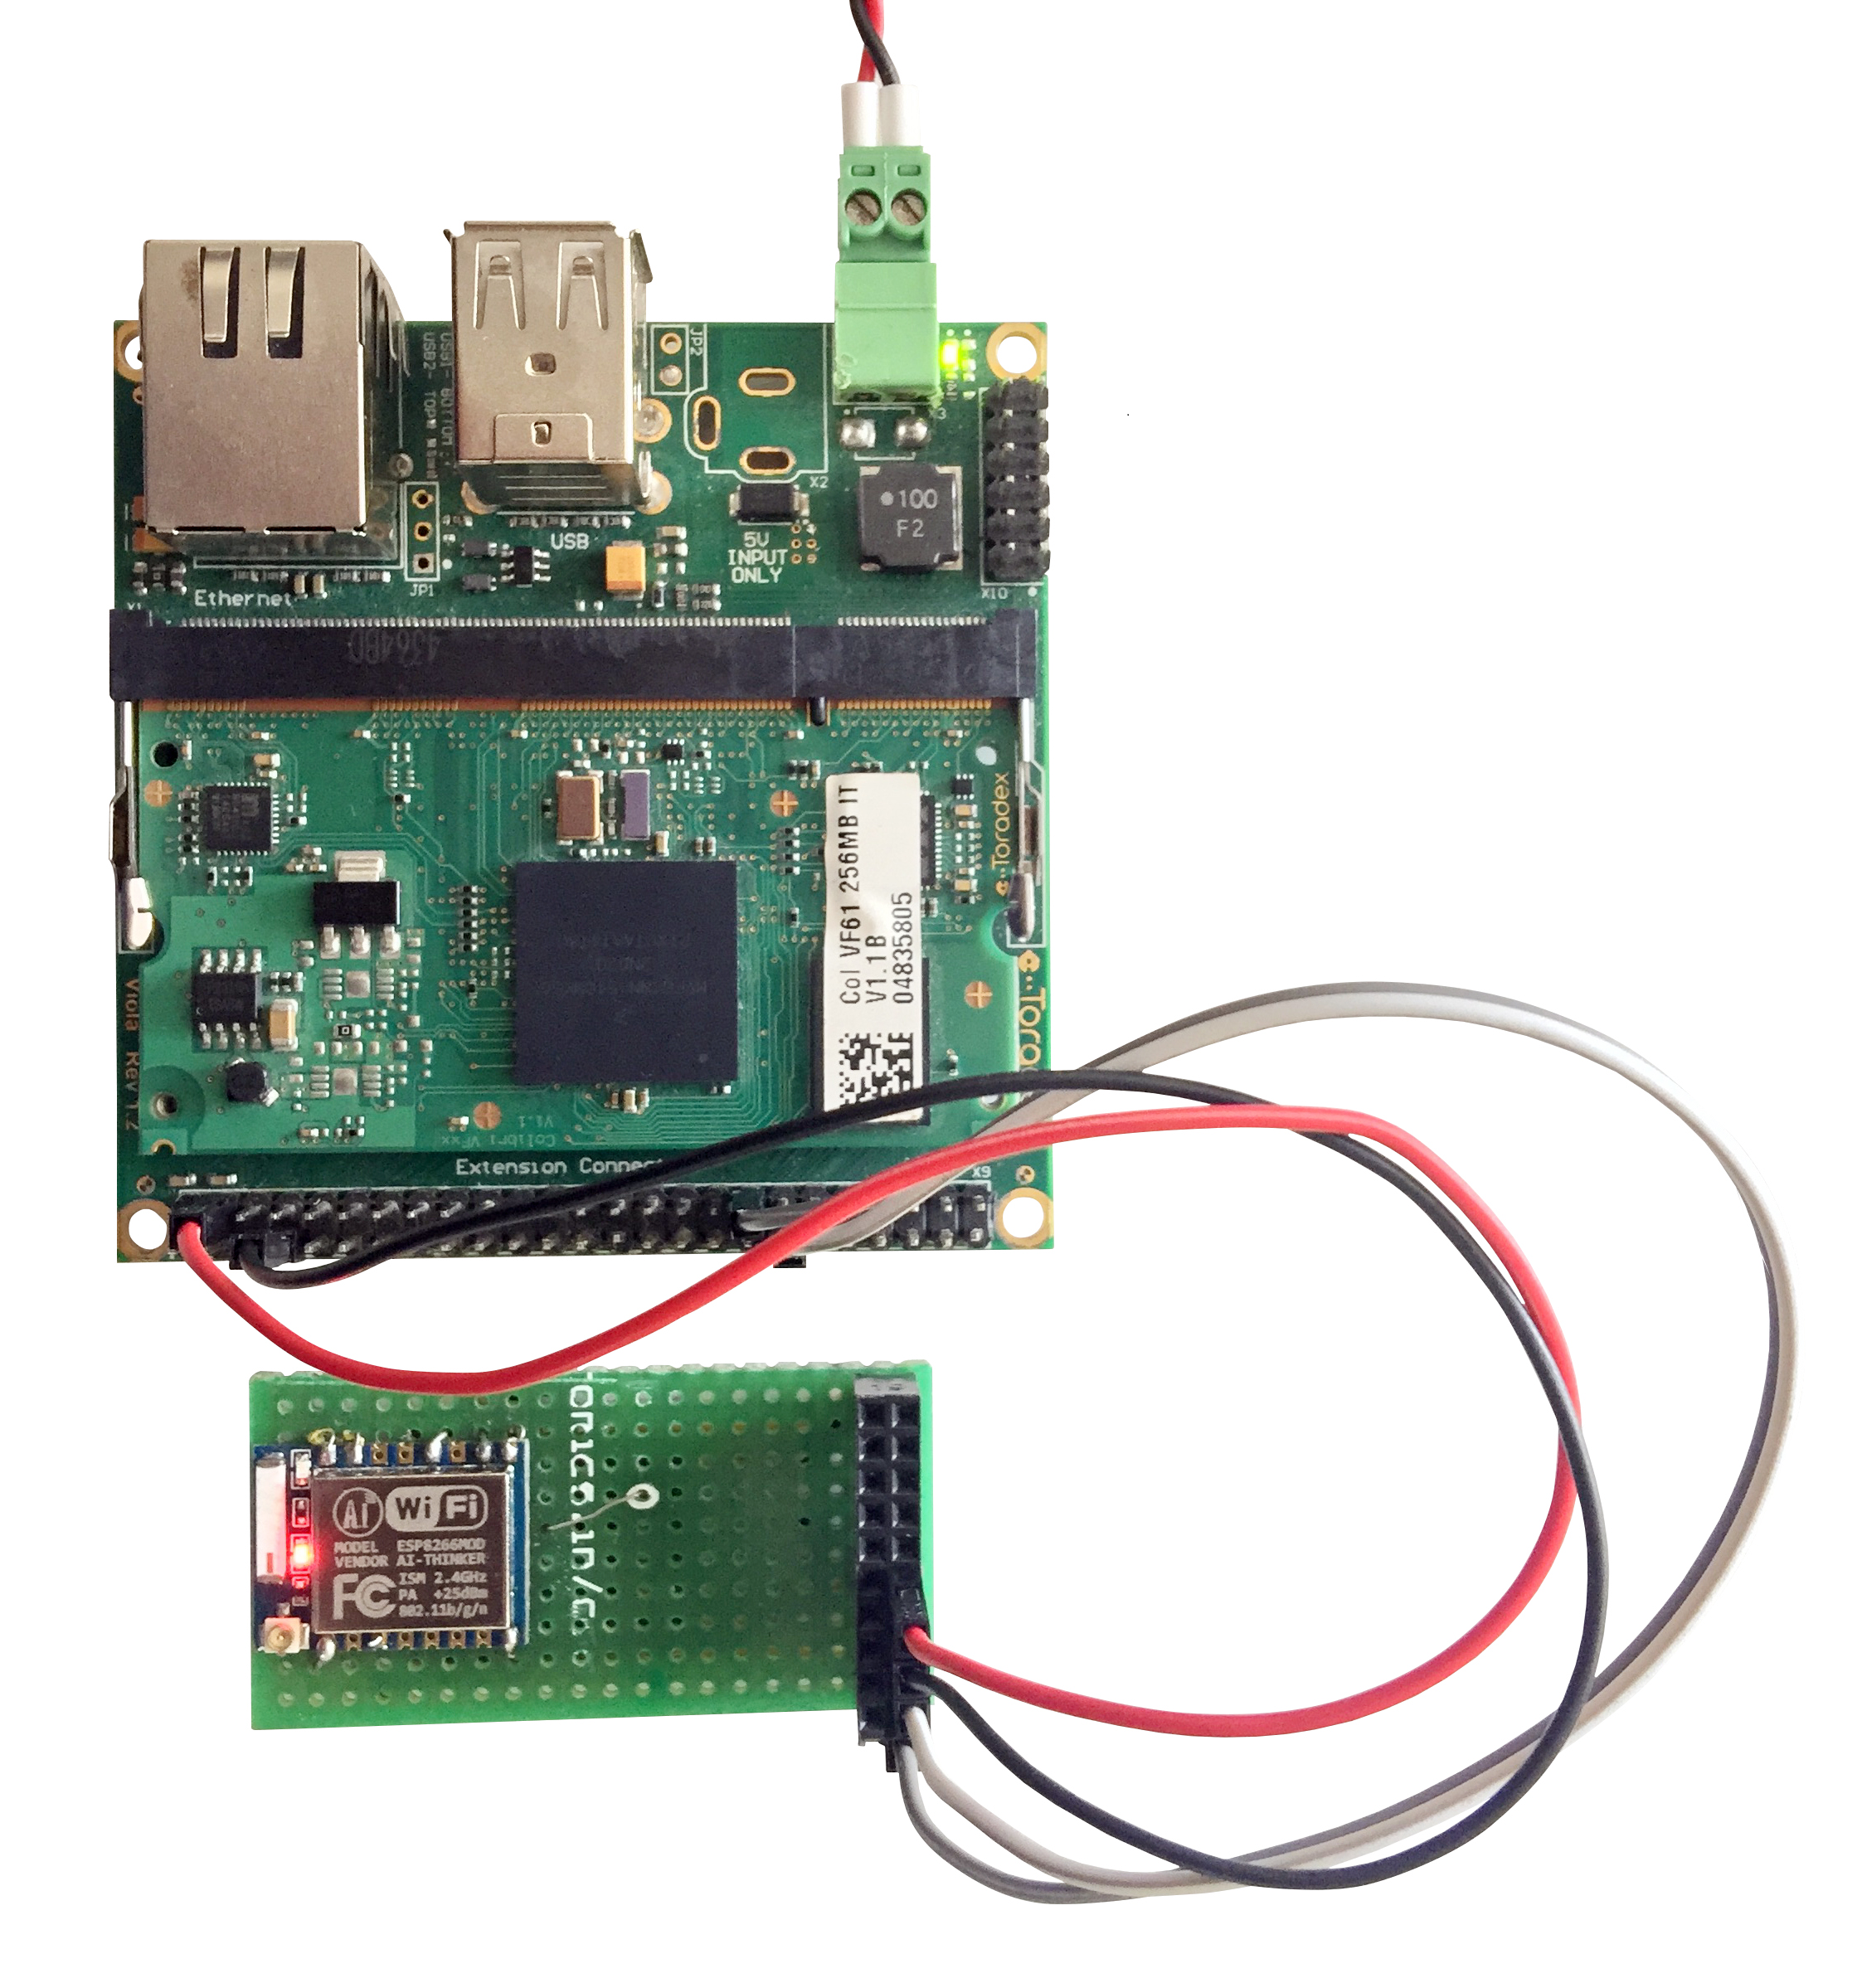
Hardware connection
If using the NodeMCU board, connect its RX and TX pins to the TX and RX pins of your Linux board, respectively.
Don't forget to connect the GND and 3.3V pins.
Installing dependencies
You'll need to install the net-tools package. It is not available in the Ångström feeds, so you must build it using OpenEmbedded. Follow these instructions to set up OpenEmbedded on your host computer and compile the net-tools recipe:
$ bitbake net-tools
Copy the generated .ipk packages to your board. They should be in deploy/ipk/armv7at2hf-neon.
$ scp deploy/ipk/armv7at2hf-neon/net-tools* root@<board-ip>:~
Then on your board:
# opkg install net-tools*
Setting up the network interface
With the ESP8266 conenected, run the following command on your target board:
# slattach -p slip -s 115200 /dev/ttymx2&
This will attach the serial line device that is, in this example, on UART_C (mapped as /dev/ttymxc2, using the Colibri iMX6DL) with a baud rate of 115200 baud using the SLIP protocol.
Then run:
# ifconfig sl0 192.168.240.2 pointopoint 192.168.240.1 up mtu 1500
This will create a new network interface (sl0) with address 192.168.240.2 and Point-to-Point address 192.168.240.1. These addresses are default and can be altered on the user_config.h file in the firmware.
Now that the ESP8266 is working as a router, you can access its terminal by executing
# telnet 192.168.240.1 7777
If you configured your SSID and password on user_config.h previously, you can see that the ESP8266 is already connected to your wireless network by running
CMD>show
SLIP: IP: 192.168.240.1 PeerIP: 192.168.240.2
STA: SSID: <YOUR_SSID> PW: <YOUR_PASSWORD> [AutoConnect:1]
External IP: 192.168.0.108
DNS server: 192.168.0.1
Clock speed: 80
Serial bit rate: 115200
If you need to connect to another SSID and insert another password, you can run:
CMD> set ssid <NEW_SSID>
CMD> set password <NEW_PASSWORD>
CMD> save
CMD> reset
To be able to access the internet, you must add a route:
# route add default gw 192.168.240.1
And the DNS server that is shown when the show command was executed on the ESP8266 router terminal (192.168.0.1 in this example):
# echo "nameserver 192.168.0.1" > /etc/resolv.conf
Now you should be able to connect to the internet. Test it by pinging any address:
root@colibri-imx6:~# ping google.com
PING google.com (216.58.202.110): 56 data bytes
64 bytes from 216.58.202.110: seq=0 ttl=47 time=273.141 ms
64 bytes from 216.58.202.110: seq=1 ttl=47 time=204.406 ms
64 bytes from 216.58.202.110: seq=2 ttl=47 time=166.225 ms
64 bytes from 216.58.202.110: seq=3 ttl=47 time=161.818 ms
64 bytes from 216.58.202.110: seq=4 ttl=47 time=159.971 ms
64 bytes from 216.58.202.110: seq=5 ttl=47 time=158.016 ms
64 bytes from 216.58.202.110: seq=6 ttl=47 time=156.343 ms
^C
--- google.com ping statistics ---
7 packets transmitted, 7 packets received, 0% packet loss
round-trip min/avg/max = 156.343/182.845/273.141 ms
Note that, since the UART is communicating at 115200 baud, the connection speed will be rather slow.
Using an ESP07 module on WinCE
It is really easy to interface these modules supporting UART (AT Commands) with any controller or processor.
Hardware Interface

Demo application in C (WinCE)
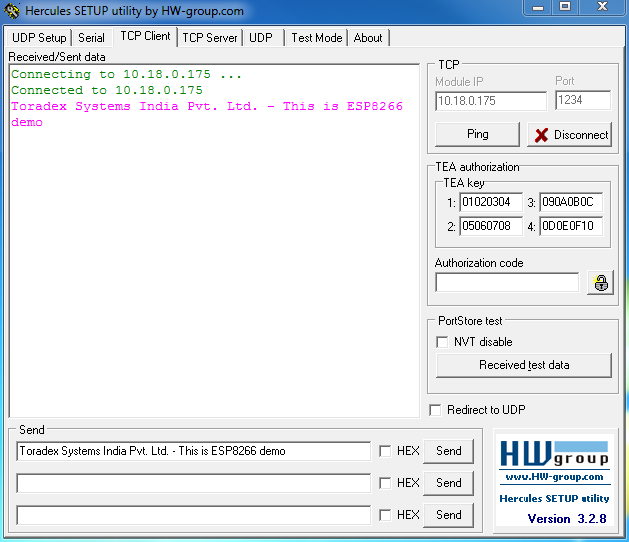
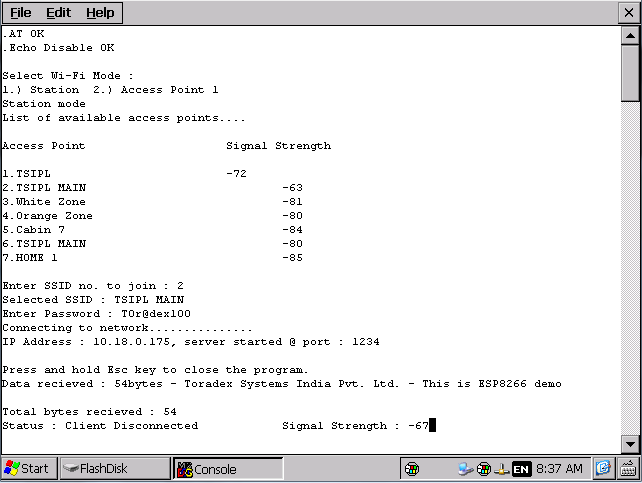
We have done an example application in C to connect the ESP07 WiFi module to network & receive data. The ESP07 module is configured as server and Hercules is used as client.