How to include libraries to VC++ project in VS2008
Use the following steps to include libraries to a VC++ project in VS2008. This tutorial will demonstrate how to include libraries by taking the GPIO demo as an example. The same steps can be used for including any other library.
1. Setup the development environment for Colibri module on Windows CE by following this guide.
2. Create a new VC++ project by following this guide up to step 9.
3. Edit the code using this guide on how to use GPIO library.
4. Download the free GPIO library from here.
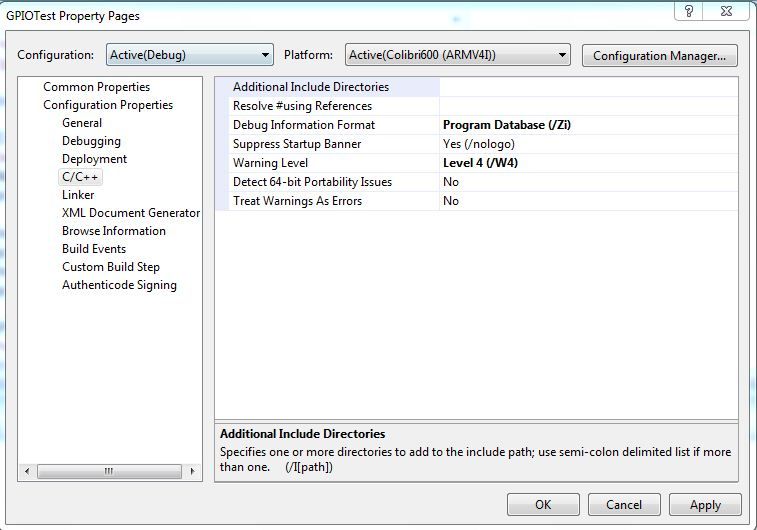
5. Right click on the project name. Click on Properties.

6. Project property pages will open up as shown below. Click on C/C++ tab to the left as shown.
7. Extract the downloaded archive and copy the inc and libs folder to the project folder.
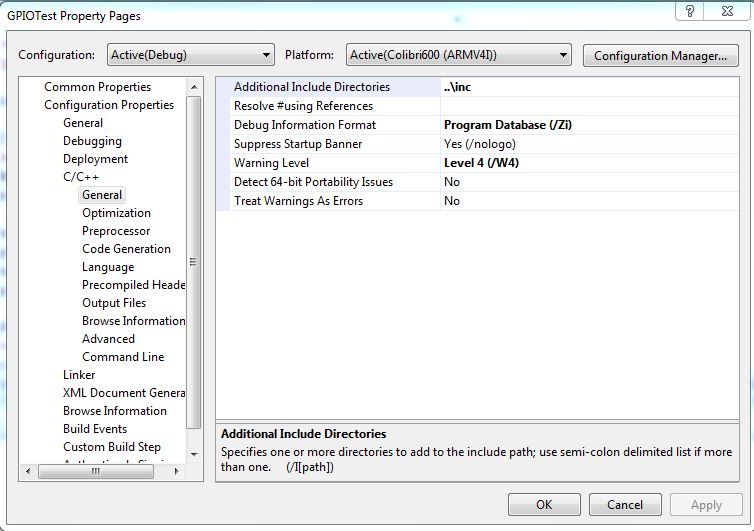
8. In the Additional Include Directories, specify the relative path for the inc folder as ..\inc. Click on Apply.
The advantage of providing relative path is that even if the project folder is moved to another directory, there is no need to link all the libraries again.
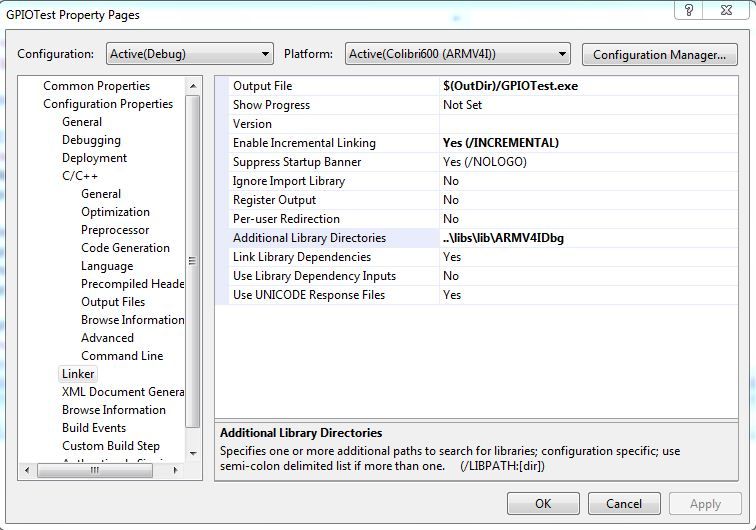
9. Click on the Linker tab to the left and specify the relative path to the libs/lib/ ARMV4IDbg folder as ..\libs\lib\ARMV4IDbg. Click on Apply.
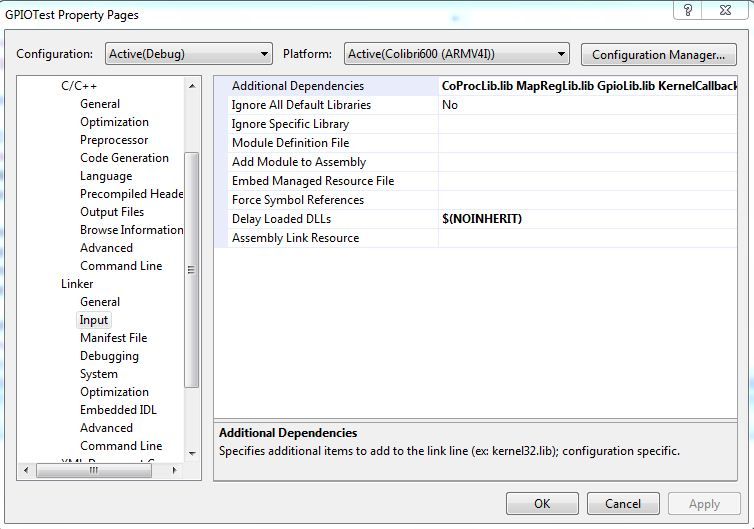
10. Click on the Input option under Linker tab and enter the library dependencies in the Additional Dependencies option as shown in the figure below. All the libraries given in the libs/lib/ ARMV4IDbg folder need to be entered. Click on Apply.
11. Build the project.