Production Programming for iMX7 Modules
Use the Easy Installer (suggested)
Backup the Existing Configuration
Once you have a running module that is configured in the way you want you can use the update tool to save the configuration files you need to replicate the same configuration on other modules.
1. Launch update tool
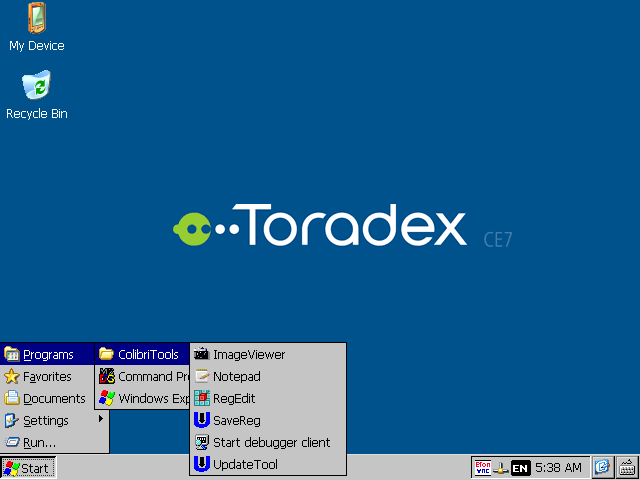
If you are using our standard image you should be able to find update tool shortcut in the start menu, otherwise, you will have to launch it from your application or from external media using the AutoRun feature.
2. Backup registry
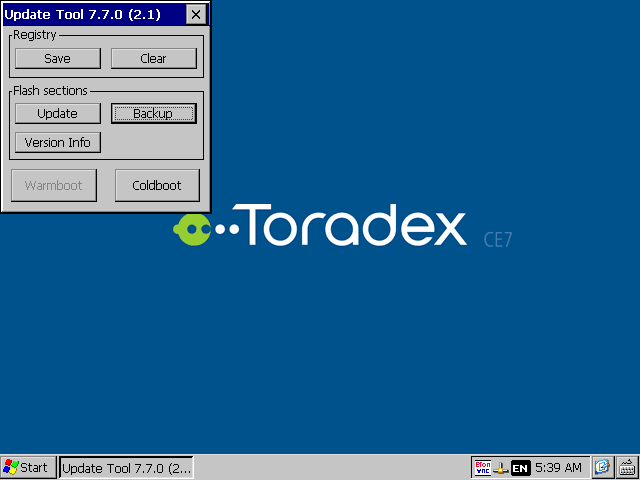
Select "backup" button in the update tool main UI.
Select "registry raw" as file type, press ok.
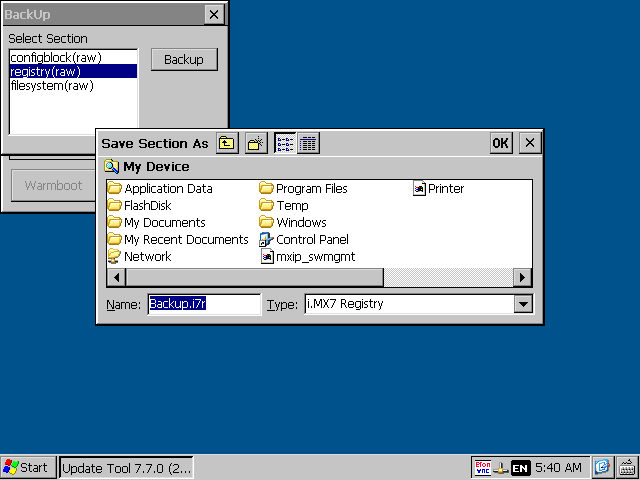
save the file on a mass-storage device that you could use to transfer it to your PC.
3. Backup config block
Select backup again but this time select "config block (raw)" and press ok.
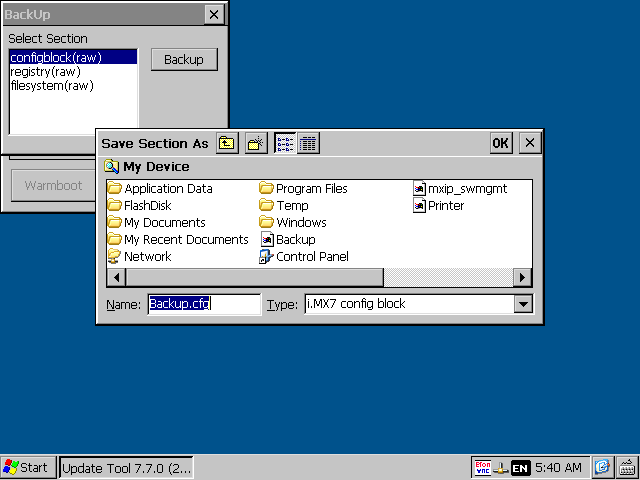
save the file on a mass-storage device that you could use to transfer it to your PC.
Install a Custom Image
After you backup the existing configuration from your development module, you can restore it on new ones. This is done in two steps:
- Install a WinCE image using Toradex Easy Installer
- Restore the backup files to the newly installed WinCE image
Load the Latest Version of Easy Installer
Colibri iMX7 comes with Toradex Easy Installer 1.8 from factory. A known bug may lead to a non-bootable installation of WinCE. You must use a version greater than 2.0b6, preferably the latest version available.
Once the module boots you can update to the latest version by installing it from the Easy Installer GUI itself - in other words, you can use Easy Installer V1.8 to update to the latest version:

If you have trouble or for some reason, you need to reload Easy Installer into the SoM, read our article Toradex Easy Installer - Load Toradex Easy Installer.
Install an Unmodified WinCE Image
It is not possible to install the registry, root filesystem and config block for a WinCE image with Toradex Easy Installer. Therefore, you must install an unmodified image.
Follow the instructions from Toradex Easy Installer and select the corresponding WinCE image version that you need.
Fully Automate the Easy Installer Setup
Instead of manually installing the WinCE image from our online feeds, you can have a setup that automatically installs it from as SD Card or USB stick. You must download a WinCE image from Toradex Easy Installer - OS and Demo Images and modify the image.json to set the autoinstall flag to true.
Replace the statement:
"autoinstall": false,
at the beginning of the file with:
"autoinstall": true,
In this way, the only message you will see is the one that tells you that is safe to power-off the device.
Restore the Master Backup Files to Many Modules
There are a few options to restore the master backup files onto other modules,
If a power loss occurs while programming data, the flash could get corrupted.
As long as the Bootloader is not damaged, you can always use it to restore the module. If the bootloader is damaged, you need to reload Toradex Easy Installer to restore the module using the recovery mode.
Restore Using the Latest Update Tool
We strongly recommend using the latest available Update Tool. We cannot guarantee that an old Update Tool will work properly for example to downgrade a newer image to a previous version!
- Execute
Update.exewith Command Line parameters to restore regions one by one
Restore Using a Production Programming Script
For production programming, you will need a USB, SD Card or other mass storage device.
We call it production programming storage device in the following.
Preparation (Once)
Use the following steps to prepare the production programming storage device once:
- Download the production programming template
- Copy the master backup files into the folder
Production programming template\Backup\ - Copy the latest Update tool into the folder
Production programming template\UpdateTool\
The latest update tool is available as part of the latest image download package - Modify the
ProductionProgramming.Batfile to your needs
Notes:- If you are updating the OS to a newer image version of the same OS you need to clear the registry, as it may be incompatible
- If you are updating from a different version of Windows CE you need to first update the bootloader and the image, reboot, and update the rest of the sections
- Copy all the
Production programming template\files to the production programming storage device
Programming
To program modules, follow the simple steps below:
- Boot the target module and insert the production programming storage device
The update process will start automatically. Wait for the update to complete. - Reboot the device
Build Your Own Restore Application
If you need more control over the programming, you can write your own program and use the Update tool to do the actual programming.
If you wish to further customize the programming, use the Toradex CE Libraries. The package contains the UpdateLib, which provides an API to implement your own update process. This is, for example, useful if you would like to show your own progress bar.
Partial programming
In case you do not wish to program the complete flash, just make a backup file of each region you would like to program. Available regions include:
- Bootloader
- Config Block
- OS Image
- Registry
- File System
Import registry, splash screen and configblock and copy application and other files
If you prepared your storage media (SD card or USB thumbdrive) as described in previous points, just having it inserted at boot will copy files and execute configuration steps, using the auto-copy and auto-run features.
With auto-run you may also execute some test applications to check that your hardware is behaving as expected, but this may require a reboot in between (after copy and registry import) and so a second mass-storage device with just your testing application inside autorun folder.
As an alternative you can copy the test application to \Flashdisk\autorun and have it executed at next reboot and then move itself to a different folder when testing has been completed.
Notes on Toradex Firmware Versions
Toradex modules are normally shipped with the newest version of the Image/Bootloader firmware. We change the SW version of the preinstalled Win CE image/bootloader firmware without any notification.
If you receive a new batch of Colibris, make sure you check the version of the installed SW. If the version is different check the change log file on our server.
We recommend that you should always use our latest OS release. Make sure that your own SW/HW still works fine with the newest Toradex SW. (This is normally the case).
However, it is not possible for all customers to always use the latest Toradex SW. In this case you can downgrade all the Colibri SW with your tested version of the SW. If the HW version of the Colibri has changed, you need to verify if the "old" SW is still 100% compatible. If you are not sure, you can contact the support.
Use recovery mode (deprecated)
Those instructions apply to release 1.1 beta 4 of the Windows CE images and BSP. Some of the features described here may not work as described in this document on previous releases.
Collecting the required files
To install Windows Embedded Compact 7 or 2013 on your module you need the following elements:
- recovery mode tools
- eboot bootloader
- operating system
- configuration block
- registry entries for customization (optional)
- splash screen (optional)
- additional drivers and applications
By default modules come with Linux pre-installed, so during production programming, you have to switch from Linux to Windows CE, this switch operation does not impact module-unique settings, like MAC address or production information, so the exact same steps can be performed on each module, as long as you prepared the right files.
Recovery mode tools
Those tools are part of our standard OS image downloads, available here.
In the zip file, you'll find a folder named "recovery" that contains all the files you need to perform recovery-mode operations.
Bootloader
Bootloader is provided as part of our standard images and BSPs and can be downloaded here.
If you built your own bootloader, customizing it with our bootloader kit (available as paid additional tool), at the end of the build process, you will have the same eboot.imx file provided with our downloadables images and BSP.
You'll have to write eboot.imx on a SD card using the Win32 Disk Imager tool.
- download the tool here: http://sourceforge.net/projects/win32diskimager/
- launch it and select the eboot.imx file you want to write
- select the drive letter matching your SD card reader in the “Device" box (be careful, the devices are not filtered and you may overwrite a regular hard drive by mistake!)
- select “write" and wait until the writing process is completed
- remove and re-insert the SD card, your PC will ask you to format it
- format the card as FAT32
Windows CE Image
Our images are provided as compressed binaries with the .nbx file name extension.
You can use nk7.nbx if you plan to use the module with Windows Embedded Compact 7 or nk8.nbx if you plan to use Windows Embedded Compact 2013.
If you build your own image you'll have a file named nk.bin, this can also be flashed using the same procedure we will describe in the next steps.
Take your file (nbx or bin format) and copy it to the root partition of your SD card.
Config block settings
Config block contains all the information required by the bootloader to initialize the module, show splash screen (if needed) and load and start the operating system. Different settings can be changed by the set command of the bootloader console.
Config block parameters are documented here (some may not apply to i.MX7).
Once you have configured the config block in the correct way you can save it using the update tool, as documented here.
This will generate a .cfg file containing those settings.
Splash screen
Our standard OS images already contain a splash screen.
You can generate a custom one using our splash screen generation tool (paid tool, available on request) and this can be then flashed on each module during production programming.
Registry Settings
You can use the registry editor that is integrated with our images or part of our binary BSP to export the registry settings you made to customize your image.
Changing display resolution, configuring IP address etc. are operations that could be performed using registry customization.
You'll have one or more text files, containing the registry entries you want to change. You can keep them as separate files or, to simplify installation and maintenance, consolidate them into a single file.
Applications, drivers, and additional files
You can prepare your own application and any additional files you want to copy to the module, considering that the internal storage will be mapped as \FlashDisk folder by the operating system.
You can prepare all the contents in a subfolder named FlashDisk to remap the right organization of those files. If you need to transfer files to different folders (ex \Windows) at boot, you can use the autocopy feature and place files in a folder named "Autocopy" on Flashdisk, forcing those files to be copied on every boot.
Prepare storage with autocopy and autorun
You can copy the Flashdisk folder you created in the previous step inside a folder named Autocopy on the storage media device(it can be the same SD where you put bootloader and OS image, if you use different storage media, this must be formatted as FAT or exFAT). In this way, the autocopy feature (documented autocopy) can be used to set-up application and other files on first boot. If you need to import config block, splash screen or registry settings you'll need to use the autorun feature described here.
Create a folder named Autorun in the root folder of your storage device where you can create shortcuts (text files with .lnk extension) to execute the commands required to import the different settings.
Importing registry files
To silently import registry files you can run regedit.exe, passing the name of the registry file you want to import on the command line. So a shortcut pointing to:
Regedit.exe /S "\Sd card\settings.reg"
will import the contents of the file named settings.reg from the SD card.
Importing config block
Config block can be imported by running update tool.
If you saved your settings as described before you can restore them by launching (again via a shortcut in autorun folder if you need fully automated setup):
update.exe /u configblock,raw,<configuration file path>
Flashing splash screen
The procedure to flash a new splash screen is similar to the one used for config block since it also uses update tool.
update.exe /u splashscreen,raw,<configuration file path>